Author: SectoJoy

  • Centimeters to Kilometers Made Simple: The Everyday Conversion Guide

    Centimeters to Kilometers Made Simple: The Everyday Conversion Guide

    Converting centimeters to kilometers is simpler than it sounds. The rule comes down to one number: 100,000. Divide your centimeters by 100,000, and you get kilometers. That is the whole formula. In this guide, we will walk through how it works, share some mental math tricks, and show you real-world situations where this conversion actually matters.

    The Core Formula: How cm and km Connect

    Both centimeters and kilometers are built on the meter — the base unit of length in the Metric System (also called the SI system). Everything in the metric system scales by powers of 10, which makes conversions predictable and easy.

    Here is the chain connecting the two units:

    Unit Relationship
    1 meter = 100 centimeters
    1 kilometer = 1,000 meters
    1 kilometer = 100,000 centimeters

    So the conversion formula is:

    km = cm / 100,000

    Or equivalently, multiply by 0.00001 (which is 1 / 100,000). As confirmed by NIST standards verified in 2026, this factor is exact — no rounding needed.

    Quick Example

    You have a measurement of 250,000 cm and want to know how many kilometers that is:

    1. Take your value: 250,000 cm
    2. Divide by 100,000: 250,000 / 100,000 = 2.5 km

    Done. According to Calqro, these are exact decimals, so you never have to worry about rounding errors when staying within the metric system.
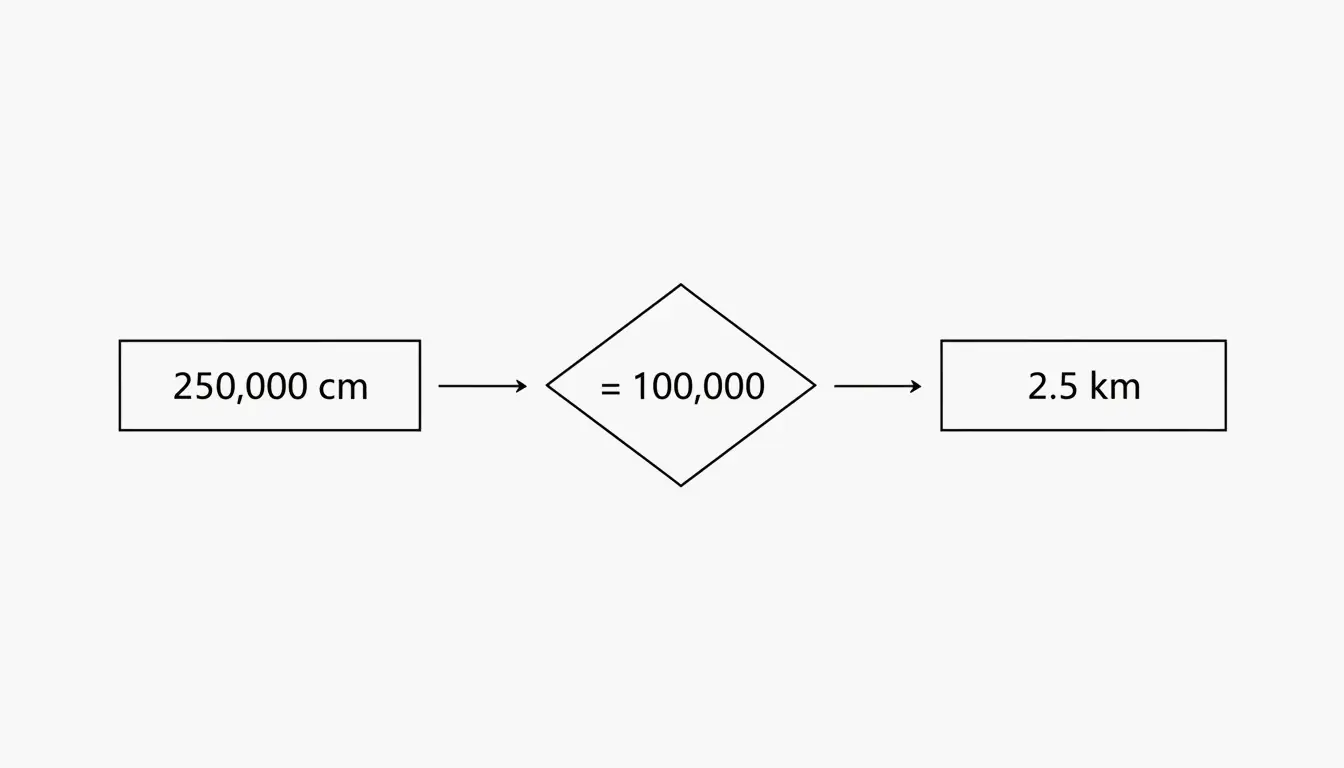
    Simple cm to km conversion logic diagram

    The Mental Math Shortcut: Move the Decimal 5 Places

    Here is a trick that saves you from reaching for a calculator. Since 100,000 has five zeros, converting from centimeters to kilometers is just a matter of moving the decimal point five places to the left.

    Let us try it with 90,000 cm:

    1. Start with the number: 90,000.0
    2. Move the decimal left one place: 9,000.0
    3. Move it again: 900.0
    4. Again: 90.0
    5. Again: 9.0
    6. One more time: 0.9

    So 90,000 cm = 0.9 km. Data from CoolConversion confirms this result.

    This trick works in reverse too. To go from kilometers to centimeters, move the decimal five places to the right. So 0.9 km becomes 90,000 cm.

    When Would You Actually Use This?

    You might be surprised how often this comes up in daily life:

    • Planning a road trip: Your car’s trip computer might show distance in kilometers, but a product specification lists a cable length in centimeters.
    • Home improvement: A garden hose is 1,500 cm long — that is 0.015 km, or about 15 meters.
    • School projects: Students often encounter both units in science and geography assignments.

    Converting in the Other Direction: Kilometers to Centimeters

    To go from kilometers back to centimeters, simply multiply by 100,000 (or move the decimal five places to the right).

    Kilometers Calculation Centimeters
    1 km 1 x 100,000 100,000 cm
    2.5 km 2.5 x 100,000 250,000 cm
    0.9 km 0.9 x 100,000 90,000 cm
    8.848 km 8.848 x 100,000 884,800 cm

    Real-World Scale: Understanding the Size Gap

    To really appreciate how different centimeters and kilometers are, it helps to look at some familiar examples:

    Example In Kilometers In Centimeters
    A standard pencil 0.000019 km ~19 cm
    A football field ~0.091 km ~9,144 cm
    The Three Gorges Dam (Wikipedia) ~2.3 km ~230,000 cm
    Mount Everest height 8.848 km 884,800 cm
    The Karman Line (“edge of space” – Wikipedia) 100 km 10,000,000 cm

    Notice how quickly the numbers get unwieldy in centimeters once you move beyond everyday objects. That is exactly why we switch to kilometers for larger distances — the numbers stay readable.

    Scientific Notation: The Professional Way

    In science and engineering, writing out long strings of zeros can lead to typos. That is where scientific notation comes in. The conversion factor is written as:

    1 cm = 1 x 10^-5 km (or 0.00001 km)

    This follows ISO 80000-3 standards, which set the global rules for measuring space and time quantities. CoolConversion notes that these factors are checked against BIPM and ISO 80000-3 guidelines (last reviewed March 2026) to keep global trade and research consistent.

    For most everyday situations, though, you do not need scientific notation — just remember “divide by 100,000” and you are set.

    Area Conversions: Square Centimeters to Square Kilometers

    When you move from length (one dimension) to area (two dimensions), the conversion factor gets squared. Since the length factor is 100,000, the area factor is:

    100,000 x 100,000 = 10,000,000,000 (ten billion)

    The formula becomes:

    km^2 = cm^2 / 10,000,000,000

    According to CoolConversion, 1 cm^2 = 1 x 10^-10 km^2. This is mostly used in specialized fields like satellite mapping or land surveying. For everyday purposes, you would never measure a city in square centimeters — the numbers would be impossible to read.

    A Handy Reference Table

    What You Want What to Do Example
    cm to km Divide by 100,000 500,000 cm = 5 km
    km to cm Multiply by 100,000 3 km = 300,000 cm
    cm to m Divide by 100 250 cm = 2.5 m
    m to km Divide by 1,000 2,500 m = 2.5 km
    cm^2 to km^2 Divide by 10,000,000,000 1,000,000,000 cm^2 = 0.1 km^2

    Conclusion

    Converting centimeters to kilometers boils down to one simple rule: divide by 100,000. The metric system’s base-10 design makes this easy, whether you are using a calculator, doing mental math by shifting the decimal, or applying scientific notation for a technical report. For everyday tasks, just remember that 100,000 cm always equals 1 km. Bookmark this guide or save the reference table above for the next time you need a quick conversion.

    FAQ

    How many kilometers are in 1 centimeter?

    There are 0.00001 kilometers in 1 centimeter. In scientific notation, this is expressed as 1 x 10^-5 km. This exact factor is defined by international standards (SI) and is used globally for technical precision.

    What is the easiest way to convert cm to km without a calculator?

    Use the “decimal shift” method. Move the decimal point five places to the left. For example, 500,000.0 cm becomes 5.0 km after shifting the decimal five places. No math required.

    Are centimeters and kilometers part of the Imperial or Metric system?

    Both are units of the Metric System (also known as the International System of Units or SI). The metric system is used globally for science, medicine, and most international trade. The Imperial system uses units like inches and miles instead.

    When should I use centimeters vs. kilometers?

    Use centimeters for small, everyday measurements (a phone screen, a book, a piece of furniture). Use kilometers for distances between places (city to city, a hiking trail, a marathon route). If the number in centimeters gets hard to read, it is probably time to switch to kilometers.

    How do I convert square centimeters to square kilometers?

    Divide the number of square centimeters by 10,000,000,000 (ten billion). For example, 5,000,000,000 cm^2 equals 0.5 km^2. This type of conversion is mostly used in mapping, geography, and land surveying.
  • How to Make QR Codes for Websites: A 2026 Guide to Secure and Custom Designs

    How to Make QR Codes for Websites: A 2026 Guide to Secure and Custom Designs

    A QR code on a flyer, business card, or storefront window is a direct bridge from the physical world to your website. In 2026, the process is straightforward: copy your URL, paste it into a generator like Bitly or Adobe Express, customize the look, and download an SVG for print.

    But doing it well — with proper tracking, brand consistency, and security — takes a bit more thought. This guide walks through the full process: from preparing your URL and choosing between static and dynamic codes, to preventing quishing attacks and getting the print size right.

    The 2026 Framework: 4 Steps to a Professional Website QR Code

    Data from QR Code AI 2026 shows that custom-branded QR codes get up to 30% more scans than plain black-and-white ones. Here’s how to get there.

    Step 1: URL Preparation and UTM Tagging

    Before you generate anything, prepare your destination URL:

    1. Use HTTPS — Always. An HTTP link will trigger browser security warnings that scare users away.
    2. Add UTM parameters — Append tags like ?utm_source=flyer&utm_campaign=spring_sale to track exactly which QR code drove the traffic in Google Analytics.
    3. Shorten long URLs — For static codes, a shorter URL produces a simpler, faster-scanning pattern. Use a URL shortener before generating the code.

    Step 2: Customize for Brand Identity

    Modern generators (Canva, Bitly, Adobe Express) go well beyond the basic black-and-white grid. You can:

    • Add your brand colors to the foreground modules
    • Place a logo in the center of the code
    • Include a Call to Action frame like “Scan to Order” or “Scan for Menu”
    • Use AI-powered tools to blend the QR pattern with artistic brand imagery

    The key is making the code feel like part of your design, not an afterthought bolted onto the corner.

    Step 3: Pre-Print Security Audit

    Don’t send anything to print until you’ve verified:

    • The destination URL is live and loading correctly
    • Any redirects are functioning as expected
    • The code is not vulnerable to quishing (QR phishing — where scammers swap your code for a malicious one)
    • The exported file is SVG format, which stays sharp at any print size

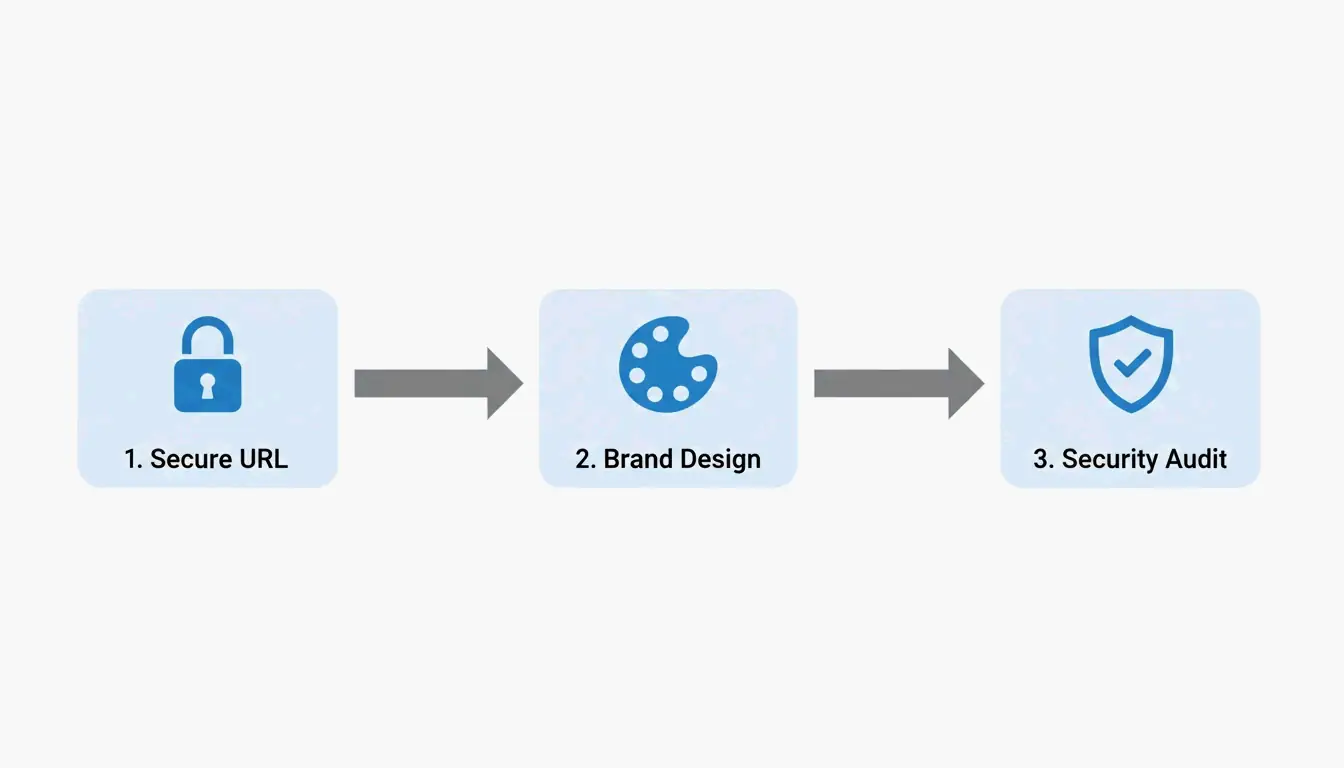
    3-step creation process: Secure URL, Custom Brand, Security Audit

    Step 4: Choose Your Format (Static or Dynamic)

    This decision shapes everything else — see the detailed comparison below.

    Static vs. Dynamic QR Codes: Which Should You Choose?

    As the DoItQR Industry Guide puts it, “A URL is invisible on a printed surface” — which is why the flexibility of your format matters so much.

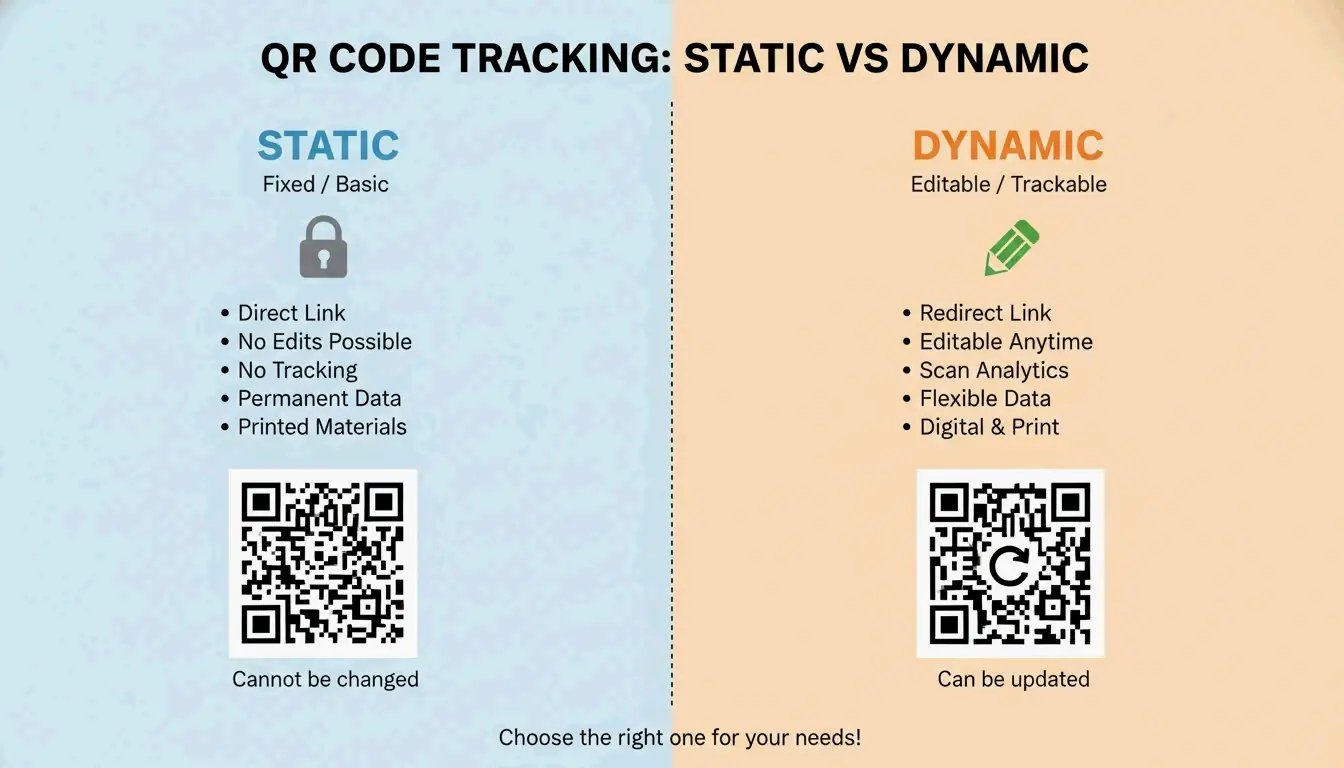
    Feature Static QR Code Dynamic QR Code
    Data storage Baked into the pattern Uses a redirect link
    Change URL after printing? No — permanent Yes — anytime
    Scan tracking Not available Time, location, device
    Pattern complexity Depends on URL length Always clean (short redirect)
    Cost Free Typically paid plan
    Best for Permanent links (“About Us” page) Campaigns, menus, promotions

    Simple comparison: Static (Fixed) vs Dynamic (Flexible/Trackable)

    In 2026, most professional creators default to dynamic codes for the flexibility and analytics — unless the use case is truly permanent and doesn’t need tracking.

    Advanced Design: Error Correction, Logos, and the Quiet Zone

    Good QR code design is a balance between looking great and actually scanning. Statista reported nearly 100 million US users scanning codes by 2025 — your design needs to work on every device.

    Error Correction and Logo Placement

    QR codes use Reed-Solomon error correction, which allows the code to remain readable even when partially covered or damaged — up to 30% in the highest setting.

    Level Tolerance When to Use
    L 7% Digital screens only
    M 15% Standard marketing (default)
    Q 25% Small logo in center
    H 30% Logo overlay or heavy customization

    If you’re placing a logo in the center, you must use Level H to ensure scanners can still read the data hidden behind the logo.

    The Quiet Zone and Sizing Rules

    Two physical requirements that trip people up:

    1. Quiet Zone — Every QR code needs a blank white border on all sides (at least 4 module widths). Without it, scanners can’t find the code’s edges.
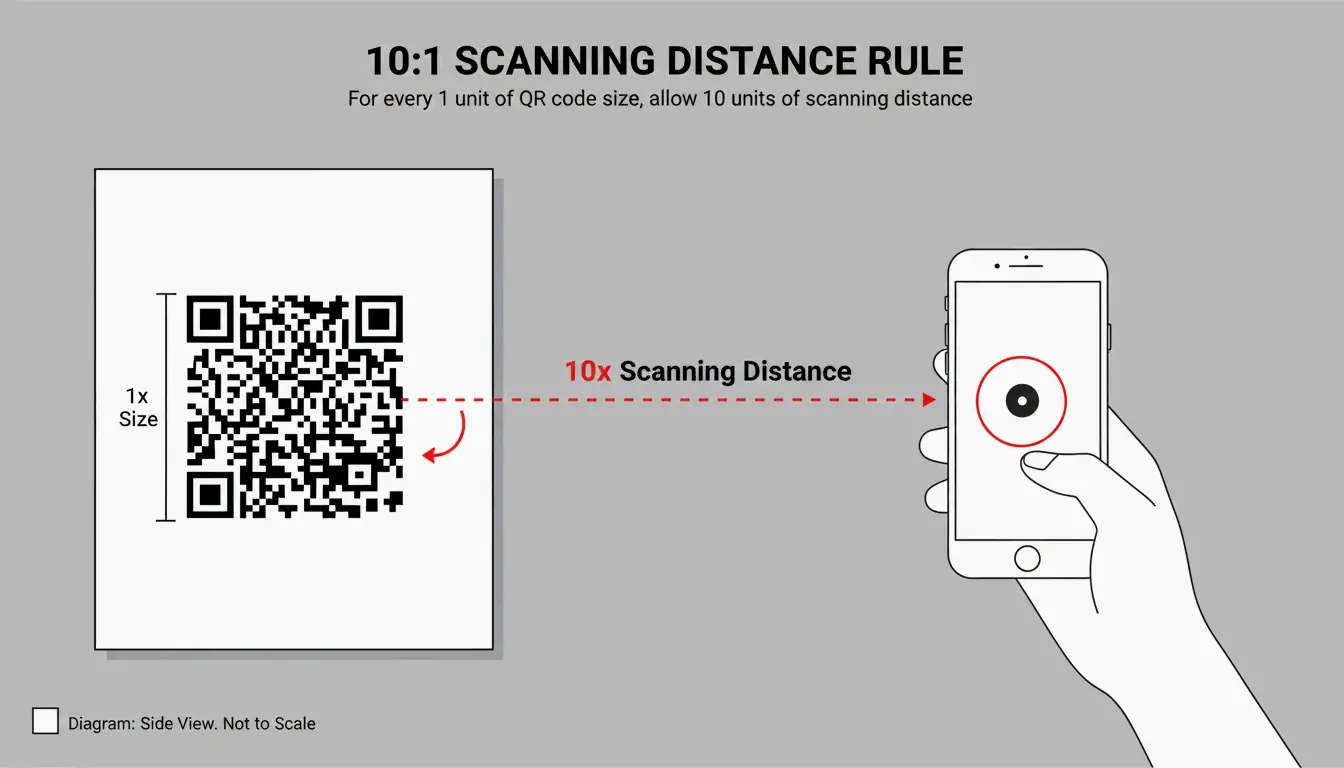
    2. The 10:1 distance rule — The code’s size should be roughly 1/10th of the scanning distance.
    Use Case Scanning Distance Minimum Code Size
    Business card ~8 in (20 cm) 0.8 × 0.8 in (2 × 2 cm)
    Table tent ~20 in (50 cm) 2 × 2 in (5 × 5 cm)
    Poster ~40 in (1 m) 4 × 4 in (10 × 10 cm)

    Never go smaller than 0.8 × 0.8 inches (2 × 2 cm) on a business card — anything smaller and older phone cameras will struggle.

    2026 Security: Preventing Quishing (QR Phishing)

    With the global QR market projected to hit $33 billion by 2030 (DoItQR), security is no longer optional. Quishing — QR phishing — happens when fraudsters replace legitimate codes with malicious ones that steal data or install malware.

    Three rules for 2026:

    1. Enforce HTTPS everywhere — Never link to an unencrypted (HTTP) page.
    2. Use preview-capable generators — Tools that show a safety preview or diagnostic report before the user reaches the destination add a trust layer.
    3. Automate with controlled platforms — For bulk projects, use tools like Zapier to generate unique, trackable codes in a controlled environment rather than creating them manually across multiple services.

    Conclusion

    Making a QR code for a website is simple. Making one that’s professional, trackable, and secure takes a bit more work — but it’s worth it. Follow the four-step framework:

    1. Prepare your URL — HTTPS + UTM tags + shorten if needed
    2. Customize the design — Brand colors, logo, CTA frame
    3. Audit security — Verify the link, check for quishing risks
    4. Pick the right format — Dynamic for campaigns, static for permanent links

    Start with a dynamic QR code, set error correction to Level H if you’re adding a logo, and always test on multiple phones before printing.

    FAQ

    Do QR codes for websites ever expire?

    Static QR codes never expire — the data is hardcoded into the pattern. They only become useless if the destination URL is deleted. Dynamic QR codes don’t technically expire either, but the redirect will stop working if your subscription to the generator service ends.

    Can I change the destination URL after printing?

    Only with dynamic QR codes. Static codes embed the URL directly into the pixel pattern — if the URL changes, you need to generate and reprint a completely new code.

    Why is my QR code not scanning correctly?

    The usual culprits: low contrast between code and background, a missing Quiet Zone (white border), or — for static codes — a URL that’s too long, making the pattern too dense for older phone cameras to resolve.

    Is it possible to track website QR scans for free?

    Yes — add UTM parameters to your URL and monitor the traffic in Google Analytics. While some free generators offer basic scan counts, detailed analytics (device type, location, time) typically require a premium dynamic plan.

  • How Can I Make a QR Code? A Complete Guide to Free & Custom Generators (2026 Update)

    How Can I Make a QR Code? A Complete Guide to Free & Custom Generators (2026 Update)

    Need a QR code? You’re closer than you think. Open a free generator like QR Code Generator or Adobe Express, paste your link, tweak the design if you want, and download it as a PNG or SVG. In 2026, you can even create one straight from Chrome or Safari’s built-in Share menu — no extra tools required.

    Whether you’re putting a QR code on a business card, a restaurant menu, or a conference banner, this guide walks through every method, helps you pick the right type (static vs. dynamic), and shows you how to make sure it actually scans every time.

    The Fastest Way to Make a QR Code (Step-by-Step)

    Creating a QR code has become a basic digital skill. According to Wikipedia, 89 million US users scanned a QR code in 2022 — a 26% increase from 2020 — mostly to open digital menus or make payments.

    Method 1: Online Generators (Best for Customization)

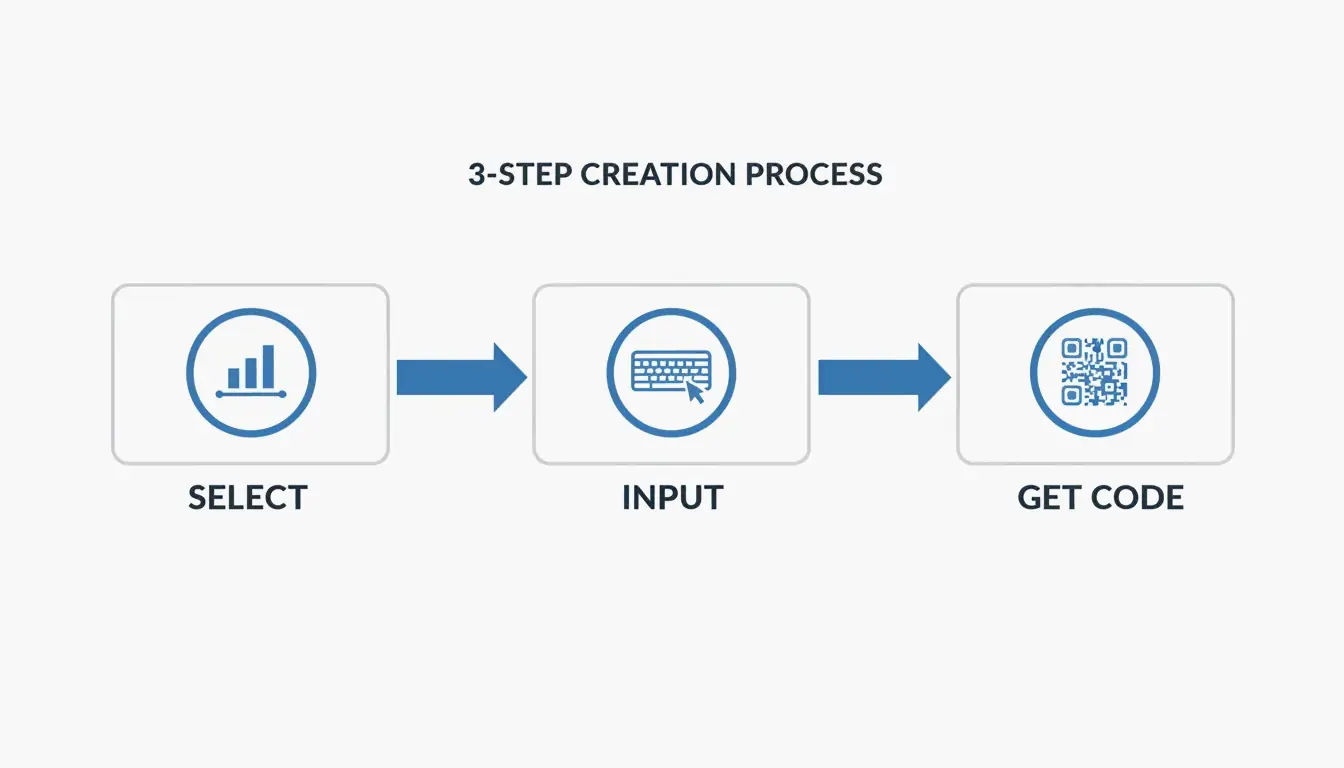
    Online tools give you the most control over branding, format, and image quality. According to QR Code Generator, the standard workflow is three steps:

    1. Select the data type — Choose what you want to share: a URL, vCard (contact info), plain text, or WiFi credentials.
    2. Enter your information — Paste your link or type your text. If your URL is very long, Freetool24 recommends using a URL shortener first. Shorter URLs produce simpler patterns that are easier for older phones to scan.
    3. Customize and download — Adjust colors, add a frame, or choose your format. Use PNG for digital use (emails, social media) and SVG for anything that will be printed — vector files stay sharp at any size.

    3-step creation process: Select Data -> Input Info -> Customize/Download

    Pro tip: Always test the scan on your screen before you finalize. If it takes more than two seconds to register, try increasing the contrast or simplifying the design.

    Method 2: Built-in Browser Tools (Chrome & Safari)

    If you just need a quick code for a webpage, your browser already has this built in:

    • Chrome (Desktop): Go to the page → three-dot menu → “Cast, Save, and Share” → “Create QR Code.”
    • Chrome / Safari (Mobile): Tap the Share icon in the address bar → “Create a QR Code.”

    This is the fastest option for instant sharing, though customization is limited to the standard black-and-white pattern (plus the occasional Chrome dinosaur logo).

    Static vs. Dynamic QR Codes: Which Should You Choose?

    This is the most important decision for any QR code you plan to use long-term.

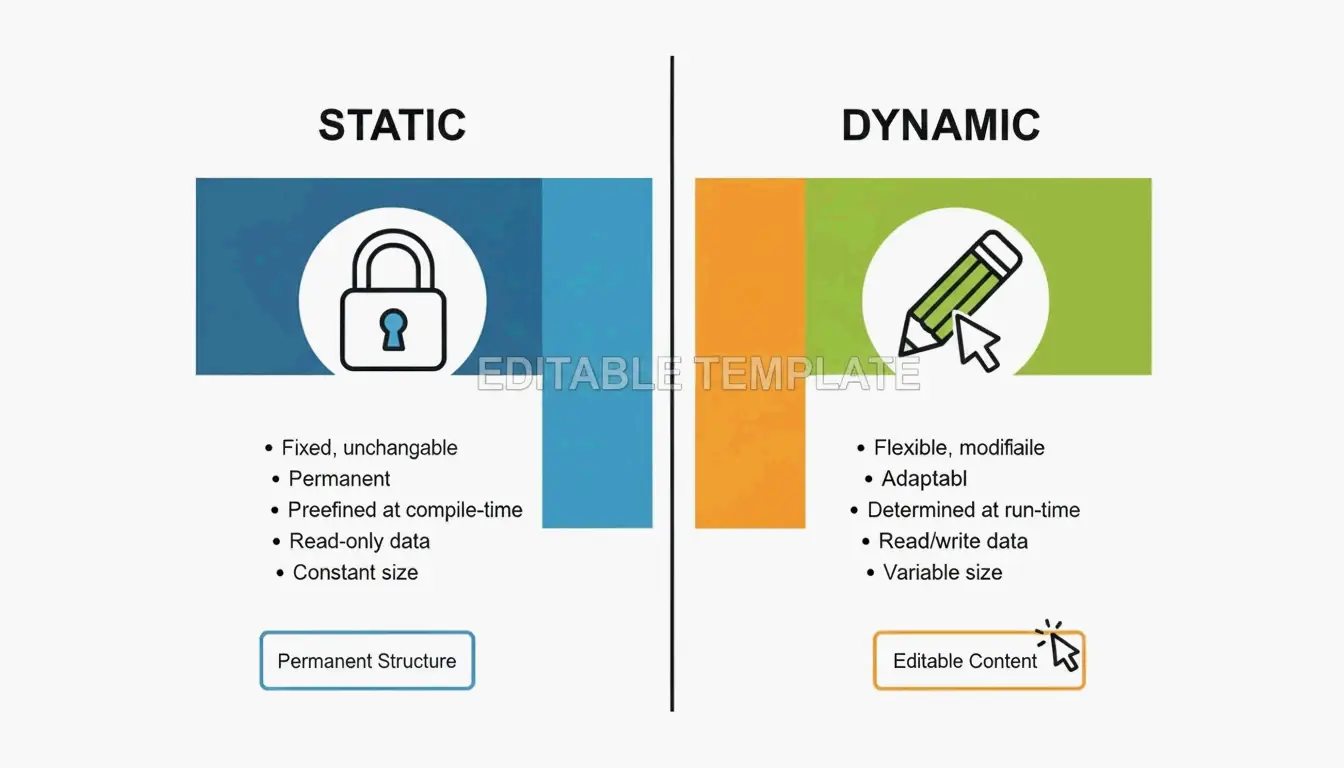
    Feature Static QR Code Dynamic QR Code
    Data storage Baked directly into the pattern Uses a redirect short link
    Can change the URL later? No — permanent once printed Yes — update anytime
    Expires? Never Only if subscription ends
    Scan analytics Not available Location, time, device type
    Cost Free Typically requires paid plan

    Side-by-side comparison of Static (permanent) vs Dynamic (editable) codes

    According to QR Code AI, custom-branded codes can produce a +30% marketing engagement lift over plain black-and-white designs. That said, be aware of “quishing” (QR phishing). By 2026, security best practices recommend using dynamic links from reputable providers that offer encrypted, GDPR-compliant redirection to prevent malicious link swaps.

    Optimizing for Scannability: The 10:1 Rule and Error Correction

    A QR code that looks great but doesn’t scan is wasted space. Most scanning failures come down to two things: size and error correction.

    The 10:1 Distance Rule

    Your QR code’s physical size should be about 1/10th of the expected scanning distance:

    Use Case Scanning Distance Minimum QR Code Size
    Business card ~20 cm 2 × 2 cm
    Table tent / menu ~50 cm 5 × 5 cm
    Poster on a wall ~1 meter 10 × 10 cm
    Billboard ~5 meters 50 × 50 cm

    Visualization of the 10:1 ratio between scanning distance and QR code size

    Error Correction Levels (L, M, Q, H)

    QR codes use Reed-Solomon error correction, which acts as a built-in backup system. The code remains scannable even when partially damaged or covered.

    Level Damage Tolerance Best For
    L 7% Digital screens — always clear, no damage risk
    M 15% General marketing materials (default choice)
    Q 25% Adding a small logo in the center of the code
    H 30% Heavy customization, outdoor signage, harsh environments

    If you’re adding a logo overlay, use Level Q or H to compensate for the data area you’re covering.

    Advanced Use Cases: vCards, WiFi, and Design Integration

    QR codes aren’t limited to URLs — they can trigger specific actions on a smartphone:

    vCard / Digital Business Card
    Instead of a link, encode your name, phone, and email. When scanned, the phone prompts “Add to Contacts.” SkyToolz recommends the vCard 3.0 format for the best cross-platform compatibility between iPhones and Androids.

    WiFi Credentials
    Let guests join your network without typing a password. Use this format:

    WIFI:S:NetworkName;T:WPA;P:Password;;
    

    Scan it and the phone connects automatically.

    Design Integration
    Tools like Canva and Adobe Express now let you generate QR codes directly inside your design project. This makes it easy to match the code’s colors to your brand while keeping the Quiet Zone (the required white border) intact.

    The global reach of QR technology is remarkable — Wikipedia notes that China had an 83% QR payment adoption rate as far back as 2018.

    Conclusion

    Making a QR code comes down to three steps: choose your data, generate the pattern, and download the file. The key decisions are:

    • Static vs. Dynamic — Use static for simple, permanent links; use dynamic if you need to track scans or update the URL later.
    • PNG vs. SVG — PNG for digital, SVG for print.
    • Size it right — Follow the 10:1 distance rule and test before you print.

    With the right generator and a basic understanding of error correction, anyone can create a professional, reliable QR code in under a minute.

    FAQ

    Do QR codes expire?

    Static QR codes never expire — the data is hardcoded into the pattern. They’ll work as long as the destination (your website) stays online. Dynamic QR codes may stop working if your subscription to the generator service ends or if the provider deletes the redirect link from their database.

    Why is my QR code not scanning?

    The most common culprits: low contrast (light-colored code on a light background), the code being too small for the scanning distance, or a missing Quiet Zone (the white border around the code). For print, always use SVG files — pixelation from raster images is a leading cause of scan failures.

    Can I track QR code scans for free?

    Most free generators only track scans for dynamic codes, which typically require a paid plan. A practical workaround for static codes: use a free URL shortener with built-in analytics (like Bitly) as your destination link. You won’t track the QR scan itself, but you’ll see every click that came through it.

  • How to Extract ZIP Files on Mac: Native & Terminal Methods (2026)

    How to Extract ZIP Files on Mac: Native & Terminal Methods (2026)

    To extract a ZIP file on Mac, double-click the file in Finder — macOS uses the built-in Archive Utility to decompress it instantly into the same folder. For more control, use the Terminal command unzip filename.zip. For non-native formats like RAR and 7z, install a third-party tool like Bandizip or use a browser-based extractor.

    Three Ways to Extract ZIP Files on Mac

    Method 1: Double-Click in Finder (Fastest)

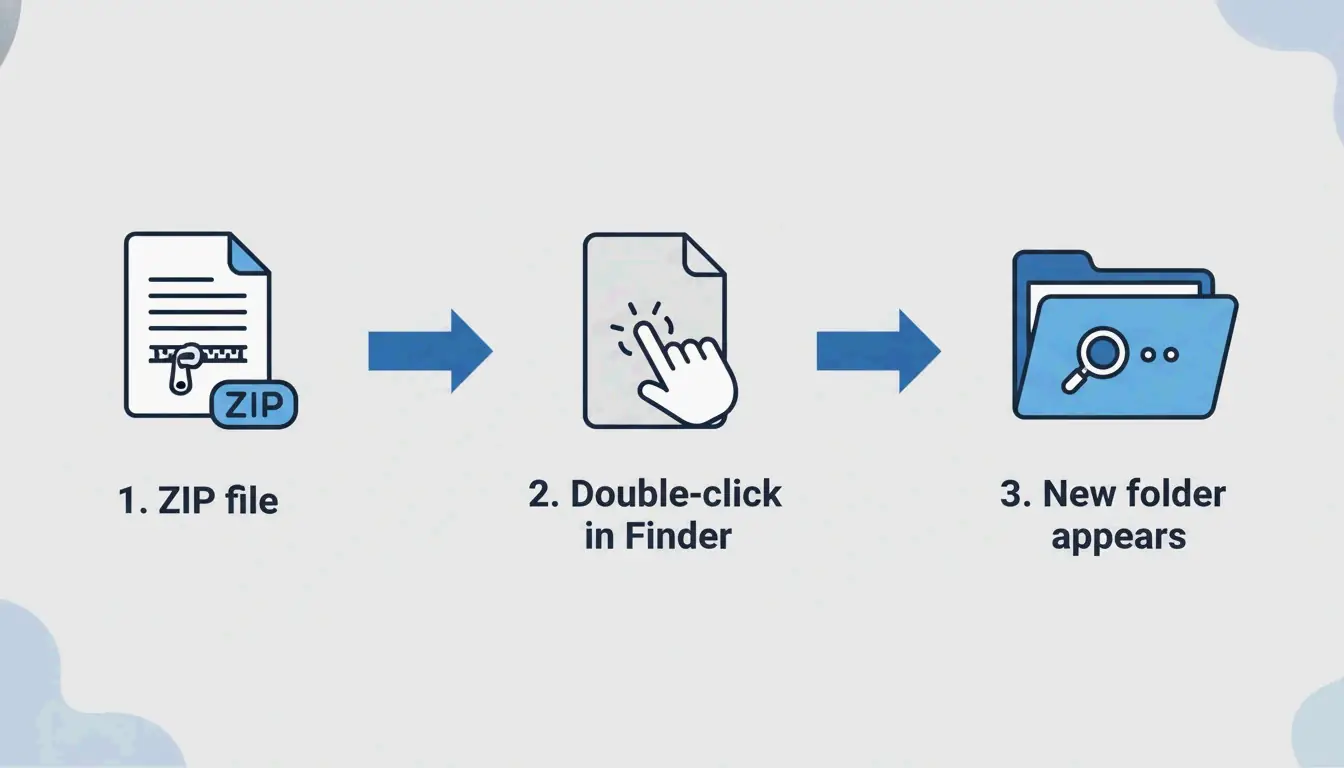
    macOS has native ZIP support — no extra apps needed. Double-click any ZIP file in Finder, and Archive Utility runs in the background, creating a new folder with the extracted contents in the same location.

    This works on all modern macOS versions (Sonoma and later) and across all Apple Silicon hardware (M1, M2, M3, M4).

    Simple 3-step visualization of the double-click process

    Method 2: Terminal Commands (For Power Users)

    When Finder shows “Decompression Failed” or “Error 1” permission issues, Terminal is more reliable:

    
    unzip filename.zip
    
    # Extract to a specific folder
    unzip filename.zip -d ~/Desktop/extracted/
    
    # View contents without extracting
    unzip -l filename.zip
    
    # Extract password-protected ZIP
    unzip -P yourpassword filename.zip
    

    Expert Olga Weis recommends moving developer packages into a clean folder before unpacking: “This keeps extracted files from cluttering your Downloads folder.”

    Method 3: Right-Click with Third-Party Tools

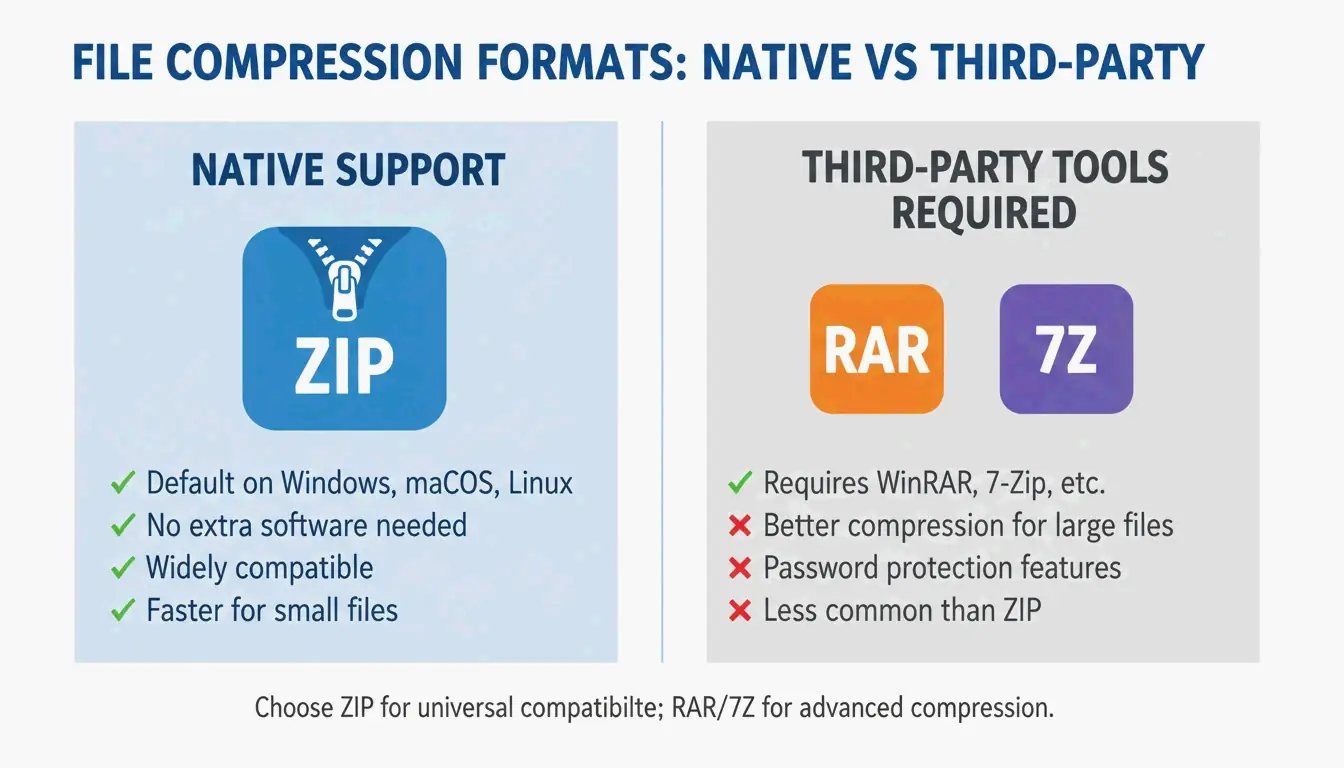
    For formats beyond ZIP (RAR, 7z, TAR, GZIP), the built-in Archive Utility cannot help. Third-party apps add right-click extraction:

    Tool Formats Supported Key Feature Price
    Bandizip 40+ (RAR5, ZIPX, 7z) Multi-core processing for large files Free
    iBoysoft MagicMenu ZIP, RAR, 7z Right-click Finder integration Paid
    ZIP Extractor ZIP, RAR, 7z Browser-based, works in Google Drive Free (300M+ users)

    Comparison between Native support vs. Third-party needs

    Format Support: What Mac Can and Cannot Open Natively

    Format Finder (Native) Terminal Third-Party Needed?
    ZIP Yes unzip No
    TAR No tar -xf No
    GZIP (.gz) No gunzip No
    RAR No No Yes
    7z No No (without p7zip) Yes
    ZIPX No No Yes

    Safari Auto-Open: Convenience vs. Security

    Safari can automatically unzip downloads: Safari → Settings → General → “Open ‘safe’ files after downloading.”

    Recommendation: Keep this disabled. Auto-opening ZIP files can execute unknown scripts without your knowledge. Manually check downloaded files before extracting.

    Troubleshooting: “Unable to Expand ZIP” Errors

    Error Cause Fix
    “Decompression Failed” Corrupted download Re-download the file
    “Error 1” (permission) Protected folder or shared drive Move ZIP to Desktop or Documents
    “No space left on device” Insufficient disk space Free up storage; extracted files are larger than the ZIP
    “Unable to expand” (encrypted) Password-protected archive Use Terminal: unzip -P password filename.zip

    Always verify disk space before extracting large archives — uncompressed files can be significantly larger than the ZIP.

    Conclusion

    Double-clicking in Finder handles 95% of ZIP extraction needs on Mac. For errors and advanced control, use Terminal unzip commands. For RAR, 7z, and other non-native formats, install Bandizip or use ZIP Extractor in your browser. Keep Safari’s auto-open disabled for security, and always extract to a dedicated folder to stay organized.

    FAQ

    Where is the ‘Unzip’ app on a Mac?

    There is no standalone app. Archive Utility runs automatically when you double-click a ZIP file. You can also right-click → “Open With → Archive Utility.”

    How do I automatically unzip Safari downloads?

    Go to Safari → Settings → General and check “Open ‘safe’ files after downloading.” This auto-decompresses ZIP files. Disable this for better security if you download from untrusted sources.

    How do I extract a password-protected ZIP on Mac?

    Double-clicking usually shows a password prompt. If it does not, use Terminal: unzip -P yourpassword filename.zip. Replace yourpassword with the actual password and filename.zip with your file name.

  • How to Unzip Files on Windows: Complete Guide for Windows 11 & 10 (2026)

    How to Unzip Files on Windows: Complete Guide for Windows 11 & 10 (2026)

    To unzip files on Windows, open File Explorer, right-click the ZIP folder, and select “Extract All” — then choose a destination folder. As of May 2026, Windows 11 also natively supports extracting .rar and .7z files, so most users no longer need third-party software for basic decompression.

    Three Methods to Unzip on Windows

    Method 1: Right-Click “Extract All” (Simplest)

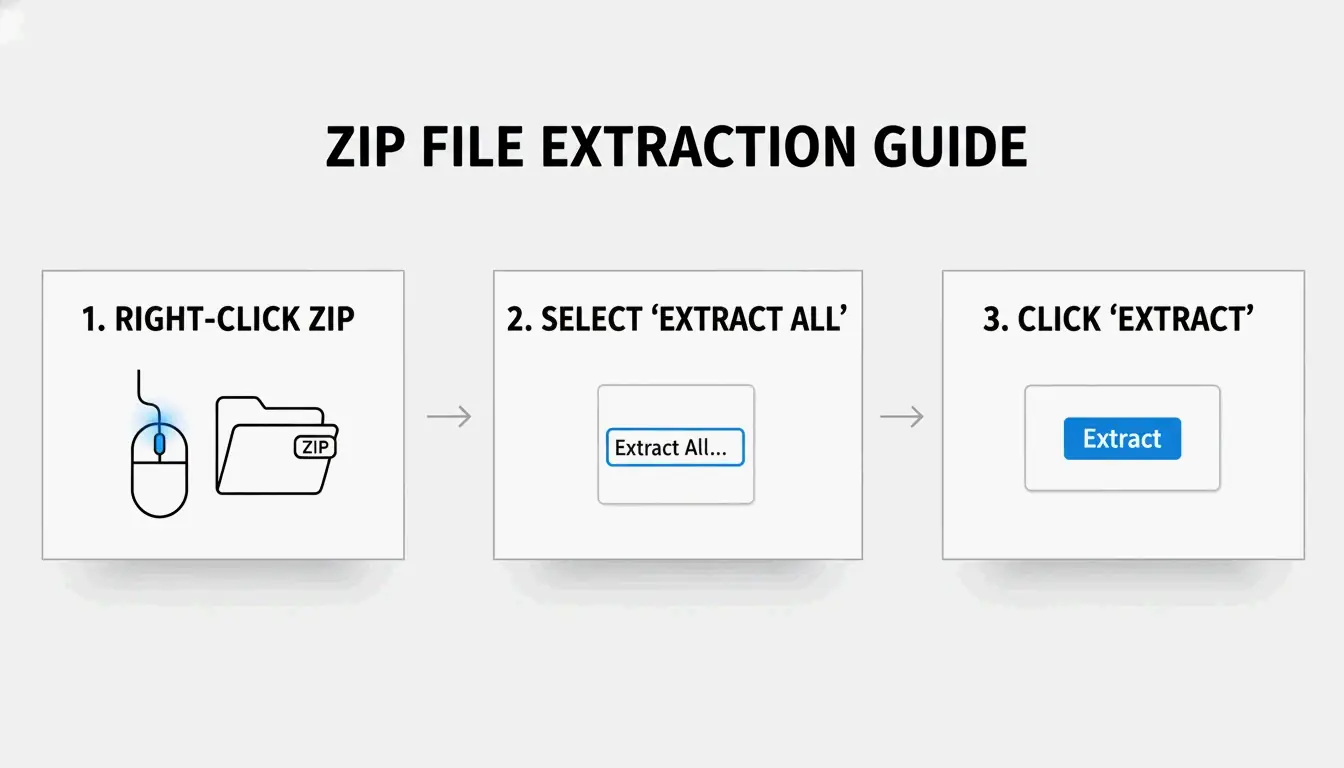
    1. Locate the ZIP file in File Explorer (look for the zipper icon)
    2. Right-click → Select “Extract All”
    3. Choose destination — Windows suggests a new folder in the same location
    4. Click “Extract” — A progress bar appears for large archives

    SupportYourTech notes this is the fastest method for most users.

    Windows standard 3-step extraction workflow

    Method 2: Drag-and-Drop Individual Files

    Need just one or two files from a large archive? Double-click the ZIP to browse inside, then drag specific items to your desktop or another folder. Windows extracts only those files instantly — no full decompression needed.

    Method 3: PowerShell Batch Extraction

    For dozens or hundreds of archives, automate with PowerShell:

    
    Get-ChildItem -Path "C:\SourceFolder" -Filter *.zip |
      ForEach-Object {
        Expand-Archive -Path $_.FullName -DestinationPath "C:\DestinationFolder"
      }
    

    Serverman recommends this for IT admins processing bulk data or setting up automated weekly backups.

    Windows 11: Native RAR and 7z Support

    After the November 2023 update, Windows 11 can extract .rar and .7z files directly in File Explorer — just like ZIP files. Microsoft integrated the open-source libarchive project to make this possible, as noted by PandaOffice Drecov.

    Limitation: You can extract RAR/7z, but Windows still only creates ZIP archives. For creating .7z or .rar files, you need a dedicated app.

    Format Extract (Win 11) Create (Win 11) Windows 10
    ZIP Native Native Native
    RAR Native No Requires third-party app
    7z Native No Requires third-party app
    GZIP / TAR / BZIP2 No No Requires third-party app

    When to Use 7-Zip or WinRAR Instead

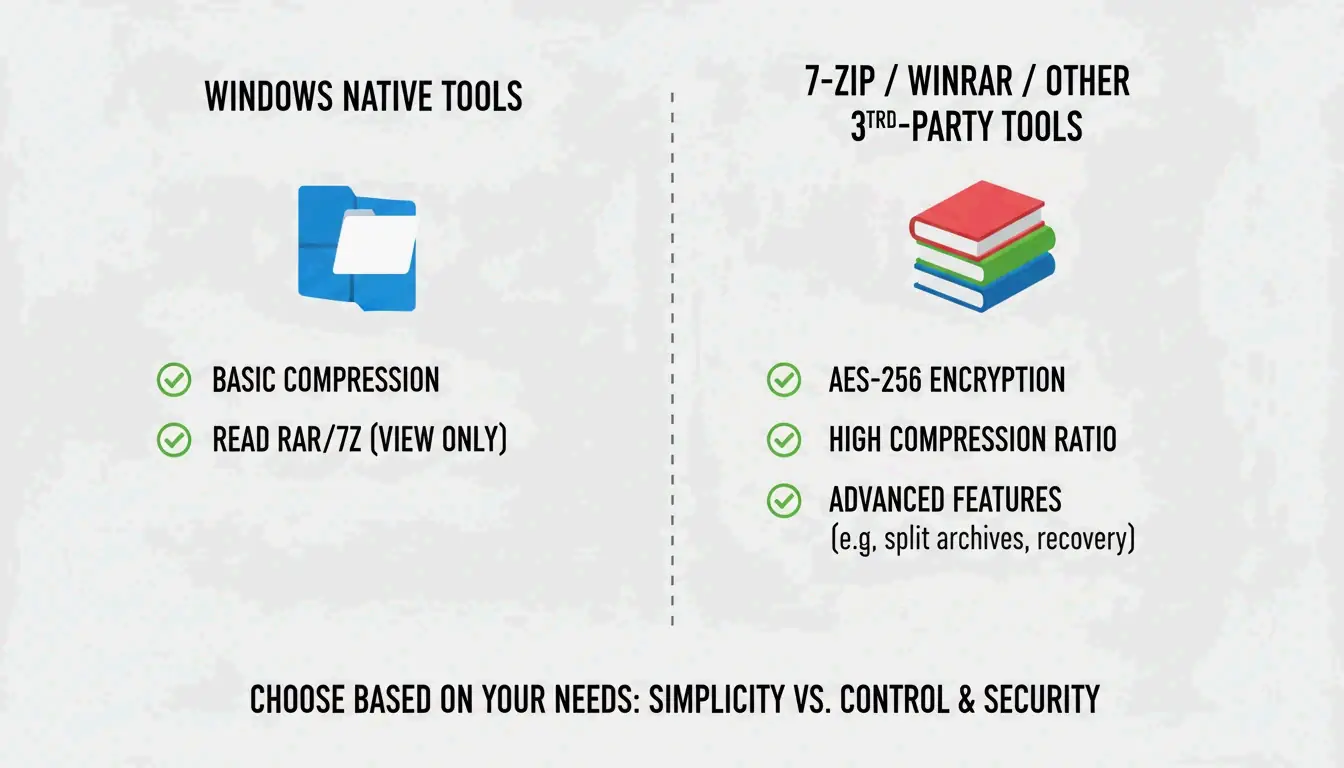
    The built-in Windows tool does not support AES-256 encryption for creating password-protected archives. For sensitive data (medical records, tax returns), use a dedicated tool.

    Feature Windows Built-in 7-Zip WinRAR
    Create ZIP Yes Yes Yes
    Create 7z (LZMA2) No Yes No
    Create RAR No No Yes
    AES-256 encryption No Yes Yes
    CRC error recovery Limited Strong Strong
    Price Free Free Paid (trial)

    ZIP Extractor notes that desktop apps like 7-Zip offer better protection against corrupted files and CRC errors compared to browser-based tools.

    Native tools vs third-party software comparison

    Use 7-Zip or WinRAR when:
    – Opening password-protected files with AES-256 encryption
    – Maximum compression is needed (LZMA/LZMA2 algorithms)
    – Working with GZIP, TAR, or BZIP2 formats

    Compression Ratios by File Type

    Not all files compress equally. Serverman provides useful benchmarks:

    File Type Typical Compression Why
    Text documents / spreadsheets 60–90% Highly repetitive data compresses well
    PDFs 20–40% Partially compressed already
    JPEG / MP3 / MP4 Less than 1% Already compressed by their own codecs
    RAW images / BMP 40–70% Uncompressed pixel data

    Modern Windows uses the ZIP64 extension, supporting archives up to 16 exabytes — more than enough for any real-world scenario, per Wikipedia.

    Conclusion

    For most users, right-click “Extract All” in File Explorer handles ZIP, RAR, and 7z extraction on Windows 11. Use PowerShell for batch jobs, and install 7-Zip when you need AES-256 encryption or maximum compression. Always ensure sufficient disk space before extracting large archives.

    FAQ

    What is the difference between ‘Extract All’ and double-clicking a ZIP?

    Double-clicking lets you browse inside without decompressing — files appear but won’t run correctly. “Extract All” fully unpacks the data into a normal folder, which is necessary for apps, installers, and files that interact with your system.

    Why can’t I see the ‘Extract All’ option?

    You may have clicked a regular folder instead of a compressed archive (check the extension is .zip, .rar, or .7z). If WinRAR is installed, it may have replaced the default context menu. Try “Open With → File Explorer” to restore the native option.

    How do I unzip password-protected files when Windows fails?

    The built-in tool doesn’t handle high-level encryption. Use 7-Zip or WinRAR — both support AES-256 encryption that Windows cannot process natively.

  • What Is WAV Audio Format? Professional Guide to Lossless Sound (2026)

    What Is WAV Audio Format? Professional Guide to Lossless Sound (2026)

    The WAV format (Waveform Audio File Format) is an uncompressed audio container by Microsoft and IBM that stores raw PCM data — preserving 100% of original sound quality. It uses roughly 10 MB per minute of audio at CD quality. In 2026, WAV remains the standard for professional mastering, studio recording, and AI audio workflows.

    WAV Technical Structure

    Component Role
    RIFF Header Identifies file format and overall structure
    fmt Chunk Sample rate, bit depth, channels, byte rate
    data Chunk Raw PCM audio samples

    Wikipedia notes WAV launched in 1991 as the native uncompressed sound format for Windows.

    Bit Depth and Sample Rate Settings

    Setting Bit Depth Sample Rate File Size (per min) Use Case
    CD Quality 16-bit 44.1 kHz ~10.1 MB Standard digital distribution
    Film/TV 16-bit 48 kHz ~11 MB BBC broadcast standard per Wikipedia
    Professional Studio 24-bit 48 kHz ~16.5 MB Film, TV, studio production
    High-Res 24-bit 96 kHz ~33 MB Archival, mastering
    32-bit Float 32-bit float 48 kHz+ ~22 MB+ Field recording, clipping prevention

    Flipper File confirms CD-quality audio requires 10.1 MB per minute.

    32-bit Float: Clipping Prevention

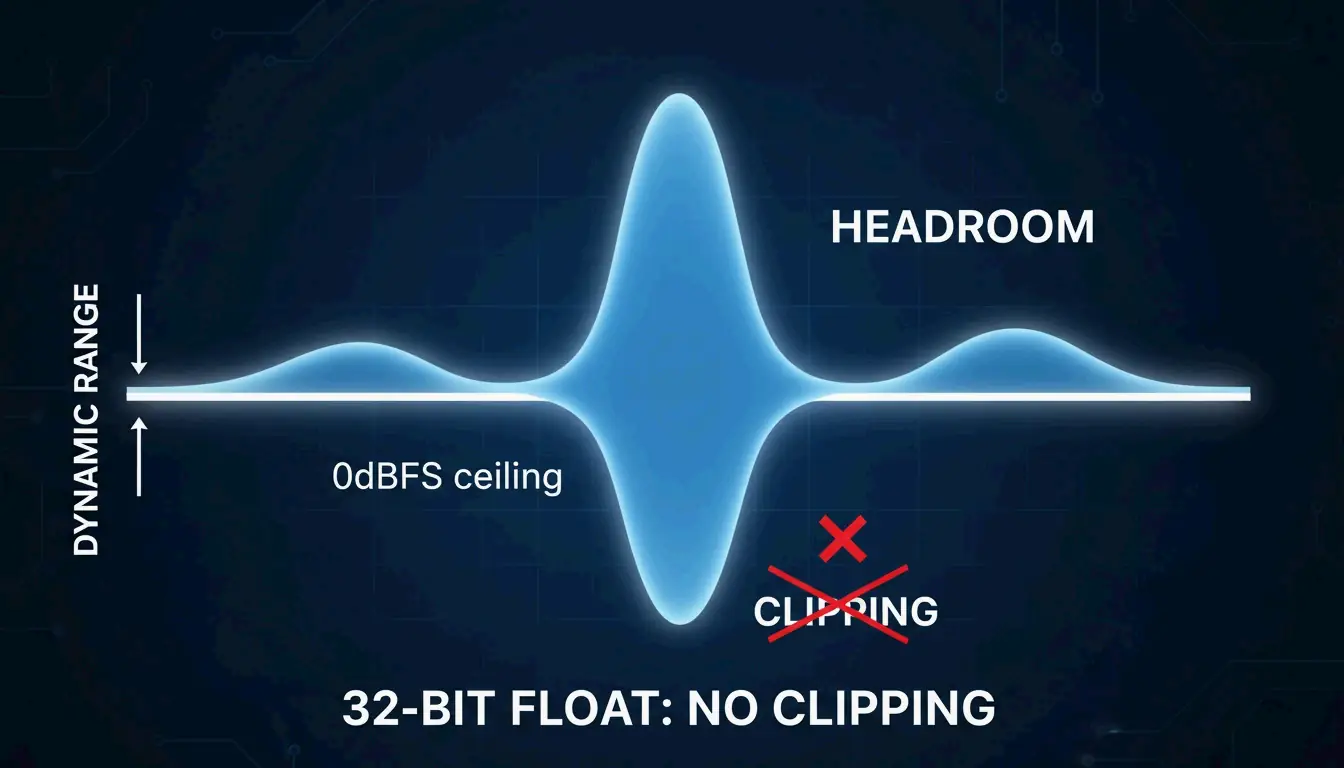
    32-bit float offers a dynamic range of up to 1,528 dB, making it nearly impossible to clip during recording. If audio exceeds the input level, you can recover it perfectly in post-production — impossible with 16-bit or 24-bit.

    A visual metaphor for 32-bit float headroom, showing a wave that exceeds a boundary but remains intact/retrievable.

    WAV vs. FLAC vs. MP3

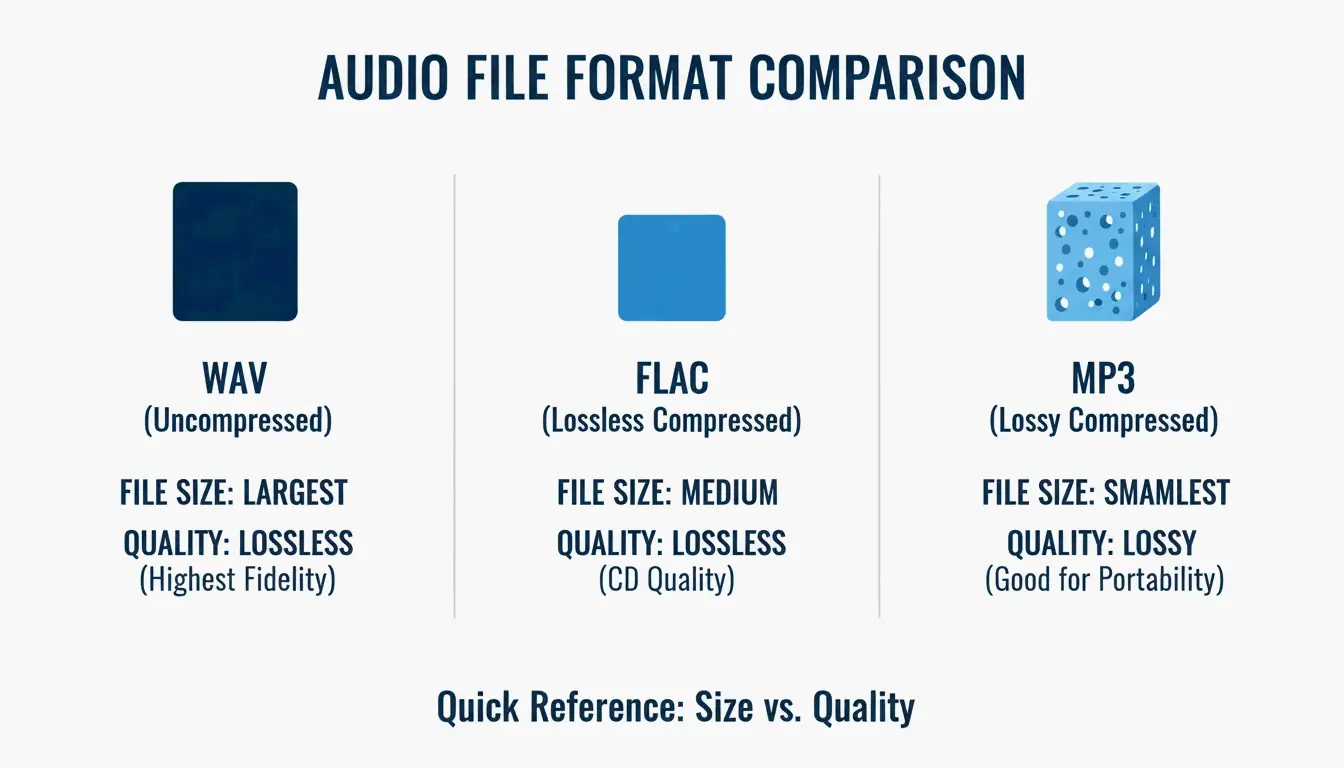
    Format Compression Quality Size (per min) CPU Decode Best For
    WAV None (raw PCM) 100% lossless ~10 MB Zero Recording, mixing, DJing
    FLAC Lossless Mathematically identical ~5 MB Low Archival, streaming
    MP3 Lossy Perceptually close at 320 kbps ~2.4 MB Low Casual listening, sharing

    Studio Supplies notes FLAC reduces size by 50–60% while keeping audio mathematically identical. Per FastPix, even pro engineers struggle to distinguish 320 kbps MP3 from WAV in blind tests — but discarded MP3 data is gone forever.

    A simple 3-way comparison of WAV, FLAC, and MP3 focusing on the trade-off between file size and data integrity.

    The 4GB File Size Limit

    The original RIFF header uses a 32-bit unsigned integer for file size, capping at 4 GB. Workarounds:

    Extension Max Size Maintainer
    RF64 Virtually unlimited European Broadcasting Union
    W64 Virtually unlimited Sound Forge

    WAV for AI Audio Workflows (2026)

    FastPix reports AI noise reduction and frequency repair tools require lossless source files. Starting from MP3 deprives AI models of the high-frequency data they need — WAV is the only way to get professional AI audio results.

    Conversion: FFmpeg Commands

    
    ffmpeg -i input.wav -codec:a libmp3lame -b:a 320k output.mp3
    
    # WAV to FLAC
    ffmpeg -i input.wav -codec:a flac output.flac
    
    # WAV to OAC (Open Audio Codec, 2026)
    ffmpeg -i input.wav -codec:a libopus -b:a 128k output.opus
    

    Loudness Normalization (EBU R128)

    Modern platforms normalize to -23 LUFS per EBU R128 standard. FastPix offers automated normalization to ensure consistent volume across platforms.

    2026 Streaming Landscape

    Platform Lossless Support Codec
    Spotify Added late 2025 FLAC/ALAC
    Apple Music Yes (since 2021) ALAC
    Amazon Music Yes FLAC
    YouTube Supports WAV uploads Transcodes to AAC/Opus

    The global audio codec market is valued at $13.07 billion in 2026 (Fortune Business Insights).

    Conclusion

    Use WAV for all recording, mixing, and production work — zero CPU overhead, maximum quality. Switch to FLAC for archival storage (50–60% smaller, mathematically lossless). Use MP3/OAC only for final delivery to listeners. For AI audio workflows, always start from WAV.

    FAQ

    Is WAV truly lossless compared to FLAC?

    Both are lossless with identical audio data. WAV is uncompressed (raw), FLAC is compressed (smaller). WAV is preferred for active editing because the CPU doesn’t need to decompress in real time.

    Why are WAV files limited to 4 GB?

    The RIFF header uses a 32-bit unsigned integer for file size. Use RF64 or W64 extensions for long-form recordings exceeding 4 GB.

    Can I convert MP3 back to WAV to restore quality?

    No. MP3 permanently discards data via perceptual coding. Converting MP3 to WAV creates a larger file but cannot reconstruct lost harmonics. The result only matches the source MP3 quality.

    Does YouTube recommend WAV for uploads?

    Yes. YouTube re-encodes all audio to AAC or Opus, so uploading WAV ensures the highest-quality source for transcoding, minimizing generation loss.

  • How to Convert Centimeters to Kilometers: Formula, Examples & Visual Guide

    How to Convert Centimeters to Kilometers: Formula, Examples & Visual Guide

    To convert centimeters (cm) to kilometers (km), divide by 100,000. The formula is km = cm ÷ 100,000 (or equivalently, km = cm × 0.00001). For example, 250,000 cm = 2.5 km. Per NIST, the conversion factor is exactly 10⁻⁵.

    The Conversion Formula

    Method Formula Example
    Division km = cm ÷ 100,000 500,000 cm = 5 km
    Multiplication km = cm × 0.00001 500,000 cm = 5 km
    Decimal shift Move decimal 5 places left 250,000 → 2.5 km

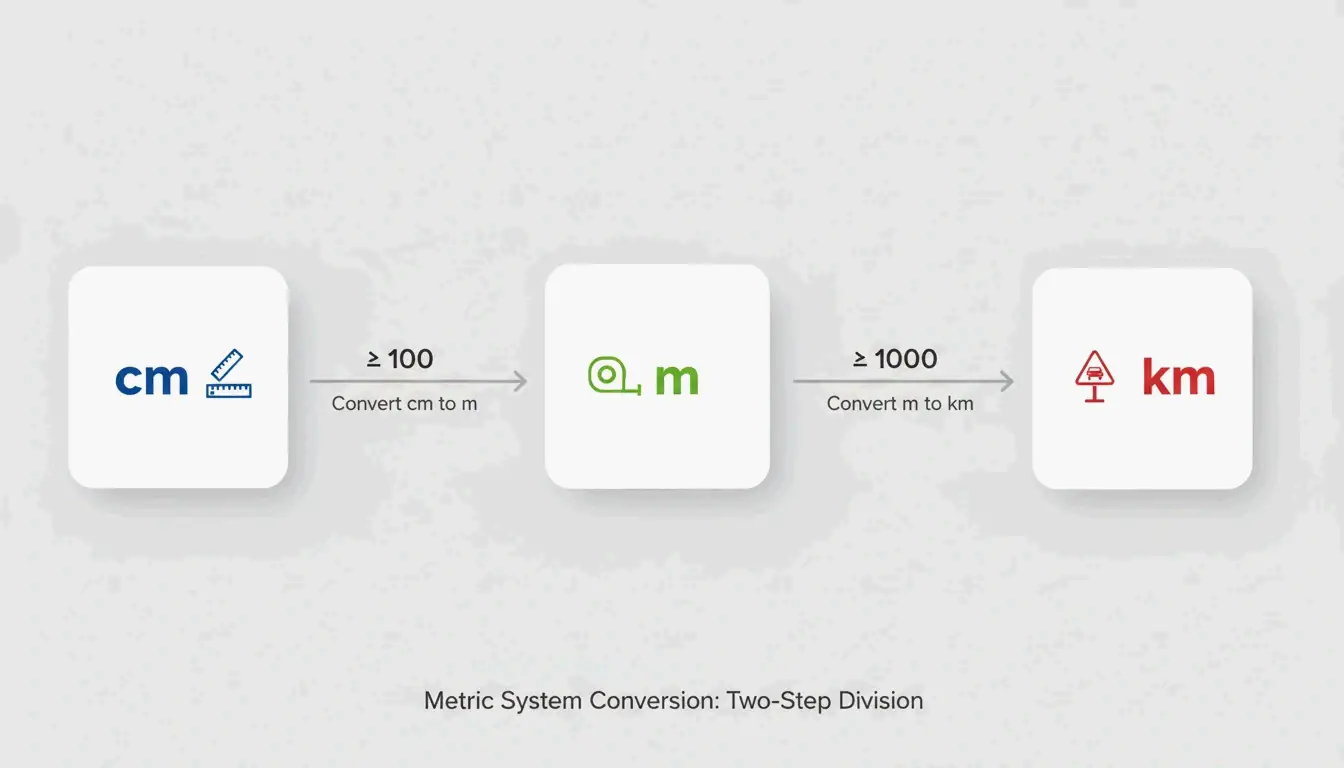
    Two-Stage Method (via Meters)

    1. cm → m: Divide by 100 (e.g., 100,000 cm = 1,000 m)
    2. m → km: Divide by 1,000 (e.g., 1,000 m = 1 km)

    A simple 3-step transition from cm to m to km

    Step-by-Step: Manual Conversion

    1. Identify the value — e.g., 250,000 cm
    2. Find the decimal point — 250,000.0
    3. Shift 5 places left — 2.50000 → 2.5 km

    Quick Conversion Table

    Centimeters Kilometers Scientific Notation
    1 cm 0.00001 km 1 × 10⁻⁵ km
    100 cm 0.001 km 1 × 10⁻³ km
    1,000 cm 0.01 km 1 × 10⁻² km
    10,000 cm 0.1 km 1 × 10⁻¹ km
    45,000 cm 0.45 km 4.5 × 10⁻¹ km
    100,000 cm 1 km 1 × 10⁰ km
    250,000 cm 2.5 km 2.5 × 10⁰ km
    1,000,000 cm 10 km 1 × 10¹ km

    As CoolConversion notes, describing a distance as 0.45 km is far more practical than 45,000 cm.

    Why the Metric System Uses This Scale

    The metric system is decimal-based, governed by ISO 80000-3 for length units. A centimeter measures small objects (button width, pencil thickness). A kilometer measures geographic distances (road lengths, city-to-city). The 100,000:1 ratio keeps both scales manageable.

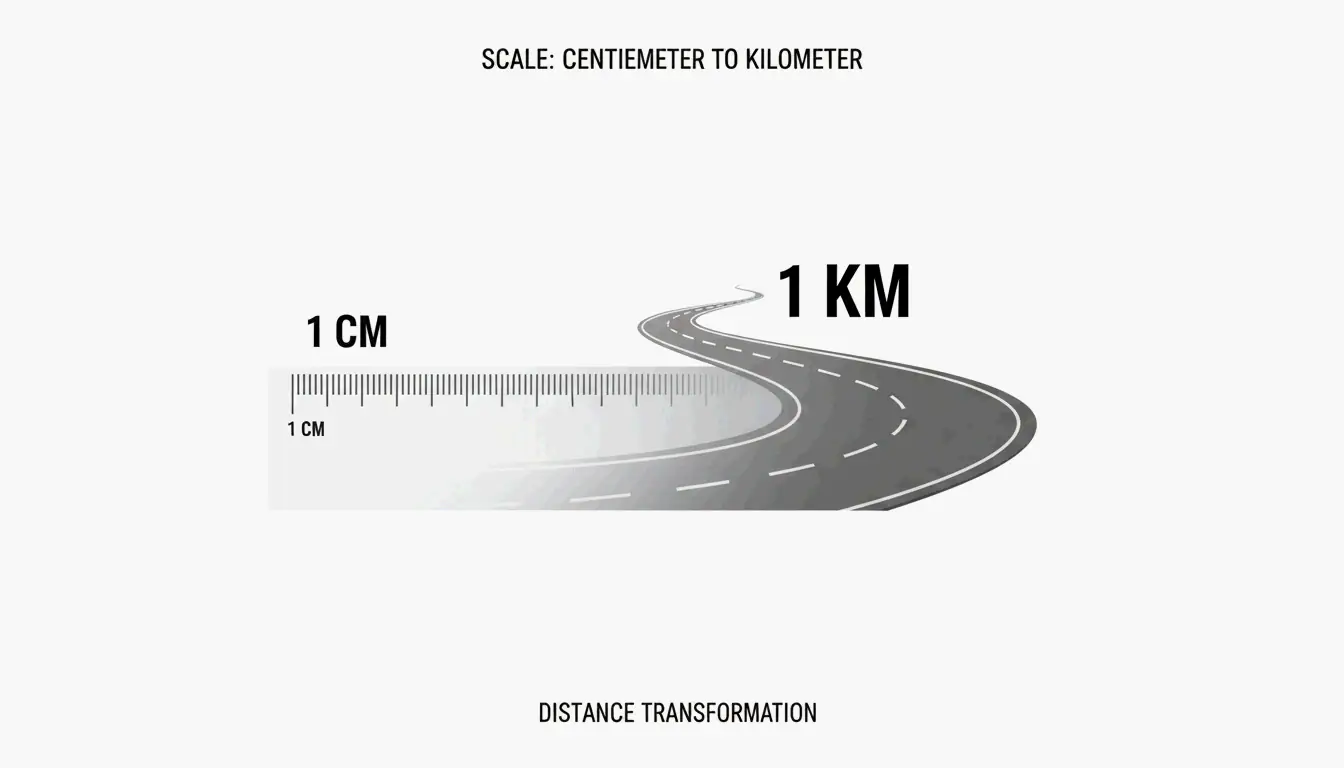
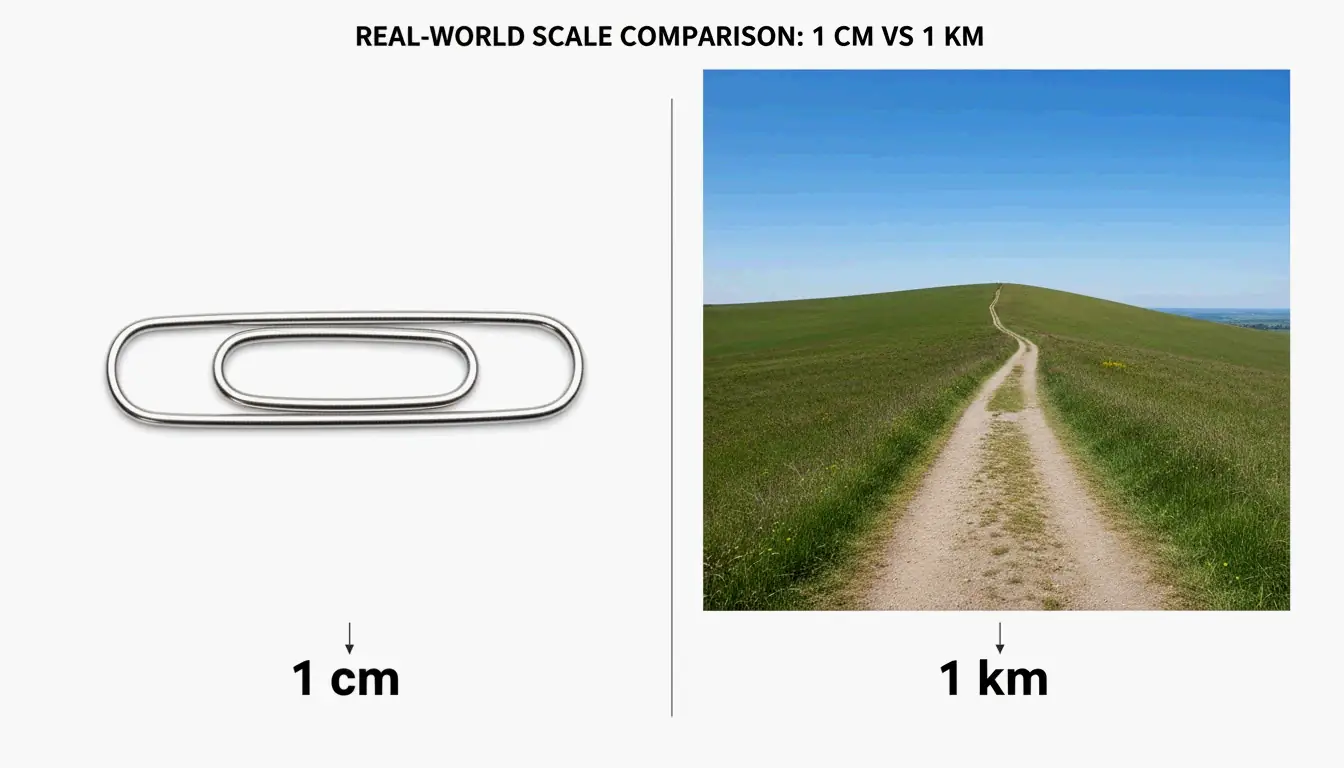
    Visualizing the Scale

    Object Measurement Scale
    Paperclip thickness ~1 cm Hand-held
    Pencil width ~0.7 cm Hand-held
    10-minute brisk walk ~1 km Navigational
    1.5 km road segment 150,000 cm Navigational

    A clean side-by-side comparison of a paperclip and a long path

    Per CoolConversion, 0.001 cm is thinner than pencil lead (microscopic), while 150,000 cm represents a 1.5 km road segment.

    Speed Conversion: cm/s to km/h

    To convert centimeters per second (cm/s) to kilometers per hour (km/h), multiply by 0.036.

    Formula Derivation
    km/h = cm/s × 0.036 (cm ÷ 100,000) × 3,600 seconds
    cm/s km/h
    1 cm/s 0.036 km/h
    100 cm/s 3.6 km/h
    1,000 cm/s 36 km/h
    10,000 cm/s 360 km/h
    100,000 cm/s 3,600 km/h

    Per Tradukka, this conversion is essential for drone altitude tracking, conveyor belt rates, and robotics.

    Scientific Notation Reference

    Per CoolConversion, 90,000 cm = 9 × 10⁴ cm = 0.9 km. For extremely small values, 0.01 cm = 1 × 10⁻⁷ km.

    Precision Level Format Example
    Everyday Decimal 2.5 km
    Engineering Scientific notation 2.5 × 10⁰ km
    Standards compliance NIST factor 250,000 cm × 10⁻⁵

    Conclusion

    cm to km = divide by 100,000 (decimal shift 5 places left). For speed, multiply cm/s by 0.036 to get km/h. For professional or scientific work, verify against NIST and ISO 80000-3 standards.

    FAQ

    How many kilometers are in 1 centimeter?

    0.00001 km (1 × 10⁻⁵ km). This is an exact metric conversion per NIST.

    What is the conversion factor between cm and km?

    1/100,000 = 0.00001. Multiply cm by 0.00001 or divide by 100,000.

    How do I convert cm/s to km/h?

    Multiply cm/s by 0.036. Formula: (cm ÷ 100,000) × 3,600 = km/h.

    Is this different from imperial system conversions?

    Yes. cm-to-km is purely metric (SI), based on powers of ten. Imperial units (inches, feet, miles) use non-decimal factors and require entirely different conversion formulas.

  • How to Convert and Compress Photos Format: 2026 Guide to Faster Web Performance

    How to Convert and Compress Photos Format: 2026 Guide to Faster Web Performance

    To convert and compress photos format in 2026, use browser-native tools like PixConvert or professional software like Adobe Photoshop. Simply upload your images, select a next-gen format such as AVIF or WebP, and set the quality slider to 70-80%. This process shrinks file sizes to meet Core Web Vitals standards while keeping your visuals sharp for professional use.

    How to Convert and Compress Photos Format: The 3-Step Workflow

    Optimizing digital images is all about finding the “sweet spot” between a small file size and a clear picture. It is a business necessity, too: according to Salsify 2025, 42% of shoppers will walk away from a purchase if product images are missing or low-quality.

    Step 1: Choosing Your Conversion Tool (Local vs. Online)

    First, decide where you want to process your files. If you are handling sensitive documents, local software like Adobe Photoshop or even Microsoft Paint keeps everything on your hard drive for maximum security. However, if you prefer the convenience of the web, tools like PixConvert and ToolPix now use WebAssembly technology. This means they process images directly in your browser’s RAM — your photos are never actually uploaded to a cloud server.

    Tool Type Examples Privacy Level Speed
    Desktop software Adobe Photoshop, MS Paint Highest (offline) Moderate
    WASM browser tools PixConvert, ToolPix High (local RAM) Fast
    Cloud-based Various online converters Lower (server upload) Fastest

    Step 2: Selecting Lossy vs. Lossless Compression

    Understanding the difference between these two methods helps you maintain professional standards:

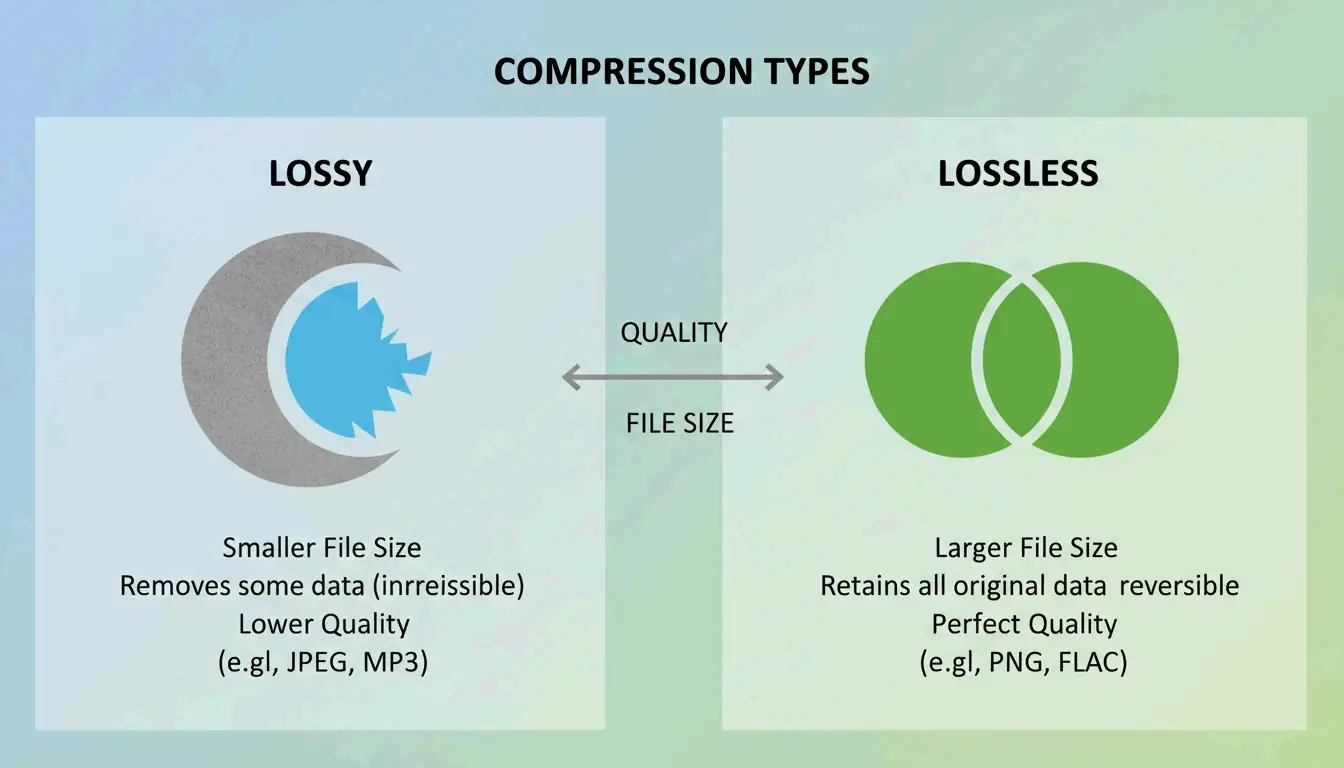
    • Lossy Compression: This strips away pixel data that the human eye cannot really see. It results in much smaller files and is the standard for JPEG/JPG and next-gen formats.
    • Lossless Compression: This shrinks the file without removing any data at all. It is the best choice for logos or images you plan to edit again later.
    • The 70-80% Rule: For most websites, setting your quality between 70% and 80% is ideal. If you drop below 60%, you will likely start seeing “artifacts” — those ugly blurs or grainy patches in the image.

    A simple comparison of Lossy vs. Lossless compression

    Why WebP and AVIF are Essential for 2026 SEO

    By 2026, search engine rankings are tied closely to how users experience your site. Google’s Core Web Vitals (LCP) require your main content to load within 2.5 seconds. Since heavy images are usually what slow a page down, switching to next-gen formats is one of the fastest ways to hit that speed target.

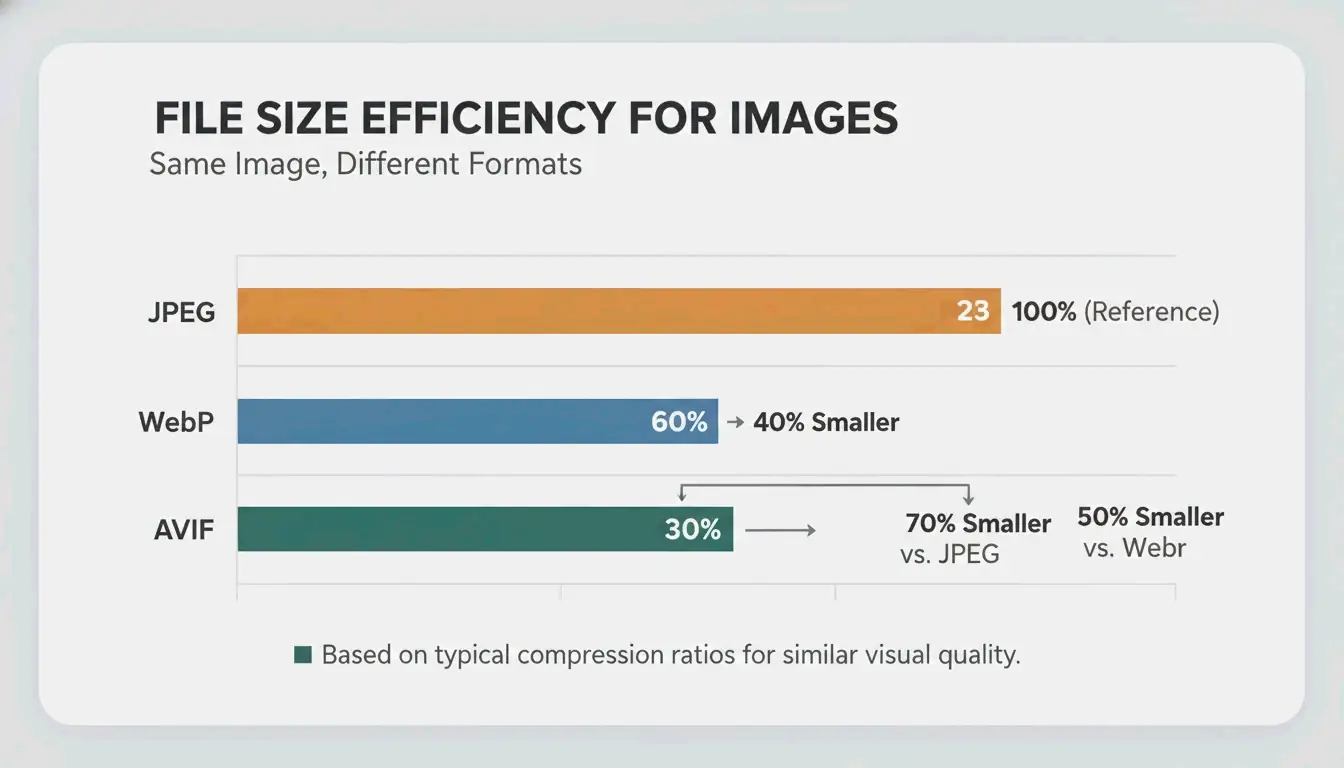
    AVIF has become the top choice in 2026. It compresses files much better than WebP or the old-school JPEG. While WebP is still a great upgrade, AVIF can often shave off an extra 20-30% in file size without making the photo look worse.

    Format Compression vs JPEG Browser Support (2026) Transparency Best Use
    JPEG Baseline 100% No Universal compatibility
    WebP 25-35% smaller 97%+ Yes General web optimization
    AVIF 50-70% smaller 93%+ Yes Maximum compression for modern sites
    PNG Larger than JPEG 100% Yes Logos, text graphics

    The payoff for these technical tweaks is real. Illustrate Digital’s 2023 Global Page Speed Report found that a B2B site loading in one second has a conversion rate five times higher than a site taking 10 seconds. Today, almost every browser supports AVIF and WebP, though WordPress users might still want a plugin like Imagify to handle “fallbacks” for very old browser versions.

    A simple visualization of AVIF vs. JPEG file size efficiency

    Batch Processing: Converting Thousands of Images Simultaneously

    If you are an e-commerce manager or a photographer, you do not have time to click through images one by one. Modern tools now use your computer’s CPU and GPU to handle heavy workloads fast.

    Data from HitPaw shows that professional converters can batch process 200-333 images per minute. This means you can optimize a library of over 1,000 photos in less than five minutes. For webmasters, the Imagify plugin automates this by optimizing images the moment you upload them to your media library, letting the server do the heavy lifting in the background.

    Batch Processing Performance:

    Tool Images per Minute Input Formats Output Formats
    Adobe Photoshop (Batch) 50-100 All major All major
    HitPaw Image Converter 200-333 JPG, PNG, WebP, AVIF JPG, PNG, WebP, AVIF
    Imagify (WordPress) Auto on upload JPG, PNG WebP, AVIF
    Microsoft PowerToys 100+ JPG, PNG JPG, PNG

    Professional Tools: Adobe Photoshop vs. WebAssembly Solutions

    Your workflow usually comes down to a choice between heavy-duty desktop software and fast, privacy-focused web tools.

    Adobe Photoshop remains the gold standard for total control. By using the “Export As” function, you can tweak the DPI (Dots Per Inch) — standardized at 72 DPI for web and 300 DPI for print — and watch the estimated file size change in real-time as you move the quality slider.

    On the other hand, WebAssembly tools like PixConvert offer speed without the monthly subscription. Many of these tools include a “Target File Size” feature: you tell the tool you need a 50KB file, and its engine automatically figures out the best dimensions and quality to get you there.

    Target Size Cheat Sheet: Amazon, Shopify, and Government Portals

    Platform Recommended Format Size Constraint Key Action
    Shopify / Amazon WebP / AVIF Under 200 KB Prioritize LCP speed
    Gov Portals (e.g., SSC/UPSC) JPG 20 KB — 50 KB Use “Target Size” tool
    Professional Print TIFF / JPG 300 DPI Disable lossy compression
    Social Media WebP / AVIF Platform-specific Use batch converter

    Conclusion

    Switching to next-gen formats like AVIF while keeping a sensible compression ratio is the best move for both SEO and user experience in 2026. Moving away from old JPEGs helps you satisfy Google’s Core Web Vitals and hit that 2.5-second loading goal. To get started, check your current site speed, then use a batch processor or a WebAssembly tool to convert your library to AVIF at 75% quality. This simple change can go a long way in keeping visitors on your site and boosting your conversions.

    FAQ

    What is the best compression level to maintain image quality?

    For most web images, 70-80% is the “sweet spot.” This range reduces file size significantly while keeping visual artifacts invisible to the human eye. If you go below 60%, you will likely see banding or noise. When using AVIF, you can often drop to 50-60% and still achieve better visual results than a high-quality JPG.

    How can I compress a photo to a specific size, like 50KB?

    You should use a tool with a “Target File Size” feature, such as IMG Size Reducer. These tools use binary search logic to automatically adjust the quality slider until the file meets your exact KB requirement. If the quality becomes too poor at 50KB, try reducing the pixel dimensions (width and height) before applying further compression.

    Are online image compressors safe for private documents?

    Standard cloud-based tools that upload your files to a server may pose a privacy risk. For sensitive data, look for “Client-Side” or WebAssembly-powered tools like PixConvert or ToolPix, which process images locally in your browser RAM. Alternatively, use local software like Adobe Photoshop or Microsoft Paint to ensure your files never leave your device.

  • How to Compress Image Size in KB and MB: 2026 Guide to Fast and Lossless Optimization

    How to Compress Image Size in KB and MB: 2026 Guide to Fast and Lossless Optimization

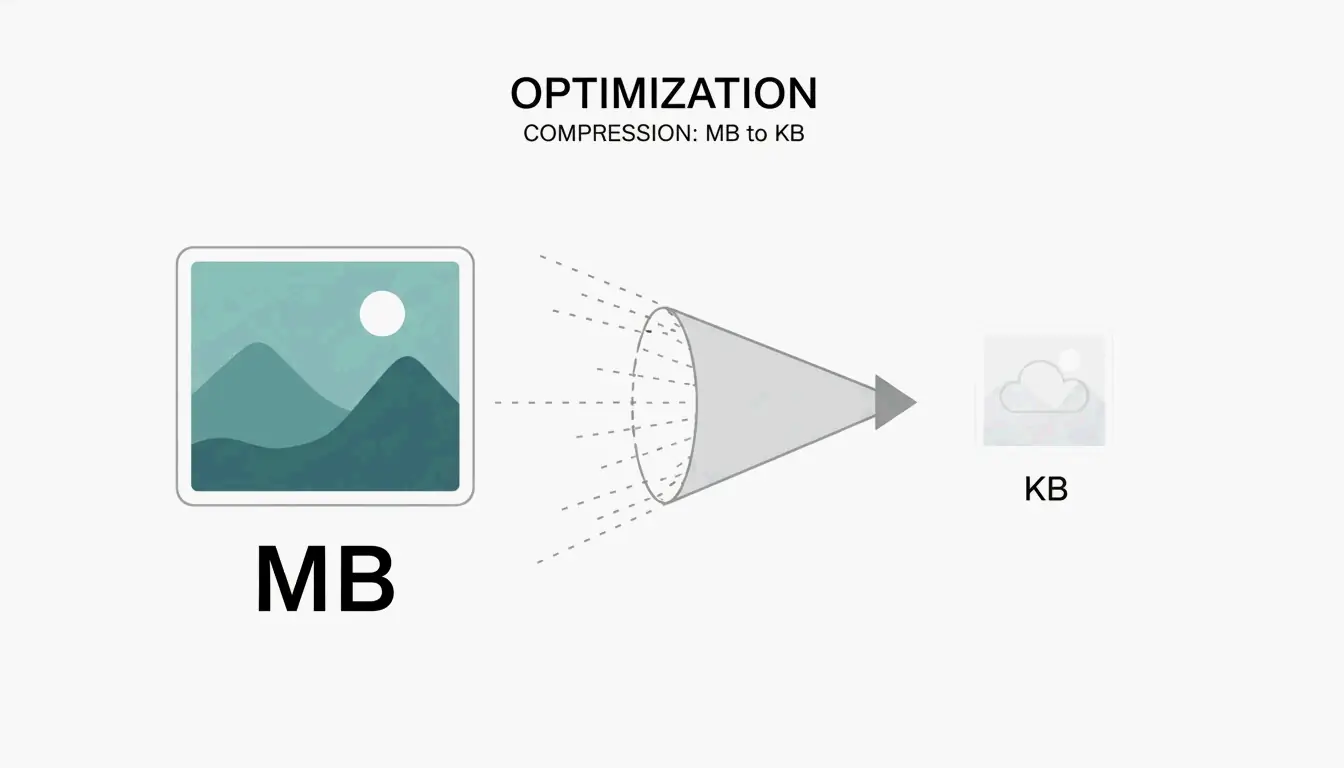
    As of May 2026, the quickest way to compress image size in KB and MB is by using WASM-based online tools like ImResizer or pdfFiller. These platforms process your files directly in your browser, which keeps your data private and secure. Simply upload your JPG or PNG, enter your target size (like 50KB), and download the result. For large batches of photos, offline software remains the best choice for maintaining consistent quality.

    Quick Steps: How to Compress Image Size in KB and MB for Instant Uploads

    If you need to shrink a file from several megabytes down to a few kilobytes, you need a tool with “target-size” settings. Most modern web compressors now use WebAssembly (WASM) technology. This means the actual compression happens on your own computer rather than a distant server, making the process both faster and safer.

    The Standard Compression Workflow

    1. Pick Your Tool: Use a platform like ImResizer or pdfFiller that lets you set specific KB or MB goals.
    2. Upload and Set Limits: Select your JPG / JPEG or PNG file. Keep in mind the standard conversion: 1 MB = 1024 KB, as noted by SmartToolsWala. If you have a 2MB file but the upload limit is 100KB, set that as your target.
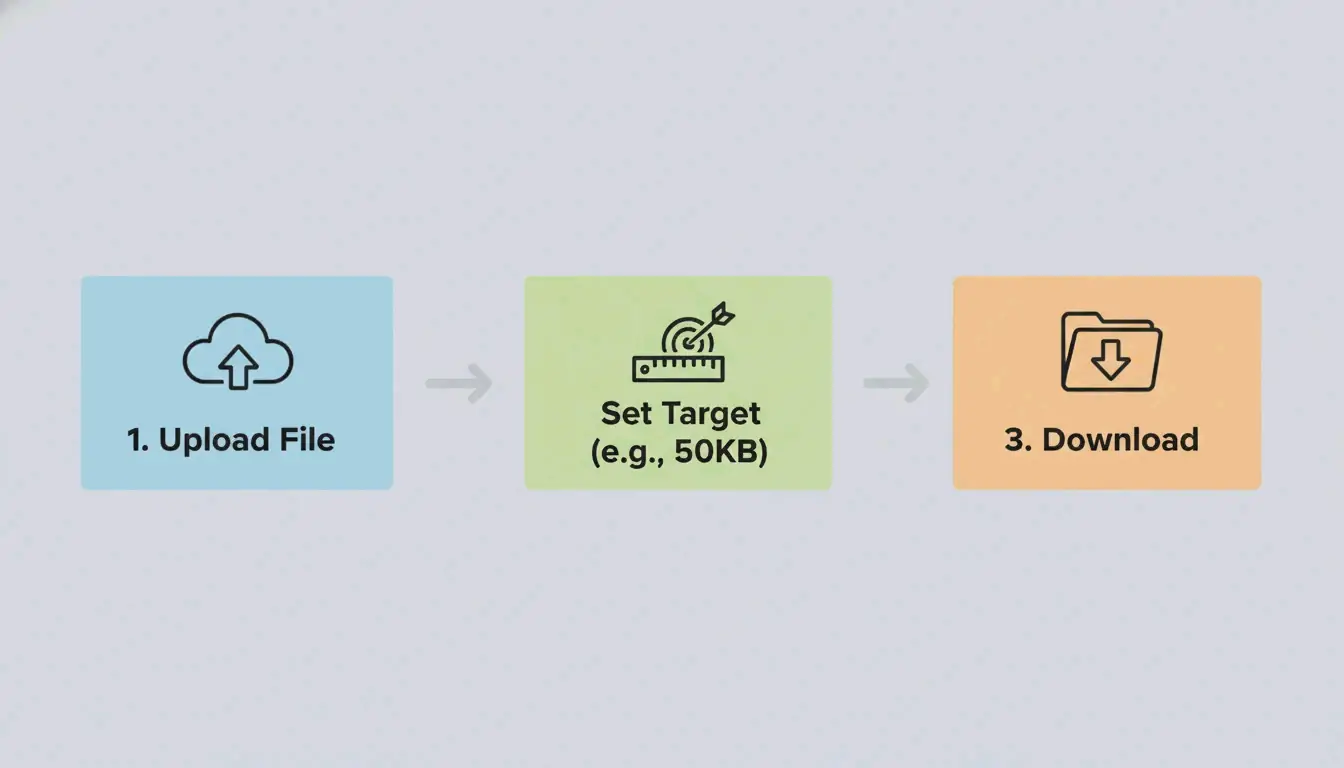
    3. Process and Download: Hit the “Target Size” button. The algorithm will automatically tweak the quality and dimensions to meet your exact limit.

    3-step visualization of the compression process

    The “Final Inch” Checklist: Why Your File is Still 1KB Over

    Government websites and exam portals are often very strict, usually requiring files between 20KB and 200KB. If your image is still just over the limit, check for hidden metadata. Removing thumbnails and preview data can often shave off those last few bytes you need to hit a 50KB or 100KB threshold.

    Common File Size Targets:

    Use Case Typical Limit Strategy
    Government form (e.g., SSC/UPSC) 20-50 KB Target-size tool + strip EXIF
    Visa / passport photo 50-100 KB 96 DPI + aggressive lossy compression
    Email attachment (per image) Under 1 MB 80% JPEG quality
    Web hero image Under 200 KB WebP/AVIF at 75%

    Online vs Offline Tools: Which Should You Choose in 2026?

    Deciding between a browser tool and desktop software depends on how many photos you have and how much privacy you need. In 2026, browser-based tools are almost as fast as desktop ones because they process files locally.

    Online Tools for Speed and Accessibility

    Sites like pdfFiller, which has over 12,500 verified reviews, are great for quick, one-off jobs. Many of these tools now respect GPC (Global Privacy Control) signals, so your session is not tracked. They are the go-to option if you are on a phone or a public computer and need to fix a JPG / JPEG for a visa form or job application.

    Offline Software for Batch Processing and Privacy

    If you are a professional dealing with thousands of images, offline software like Batch Picture Resizer is a better bet. It uses your computer’s full processing power to finish bulk tasks in minutes. Because it works without an internet connection, it is the safest way to handle sensitive company files.

    Tool Type Speed Privacy Batch Support Best For
    WASM browser tools Fast Local processing Limited Quick single-file edits
    Server-side tools Fastest Files uploaded to server Yes Large batches, non-sensitive
    Offline software Moderate Full offline Yes Sensitive files, bulk work

    How to Maintain Image Quality and Resolution During Compression

    Keeping your Image Quality / Resolution sharp while shrinking the file size is all about choosing the right method: Lossy or Lossless.

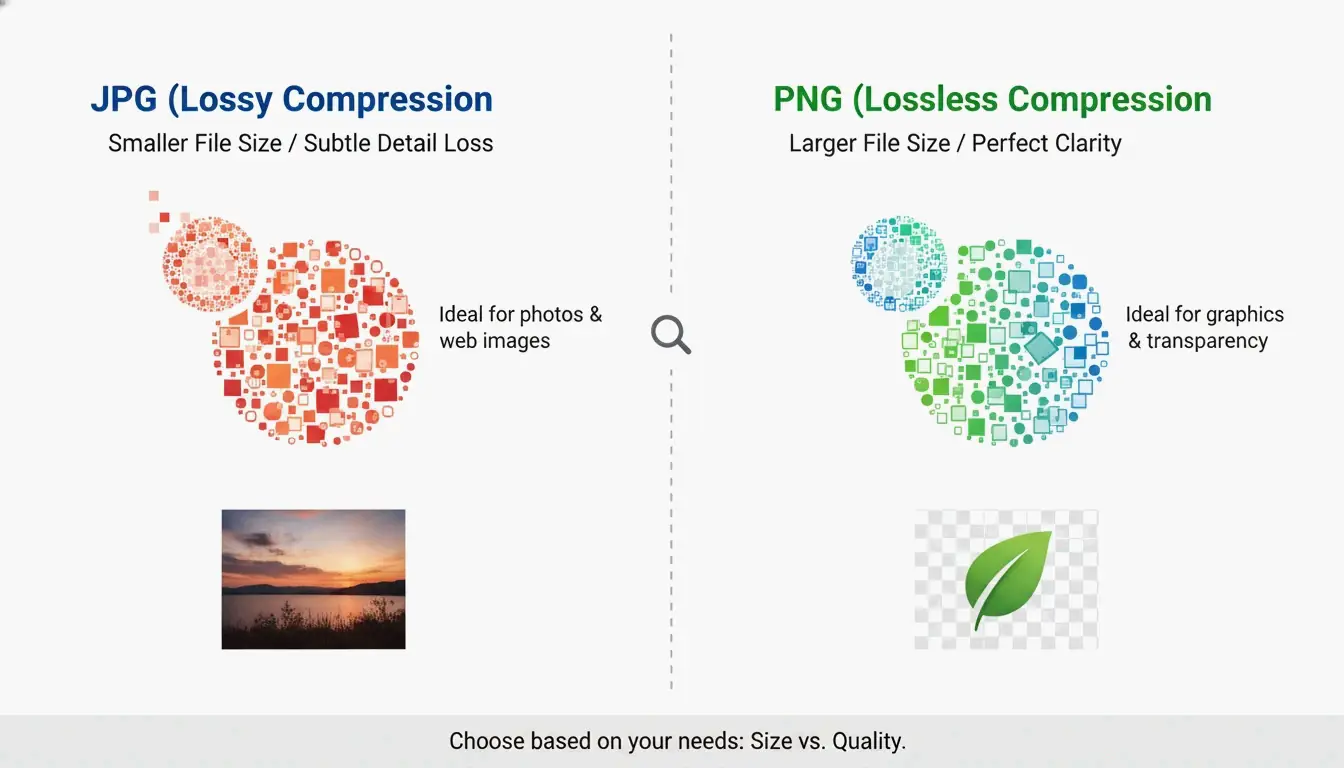
    Lossy (JPG) vs. Lossless (PNG)

    • JPG / JPEG: This uses “lossy” compression. It throws away data that the human eye cannot really see to make the file much smaller. It is perfect for standard photos.
    • PNG: This uses “lossless” compression, meaning it keeps every bit of original data. The image stays perfectly clear, but the file size will be much larger than a JPG.

    Simple visual comparison of JPG vs PNG file size and clarity

    Format Compression Typical Size (1080px photo) Transparency Best For
    JPEG Lossy 150-300 KB No Photos, web
    PNG Lossless 1-3 MB Yes Logos, screenshots
    WebP Both 100-200 KB Yes Web optimization
    AVIF Both 80-150 KB Yes Next-gen web

    The 2026 Shift: Adopting WebP

    By 2026, WebP has become the new standard. ImResizer reports that WebP can make files 30% smaller than JPEGs without losing visual quality. Most browsers and websites now accept this format without any issues.

    The “Upscaling” Myth

    It is a technical reality that you cannot really turn a tiny KB file back into a high-quality MB file. As ImResizer points out, while tools can “inflate” a file size by adding empty data, they cannot bring back lost detail. Always keep your original high-resolution photos safe before you start compressing.

    Advanced Tactics: Stripping EXIF Data to Save Extra Space

    Images often hide “extra” info called EXIF Data, which includes things like camera settings, GPS location, and the date the photo was taken. This can add 5KB to 50KB to your file size.

    Tools like the EclixTech Photo Compressor give you the option to strip this data. Removing it helps with two things:

    1. Privacy: No one can see exactly where or when you took the photo.
    2. Size Limits: If you are struggling to meet a tiny 20KB limit for a government form, cutting 10KB of metadata can make the difference.

    EXIF Data Size Breakdown:

    Data Type Typical Size Privacy Risk
    GPS coordinates 2-5 KB High — reveals exact location
    Camera model + settings 1-3 KB Low
    Date and time 0.5-1 KB Medium
    Thumbnail preview 5-20 KB Low (but adds to file size)

    Conclusion

    To successfully compress image size in KB and MB, you just need to pick the right format (like WebP or JPG) and the right tool for the job. For a quick government upload or a social media post, WASM-based tools like ImResizer or pdfFiller are fast, secure, and do not require an account. If you are a professional photographer or a business owner who needs to process huge batches of files, investing in offline software is the best way to keep your quality standards high.

    FAQ

    Is it safe to upload my private photos to online compressors?

    Most reputable tools now use SSL encryption to protect data during transfer. Furthermore, a major 2026 update in web technology means many top-tier tools now use WASM (WebAssembly) for local browser processing. This means your photo is processed on your own device and never actually reaches a remote server, providing maximum privacy.

    Can I increase an image size back to MB after compressing it to KB?

    Technically, you can increase the file size by adding “padding” data or upscaling the dimensions, but you cannot restore the visual detail lost during the initial compression. To avoid blurry results, always perform your edits on the original high-resolution file rather than trying to upscale a previously compressed version.

    What is the difference between lossy and lossless image compression?

    Lossy compression (used in JPG files) removes certain bits of data to shrink the file size significantly, which may lead to a slight loss in quality. Lossless compression (used in PNG and some WebP files) keeps all original data intact, ensuring the image looks exactly like the original, though the resulting file size will be larger than a lossy version.

  • How to Compress Photos and Save Space – The 2026 Ultimate Guide to Storage Optimization

    How to Compress Photos and Save Space – The 2026 Ultimate Guide to Storage Optimization

    Compressing photos to save space in 2026 starts with built-in settings like iPhone’s HEIC format or Google Photos’ Storage Saver. For maximum efficiency, use AI-powered tools to convert images to WebP or AVIF, applying lossy compression at 75-85% quality to reduce file sizes by up to 80% while maintaining visual clarity.

    Quick Wins: How to Compress Photos and Save Space on Any Device

    Shrinking your digital library begins with changing how devices capture and store files. According to Business.com, modern compression tools can cut standard JPEG sizes by 40-60% without visible quality loss. A few system-level settings stop storage bloat before it starts.

    Mobile: Enabling High Efficiency Formats

    iPhone (HEIC):
    1. Open Settings > Camera > Formats
    2. Select High Efficiency
    3. New photos save as HEIC automatically

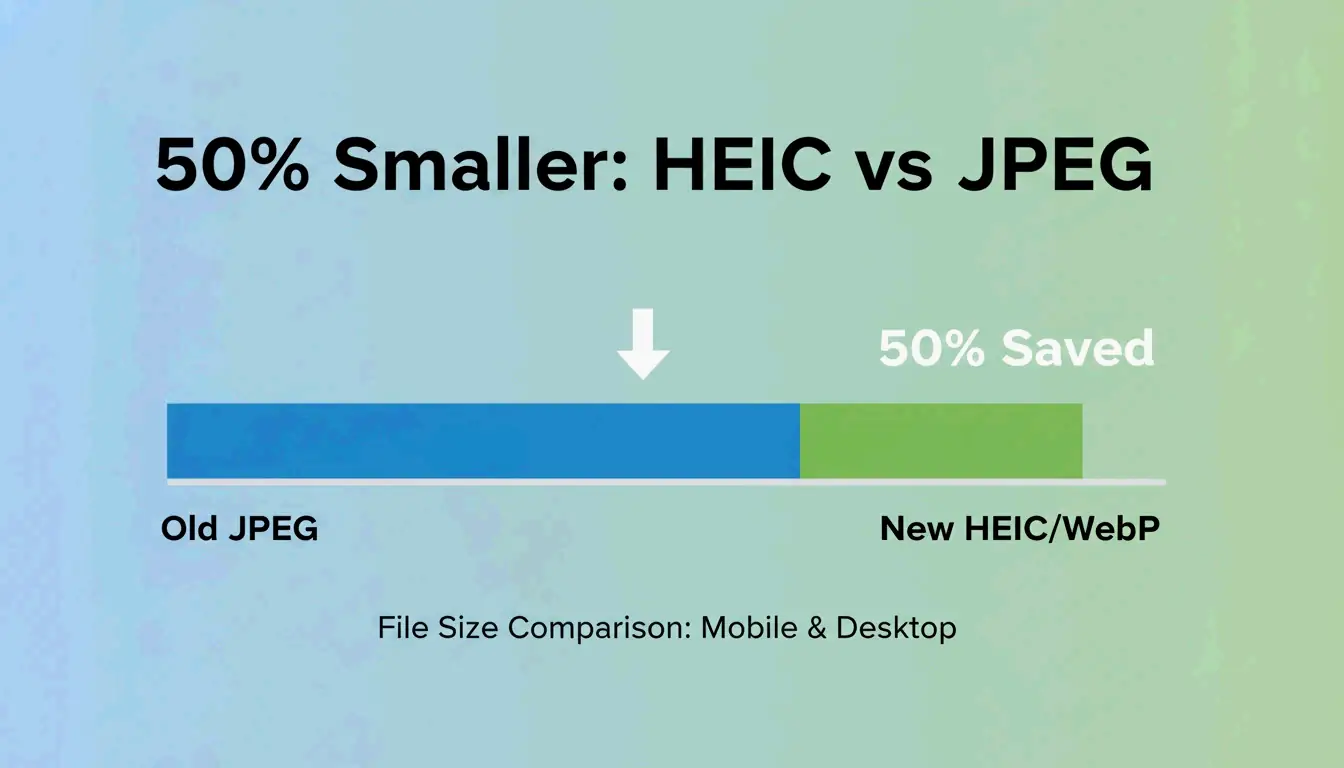
    As Popular Outdoor Sports notes, HEIC files are approximately 50% smaller than traditional JPEGs at equivalent visual quality.

    Android (Google Photos Storage Saver):
    1. Open Google Photos app settings
    2. Enable Storage Saver
    3. Google auto-compresses uploads to a “High Quality” level

    Check your Android camera app’s “Advanced Picture Options” for a high-efficiency format toggle.

    Desktop: Quick Resizing without Extra Apps

    OS Tool Steps
    Windows Microsoft Paint Open image, click “Resize,” lower percentage or pixels, save as JPEG
    macOS Preview app Open photo, go to Tools > Adjust Size, scale down, then File > Export with quality slider

    A simple side-by-side comparison of file size reduction (e.g., JPEG vs HEIC).

    Smart Storage Cleanup: Downgrade Your Cloud Subscription Tier

    Cleaning up your current library can reduce a 2TB cloud plan to a much cheaper 200GB tier. The strategy focuses on finding “bloat” photos — screenshots, accidental burst shots, and duplicates.

    Quick cleanup process:

    Step Action Tool
    1. Find junk Identify blurry shots, large videos Google Photos / iCloud “Review and Delete”
    2. Delete bloat Remove screenshots, duplicates Built-in cleanup tools
    3. Batch compress Compress remaining library Ashampoo Image Compressor
    4. Verify savings Check total storage used Cloud dashboard

    Alice at Popular Outdoor Sports notes that managing bulky files is becoming a necessity as cloud storage costs rise. Ashampoo Image Compressor supports drag-and-drop batch processing of thousands of images, cutting total size by up to 80%.

    Lossy vs. Lossless: Which Compression Method Should You Choose?

    Method How It Works Size Savings Best For
    Lossy Removes data invisible to the human eye 50-80% Social media, cloud backups, JPEG, HEIC
    Lossless Preserves every pixel, removes redundancy 20-40% Logos, text graphics, PNG, TIFF, archival

    PDFFlare reports that lossy settings can save 50-80% of storage space while maintaining acceptable visual quality for social media and cloud backups.

    Quality directly affects business outcomes. Salsify’s 2025 Consumer Research Report found that 42% of shoppers abandon a purchase if images are missing or look low-quality. In 2026, WebP and AVIF offer significantly better compression-to-quality ratios than JPEG.

    2026 format comparison:

    Format Compression Efficiency Visual Quality Use Case
    JPEG Baseline Good Universal compatibility
    HEIC ~50% smaller than JPEG Equivalent to JPEG Apple ecosystem
    WebP 25-30% smaller than JPEG Better than JPEG Web performance
    AVIF 30-50% smaller than JPEG Best in class Modern web, maximum savings

    AI-Enhanced Compression: The 2026 Tech Revolution

    The key shift in 2026 is Visual Saliency AI. Unlike traditional algorithms that compress the entire image uniformly, AI tools identify the most important parts — faces, foreground subjects — and keep those areas sharp while aggressively compressing backgrounds where artifacts are less noticeable.

    AI "Visual Saliency" concept: focus on subject vs background compression.

    AI compression tool landscape (2026):

    Tool Type Key Feature
    Adobe Photoshop Professional Neural filters for precision web optimization
    Ashampoo Image Compressor Consumer/batch Processes huge DSLR photos (50-75MB each) into compact files

    AI compression can shrink 50-75MB DSLR photos to a fraction of their original size while preserving “hero” elements — the subject, key details, and visual impact of the shot.

    Compressing for Specific Needs: Web, Email, and Forms

    Different platforms require different compression strategies:

    Web SEO

    To meet Google’s Core Web Vitals (LCP) standards, images must load fast. Illustrate Digital reports that a one-second load time on B2B sites leads to conversion rates five times higher than sites taking 10 seconds.

    Target Recommended Setting
    Hero images Under 200KB, WebP or AVIF
    Thumbnails Under 30KB
    Quality 75-85%

    Government Forms

    Official sites impose strict limits. IRCC Canada guidelines require files under 2MB, recommending scan resolution at 96 DPI.

    Email Attachments

    Keep quality at 70-80% to maintain individual images under 1MB, staying well within the common 25MB attachment limit.

    Use Case Quality DPI Max File Size
    Web SEO 75-85% 72 Under 200KB (hero)
    Government forms 80% 96 Under 2MB
    Email 70-80% 72 Under 1MB per image

    Conclusion

    Compressing photos no longer requires choosing between quality and size. Modern formats like HEIC and AI-based tools deliver both. By switching to WebP and AVIF, you can cut storage needs by up to 80% without losing visual detail. Start by enabling “High Efficiency” in your phone’s camera settings, then use an AI batch compressor to audit your cloud storage. These small changes save money on monthly subscriptions and ensure room for new photos.

    FAQ

    Does compressing a photo reduce its print quality?

    Yes, when using aggressive lossy compression. For physical prints, maintain a high resolution — at least 300 DPI. Use lossless compression or high-quality JPEG settings (90%+) to ensure the printed image remains sharp and free of pixelation artifacts.

    How do I batch compress multiple photos on a Mac?

    Use the native Quick Actions feature in Finder:
    1. Select all photos to compress
    2. Right-click and navigate to Quick Actions > Convert Image
    3. Choose “Small” or “Medium” size
    4. Select your preferred format

    This saves significant space instantly without opening a separate application.

    What is the difference between HEIC and JPEG for storage?

    HEIC (High Efficiency Image Format) uses HEVC encoding to produce files roughly 50% smaller than JPEGs at the same visual quality. JPEG offers broader compatibility with older software, while HEIC is the preferred standard for modern Apple and Android ecosystems to maximize storage efficiency.