Category: Productivity

  • Free PDF Compress: Shrink Any PDF to Any Size Limit

    Free PDF Compress: Shrink Any PDF to Any Size Limit

    PDF compression simplified — any size, any limit

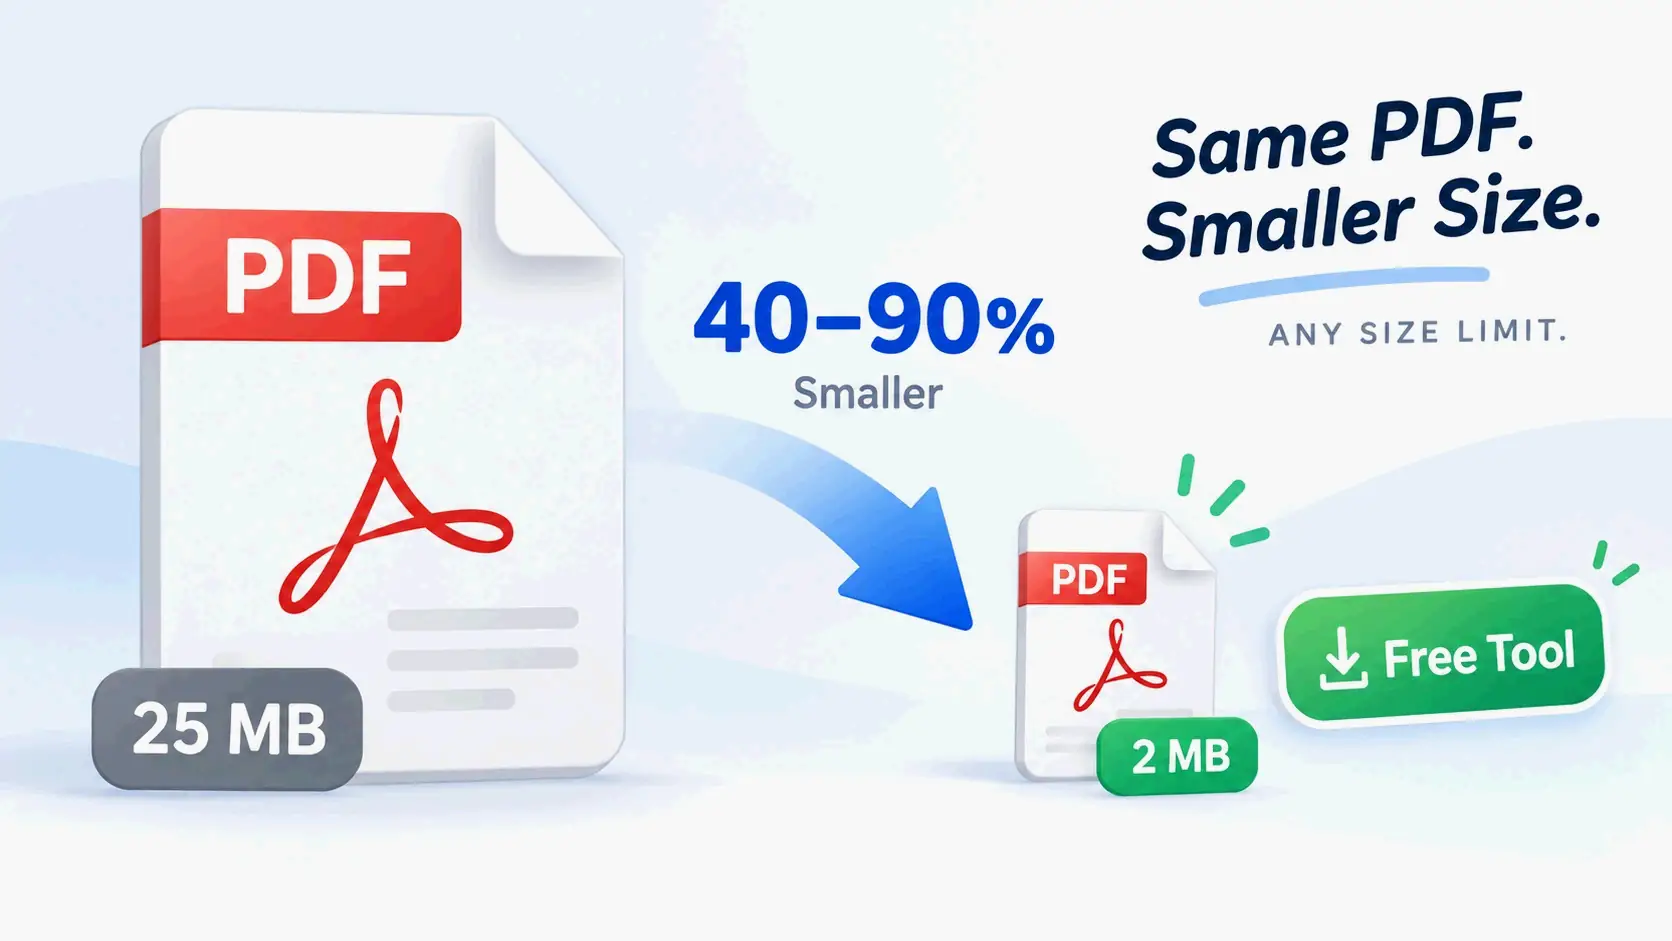
    Open a free PDF compress tool in your browser, upload your file, choose a preset—Low for print, Medium for email, High or Max for strict upload caps—and download it. No sign-up or watermark. Image-heavy PDFs usually shrink 40–90%; text-only files shrink much less.

    How to Free-Compress a PDF in Three Steps (No Sign-Up, No Watermark)

    Most free compressors do the whole job in three moves: upload, pick a level, download. But the tool you choose sets two important limits: the largest file it accepts and how many files it can handle at once. Check both before you start.

    Per PurePDF, the free tier processes two PDFs at a time without an account and five at a time with a free account. There’s no watermark and no daily cap (page last updated September 22, 2026). Input ceilings vary widely across tools: PDNob accepts up to 15 MB per file, PdfPixels up to 50 MB, and pdfFiller and OneClickPDF up to 100 MB.

    Steps 1–3: Upload, Choose a Preset, Download

    Step 1 — Open a free PDF compress tool in your browser. Most free tools don’t ask for an account or email. PurePDF states plainly that you can compress 2 PDFs at a time anonymously and 5 with a free account. There’s no watermark and no daily limit.

    Step 2 — Drop in your PDF. Check the tool’s own input ceiling first. Free online versions commonly cap a single file somewhere between 15 MB and 100 MB: PDNob allows 15 MB per file, PdfPixels 50 MB, and pdfFiller and OneClickPDF 100 MB each.

    Step 3 — Choose a preset, click compress, and download. I7 Pixel’s browser tool says a typical file usually finishes in under 30 seconds. For files under about 20 MB, the whole cycle normally takes under a minute.
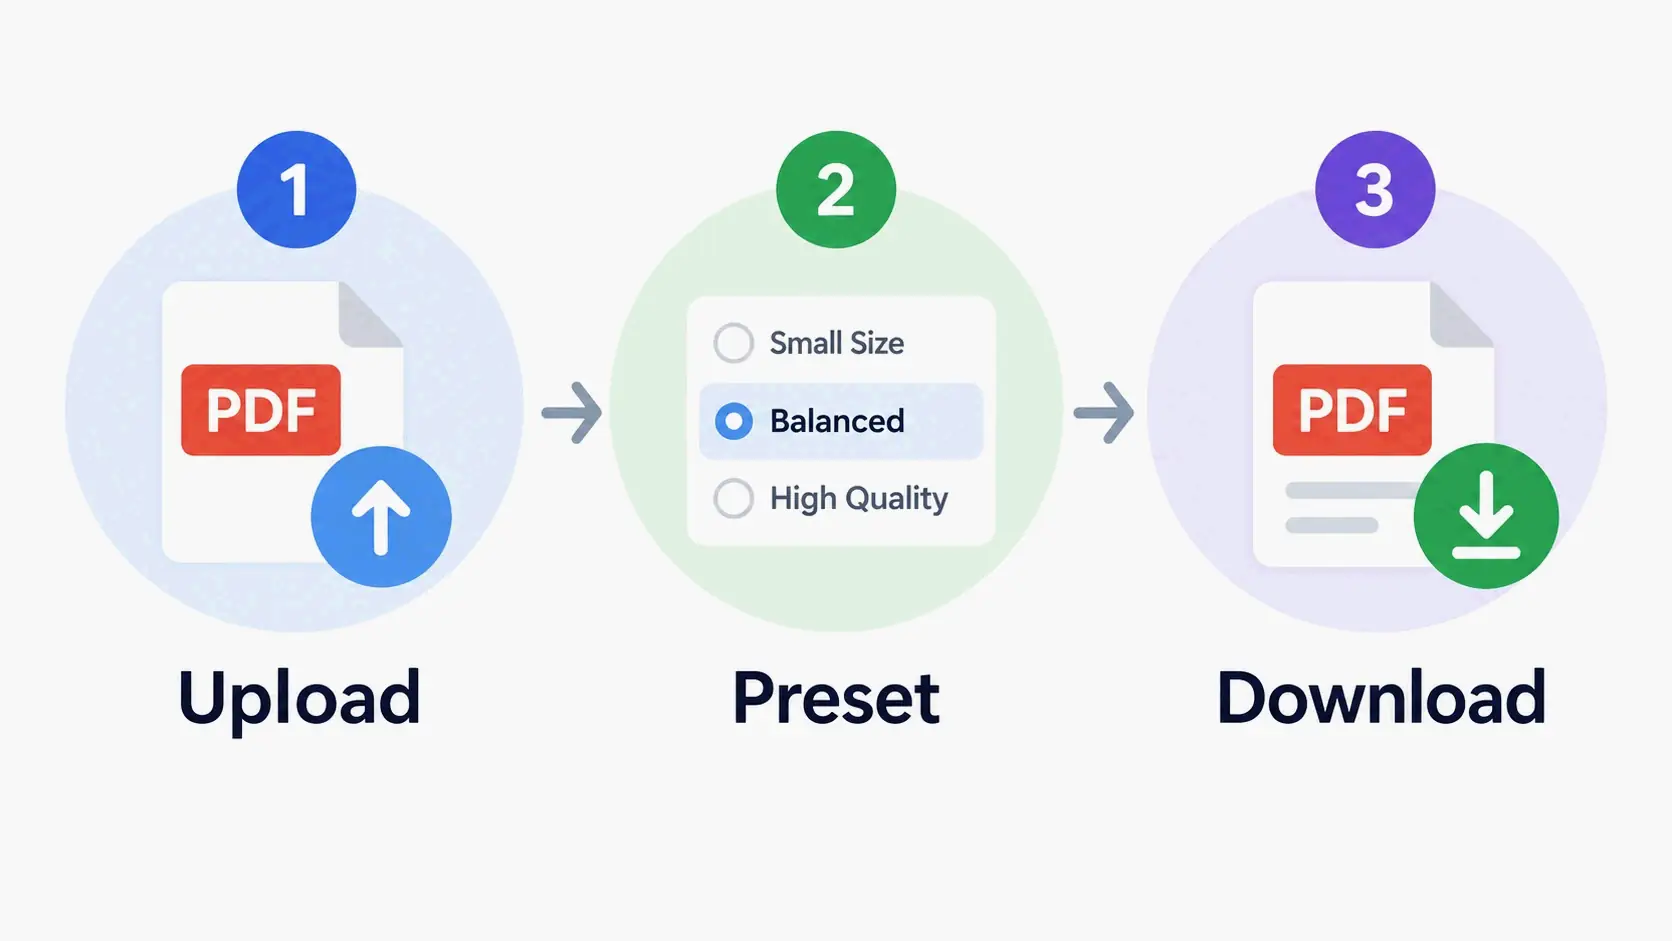
    Three-step PDF compression flow: upload, choose preset, download

    Compressing several PDFs at once: batch runs and ZIP output

    Batch compression is the fastest way to clear out a folder before emailing or uploading. PurePDF returns several files as a ZIP, with each PDF compressed separately. pdfFiller markets batch processing as a differentiator for teams handling many documents.

    The practical limit is memory, not file count. Client-side tools use your device’s RAM and CPU, so a large batch of big scans can stall on a phone or an older laptop. If you’re compressing dozens of scanned packets, a desktop tool with real batch handling is more predictable.

    Which Compression Level Should You Choose: Low, Medium, High, or Max?

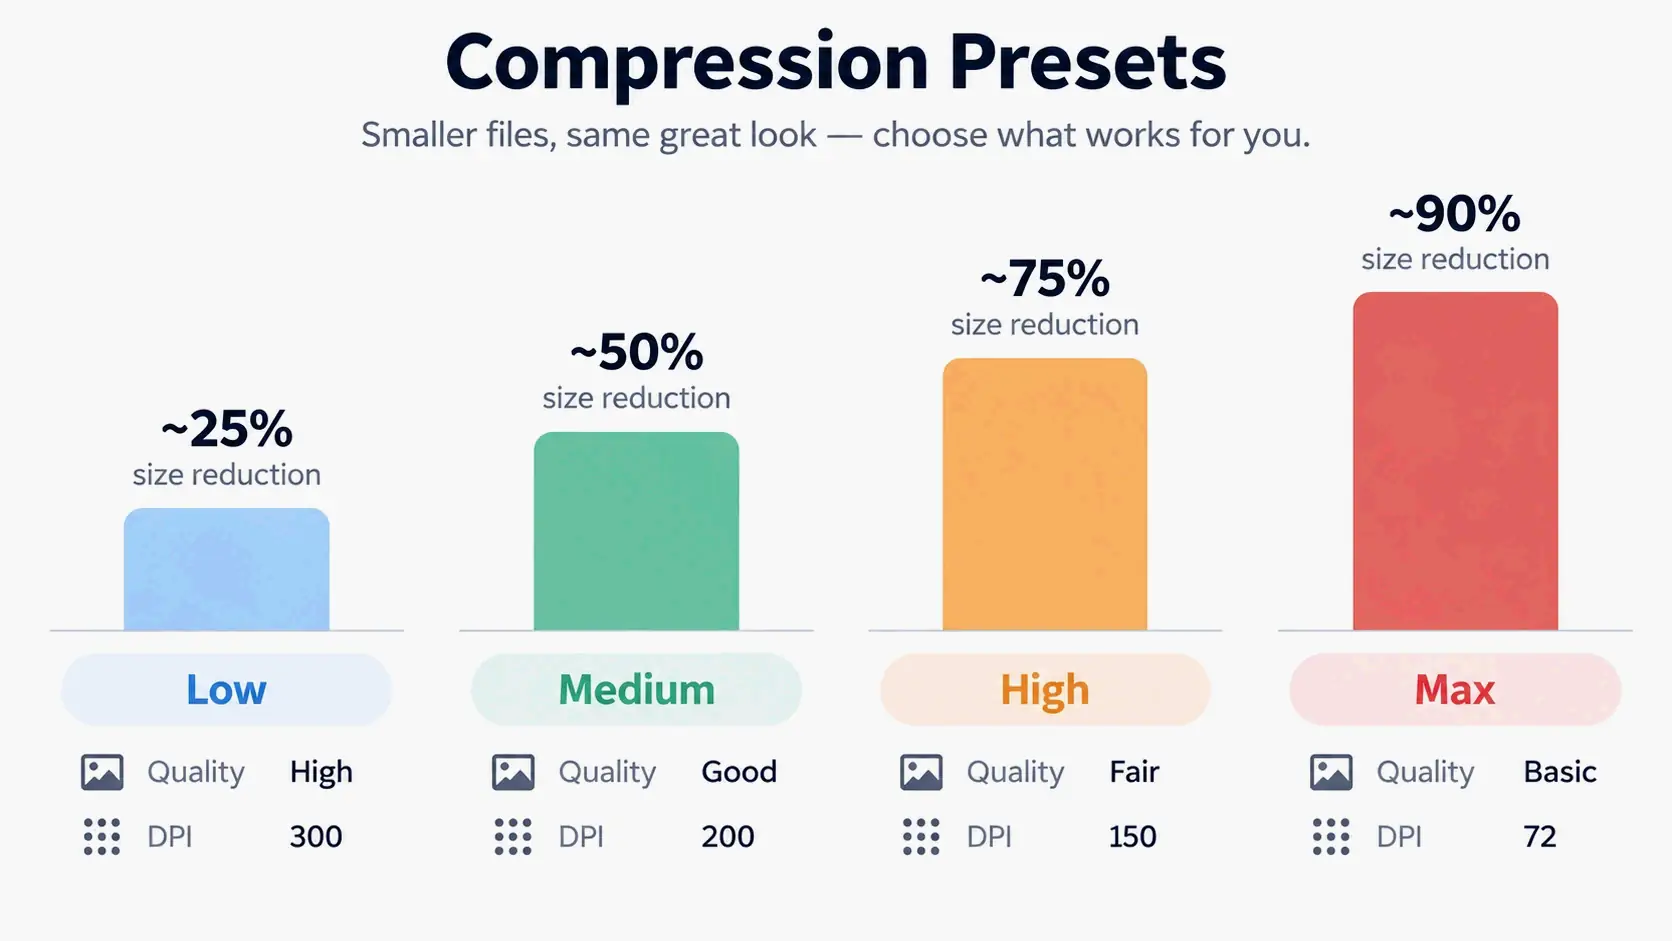
    The preset is the first real decision you make, because it sets the JPEG quality and the target DPI applied to embedded images. I7 Pixel publishes a preset comparison table that maps each level to a quality setting, a DPI target, and an expected reduction range:

    Preset JPEG Quality DPI Typical Size Reduction Best Used For
    Low 90% 300 DPI 10–30% High-fidelity, print-ready output
    Medium (default) 72% 96 DPI 40–70% General sharing, email attachments, web upload
    High 50% 72 DPI 60–80% Messaging apps and portals where small size matters
    Max 30% 72 DPI 75–90% Previews or cases where size is the only priority

    Compression presets compared: Low, Medium, High, Max with quality, DPI, and reduction

    A simple rule: printing or archiving → Low. Email and everyday sharing → Medium. A hard portal cap → High. Last resort before splitting the file → Max.

    DPI affects embedded bitmaps, not fonts. In most engines, your text stays vector at every level. That’s why Low is much safer than users who choose “compress nothing” might assume. PdfPixels describes the same three-tier setup—Low for print preservation, Medium as the email standard, and High for strict portal caps—and notes that its engine compresses text streams losslessly with FlateDecode while saving downsampling for raster image objects.

    Start with Medium: the default that clears most email and portal limits

    Medium is the default for a reason. It clears the most common size limits while keeping documents readable on screen. PdfPixels reports that Medium delivers 60–80% size savings while preserving 150 DPI image clarity, and calls it the “industry sweet spot” for standard email attachments.

    PurePDF frames the same choice as “Balanced,” which it says typically cuts 50–70% of file size with no visible difference on screen. Both tools save their most aggressive setting for when you must hit a hard number, such as a government portal limit.

    Is Free PDF Compression Really ‘Lossless’? What the Engine Is Actually Doing

    There are two engine families, yet the word “lossless” gets used for both. True lossless stream compression rewrites object streams, removes duplicate objects, and strips metadata without touching image pixels. That’s the pikepdf/QPDF route that OneClickPDF documents. The second family re-encodes images: it downsamples bitmaps to 150, 96, or 72 DPI and saves them again as JPEG. That’s where the 40–90% reductions come from—and where pages can get rasterized.

    The real numbers vary a lot. OneClickPDF reports that pure lossless compression yields only 10–40% reduction on text-heavy, font-embedded PDFs, with output that looks identical to the original. On the lossy side, PdfPixels reports that documents with 300+ DPI scanner photos typically shrink 60–90%, while text-only exports from Word or LaTeX shrink only 10–30%.

    Claims like “no quality loss, maintains 600 DPI+” on free tool pages are marketing copy. Some presets visibly do the opposite of what those lines promise, and none of these numbers are independently verified. Whatever the engine, the output is still a standard ISO 32000 PDF; what changes is which internal objects were replaced. PdfPixels says its engine conforms to ISO 32000-1 and ISO 32000-2, and PurePDF cites ISO 32000-2 (PDF 2.0) as its format reference.

    The 10-second text-selection test anyone can run

    Open the compressed file, click into a sentence, and try to select it. Then search for a word you know appears in the document. If the text highlights normally and the search returns hits, the text layer survived. If neither works, the pages were rasterized into images.

    This test matters because the result isn’t just cosmetic. TrulyFreePDF is unusually direct about its own behavior. It says compression “re-renders each page at an optimised resolution and image quality and rebuilding the PDF, so the output is image-based — its text is no longer selectable or searchable.” By contrast, PdfPixels says the vector text layer is never rasterized or degraded, so characters remain selectable and searchable by screen readers and OCR systems.

    When ‘no visible quality loss’ is technically false

    Run the check before you send the file, not after someone complains. Two things commonly break: photo detail at very low DPI, and text selection on raster-based tools.

    I7 Pixel is candid that on its image-recompression path, each page is rasterized as a JPEG, so text is rendered at the chosen DPI and encoded as an image. It recommends the Low preset at 300 DPI when text sharpness is critical. It also suggests disabling image re-compression entirely and only stripping metadata if you need the text layer intact. That’s the difference between a marketing claim and a documented behavior.

    How Much Smaller Will Your PDF Actually Get? Think 40–90% vs 10–40%

    Compression results fall into two very different ranges, depending on what’s inside the file. Image-heavy and scanned documents are the big winners: PdfPixels reports 60–90% reduction on 300+ DPI scans, noting that a 40 MB scan often drops to 3–5 MB. Bitmaps are what made the file large in the first place, so removing them is where the savings come from.

    Text-only PDFs exported from Word or LaTeX usually shrink just 10–30%, according to the same source. The fonts are lightweight vector commands, so there’s almost nothing heavy to remove. A purely lossless engine tops out around 10–40% on that same document type, according to OneClickPDF.

    PurePDF reports 40–90% as the general range across documents, depending on how many images a file contains (page last updated September 22, 2026). pdfFiller makes the same point without numbers: a PDF filled with images may see a much larger reduction than a text-heavy one, and reductions are minimal when the original is already optimized.

    The practical takeaway is simple. If a 2 MB text-only PDF must hit 200 KB, no compressor will get there by compression alone. That requires the step ladder in the next section. If your goal is simply fewer megabytes rather than an exact figure, see five fast ways to decrease the MB of a PDF.

    Hitting an Exact Size Limit: 200 KB, 500 KB, 1 MB, or 25 MB

    A hard number changes the problem. Instead of asking “how small can this get,” you’re asking “which trade-offs do I accept to reach exactly this?” The answer is a ladder, ordered from least to most damaging, and you climb it one rung at a time.

    The six-rung ladder when you’re still over the cap

    1. Retry at Medium. If your first attempt used Low, the balanced preset usually covers the next tier of limits without visible change.
    2. Drop to High / 72 DPI. I7 Pixel maps High to 50% JPEG quality at 72 DPI and a typical 60–80% reduction.
    3. Convert to grayscale. PdfPixels recommends this exact sequence: start with High compression. If a 50-page document is still over target, convert it to grayscale first to remove color data channels, then run compression again.
    4. Delete blank or appendix pages. Removing pages you don’t need is the only rung that reduces content rather than quality.
    5. Split the file. PdfPixels points users to its Split PDF tool to remove extraneous appendices when text files must go smaller.
    6. Use Max and accept softer images. Save this for previews and archive thumbnails, not for anything a person has to read closely.
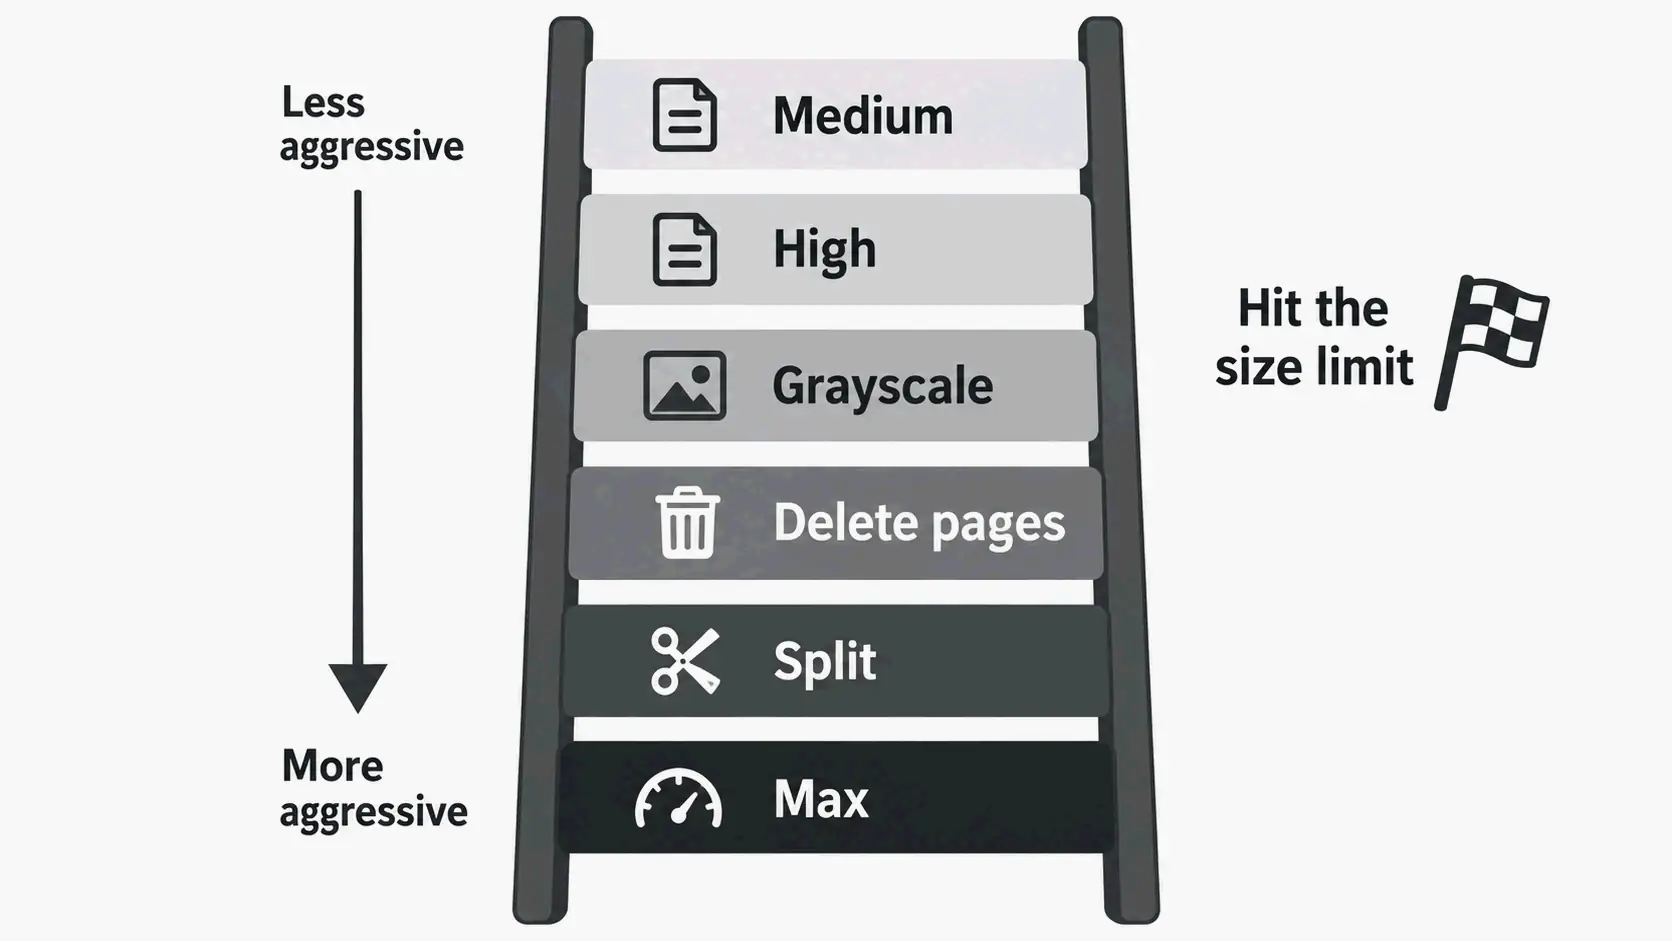
    Six-rung ladder for hitting exact PDF size limits: retry Medium, High, grayscale, delete pages, split, Max

    Grayscale is the most underused rung. Color scans carry chroma channels you don’t need for a text document. Dropping to gray can remove a large chunk of data that DPI reduction alone won’t touch.

    Email attachments: Gmail 25 MB and Outlook or corporate 10 MB

    Email is the most common reason people compress files in the first place. PdfPixels cites Gmail’s 25 MB attachment limit and a 10 MB threshold for Microsoft Outlook and many corporate servers. PurePDF gives the same figures and notes that messaging apps either compress or reject large files outright.

    Target playbook: 25 MB → Medium is almost always enough. 10 MB → Medium or High. That covers the overwhelming majority of attachment bounce-backs.

    Job portals and government forms: 200 KB–2 MB

    Portal caps go much lower than email caps. PurePDF notes that government and job portals often enforce limits as low as 1–2 MB, and PdfPixels describes job candidates compressing illustrated portfolio decks and resumes to meet 2 MB employer portal caps.

    At the 200 KB–500 KB end, compression alone often isn’t enough. That’s the tier where you combine High compression, grayscale, and splitting—or extract only the pages the recipient actually asked for.

    Court filings, immigration packets, and academic submissions

    These destinations combine low caps with high stakes. PdfPixels states that U.S. Federal Court CM/ECF and PACER systems generally mandate black-and-white or grayscale scanned documents at 300 DPI, with per-file size limits typically between 35 MB and 50 MB, and separately lists USCIS and consular portals at under 12 MB.

    Treat those numbers as vendor-sourced. PdfPixels doesn’t link an official court or agency source for either figure, so verify directly with the court or agency before relying on them. What’s safe to act on: grayscale at 300 DPI is the direction these systems push you toward, and Low or Medium compression keeps a scanned filing well within a typical cap.

    Academic repositories and journal portals add their own limits. PDNob lists dissertation uploads to ProQuest or university repositories and journal article sharing on ResearchGate as common scenarios. That’s a reminder that the cap you’re fighting is set by the destination, not by the file.

    Does a Free Browser PDF Compressor Upload Your File? Local vs Server Processing

    Client-side tools run the compression engine inside your browser—often a WebAssembly build of a desktop-grade engine—so the file never leaves your device. That’s the strongest privacy position available, and unlike most privacy claims, it’s verifiable: open your browser’s network tab and watch whether any upload happens while you compress a test file.

    PurePDF runs a WebAssembly build of Ghostscript, the engine used in professional print workflows, in your browser first and only sends a file to its server if the browser cannot shrink it. I7 Pixel uses PDF-lib and PDF.js entirely client-side and states that your document is never sent to any server.

    Server-side tools upload, process, and return the file. PdfPixels says uploaded files reside only in temporary volatile storage and are automatically removed within 60 minutes, protected by TLS 1.3. Those compliance labels are vendor self-descriptions and can’t be independently verified from the page alone.

    The real trade-off is capacity, not marketing. In-browser processing is limited by your device’s RAM and CPU. PurePDF states this directly: files in the hundreds of megabytes work on a desktop but may struggle on an older phone. Server tools accept larger inputs—50 MB at PdfPixels, 100 MB at pdfFiller and OneClickPDF—but the file leaves your device during processing.

    A workable decision rule: contracts, financial records, medical documents, or ID scans → client-side tool. Very large or numerous files → server tool with a published deletion policy.

    Why Won’t Your PDF Compress? Five Common Causes

    1. The PDF is password-protected or encrypted. The compression engine can’t parse encrypted streams at all. PdfPixels says password-protected or certificate-encrypted PDFs cannot be parsed directly and tells users to unlock the document first. OneClickPDF says the same, suggesting Adobe Acrobat, macOS Preview, or your PDF reader to remove the password before uploading.

    2. The PDF was already optimized. A file compressed before, or exported at low DPI, has little left to remove. pdfFiller notes that minimal reductions occur when the original file is already optimized.

    3. The PDF is text-only. PdfPixels reports that Word and Google Docs exports store typography as lightweight vector commands, leaving little raster data to compress — a realistic ceiling of 10–30%.

    4. The PDF carries a digital signature. Re-compression rewrites the byte stream and changes the cryptographic hash covered by the X.509 certificate, so an existing signature is invalidated. PdfPixels advises compressing first and applying electronic or digital signatures as the final step.

    5. The file exceeds the tool’s input ceiling. PDNob allows 15 MB per file, PdfPixels 50 MB, and pdfFiller and OneClickPDF 100 MB. If you’re over the limit, switch tools, split the document, or move to desktop software.

    Order of Operations: Compress First, Merge Second, Sign Last

    Order matters more than tool choice. Get it wrong, and you either undo your savings or invalidate a signature you already applied.

    Compress before merging. PurePDF states the principle directly: smaller inputs make every downstream step faster, and compressing first keeps each file under per-file caps during the merge. Compressing after merging means processing one large file instead of several small ones.

    Sign after compressing. PdfPixels notes that re-compressing or modifying internal PDF stream structures can invalidate cryptographic digital signatures because the file’s cryptographic hash changes. Always compress first, then sign the final file.

    Unlock before compressing. Encrypted files cannot be parsed by the compression engine. Remove the password with your PDF reader, save a copy, then compress.

    Delete or split pages before the final pass. Saving a file you already compressed adds overhead and can undo part of your savings. Do the content edits first, then run one compression pass on the finished document.
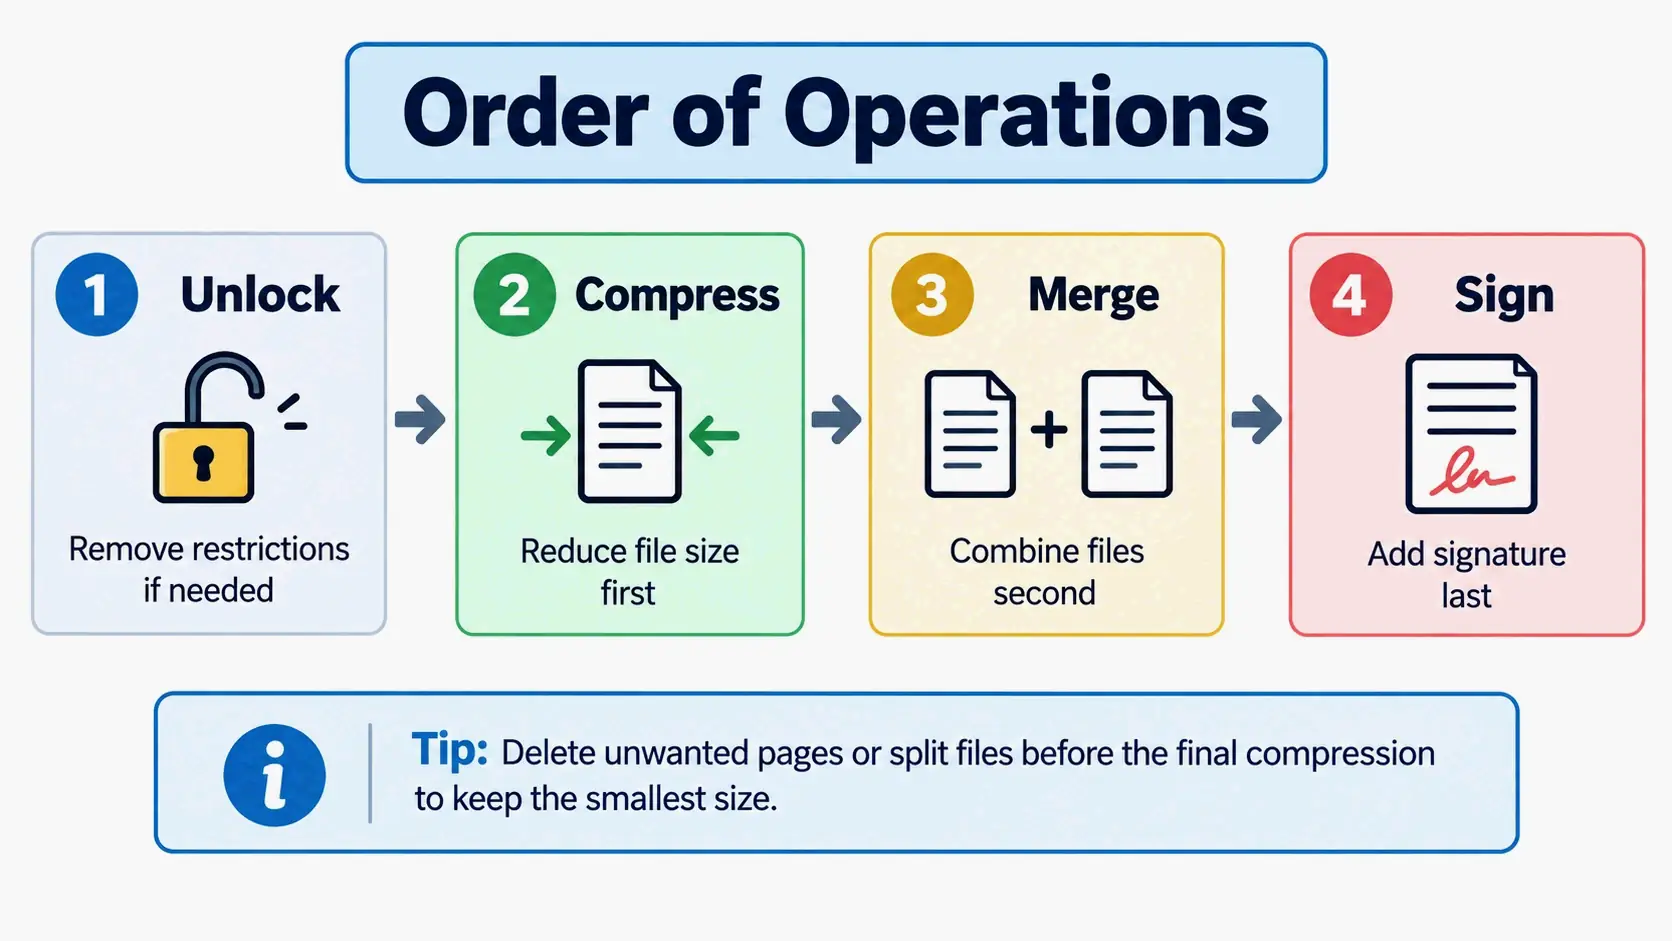
    Correct order of operations: compress, merge, sign — with unlock and edit steps integrated

    Free Online Tool, Desktop Software, or Phone App: Which Fits Your File?

    Browser tools win on speed and zero install for one or two files, but free tiers differ sharply, so compare file limits rather than taglines — the same trade-offs you face when compressing PDFs on every platform. The gap is wide: PDNob caps free online uploads at 15 MB, PdfPixels at 50 MB, and pdfFiller and OneClickPDF at 100 MB.

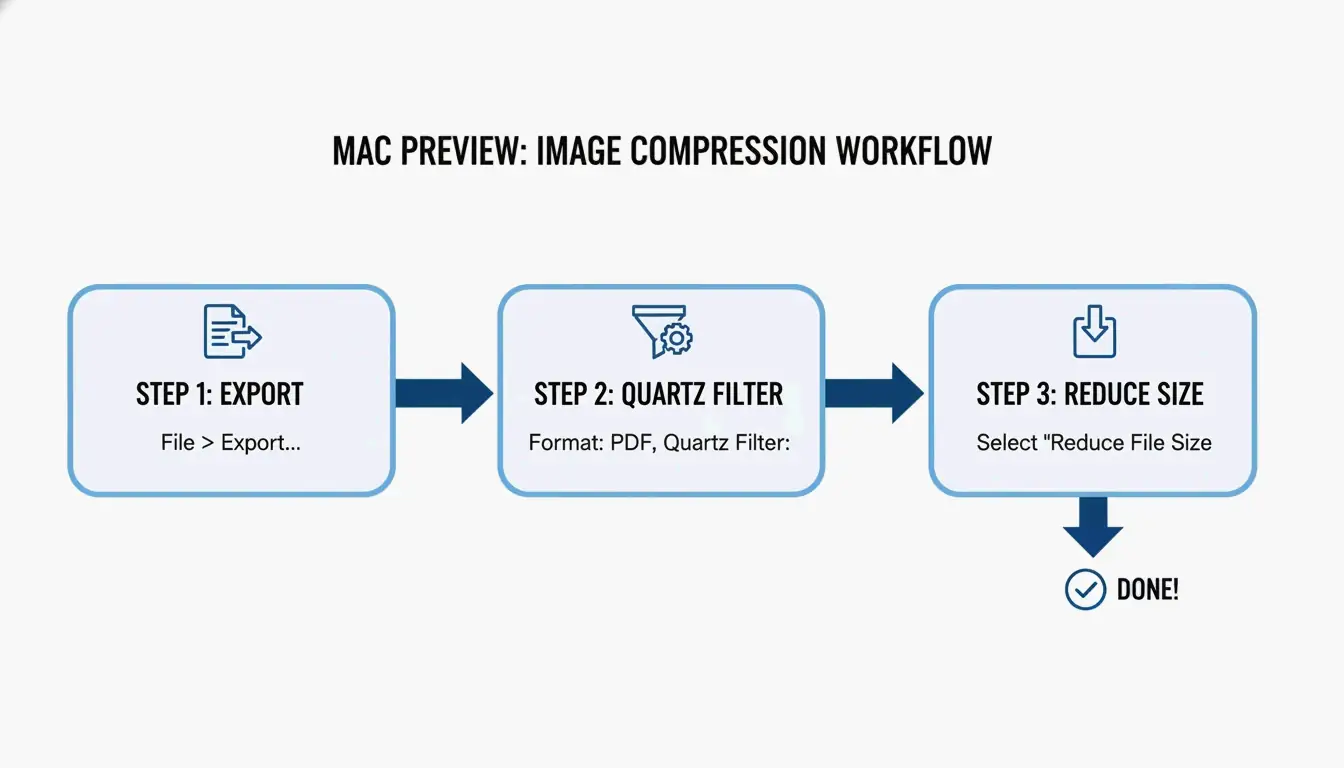
    Desktop software gives you batch processing, precise DPI control, and fully offline operation — the right call for hundreds of pages or confidential documents. Wondershare PDFelement offers one-click high, medium, and low presets plus manual DPI adjustment, bulk compression, and additional reduction methods such as splitting files, replacing or deleting large images, and changing colors. macOS users have a built-in option too: PDNob’s FAQ points to Preview’s File > Export > Quartz Filter > Reduce File Size path. For the desktop route in more depth, see five free ways to compress a PDF for Mac and Windows.

    The engines behind the interface matter more than the interface itself. Ghostscript compiled to WebAssembly powers some in-browser tools, while pikepdf/QPDF and PDF-lib appear in others. Either way, the output remains a standard ISO 32000 PDF, which is why any compliant viewer can open it.

    One trust signal worth citing, with a caveat: as of September 2026, pdfFiller reports a 4.6/5 rating across 125,000+ G2 reviews. That’s useful as a user-satisfaction signal, not as evidence of compression performance.

    Phone apps are fine for a single photo-heavy scan on the go — here’s how to compress a PDF on iPhone in three quick ways. But app-store listings often omit version and update dates, so don’t expect documented performance claims to hold. For context on why workflow matters at all, Marshall Orthopaedics reported that manual form-filling cost 30–60 minutes per patient’s paperwork. That figure is about document workflow time, not compression—read it only as a reminder that workflow cost generally exceeds file-size cost.

    Conclusion

    A free PDF compressor will shrink image-heavy files 40–90% in seconds, but the word “lossless” is doing a lot of unpaid work. Knowing whether your tool rewrites streams or re-encodes images—and in what order you compress, merge, and sign—decides whether the result is usable. Start at Medium, run the 10-second text-selection test on the output, and if you’re still over the cap, climb the ladder one rung at a time: High, grayscale, delete pages, split. For sensitive or very large files, choose your processing model (in-browser vs. server) before you choose your tool.

    FAQ

    Can I compress a password-protected PDF for free, or do I have to unlock it first?

    You have to unlock it first. Encryption stops the compressor from reading the file’s internal streams, so the tool can’t process it at all. Free compressors generally won’t ask for a password—decryption is a separate step. Unlock or decrypt the file in your PDF reader, save a copy, then run the compressor on the unlocked version.

    Will compressing a PDF make the text unselectable or blurry?

    Not with lossless engines. Those rewrite only streams and duplicate objects, so text stays selectable and searchable. Aggressive presets on image-recompression engines can rasterize whole pages into JPEGs, which breaks text selection entirely. Verify in 10 seconds: open the compressed file, try to select a sentence, and search for a word you know is in the document.

    Does compressing a PDF break an existing digital signature?

    Yes. Re-compression rewrites the byte stream and changes the cryptographic hash the X.509 signature covers, so the signature will show as invalid even if nothing visible changed. Compress first, then sign the final file. Apply electronic or digital signatures as the last step in your workflow, never before a compression pass.

    Why won’t my text-only PDF shrink below 1 MB?

    Word and LaTeX exports store text as lightweight vector fonts, so there’s very little bitmap data to compress. A realistic reduction is 10–30% with an image-recompression engine and 10–40% with a lossless one. To go lower, convert to grayscale, remove blank or unnecessary pages, or split the file into smaller parts.

    Is a free browser-based PDF compressor private — does my file get uploaded to a server?

    It depends on the tool. Client-side compressors run entirely in your browser and never upload the file. Some server-side tools do upload it, and a few publish an auto-purge window, such as 60 minutes. Check the claim yourself: open your browser’s network tab and watch whether an upload happens while you compress a test file.
  • How Do You Compress a PDF? The Complete 2026 Guide for Every Platform

    How Do You Compress a PDF? The Complete 2026 Guide for Every Platform

    To compress a PDF, use an online tool like Adobe’s free compressor for instant results, Mac Preview for built-in offline compression (up to 86%), or Ghostscript for batch processing (up to 91%). The key is choosing the right method for your platform, privacy needs, and file type.

    Why PDFs Are Large: Root Causes

    Cause % of File Size Fix
    High-res images (300+ DPI) 80–90% Downsample to 150 DPI
    Uncompressed content streams Variable Use “Save as PDF” not “Print to PDF”
    Fully embedded fonts 5–15% Enable font subsetting
    Hidden metadata / annotations 1–5% Strip in PDF Optimizer

    A single full-page photo at 300 DPI adds 5–10 MB. Image data dominates most PDF file sizes.

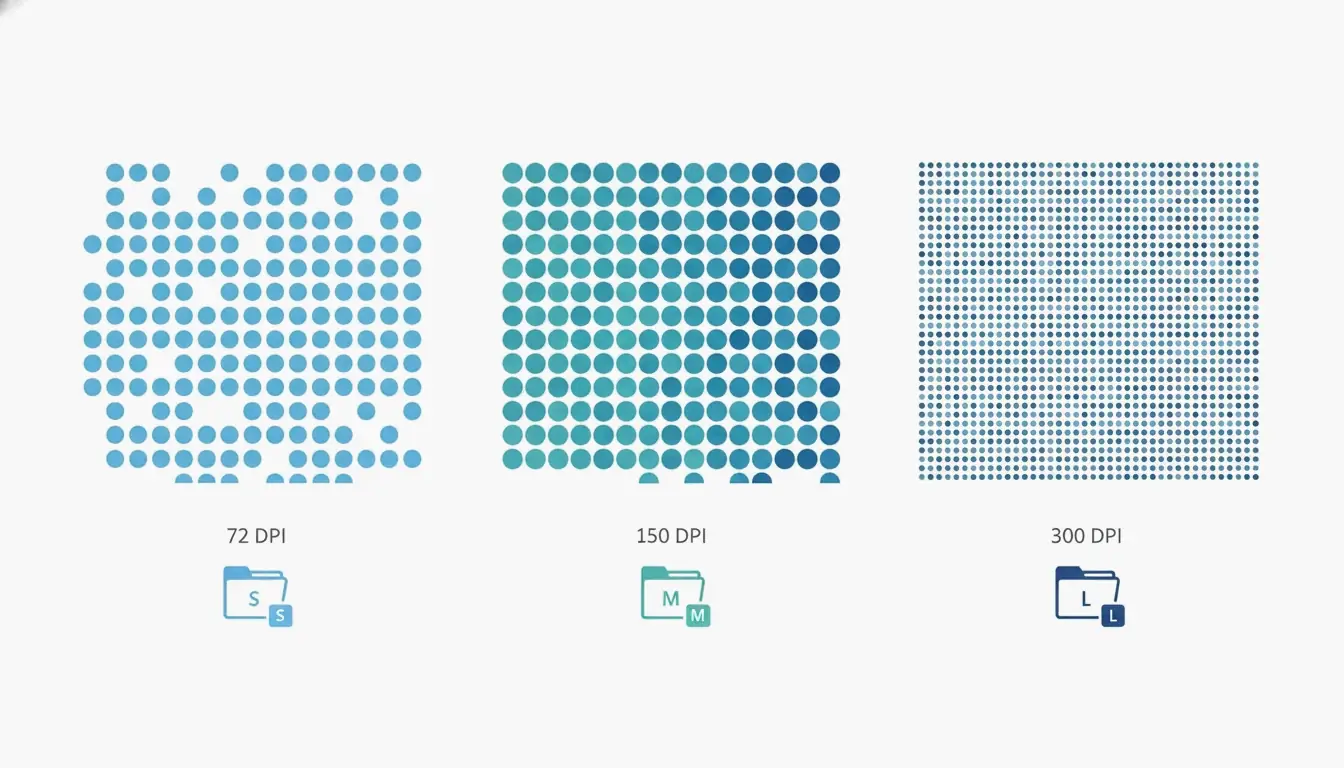
    DPI Settings and File Size

    DPI Setting Ghostscript Flag Use Case Typical Reduction
    72 DPI /screen Strict portal limits, mobile ~95%
    150 DPI /ebook Email, web sharing (recommended) 50–70%
    300 DPI /printer High-quality print ~50%

    Relationship between DPI and file size: three pixel density grids (72/150/300 DPI) with file size indicators (small/medium/large)

    Technology Org confirms /ebook at 150 DPI is the sweet spot for screen viewing. Free PDF Compress notes text-only PDFs can achieve 70% reduction with zero visible loss.

    4 Methods to Compress PDF on Any Platform

    Method 1: Online Tools (No Installation)

    Tool Limit Privacy Best For
    Adobe Online ~100 MB Cloud (SSL) Quick single-file jobs
    Smallpdf ~100 MB Cloud (GPC/GDPR) Balanced compression
    iLovePDF ~100 MB Cloud Multiple tools in one
    PDF24 No limit Cloud (German hosted) Unlimited free use

    Steps: Upload → select compression level (High/Medium/Low) → download.

    Method 2: Mac Preview (Built-in, Offline)

    1. Open PDF in Preview
    2. File → Export
    3. On macOS Sonoma or older: select “Reduce File Size” from Quartz Filter dropdown
    4. On newer macOS: check “Optimize image for screen”
    5. Click Save

    Result: A 20-page scanned research paper at 45 MB drops to 8–12 MB. This is lossy — keep a backup of the original.

    Method 3: Adobe Acrobat Pro (Windows, Paid)

    1. Open Tools → Optimize PDF
    2. Select file → click Reduce File Size
    3. For granular control: File → Save as Other → Optimized PDF
    4. Use PDF Optimizer to: downsample images, select compression algorithms (JPEG/JPEG2000/ZIP), subset fonts, strip metadata, flatten annotations
    5. Click “Audit Space Usage” to see exactly what’s consuming space

    Method 4: Ghostscript (Free, Cross-platform CLI)

    gs -sDEVICE=pdfwrite -dCompatibilityLevel=1.4 \
      -dPDFSETTINGS=/ebook -dNOPAUSE -dBATCH \
      -sOutputFile=compressed.pdf input.pdf
    

    Free PDF Compress reports scanned color PDFs reduced by 91% with minimal quality loss.

    The “Print to PDF” Trap

    PDF Candy tested the same document two ways:

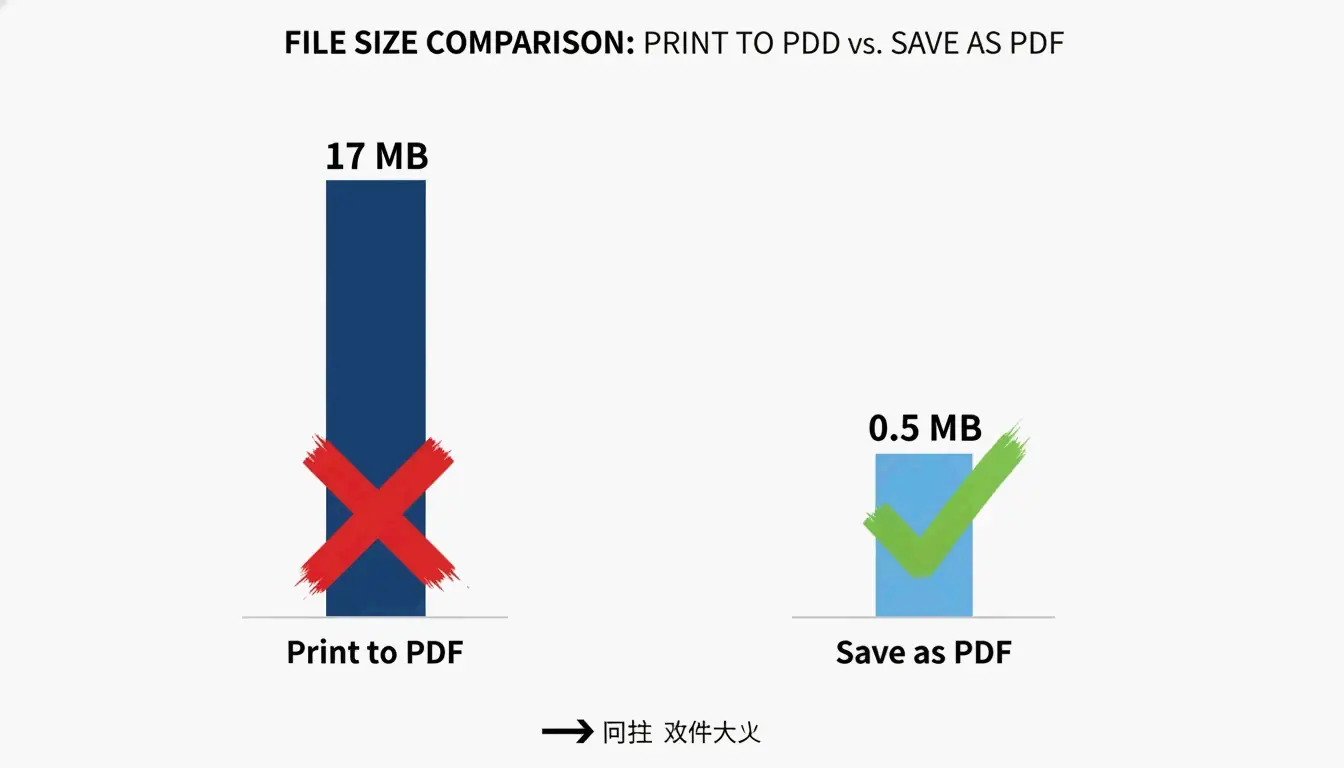
    Method File Size Why
    Print to PDF 17 MB Converts text/images into large opaque content streams
    Save as PDF (Office) 0.5 MB Proper compression from source application

    Always use “Save as PDF” from within Word, Excel, or your source app. Never use “Print to PDF” as a compression method.

    Comparison bar chart of Print to PDF (17 MB) vs Save as PDF (0.5 MB), minimal labels

    Decision Guide: Which Method to Use

    Your Situation Recommended Method
    Quick single file, no sensitive data Online tool (Adobe Online, Smallpdf)
    Mac, offline Preview export
    Windows, offline control Adobe Acrobat Pro or PDF Candy Desktop
    Batch / automation Ghostscript CLI
    Confidential / legal documents Desktop app (Preview, Acrobat Pro)
    Mobile (Android) PDF Compressor: Resizer & Zip (offline)
    Mobile (iOS) Adobe Fill & Sign or Lumin PDF

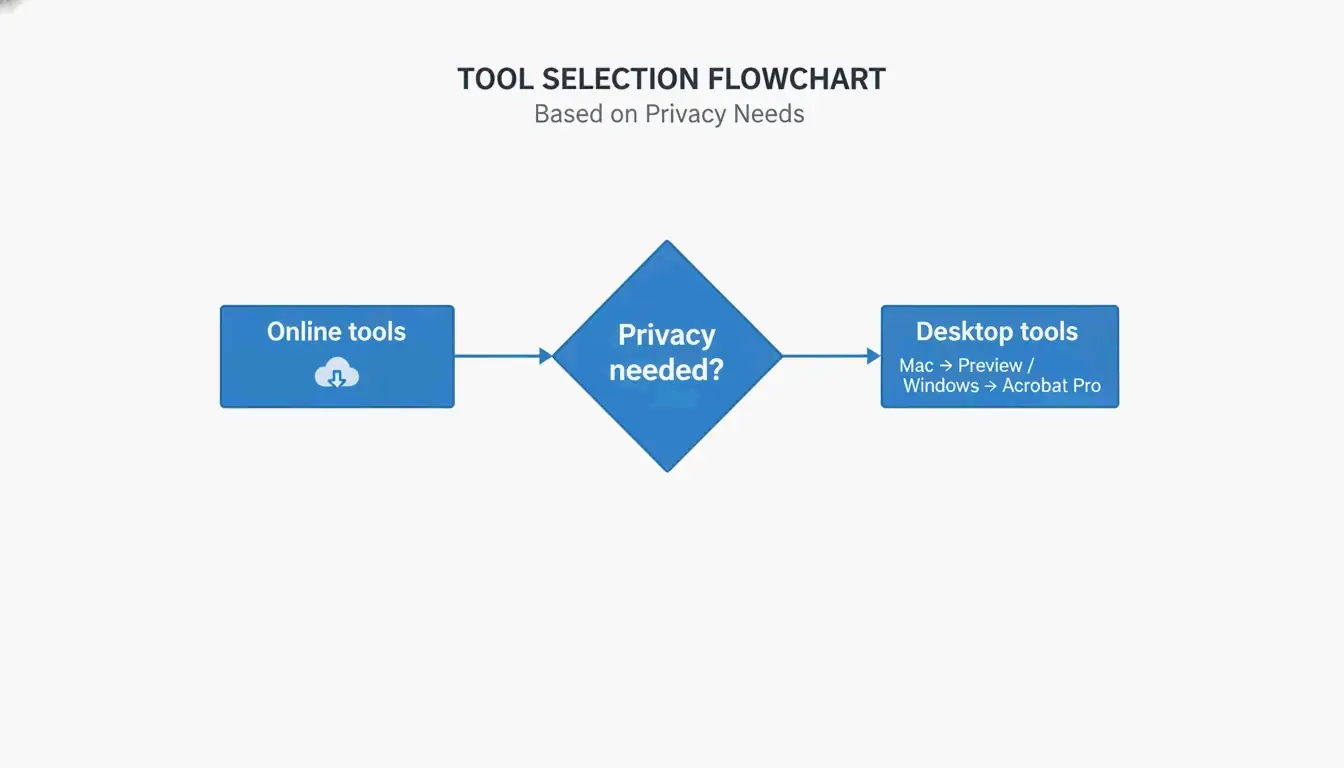
    Simplified decision flowchart: diamond node "Privacy needed?", two branches "Online tools" and "Desktop tools (Mac: Preview, Windows: Acrobat Pro)"

    Advanced: Content Streams and Font Subsetting

    Content Streams

    Neuxpower explains that “Print to PDF” stores text and images in large, opaque content streams that standard compressors cannot optimize. Fix: Go back to the source document and use “Save as PDF.” If the source is unavailable, re-print the PDF through a browser’s printer with “Save as PDF” as the destination.

    Font Subsetting

    Embedding only the characters actually used (not the entire font family) saves 400–600 KB per font. Enable subsetting in Acrobat’s PDF Optimizer or Ghostscript. This reduces file size by 5–15% with no impact on text quality.

    Mobile Compression

    Android

    PDF Compressor: Resizer & Zip (SoulApps, updated April 2026) — free, works 100% offline. Supports compression levels (Best Quality / Balanced / Smallest Size), merging, splitting, and converting. No sign-in or watermark.

    iOS

    Adobe Fill & Sign includes PDF compression. Alternatively, use Lumin PDF (browser-based) with AES-256 encryption, SOC 2 Type 1, GDPR, and CCPA compliance. For maximum privacy, use an offline app.

    Prevention: How to Avoid Large PDFs

    Prevention Step Impact
    Resize images to 96–150 DPI before inserting Eliminates 80%+ of bloat at the source
    Use system fonts (Arial, Times New Roman) Avoids font embedding entirely
    Enable font subsetting in PDF creation Saves 400–600 KB per custom font
    Use “Save as PDF” not “Print to PDF” 34× smaller files per PDF Candy
    Set scanner to 150–200 DPI for text IRCC Canada recommends this for digital submissions

    Conclusion

    Choose your compression method by platform: online tools for quick jobs, Mac Preview for offline Mac compression, Adobe Acrobat Pro for Windows with granular control, Ghostscript for batch automation. Always use “Save as PDF” instead of “Print to PDF” — the difference can be 34×. Start with 150 DPI (/ebook) for the best balance of size and quality.

    FAQ

    Will compressing a PDF affect its quality?

    Reducing DPI and re-encoding JPEGs causes minor image quality loss, but text remains perfect. The “ebook” setting (150 DPI) produces no visible difference for screen viewing. Text-only PDFs achieve 70% reduction with zero quality loss.

    Is it better to zip a PDF or compress it?

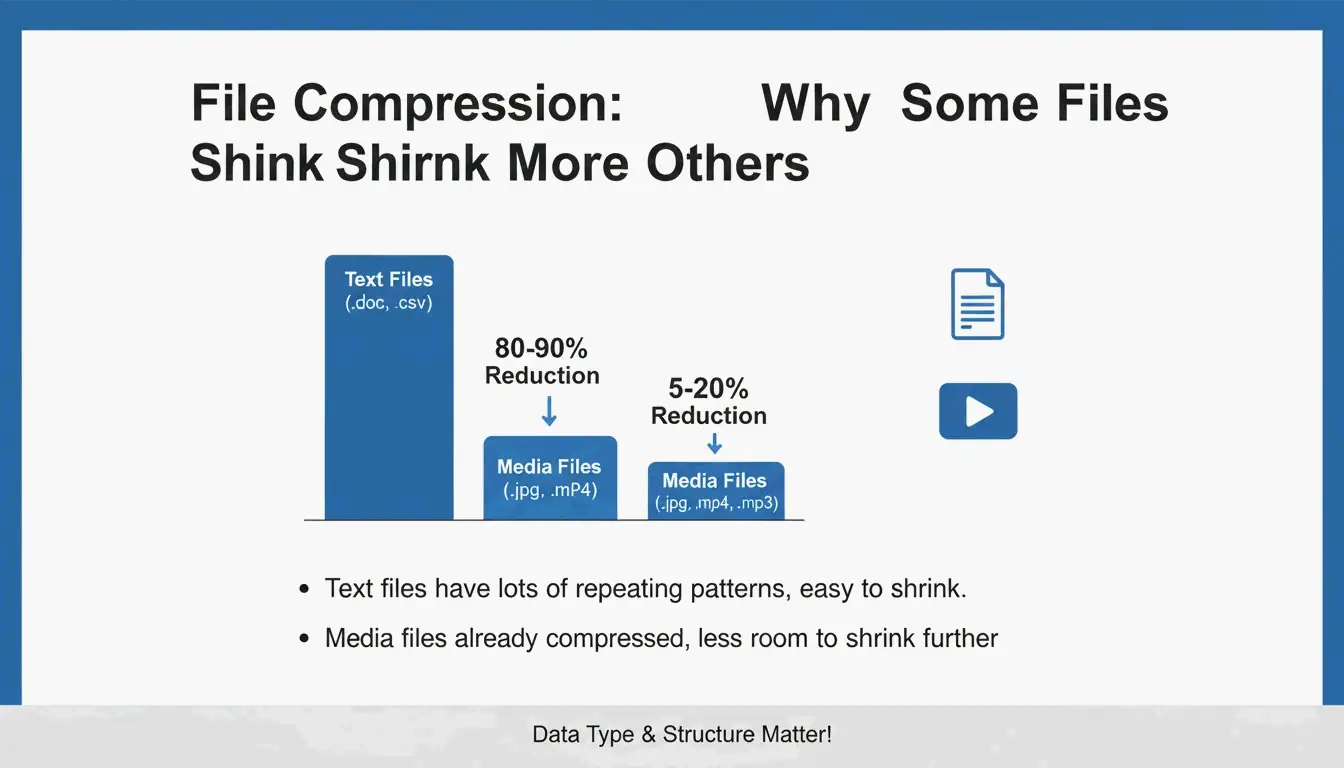
    Compress the PDF directly. ZIP achieves only 5–10% reduction because PDFs are already internally compressed. Dedicated PDF tools achieve 50–90% by re-encoding images, subsetting fonts, and stripping metadata.

    How to compress a password-protected PDF?

    Most online tools cannot process locked PDFs. Remove the password first using Adobe Acrobat, compress the file, then re-add protection. Desktop tools like PDF24 or Acrobat Pro can compress locked files if you know the password.

    What is font subsetting?

    Font subsetting embeds only the characters actually used in the document instead of the entire font family. This saves 400–600 KB per font and reduces total file size by 5–15% with no visible impact.

  • How to Compress a PDF: 5 Free Ways to Reduce File Size on Mac/Windows (2026)

    How to Compress a PDF: 5 Free Ways to Reduce File Size on Mac/Windows (2026)

    To compress a PDF for free in 2026, Mac users can use the built-in Preview app’s Quartz Filter (up to 86% reduction), while Windows users can export from Microsoft Word with “Minimum Size” settings. For maximum compression, Ghostscript achieves up to 94.5% reduction via command line. Online tools like Smallpdf handle quick jobs in the browser.

    5 Free Methods Compared

    Method Platform Max Reduction Batch Privacy Best For
    1. Mac Preview macOS ~86% No Full (offline) Quick single-file jobs
    2. Microsoft Word Windows ~60% No Full (offline) Text-heavy reports
    3. Smallpdf Browser ~75% Limited Cloud (GPC/GDPR) Quick one-off jobs
    4. Ghostscript Mac/Win CLI ~94.5% Yes Full (offline) Large archives, batch
    5. 7-Zip Mac/Win Container only Yes Full (offline) Sending multiple PDFs

    Method 1: Mac Preview — Quartz Filter

    Cisdem reports up to 86.1% reduction on image-heavy PDFs using Preview’s built-in Quartz Filter.

    1. Open PDF in Preview
    2. Go to File → Export
    3. In the Quartz Filter dropdown, select “Reduce File Size”
    4. Click Save

    Simple 3-step workflow for Mac Preview compression

    Pro tip: Ensure source images are in RGB format (not CMYK) before exporting — this strips unnecessary color data while keeping visuals crisp.

    Troubleshooting: When Preview Makes Files Larger

    Sometimes “Reduce File Size” actually increases the file. This happens when Preview re-encodes already-optimized images or struggles with complex fonts. Cisdem notes quality may still drop. Switch to Ghostscript or Smallpdf in these cases.

    Method 2: Microsoft Word — “Minimum Size” Export

    Best for text-heavy reports that need to fit email or web upload limits.

    1. Open the document in Word
    2. Go to File → Save As
    3. Select PDF as file type
    4. Under “Optimize for,” choose “Minimum size (online publishing)”
    5. Click Save

    Word prioritizes text clarity while aggressively shrinking images to web standards.

    Method 3: Smallpdf — Online Compression

    Browser-based, no installation required. Works with Google Drive and Dropbox.

    1. Upload your PDF to Smallpdf
    2. Choose compression — Basic (balanced) or Strong (maximum)
    3. Download the optimized file

    Privacy: Reputable platforms follow GPC and GDPR, deleting files within an hour. Look for SOC2 certification. For sensitive business data, JOPDF recommends offline tools.

    Method 4: Ghostscript — Maximum Compression (94.5%)

    The most powerful free option for large-scale compression. Cisdem achieved 94.5% reduction on a 60MB file.

    Install

    
    brew install ghostscript
    
    # Windows — download from ghostscript.com
    

    Commands

    # Medium quality (150 DPI) — best balance
    gs -sDEVICE=pdfwrite -dPDFSETTINGS=/ebook \
      -dCompatibilityLevel=1.4 -dNOPAUSE -dQUIET \
      -dBATCH -sOutputFile=output.pdf input.pdf
    
    # Screen quality (72 DPI) — maximum compression
    gs -sDEVICE=pdfwrite -dPDFSETTINGS=/screen \
      -dCompatibilityLevel=1.4 -dNOPAUSE -dQUIET \
      -dBATCH -sOutputFile=output.pdf input.pdf
    
    # Print quality (300 DPI) — for archives
    gs -sDEVICE=pdfwrite -dPDFSETTINGS=/printer \
      -dCompatibilityLevel=1.4 -dNOPAUSE -dQUIET \
      -dBATCH -sOutputFile=output.pdf input.pdf
    
    Setting DPI Typical Reduction Best For
    /screen 72 ~95% Strict portal limits (100KB)
    /ebook 150 ~90% General sharing, email
    /printer 300 ~50% High-quality archives

    Processes a 1,000-page document in ~10 seconds.

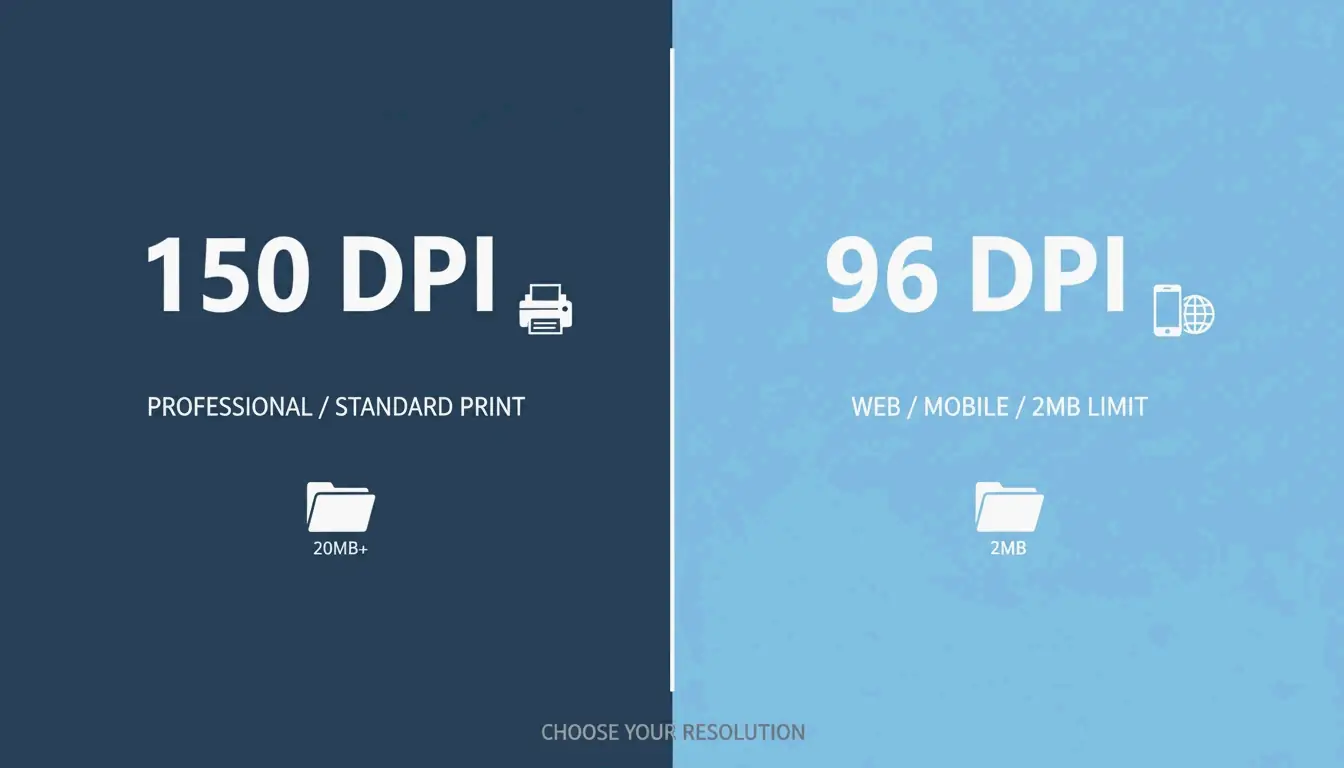
    DPI Guide for Quality

    Target DPI Use Case
    96 DPI Mobile/web viewing Government portals, strict 2MB limits
    150 DPI Professional standard Email, web sharing, printing
    300 DPI High-quality print Legal documents, blueprints

    IRCC Canada recommends 96–150 DPI for digital submissions.

    Comparison of 150 DPI vs 96 DPI for file size and clarity

    Method 5: 7-Zip — Archive Multiple PDFs

    When you cannot shrink individual PDFs further, or need to send a folder of them:

    1. Select PDF files → Right-click → 7-Zip → Add to archive
    2. Choose .zip or .7z format
    3. Send the archive

    Many government portals prefer archives because they preserve original high-resolution documents while bypassing file count limits.

    Conclusion

    For quick single-file compression, use Mac Preview or Microsoft Word. For maximum reduction (94.5%), use Ghostscript with /ebook settings. For sensitive documents, stick to offline tools. For multiple files, use 7-Zip archives. Always target 150 DPI for professional quality or 96 DPI for strict upload limits.

    FAQ

    Why does Preview sometimes make PDFs larger?

    Preview may re-encode already-optimized images inefficiently or duplicate embedded fonts and metadata during export. Use Ghostscript or Smallpdf instead when this happens.

    How do I compress a PDF to exactly 100KB?

    Use Adobe Acrobat’s “PDF Optimizer” or JOPDF with adjustable DPI. Lower resolution to 72–96 DPI and strip all metadata. For text-only documents, this reliably reaches under 100KB.

    Is it safe to upload confidential PDFs to online compressors?

    Reputable tools like Smallpdf honor GPC signals and delete files within an hour. For highly sensitive legal or financial documents, use offline tools (Ghostscript, Adobe Acrobat). Always verify SOC2 and GDPR certification before using any web-based service.

  • How to Zip a File on Mac and Windows: Complete Step-by-Step Guide (2026)

    How to Zip a File on Mac and Windows: Complete Step-by-Step Guide (2026)

    To zip files on Windows, right-click your selection in File Explorer and choose “Compress to ZIP file” (Windows 11) or “Send to > Compressed folder” (Windows 10). On Mac, right-click and select “Compress” via the built-in Archive Utility. No third-party software needed for basic compression.

    Quick Reference: Zip Files by OS

    OS Method Steps
    Windows 11 File Explorer → Right-click Select files → Compress to ZIP file
    Windows 10 File Explorer → Right-click Select files → Send to > Compressed (zipped) folder
    macOS Finder → Right-click Select items → Compress “[Name]”
    Windows (batch) PowerShell Compress-Archive -Path "C:\Source\*" -DestinationPath "C:\Backup.zip"

    How to Zip Files on Windows

    Windows 11

    1. Open File Explorer and select your files or folders
    2. Right-click the selection
    3. Click “Compress to ZIP file”
    4. A ZIP file appears in the same folder

    Windows 10

    1. Select your files in File Explorer
    2. Right-click → Send to → Compressed (zipped) folder
    3. Rename the ZIP if needed

    Compression Ratios by File Type

    PalmGear provides useful benchmarks:

    File Type Typical Compression Why
    Text (.txt, .html, .csv) 60–80% Highly repetitive data compresses well
    Documents (.docx, .xlsx) 30–50% Partially compressed already
    Images (.jpg, .png) Less than 5% Already compressed by their own codecs
    Video (.mp4, .mov) Less than 2% Already compressed
    RAW / uncompressed 40–70% Full data available for compression

    ZIP uses the Deflate algorithm — a lossless method. Your files remain identical after extraction.

    A simple comparison of compression ratios for different file types

    PowerShell Batch Compression

    
    Compress-Archive -Path "C:\Source\*" -DestinationPath "C:\Backup.zip" -CompressionLevel Optimal
    
    # Fast compression (larger file, quicker)
    Compress-Archive -Path "C:\Source\*" -DestinationPath "C:\Backup.zip" -CompressionLevel Fastest
    
    # Append files to existing archive
    Compress-Archive -Path "C:\NewFiles\*" -Update -DestinationPath "C:\Backup.zip"
    

    A technician saved 39.5 minutes by zipping 200 driver files into one package for a 30-second upload, per PalmGear.

    Archive Verification

    Always double-click your new ZIP to verify files open correctly before deleting originals. This “archive hygiene” step prevents data loss.

    How to Zip Files on Mac

    Using Finder (Built-in)

    1. Select files or folders in Finder
    2. Right-click (or Control-click) → “Compress [Name]”
    3. An Archive.zip file appears (or named after selection if single item)

    macOS uses Archive Utility — built directly into Finder, no extra apps needed.

    ZIP64 Support

    Modern macOS handles ZIP64 extensions, supporting archives beyond the old 4 GiB limit. ZIP64 technically allows up to 16 EiB per Wikipedia.

    Terminal Alternative: ditto

    For reliable large-archive creation:

    ditto -c -k --sequesterRsrc --keepParent src_directory archive.zip
    

    Naming Best Practices

    Avoid generic names like archive.zip. Use descriptive labels:

    PROJECT_ClientName_2026.zip
    Photos_Vacation_2026-05.zip
    Backup_Financial_Q1.zip
    

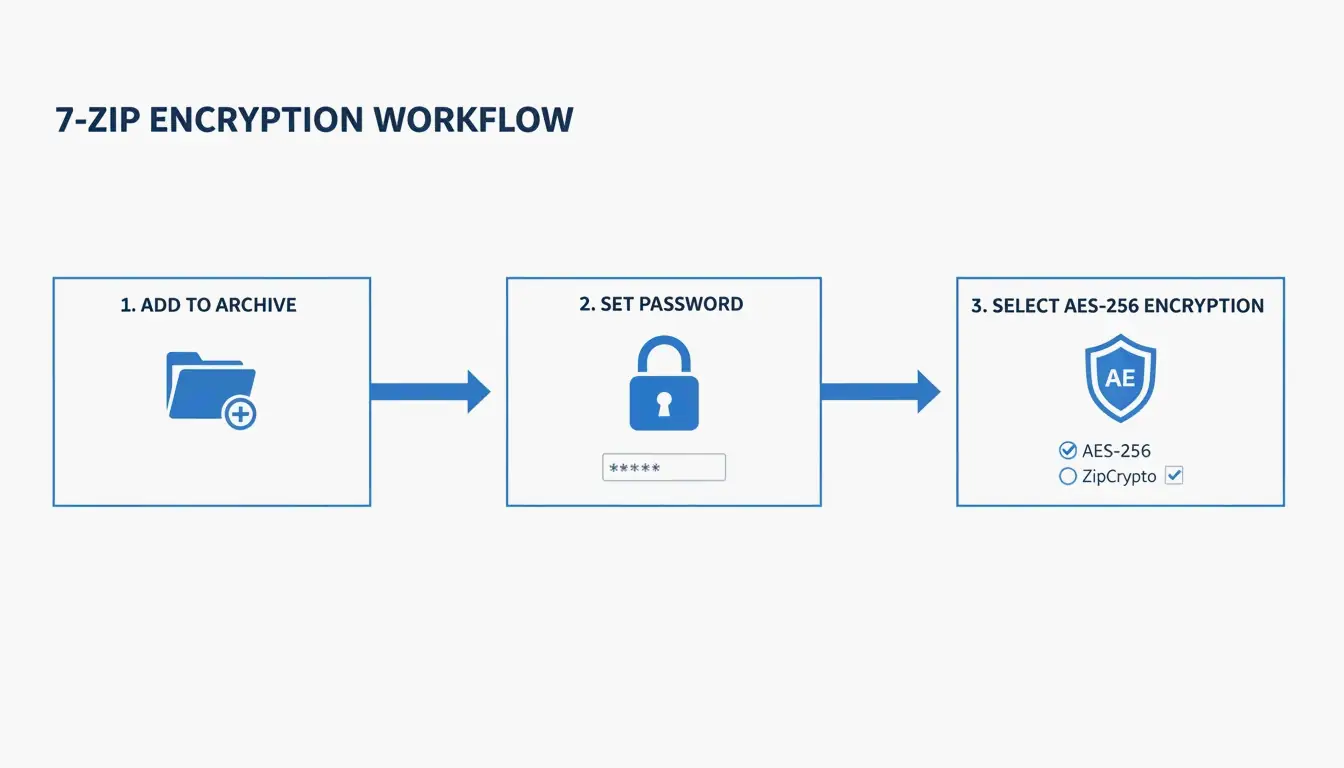
    Password Protection with 7-Zip (AES-256)

    Neither Windows nor Mac built-in tools support password-protected ZIP files. For encryption, use 7-Zip:

    1. Download and install 7-Zip
    2. Right-click files → 7-Zip > Add to archive
    3. In the Encryption section, enter a password
    4. Select AES-256 encryption
    5. Click OK

    A 3-step process for secure password protection

    ZIP Extractor explains: even if someone intercepts your file during a cloud transfer, AES-256 ensures they cannot access the data without the password.

    Format Comparison: ZIP vs. RAR vs. 7z

    Format Native Support (Win/Mac) Compression AES-256 Max Size Best For
    ZIP Both Good Requires 7-Zip 16 EiB (ZIP64) Universal sharing
    RAR Neither Better Built-in 16 EiB High compression, recovery records
    7z Neither Best (LZMA2) Built-in 16 EiB Maximum compression

    Unzipping: The Reverse Process

    OS Method
    Windows Right-click ZIP → “Extract All” → choose destination
    Mac Double-click the ZIP — Archive Utility extracts automatically

    Safari auto-unzip: If files unzip automatically when downloaded, disable at Safari → Settings → General → uncheck “Open safe files after downloading.”

    Conclusion

    Zipping files is a core 2026 data management skill. Use File Explorer (Windows) or Archive Utility (Mac) for everyday compression. For sensitive data, use 7-Zip with AES-256. For batch jobs, use PowerShell (Windows) or Terminal ditto (Mac). Always verify archives before deleting originals.

    FAQ

    Can I password-protect a ZIP without third-party software?

    No. Neither Windows File Explorer nor Mac Archive Utility supports password protection. Use 7-Zip (free) to apply AES-256 encryption.

    Why is my ZIP the same size as the original?

    This happens when the folder contains already-compressed files (JPG, MP4, PDF). The Deflate algorithm cannot further reduce these files — expect less than 5% savings.

    Does macOS automatically unzip downloads?

    Safari has “Open safe files after downloading” enabled by default. Disable it at Safari → Settings → General to prevent automatic unzipping.

    What is the difference between ZIP, RAR, and 7z?

    ZIP — Universal compatibility, built into Windows and Mac. RAR — Better compression, requires WinRAR. 7z — Best compression (LZMA2), requires 7-Zip. Both RAR and 7z support built-in AES-256 encryption.

  • How to Generate an ISBN Barcode: Bookland EAN Requirements (2026)

    How to Generate an ISBN Barcode: Bookland EAN Requirements (2026)

    To generate an ISBN barcode in 2026, purchase an official ISBN from Bowker, then encode your 13-digit number into the Bookland EAN-13 format using a free barcode generator. Place the scannable graphic on your back cover with proper quiet zones. This is required for selling through global retailers, libraries, and wholesalers.

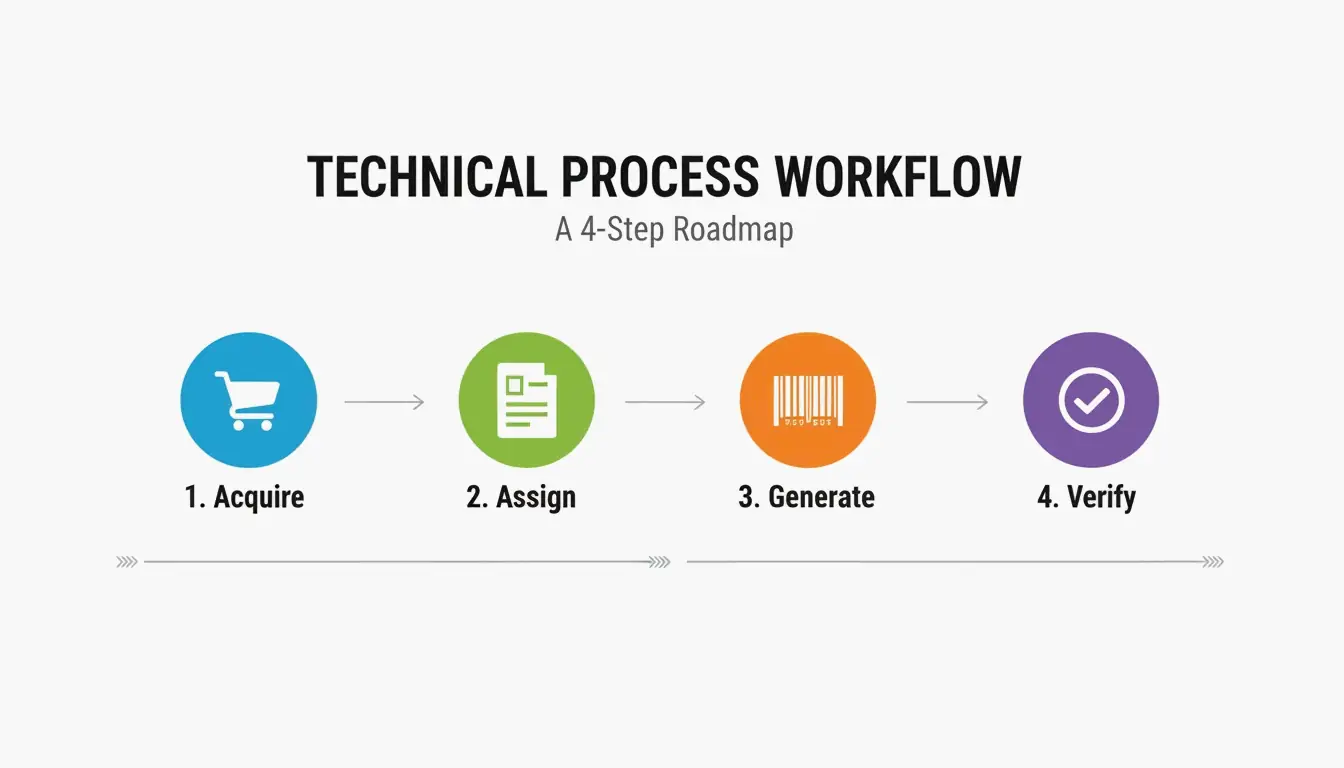
    The 4-Step ISBN Barcode Process

    Step Action Key Detail
    1. Acquire Buy ISBN from Bowker (MyIdentifiers.com) Only authorized U.S. source
    2. Assign Link ISBN to your book’s metadata Title, author, format (paperback/hardcover/ebook)
    3. Generate Create Bookland EAN-13 barcode graphic Free tools available — no need to pay Bowker $25
    4. Verify Test scan before printing Check readability and quiet zones

    Books.by reports that over 2.3 million ISBNs were issued in the U.S. in 2023 alone.

    Simple 4-step process: Acquire -> Assign -> Generate -> Verify.

    ISBN vs. Barcode: Understanding the Difference

    • ISBN — The unique 13-digit identifier (like a Social Security number for your book)
    • Barcode — The scannable graphic that represents that ISBN number

    Ash Davies, Founder of Books.by: “The ISBN is the number. The barcode is the scannable graphic. Most publishing platforms generate barcodes automatically and for free.”

    Free Barcode Generators

    Tool Cost Notes
    Author Media Free Reliable, no account needed
    Do Generator Free Specialized book barcode tool
    Bowker barcode service $25 Unnecessary — free tools work just as well

    Bookland EAN-13 Structure

    The Bookland EAN is a specialized EAN-13 barcode for books. It uses a 978 or 979 prefix that identifies the product as a book globally.

    Component Length Example Purpose
    GS1 Prefix 3 digits 978 or 979 Identifies “Bookland”
    Registration Group 1–5 digits 0 or 1 Country/language area
    Publisher Code Variable 237 Assigned by ISBN agency
    Publication Element Variable 45892 Specific title/edition
    Check Digit 1 digit 6 Catches scanning errors

    Check Digit Calculation (Modulo 10)

    1. Multiply each of the first 12 digits by alternating weights of 1 and 3
    2. Sum all products
    3. Take sum modulo 10 (remainder after dividing by 10)
    4. Subtract from 10 (if result is 10, check digit = 0)

    Wikipedia confirms this catches 100% of single-digit errors and most transposition errors.

    EAN-5 Price Extension

    Professional Bookland EANs often include a smaller EAN-5 supplemental barcode showing the retail price and currency.

    Price Currency Prefix EAN-5 Code
    $14.99 USD 5 51499
    $9.99 USD 5 50999
    £12.99 GBP 3 31299
    • USD prefix = 5, GBP = 3, CAD = 5, EUR = 3
    • Required by major U.S. retailers like Barnes & Noble
    • Optional for online-only sales (Amazon doesn’t require it)

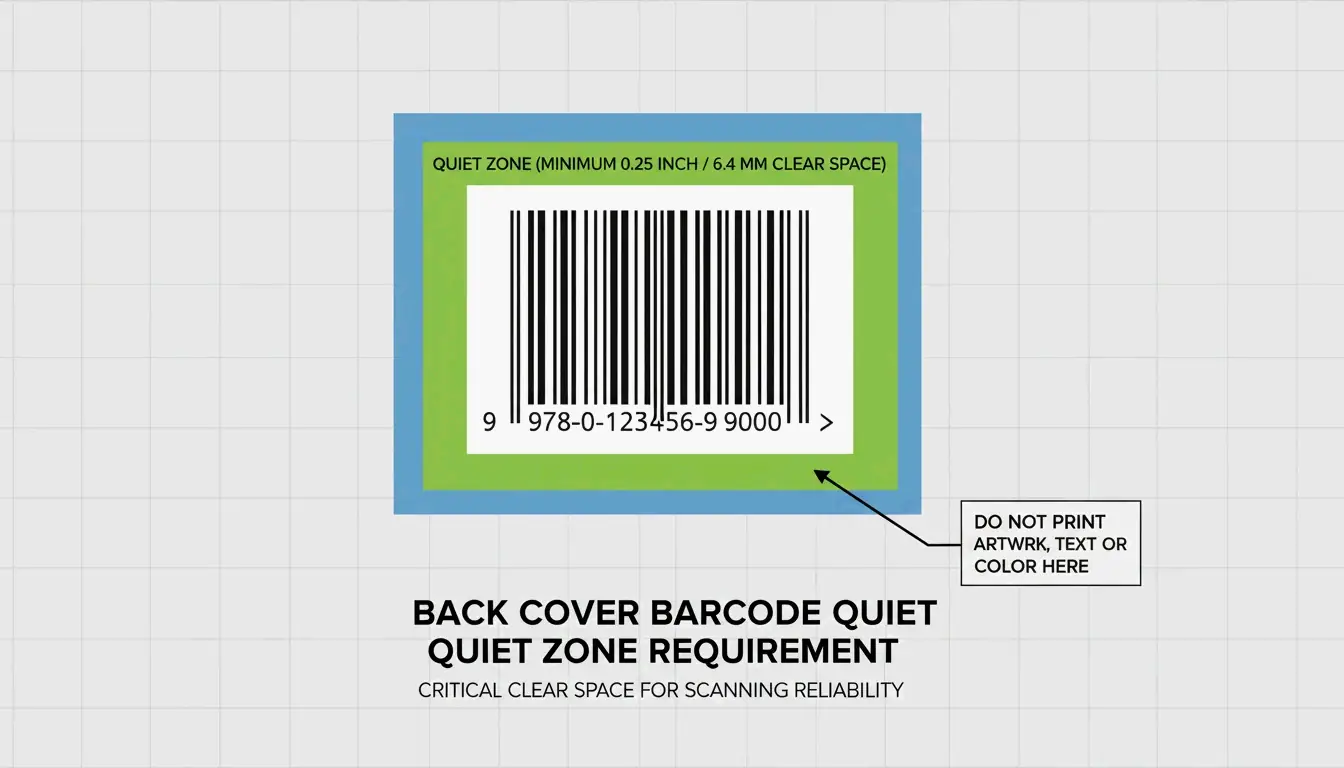
    Back Cover Placement: Quiet Zone Requirements

    Jason Pearce recommends placing the barcode in the bottom-right corner of the back cover with a white rectangle of at least 2 inches × 1.2 inches.

    Requirement Specification
    Location Bottom-right corner of back cover
    Minimum size 2″ × 1.2″ white rectangle
    Quiet zone Clear white margin on all sides of the barcode
    Resolution 300 DPI minimum for print

    Visualizing the 'Quiet Zone' and placement on the back cover.

    ISBN Costs: Why You Should Be the Publisher of Record

    Source Cost Publisher of Record
    Bowker (single) $125 You / your imprint
    Bowker (10-pack) $295 ($29.50 each) You / your imprint
    Amazon KDP (free) $0 “Independently Published”
    Other platforms (free) $0 The platform, not you

    SelfPublishing.com recommends buying your own ISBNs — many bookstores and libraries refuse to stock books with platform-assigned ISBNs.

    ISBN vs. ASIN

    Identifier Scope Use Case
    ISBN Global standard All retailers, libraries, distributors
    ASIN Amazon only Kindle ebooks sold exclusively on Amazon

    Physical bookstores and libraries require an ISBN — an ASIN is not sufficient.

    2027 Sunrise: Dual-Marking with GS1 Digital Link

    The industry is moving toward GS1 Sunrise 2027, transitioning from 1D barcodes to 2D codes. For 2026 book releases, use a dual-marking strategy:

    1. Traditional EAN-13 — Required for current checkout systems
    2. GS1 Digital Link QR code — Links to updated metadata, marketing materials, purchase links

    Automateed notes this moves beyond the limits of scan-only codes and prepares your book for modern inventory systems.

    Conclusion

    Generate your ISBN barcode by purchasing from Bowker, using a free Bookland EAN-13 generator, and placing it correctly on your back cover with quiet zones. Buy your own ISBNs to remain publisher of record. For 2026 releases, consider dual-marking with both EAN-13 and a GS1 Digital Link QR code to future-proof your book.

    FAQ

    Do I need a separate ISBN for ebook and paperback?

    Yes. International standards require a unique ISBN for every distinct format — hardcover, paperback, and epub each need their own number. This ensures accurate sales tracking across distributors.

    Can I use a free KDP ISBN for bookstores?

    Technically yes, but it lists “Independently Published” as the publisher. Many physical bookstores and libraries avoid stocking books with platform-assigned ISBNs. Buy your own ISBN to maintain professional credibility.

    What is the EAN-5 price extension?

    A small secondary barcode encoding the book’s retail price and currency (e.g., 51499 = $14.99 USD). Optional for online sales but required by major U.S. retail chains for physical shelf pricing.

  • How to Decrease MB of PDF Files: 5 Fast Ways to Shrink Size Without Losing Quality

    How to Decrease MB of PDF Files: 5 Fast Ways to Shrink Size Without Losing Quality

    To decrease PDF file size without visible quality loss, downsample images to 150 DPI, strip metadata, and remove embedded fonts. The best tool depends on your needs: Adobe Acrobat Pro for professional control, Mac Preview for free native compression, Smallpdf for quick online jobs, Cisdem for batch processing, or OCR automation for developers.

    Why Is Your PDF So Large? The Pre-Compression Checklist

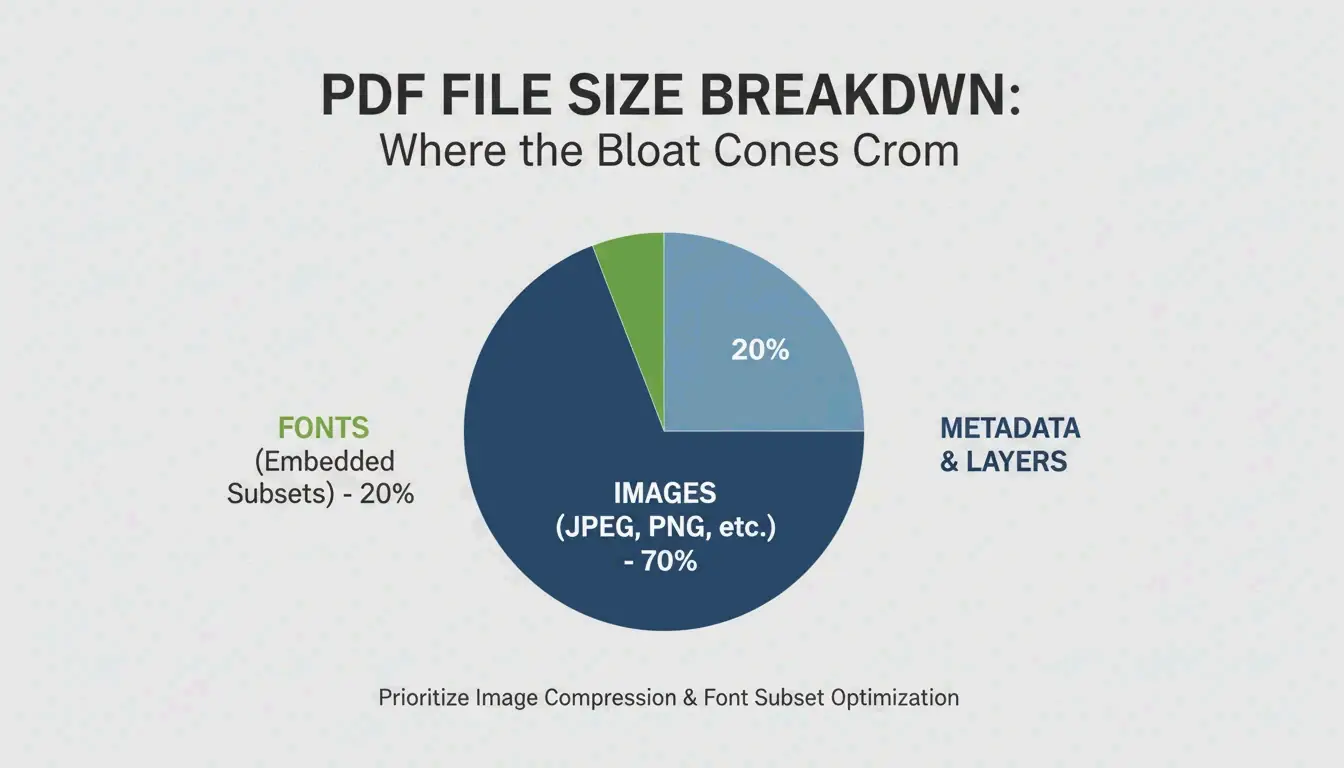
    According to Smallppt, high-resolution images often account for over 70% of a PDF’s total size.

    Size Contributor Typical Impact Fix
    High-res images 70%+ of file size Downsample to 150 DPI
    Embedded fonts Several MB Subset fonts instead of embedding full files
    Hidden layers / metadata Varies Strip via “Optimize PDF” tools
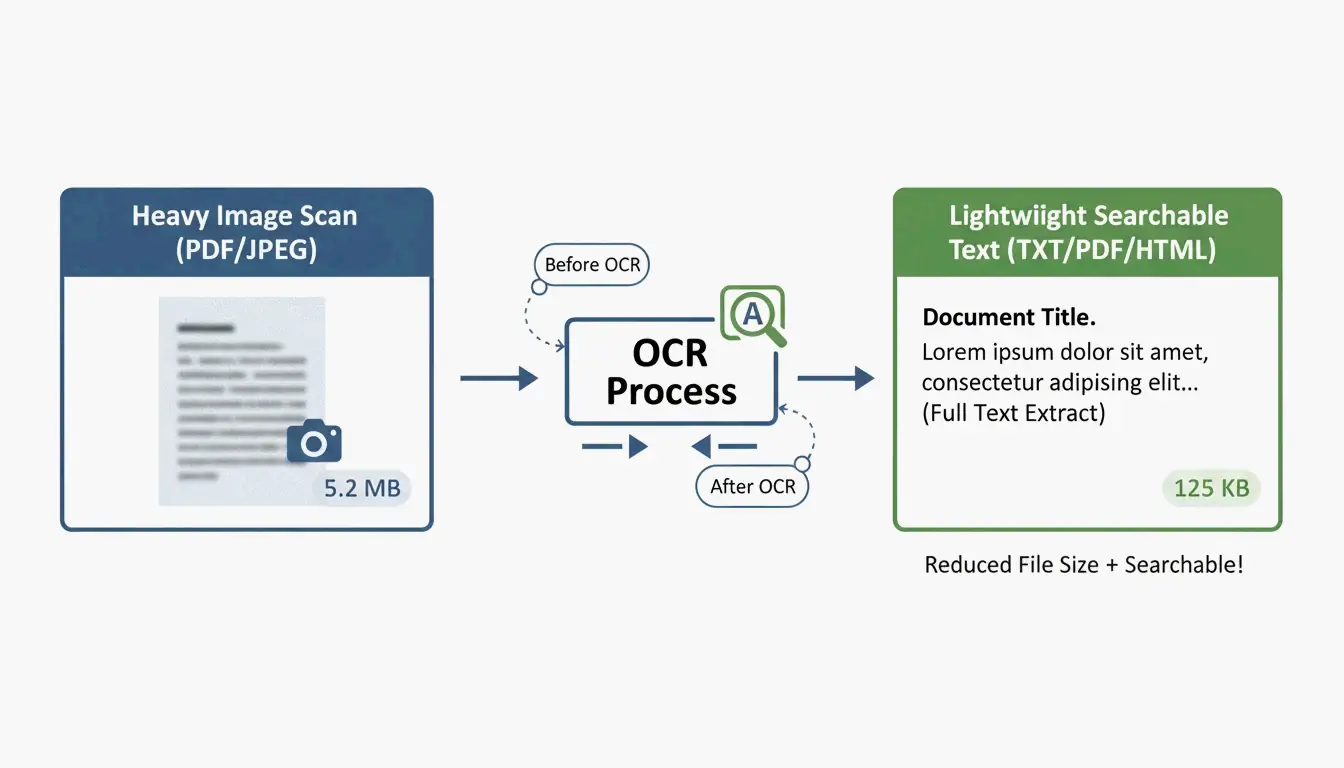
    Unoptimized scans Very large Run OCR, replace with text layer
    Version history Accumulates over edits Clean with “Discard Objects”

    A simple breakdown of PDF size contributors (Images vs. Fonts vs. Metadata)

    The 150 DPI Standard

    Use Case Recommended DPI Quality
    High-quality print 300 DPI Professional print output
    Email / web sharing 150 DPI Sweet spot — sharp on screens, small files
    Basic web reference 96 DPI Minimum for readability, maximum savings

    5 Methods to Reduce PDF Size

    Method 1: Adobe Acrobat Pro — Professional Control

    The gold standard for precise optimization:

    1. Open PDF → All Tools > Compress a PDF
    2. Choose Advanced Optimization (PDF Optimizer)
    3. Downsample images: Set color/grayscale to bicubic at 150 DPI for images above 225 DPI
    4. Discard Objects: Clear hidden layers, old bookmarks, unused form fields

    Batch performance tests show professional desktop software processes up to 100 pages per second depending on hardware.

    Method 2: Mac Preview — Free and Built-In

    No extra software needed on macOS:

    1. Open PDF in Preview
    2. Go to File → Export
    3. In the Quartz Filter dropdown, select “Reduce File Size”
    4. Click Save

    Warning: Cisdem notes the default filter can be too aggressive, making images blurry. For complex files, it can even increase file size.

    Ghostscript: The Power-User Alternative

    For better results on Mac, use Ghostscript via Terminal:

    
    gs -sDEVICE=pdfwrite -dPDFSETTINGS=/ebook \
      -dCompatibilityLevel=1.4 -dNOPAUSE -dQUIET \
      -dBATCH -sOutputFile=output.pdf input.pdf
    
    -dPDFSETTINGS Target Use Typical Reduction
    /screen Web/screen (72 DPI) ~95%
    /ebook Medium quality (150 DPI) ~90%
    /printer Print quality (300 DPI) ~50%

    Method 3: Online Tools — Smallpdf and pdfFiller

    Fastest for one-off jobs, no installation:

    1. Upload your document to Smallpdf or pdfFiller
    2. Pick compression level — Basic (balanced) or Strong (maximum shrink)
    3. Download the optimized file

    Privacy: Reputable platforms now follow GPC, GDPR, HIPAA, and SOC 2 Type II standards. Many offer “local-only” processing in your browser cache. For highly sensitive documents, stick to offline tools.

    Method 4: Batch Processing — Cisdem PDF Compressor

    For hundreds of contracts, invoices, or school resources:

    Cisdem PDF Compressor lets you drag-and-drop entire folders:

    1. Add files — Drag hundreds of PDFs at once
    2. Pick mode — Small, Medium, or Large
    3. Compress — All files processed in seconds

    Essential for real estate, healthcare, and legal industries migrating paperwork to cloud storage.

    Method 5: OCR and Developer Automation

    For programmatic compression at scale, use OCR to convert scanned images into searchable text layers, then replace heavy image backgrounds with lightweight previews.

    IronPDF (C#) example:

    // Compress images to 90% quality across all pages
    pdf.CompressImages(90, true);
    

    This scales image dimensions while stripping excess MBs — ideal for processing thousands of documents in enterprise pipelines.

    The concept of OCR: Image-based PDF to Text-based PDF

    Conclusion

    The most effective PDF compression targets 150 DPI for images and strips metadata and unused fonts. For quick jobs, use Mac Preview or Smallpdf. For professional control, use Adobe Acrobat Pro. For bulk operations, use Cisdem or Ghostscript. For enterprise automation, integrate OCR + programmatic compression.

    FAQ

    Why is my PDF still large after compression?

    Common causes: embedded fonts that can’t be subset, high-density vector graphics resistant to DPI downsampling, hidden layers, or accumulated version history. Use Adobe Acrobat’s “Audit Space Usage” to identify exactly what is consuming space.

    Is it safe to upload sensitive documents to online compressors?

    Only use tools compliant with GPC and GDPR. For legal or medical documents, use offline tools (Adobe Acrobat, Mac Preview, Ghostscript) to ensure data never leaves your machine.

    How do I reduce a PDF to a specific size (e.g., under 5MB)?

    Use Adobe Acrobat’s “Audit Space Usage” to identify the largest components, then manually adjust image compression to “JPEG High” and remove bookmarks, links, and unused metadata. Online tools like pdfFiller also show estimated output size before finalizing.

  • How to Compress PDF on iPhone: 3 Quick Ways to Reduce File Size (2026)

    How to Compress PDF on iPhone: 3 Quick Ways to Reduce File Size (2026)

    To compress PDF on iPhone in 2026, the fastest method is the built-in Files app — long-press your document and tap “Optimize File Size.” For sensitive documents, use local browser-based tools that process in your device’s RAM. For precise size targets (e.g., 500KB for a government portal), use pdfFiller from the App Store.

    Three Methods Compared

    Method Speed Privacy Size Control Batch Best For
    Files app (native) Instant Full (never leaves device) None (automatic) No Quick everyday compression
    Local browser tools Fast Full (processed in RAM) Some (quality slider) Limited KYC documents, bank statements
    pdfFiller (App Store) Fast Cloud upload Precise MB targets Yes Government portals, tax forms

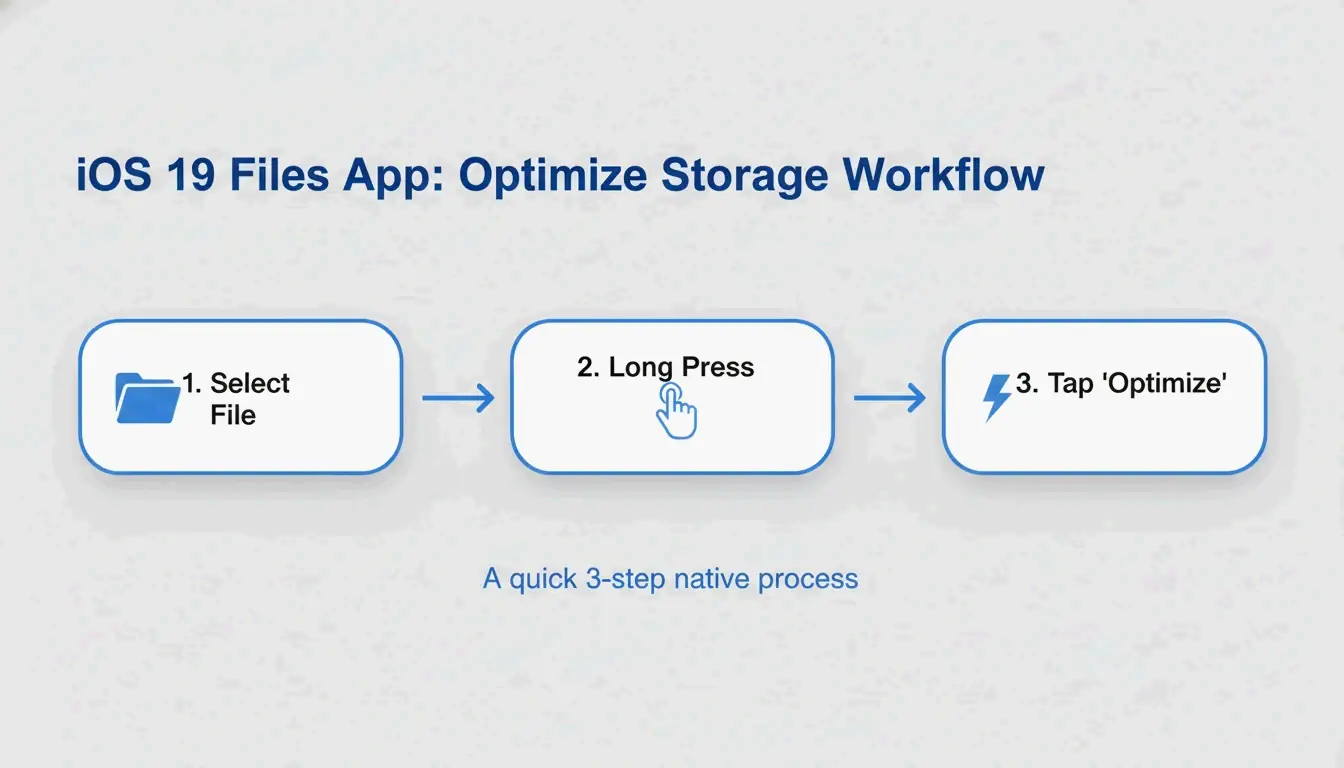
    Method 1: Files App “Optimize File Size” (iOS 19+)

    Apple built PDF compression directly into the Files app — no extra apps needed.

    1. Open the Files app on your iPhone
    2. Find the PDF you want to compress
    3. Long-press the file icon
    4. Tap “Optimize File Size”
    5. A smaller version appears in the same folder (usually named with “optimized”)

    FreePDFCompress notes that modern compression re-encodes images and strips unused metadata, often cutting file size by up to 90% — while keeping vector text perfectly sharp.

    3-step visualization of the native iOS compression process.

    Pros: Instant, free, fully private, no internet needed.
    Cons: No size control (can’t target “exactly 500KB”), no batch processing.

    Method 2: Local Browser Tools (Maximum Privacy)

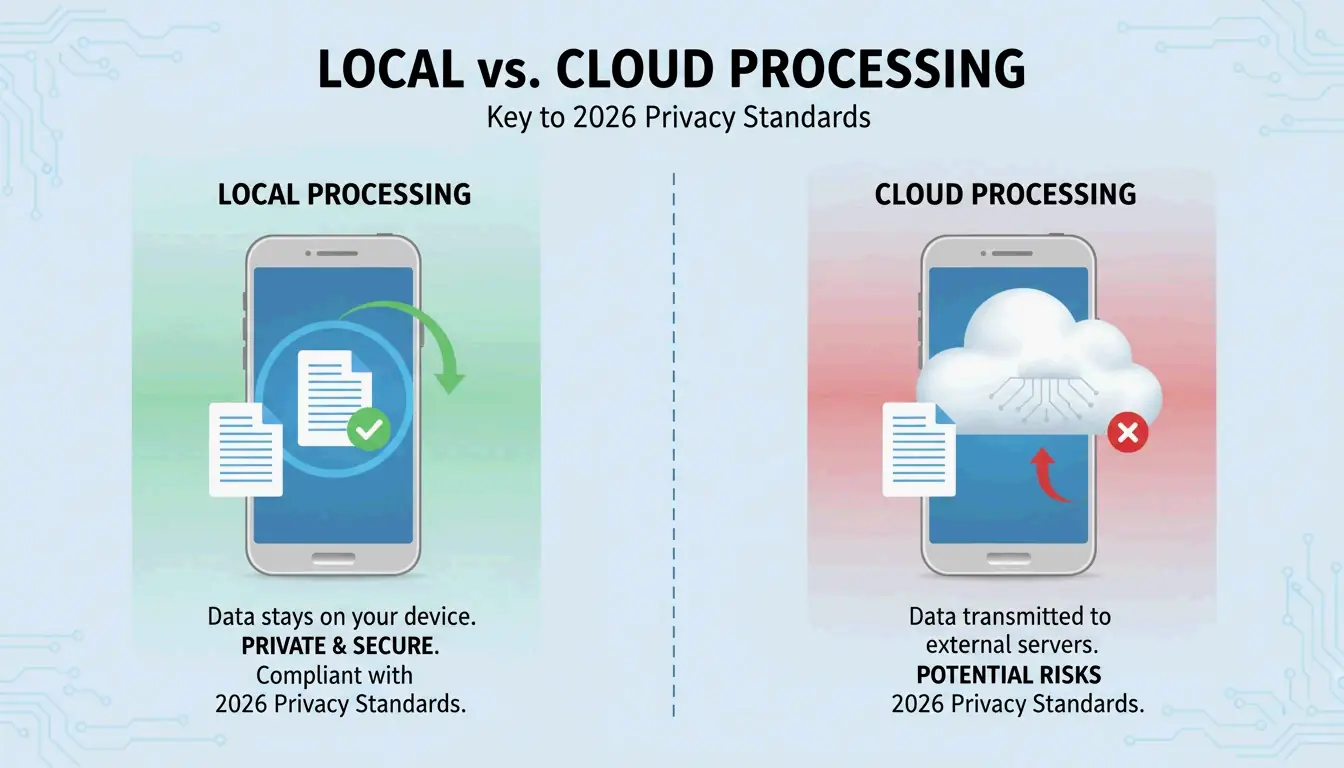
    By 2026, privacy standards have shifted away from cloud-everything. Local browser tools use JavaScript to process PDFs entirely in your iPhone’s RAM — your data is never transmitted to any server.

    FreePDFCompress confirms these tools still achieve 90% size reduction while keeping data fully on-device. In Safari, look for a “Processed Locally” badge as your guarantee.

    When to use this method:
    – KYC (Know Your Customer) paperwork
    – Bank statements and tax documents
    – ID scans and passport copies
    – Any document you wouldn’t email to a stranger

    A simple comparison between Cloud vs. Local processing paths.

    Method 3: pdfFiller (Precise Size Targets)

    When a government portal requires exactly 500KB or less, the native method’s “one-size-fits-all” approach isn’t enough. pdfFiller (App Store) lets you pick specific quality levels and see estimated file size before committing.

    pdfFiller offers three compression levels — High, Medium, Low — with real-time size estimates.

    1. Download pdfFiller from the App Store
    2. Upload your PDF
    3. Tap Compress and pick your target level
    4. Save the optimized file

    Supports batch processing for multiple files at once.

    How PDF Compression Works: DPI, JPEG Re-encoding, and Vector Text

    Component What Compression Does Impact on Quality
    Images JPEG re-encoding at lower quality Visible softening below 96 DPI
    DPI (resolution) Reduced from 300 → 96–150 DPI Fine for screens; avoid for print
    Vector text Unchanged — stays crisp at any size No quality loss
    Metadata Stripped (EXIF, unused fonts) No visual impact; saves KB

    IRCC Canada recommends 96–150 DPI as the sweet spot for 2026 digital standards — keeps text sharp on phone screens while significantly reducing file weight.

    Key insight: Text is vector-based and stays perfectly crisp regardless of compression. Only images and scans show quality changes.

    2026 Upload Target Sizes

    Platform Upload Limit Recommended Target
    Government / KYC portals 200 KB – 2 MB 500 KB
    HR / Resume portals 2 MB 1 MB
    Gmail / Outlook 20–25 MB 5 MB
    WhatsApp (consumer) 16 MB 2 MB
    WhatsApp Business 100 MB 10 MB

    Never re-compress a compressed PDF. FreePDFCompress warns that repeated compression creates artifacts and blurriness. Always start from the original document.

    Conclusion

    For everyday compression, the Files app is fastest and most private. For sensitive documents, use local browser tools with the “Processed Locally” badge. For precise size targets (government forms, tax submissions), use pdfFiller. Always verify text readability at 150 DPI before submitting.

    FAQ

    Will compressing a PDF damage text readability?

    No. PDF text is vector-based — it stays sharp at any compression level. Only embedded images and scans are affected by DPI reduction. FreePDFCompress confirms 150 DPI keeps everything readable on 2026 mobile screens.

    How do I compress a PDF to exactly 200KB or 500KB?

    The native Files app doesn’t offer size control. Use pdfFiller or StrongPDF — both offer quality sliders and presets. To reach 200KB, you typically need to drop image resolution to 96 DPI.

    Is it safe to upload confidential PDFs to online compression servers?

    For sensitive documents (IDs, bank statements, tax forms), avoid cloud-based compressors. Use local browser tools that process in your device’s RAM. Look for a “Processed Locally” badge to confirm your data never leaves your phone.

  • How to Bypass Discord’s 20MB File Limit Without Nitro (2026)

    How to Bypass Discord’s 20MB File Limit Without Nitro (2026)

    Updated September 2026: Discord raised the free upload limit from 10MB to 20MB in August 2026. Numbers and bitrate math in this guide now reflect the new cap.

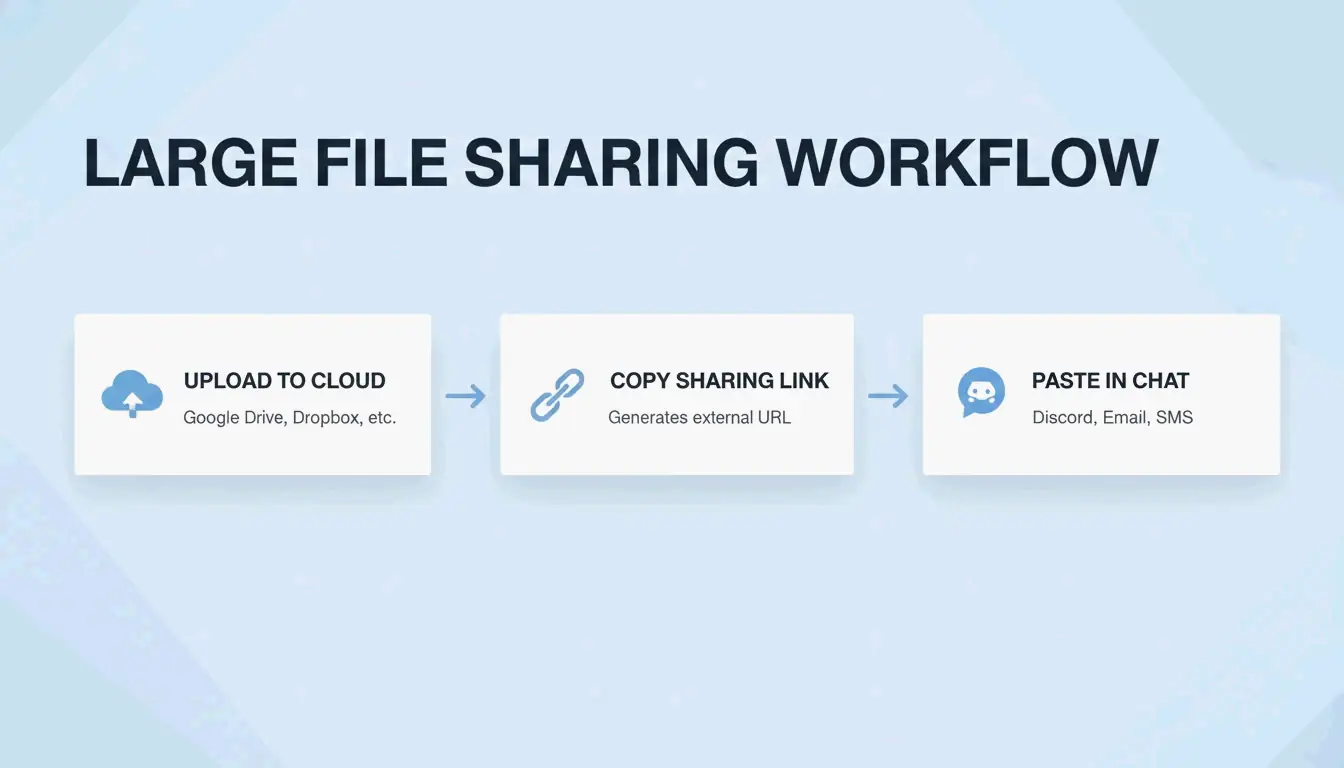
    Discord’s free upload limit is 20MB (raised from 10MB in August 2026; the old 8MB cap is older still). To bypass it without Nitro, either compress your file to stay under 20MB using HEVC encoding, or share via cloud storage (Google Drive, Dropbox, Streamable) and paste the link. Third-party client mods like Vencord offer a third option but violate Discord’s Terms of Service.

    Discord File Size Limits in 2026

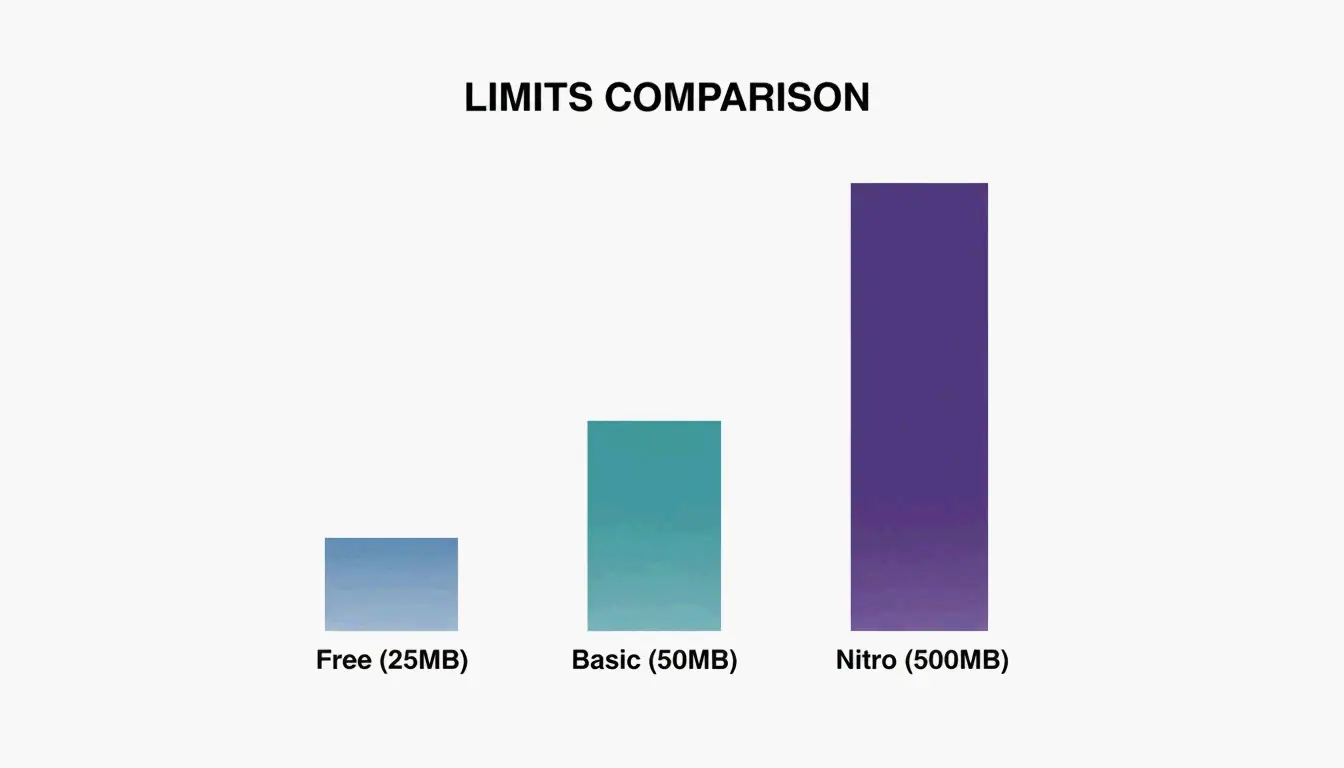
    Tier Max File Size Price
    Free 20 MB $0
    Nitro Basic 50 MB $2.99/month
    Discord Nitro 500 MB $9.99/month

    As 1MB Compress notes, any file exceeding your tier’s limit — even by 1 KB — gets blocked.

    A simple comparison of Discord file limits: Free vs Basic vs Nitro

    Method 1: Compress to Stay Under 20MB

    The most reliable approach is shrinking your file before uploading.

    Optimal Video Settings for Discord

    Parameter Recommended Setting Why
    Resolution 1280 × 720 (720p) Plays natively in Discord’s built-in player
    Frame rate 30 FPS Sufficient for chat clips, saves ~30% vs 60 FPS
    Codec HEVC (H.265) or H.264 HEVC is ~50% smaller at same quality
    Audio 128 kbps AAC Good enough for voice/music, saves extra MB
    Format MP4 or WebM Universal playback in Discord

    Bitrate Formula for 20MB Target

    Calculate your target bitrate: 160 ÷ video length in seconds = target Mbps

    Video Length Target Bitrate Approx. Size
    30 seconds ~5.3 Mbps ~19 MB
    60 seconds ~2.7 Mbps ~19 MB
    2 minutes ~1.3 Mbps ~19 MB
    5 minutes ~0.53 Mbps ~19 MB

    A case study by Filmora shows their compression tools reduce file sizes by 10–90% — a 100MB video can drop to under 20MB without noticeable quality loss at 720p.

    Step-by-Step Compression

    1. Import your video into Filmora, Handbrake, or a web tool like 1MB Compress
    2. Set format to MP4, resolution to 720p, codec to HEVC
    3. Target 20MB — many tools have an “advanced compression” setting for exact file size targets
    4. Export and upload directly to Discord

    Method 2: Cloud Storage Links

    When compression degrades quality too much (long 4K gaming clips, large presentations), host externally:

    Service Free Storage Discord Embed Support Best For
    Google Drive 15 GB Link preview (click to view) Documents, presentations
    Dropbox 2 GB Change dl=0 to dl=1 for direct download General files
    OneDrive 5 GB Link preview Office documents
    Streamable Unlimited (per file) Auto-embeds in Discord Video clips

    Streamable is the top choice for video — it embeds directly in Discord chat so viewers watch without leaving the app. For Dropbox, the dl=1 trick forces direct playback instead of a download page.

    Simple 3-step process of cloud sharing on Discord

    Method 3: Client Mods (Vencord / BetterDiscord) — Use at Your Own Risk

    Mods like Vencord and BetterDiscord use plugins that automatically detect oversized files, upload them to third-party hosts (Catbox, Litcord), and display them as seamless embeds in chat.

    Aspect Official Discord Client Mods
    Encryption End-to-end (Nitro) Depends on third-party host
    Privacy Discord servers External servers (Catbox, etc.)
    Terms of Service Compliant Violates ToS
    Ban risk None Low but non-zero

    Wikipedia notes that Discord officially forbids client modification. Bans are rare for visual mods, but bypassing paid features (Nitro upload limits) is a clearer ToS violation. For sensitive files, use official cloud sharing instead.

    Conclusion

    For most users, compressing to 20MB with HEVC at 720p is the fastest solution. For long or high-quality files, Streamable provides the best Discord experience (auto-embed, no download). Client mods work but violate Discord’s ToS and rely on third-party servers — use them only for non-sensitive content.

    FAQ

    What is the current Discord free file size limit in 2026?

    20MB per file. Discord raised it from 10MB in August 2026 (the 8MB cap is older still). Numbers like 25MB still floating around online conflict with Discord’s own documentation. Any file exceeding the limit requires compression, a cloud link, or a Nitro subscription.

    Does compressing video for Discord significantly reduce quality?

    It depends on settings. Using HEVC at 720p can reduce file size by up to 90% while keeping video clear on phone and desktop screens. Most users won’t notice a difference from the original when viewed in Discord’s built-in player.

    Is using Vencord or BetterDiscord safe?

    Technically, all client mods violate Discord’s Terms of Service. Bans are rare for visual customization, but using mods to bypass file limits involves uploading to third-party servers with no encryption guarantees. Use official cloud sharing for sensitive files.

  • How to Compress a Video Without Losing Quality: Codec, Bitrate & Tools (2026)

    How to Compress a Video Without Losing Quality: Codec, Bitrate & Tools (2026)

    To compress a video without losing quality in 2026, re-encode with AV1 or H.265 (HEVC) — both are roughly 50–60% more efficient than H.264. Use VBR 2-pass encoding with a target of 5–10 Mbps for 1080p to achieve perceptually lossless output. Free tools like Handbrake handle this in a few clicks.

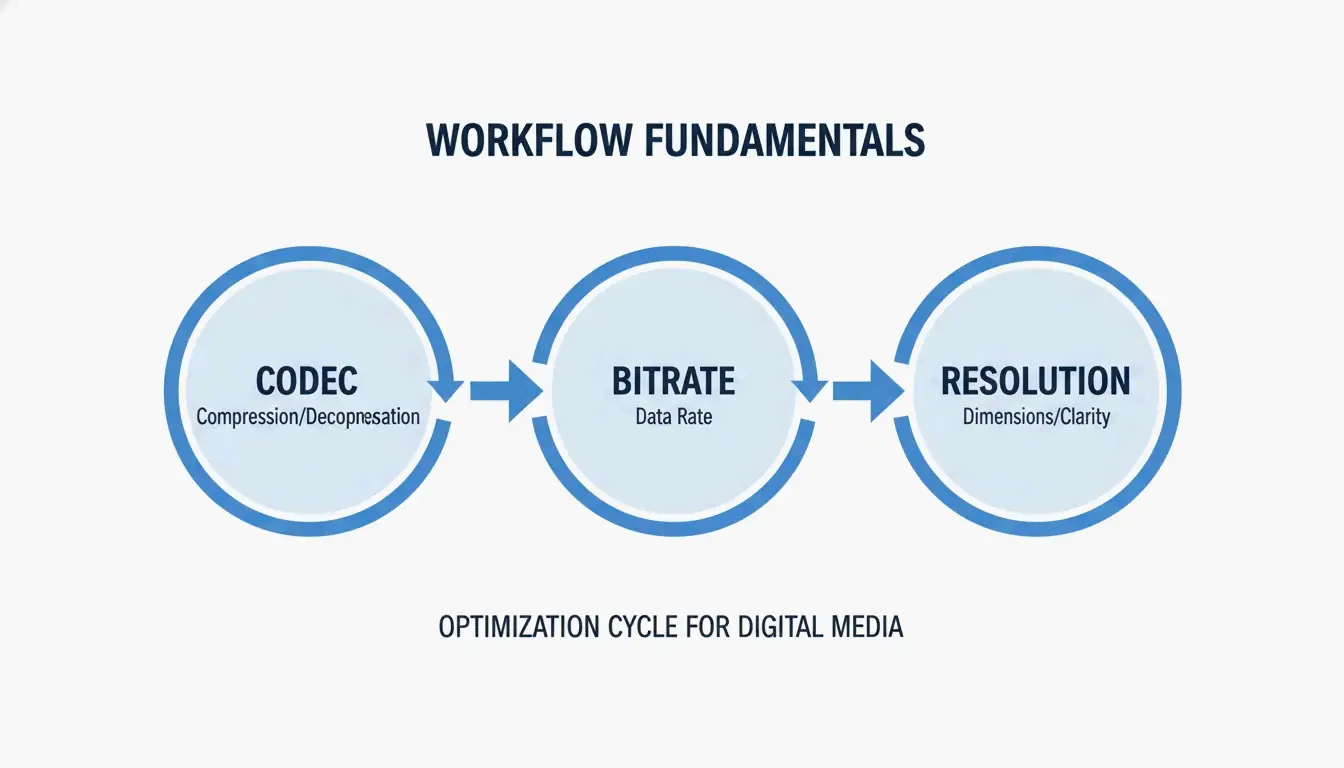
    The Three Pillars of Video Compression

    Effective compression comes down to three decisions:

    1. Codec — The algorithm that encodes your video data
    2. Bitrate — How much data per second you allocate
    3. Resolution — Matching pixel count to the actual display

    A simple 3-node diagram showing the core pillars: Codec, Bitrate, and Resolution.

    Codec Selection: AV1 vs. HEVC vs. H.264

    Codec Efficiency vs. H.264 Royalty Best For Device Support
    AV1 ~63% smaller Free (open-source) Web streaming, YouTube Modern browsers, 2022+ hardware
    H.265 (HEVC) ~50% smaller Licensed 4K HDR, mobile playback Phones, tablets, smart TVs
    H.264 (AVC) Baseline Licensed Maximum compatibility Everything (15+ years)

    Research from MDPI (2024) confirms AV1 saves approximately 63% on bitrate compared to H.264 at equivalent quality.

    Recommendation: Use AV1 for web content. Use HEVC for mobile and 4K. Use H.264 only when you need to support very old devices.

    Bitrate Management: Why VBR 2-Pass Wins

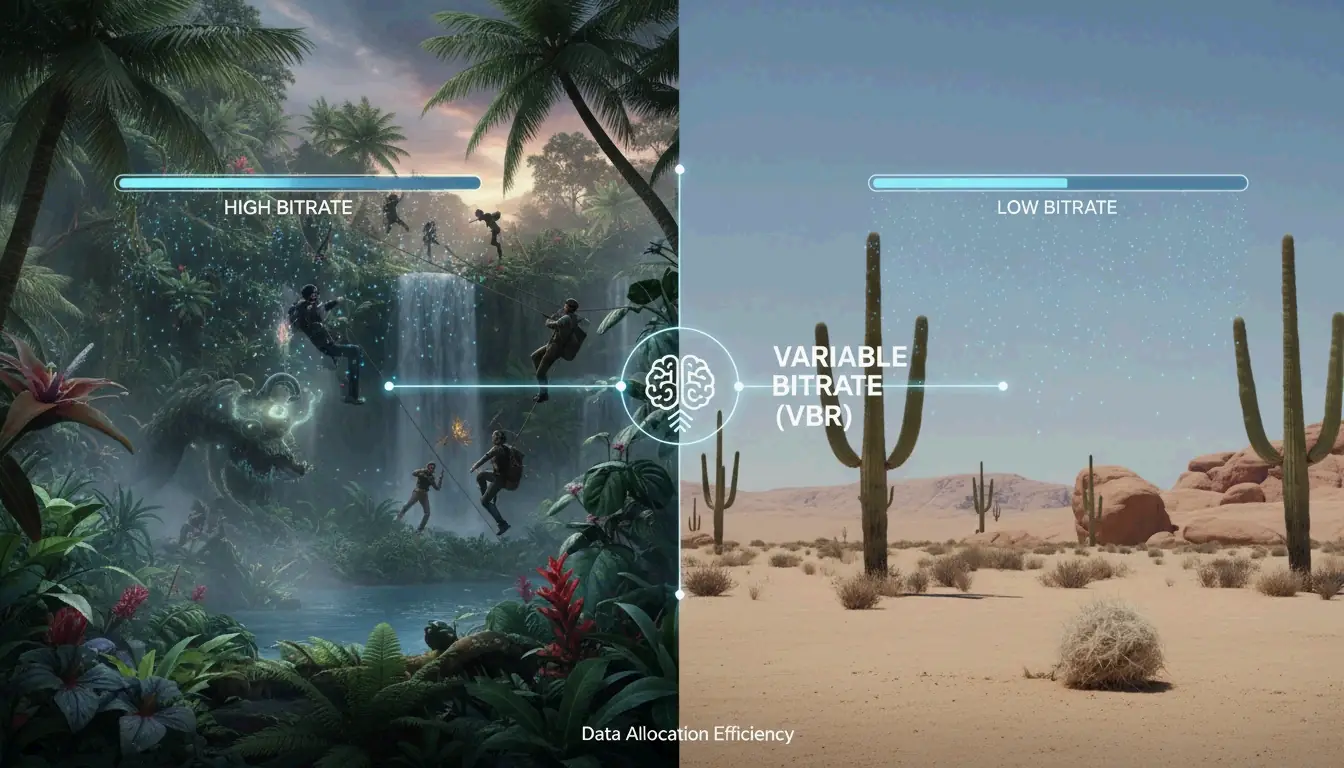
    Constant Bitrate (CBR) uses the same data for every frame — wasteful for static scenes and insufficient for action. Variable Bitrate (VBR) is smarter: it allocates more data to complex, high-motion scenes and saves space on static backgrounds.

    VBR 2-pass encoding scans the entire video first (pass 1), then distributes the data budget optimally (pass 2). This prevents blockiness during fast movement.

    A visual metaphor of VBR: allocating more "fuel" (data) to action and less to static scenes.

    2026 Bitrate Targets

    These are H.264 targets. For H.265 or AV1, reduce by 30–50%:

    Resolution Web / Social High Quality / Archive
    4K (2160p) 35–45 Mbps 50–65 Mbps
    1080p (Full HD) 8 Mbps 12 Mbps
    720p 5 Mbps 8 Mbps

    Swarmify notes that H.265 at RF 22 cuts file sizes by 40–50% with no visible loss on 1080p screens.

    Best Tools for Video Compression

    Tool Type Best For Key Feature
    Handbrake Desktop (free) Full control, any format Manual codec/bitrate/VBR settings
    FFmpeg CLI (free) Batch processing, automation ffmpeg -i input.mp4 -vcodec libx265 -crf 28 output.mp4
    VEED.io Online Quick social clips (<500MB) Automatic optimization
    FreeConvert Online One-off jobs, no install Browser-based
    NVIDIA NVENC GPU hardware 4K processing speed 5x faster than CPU encoding

    HitPaw notes that GPU-accelerated encoding processes 4K video up to 5x faster than CPU-only methods.

    FFmpeg Quick Commands

    
    ffmpeg -i input.mp4 -vcodec libx265 -crf 28 output.mp4
    
    # Compress to AV1 (60%+ smaller, slower encoding)
    ffmpeg -i input.mp4 -vcodec libaom-av1 -crf 30 output.mp4
    
    # Target specific bitrate (VBR 2-pass)
    ffmpeg -i input.mp4 -vcodec libx265 -b:v 5M -pass 1 -an /dev/null
    ffmpeg -i input.mp4 -vcodec libx265 -b:v 5M -pass 2 output.mp4
    

    Platform-Specific Rules

    Every platform re-compresses your upload. Pre-optimizing prevents double-compression artifacts:

    Platform Limit Recommended Settings
    Discord (free) 25 MB Downscale to 720p, H.265, target ~200/seconds of video
    YouTube No hard limit Upload high-bitrate “master” (12+ Mbps 1080p); YouTube re-encodes
    Email (Gmail) 25 MB Compress to 720p, 2-3 Mbps, or use a link instead
    Website / SEO Under 5 MB ideal AV1 or WebM, 5-8 Mbps 1080p

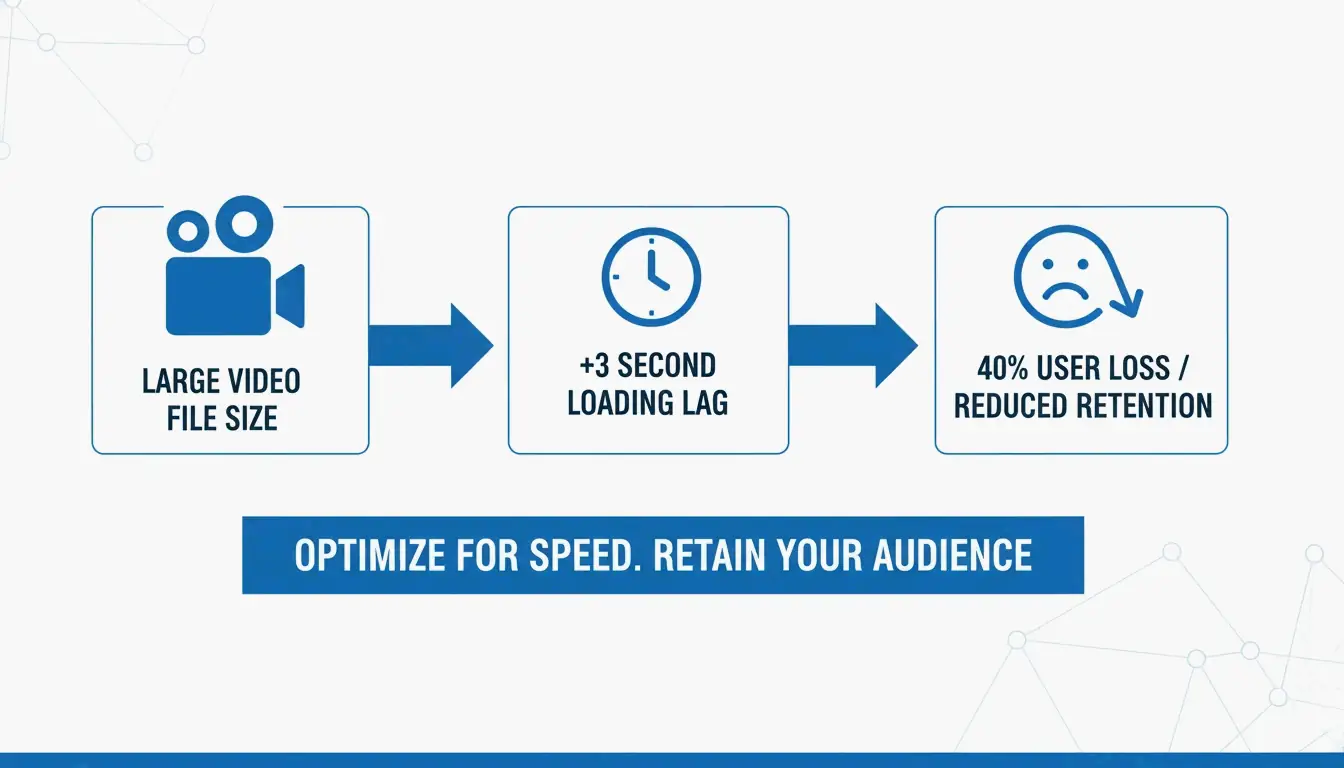
    Tooltester (2026) reports 40% of users abandon sites that take longer than 3 seconds to load — often caused by unoptimized video.

    A simple comparison showing the impact of video size on page load speed/SEO.

    Hidden Savings: Audio and Metadata

    • Audio bitrate: Switch to 128 kbps AAC — sufficient for web video and saves up to 15% total file size
    • Metadata stripping: Remove EXIF data and silent audio tracks from background/hero videos
    • AI-driven optimization: SmartVideo automatically selects the best codec based on viewer bandwidth

    Conclusion

    Video compression in 2026 means using the right codec (AV1 or HEVC), smart bitrate management (VBR 2-pass), and matching resolution to your display target. Start with Handbrake, pick an AV1 or H.265 preset, and use the bitrate cheat sheet above. You can cut file sizes by 60%+ with no visible quality loss.

    FAQ

    Does lowering FPS significantly reduce file size?

    Yes. Dropping from 60 FPS to 30 FPS reduces size by 20–30% (fewer frames to encode). Best for interviews and tutorials. Avoid for sports or gaming content where smooth motion matters.

    What is the best video codec in 2026?

    AV1 wins on efficiency (60%+ smaller than H.264) and is now supported by most browsers. H.265 (HEVC) remains the best for broad device compatibility (phones, tablets, 4K TVs) with a solid 50% size reduction.

    How do I hit Discord’s 25MB limit without pixelation?

    Use H.265 codec. Calculate bitrate: 200 ÷ video length in seconds. Downscale 1080p to 720p — fewer pixels means each one gets more data, producing a clearer image at low bitrates.

  • How to Extract ZIP Files on Mac: Native & Terminal Methods (2026)

    How to Extract ZIP Files on Mac: Native & Terminal Methods (2026)

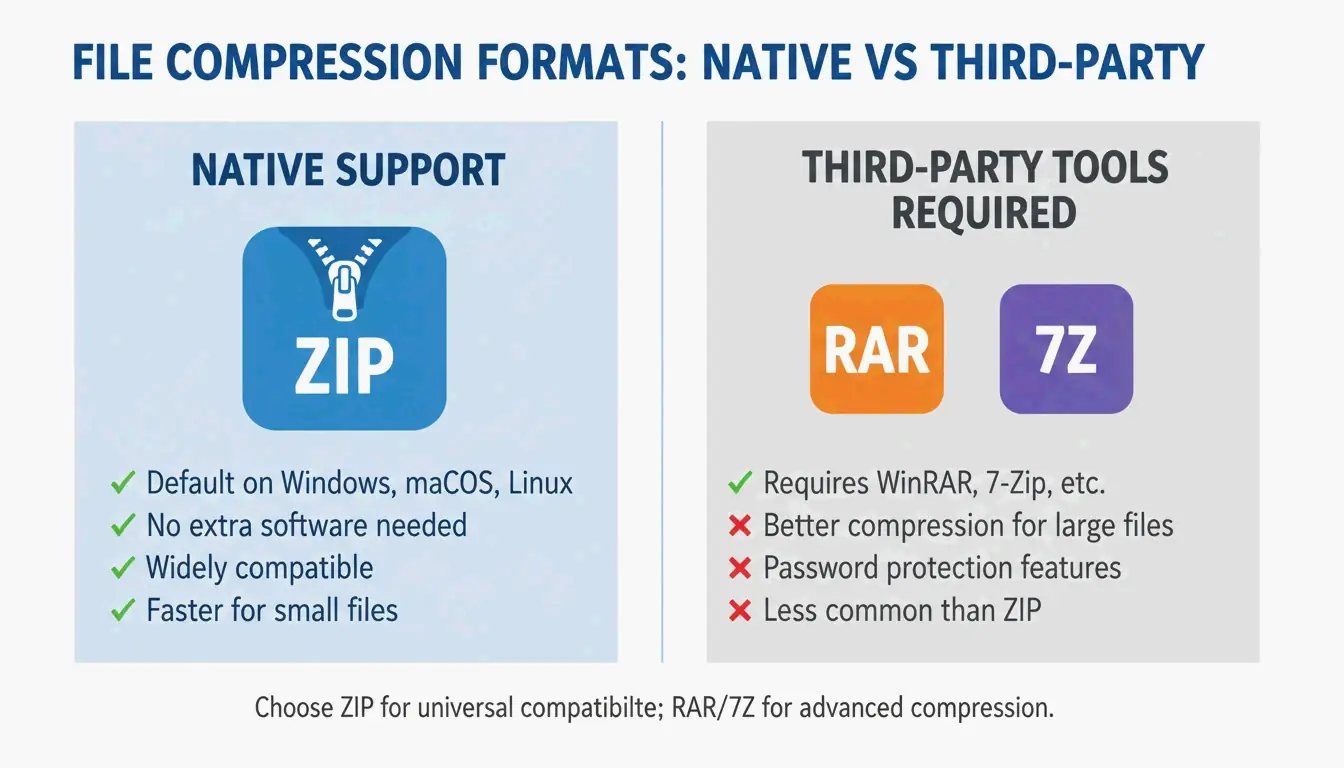
    To extract a ZIP file on Mac, double-click the file in Finder — macOS uses the built-in Archive Utility to decompress it instantly into the same folder. For more control, use the Terminal command unzip filename.zip. For non-native formats like RAR and 7z, install a third-party tool like Bandizip or use a browser-based extractor.

    Three Ways to Extract ZIP Files on Mac

    Method 1: Double-Click in Finder (Fastest)

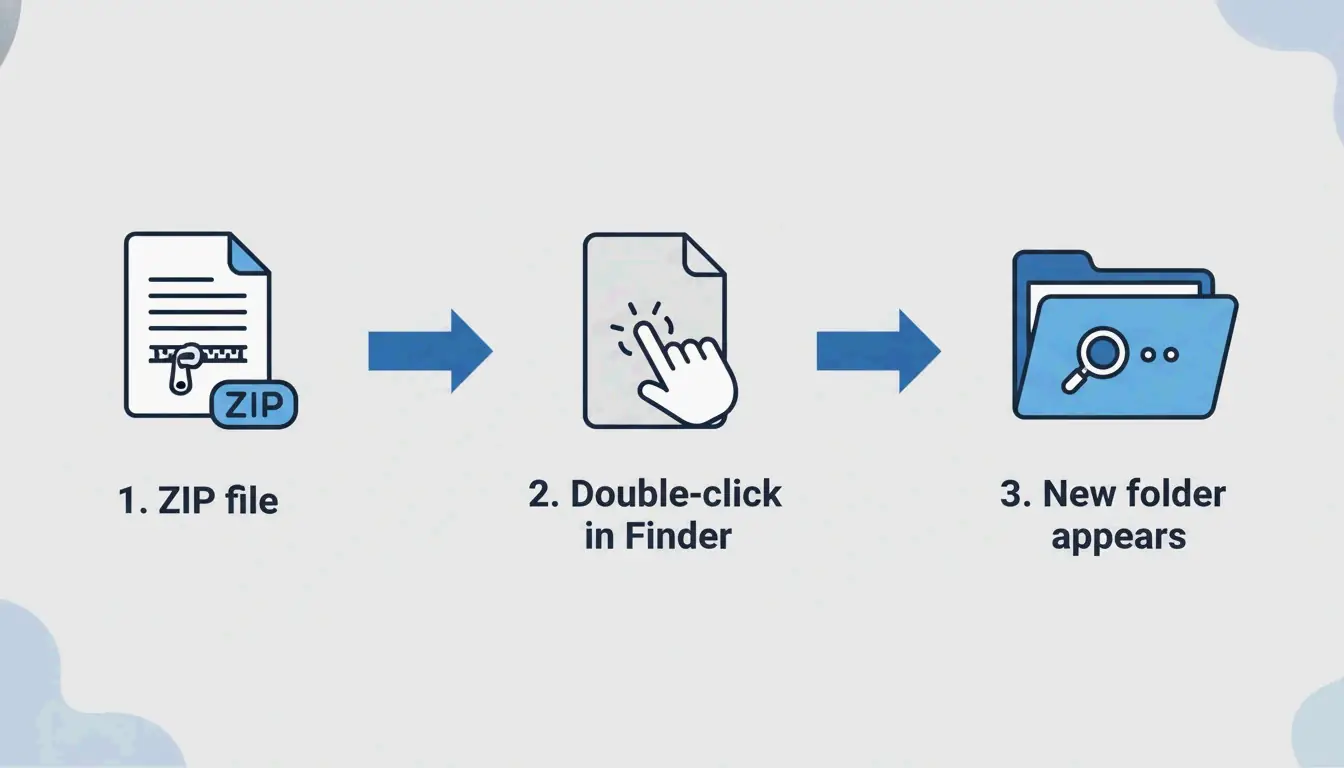
    macOS has native ZIP support — no extra apps needed. Double-click any ZIP file in Finder, and Archive Utility runs in the background, creating a new folder with the extracted contents in the same location.

    This works on all modern macOS versions (Sonoma and later) and across all Apple Silicon hardware (M1, M2, M3, M4).

    Simple 3-step visualization of the double-click process

    Method 2: Terminal Commands (For Power Users)

    When Finder shows “Decompression Failed” or “Error 1” permission issues, Terminal is more reliable:

    
    unzip filename.zip
    
    # Extract to a specific folder
    unzip filename.zip -d ~/Desktop/extracted/
    
    # View contents without extracting
    unzip -l filename.zip
    
    # Extract password-protected ZIP
    unzip -P yourpassword filename.zip
    

    Expert Olga Weis recommends moving developer packages into a clean folder before unpacking: “This keeps extracted files from cluttering your Downloads folder.”

    Method 3: Right-Click with Third-Party Tools

    For formats beyond ZIP (RAR, 7z, TAR, GZIP), the built-in Archive Utility cannot help. Third-party apps add right-click extraction:

    Tool Formats Supported Key Feature Price
    Bandizip 40+ (RAR5, ZIPX, 7z) Multi-core processing for large files Free
    iBoysoft MagicMenu ZIP, RAR, 7z Right-click Finder integration Paid
    ZIP Extractor ZIP, RAR, 7z Browser-based, works in Google Drive Free (300M+ users)

    Comparison between Native support vs. Third-party needs

    Format Support: What Mac Can and Cannot Open Natively

    Format Finder (Native) Terminal Third-Party Needed?
    ZIP Yes unzip No
    TAR No tar -xf No
    GZIP (.gz) No gunzip No
    RAR No No Yes
    7z No No (without p7zip) Yes
    ZIPX No No Yes

    Safari Auto-Open: Convenience vs. Security

    Safari can automatically unzip downloads: Safari → Settings → General → “Open ‘safe’ files after downloading.”

    Recommendation: Keep this disabled. Auto-opening ZIP files can execute unknown scripts without your knowledge. Manually check downloaded files before extracting.

    Troubleshooting: “Unable to Expand ZIP” Errors

    Error Cause Fix
    “Decompression Failed” Corrupted download Re-download the file
    “Error 1” (permission) Protected folder or shared drive Move ZIP to Desktop or Documents
    “No space left on device” Insufficient disk space Free up storage; extracted files are larger than the ZIP
    “Unable to expand” (encrypted) Password-protected archive Use Terminal: unzip -P password filename.zip

    Always verify disk space before extracting large archives — uncompressed files can be significantly larger than the ZIP.

    Conclusion

    Double-clicking in Finder handles 95% of ZIP extraction needs on Mac. For errors and advanced control, use Terminal unzip commands. For RAR, 7z, and other non-native formats, install Bandizip or use ZIP Extractor in your browser. Keep Safari’s auto-open disabled for security, and always extract to a dedicated folder to stay organized.

    FAQ

    Where is the ‘Unzip’ app on a Mac?

    There is no standalone app. Archive Utility runs automatically when you double-click a ZIP file. You can also right-click → “Open With → Archive Utility.”

    How do I automatically unzip Safari downloads?

    Go to Safari → Settings → General and check “Open ‘safe’ files after downloading.” This auto-decompresses ZIP files. Disable this for better security if you download from untrusted sources.

    How do I extract a password-protected ZIP on Mac?

    Double-clicking usually shows a password prompt. If it does not, use Terminal: unzip -P yourpassword filename.zip. Replace yourpassword with the actual password and filename.zip with your file name.