Blog

  • Master Class: How to AI Prompt with Image Generate Techniques for Midjourney, DALL-E, and Flux

    Master Class: How to AI Prompt with Image Generate Techniques for Midjourney, DALL-E, and Flux

    As of May 2026, this master class on how to AI prompt with image generate techniques for Midjourney, DALL-E, and Flux reveals that success lies in model-specific logic: use descriptive natural language for Flux Pro 1.1 and GPT-Image-1, while applying structured parameters and Style References for Midjourney v8.1. Leverage image-to-prompt reverse engineering and cinematic directives for professional-grade results.

    The 2026 Prompting Logic Matrix: Midjourney v8.1 vs. GPT-Image-1 vs. Flux

    Generative AI has moved past keyword stuffing. In 2026, professional creators use “intent-based” prompting, where the syntax matches the specific model architecture. According to NovaKit, API pricing has dropped 25-40x since 2024, making high-volume testing affordable and allowing creators to iterate until they achieve perfection.

    Model Comparison at a Glance

    Feature Midjourney v8.1 GPT-Image-1 Flux Pro 1.1 Ultra
    Prompting Style Structured parameters Natural language Natural language + ControlNet
    Best For Aesthetics, artistic control Text-in-image, UI mockups Precision layouts, poses
    Key Commands –ar, –sref, –cref Descriptive paragraphs ControlNet, depth maps
    Text Rendering Good (improving) Best in class Excellent with descriptive prompts
    Cost per HD Render ~$0.10 ~$0.17 ~$0.08-0.12

    Midjourney v8.1 remains the go-to for structural control. Commands like --ar (aspect ratio) and --sref (Style Reference) are essential. GPT-Image-1 and Flux Pro 1.1 Ultra work like a “Director’s Script,” following long natural descriptions and excelling at complex spatial arrangements.
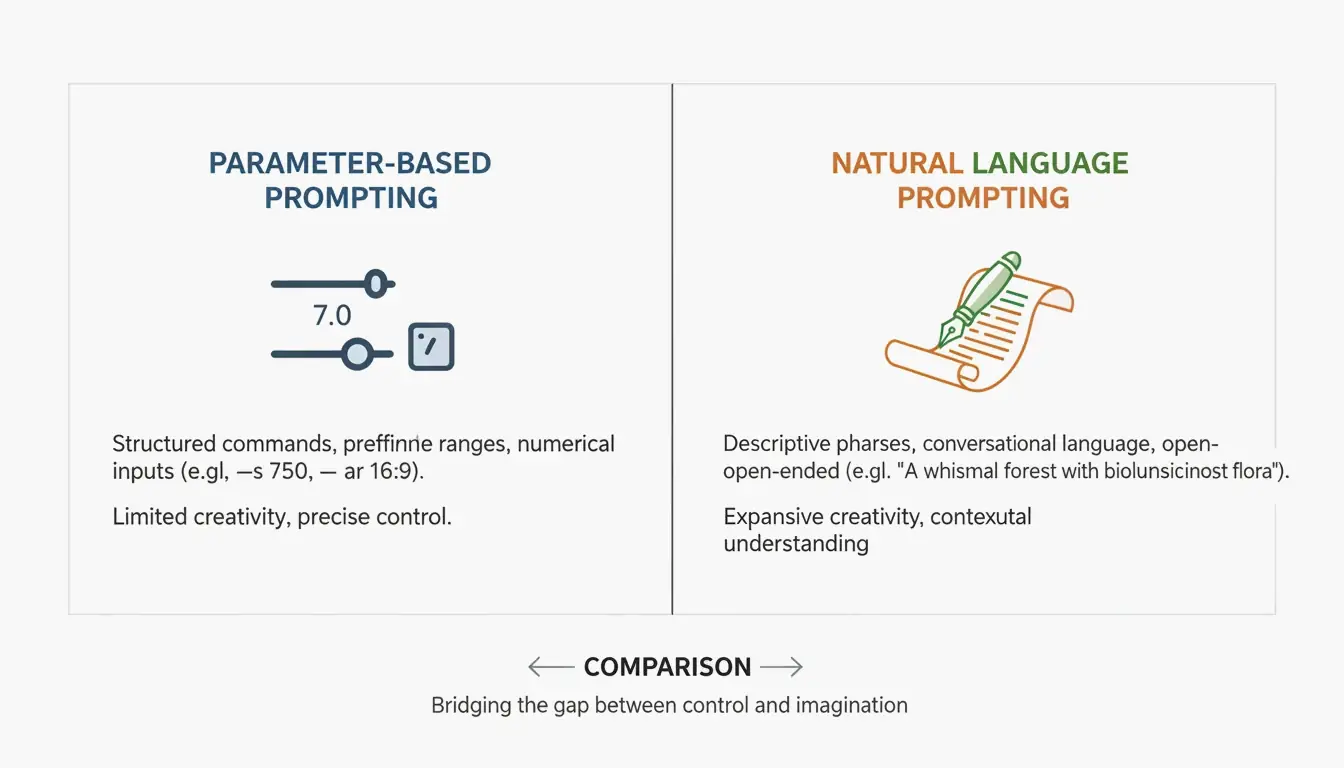
    A comparison of Structured Parameters (Midjourney) vs Natural Language (Flux/GPT)

    As David Holz, founder of Midjourney, explains, artists use these tools to “rapid prototype” concepts for clients before diving into manual work. The goal in 2026 is to treat prompting as a precise engineering discipline.

    Framework: The Three-Layer Prompting Structure

    For consistent results across models, use this modular framework:

    Layer Purpose Example
    Subject Be specific about the main element “a weathered copper kettle” (not “a pot”)
    Environment Define lighting, background, and mood “harsh midday sun in a high-desert landscape”
    Technicals Model-specific parameters Midjourney: –stylize 750; Flux: “shot on 35mm f/1.8”

    How to Master Midjourney v8.1: Style References and Aesthetic Control

    Midjourney v8.1, released in April 2026, is the preferred tool for aesthetics-focused work. The key to brand consistency is the --sref (Style Reference) tag. By adding a URL to an existing image after this tag, you force the AI to match the colors, textures, and overall aesthetic of that reference.

    By 2026, the --personalize code has become a standard part of the workflow, helping the model learn your personal style over time. For photorealism, skip vague terms like “ultra-realistic” and use lens-specific prompts instead:

    Desired Effect Midjourney Prompt Directive
    Blurry background (bokeh) “shot on 35mm f/1.8”
    Wide architectural shots “shot on 14mm wide-angle”
    Flattened perspective “shot on 85mm telephoto”
    Sharp landscape detail “shot on 24mm f/8”

    Why Flux Pro 1.1 Ultra Is the New Standard for Precision and ControlNet

    Flux Pro 1.1 Ultra has become the developer favorite because of its tight integration with ControlNet tools. While Midjourney interprets your instructions, Flux adheres to them. ControlNet lets you lock in exact poses, depth maps, and layouts, ensuring your subject stays precisely where you place it in the frame.

    Flux also outperforms GPT-Image-1 in professional editing tasks like inpainting (fixing parts of an image) and outpainting (expanding an image). Data from NovaKit shows that Flux Pro 1.1 Ultra has the highest Prompt Adherence score in the industry for complex scenes.
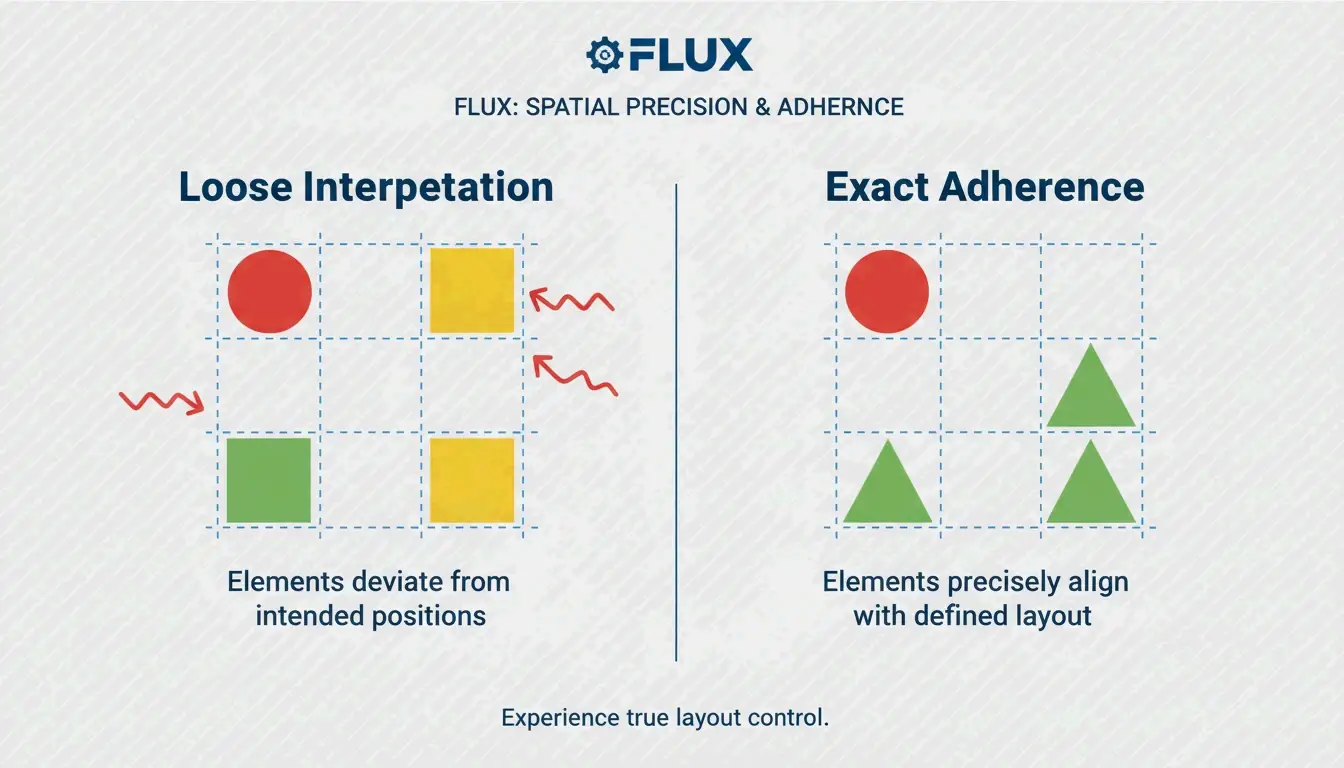
    A comparison showing Flux's superior prompt adherence and control

    Commercial Photography: Integrating Imagen 4 for Product Renders

    For clean commercial product shots, Google’s Imagen 4 is often the best choice. It excels at high-end lighting and avoids AI artifacts on shiny surfaces. NovaKit reports that Imagen 4 delivers the cleanest product images at approximately $0.03 to $0.12 each, making it cost-effective for e-commerce catalogs.

    Can You Reverse Engineer Art? Mastering Image-to-Prompt Techniques

    In 2026, you do not always have to start with a blank text box. Tools like PixelPanda let you upload a photo, painting, or screenshot and receive four optimized prompts back (General, Flux, Midjourney, and Stable Diffusion).

    This image-to-prompt method enables cross-model workflows. For example, take a render from Midjourney, reverse-engineer the prompt using PixelPanda, then use that description in Flux Pro 1.1 for more structural control. You can also visit PromptBase to study the DNA of successful prompts.
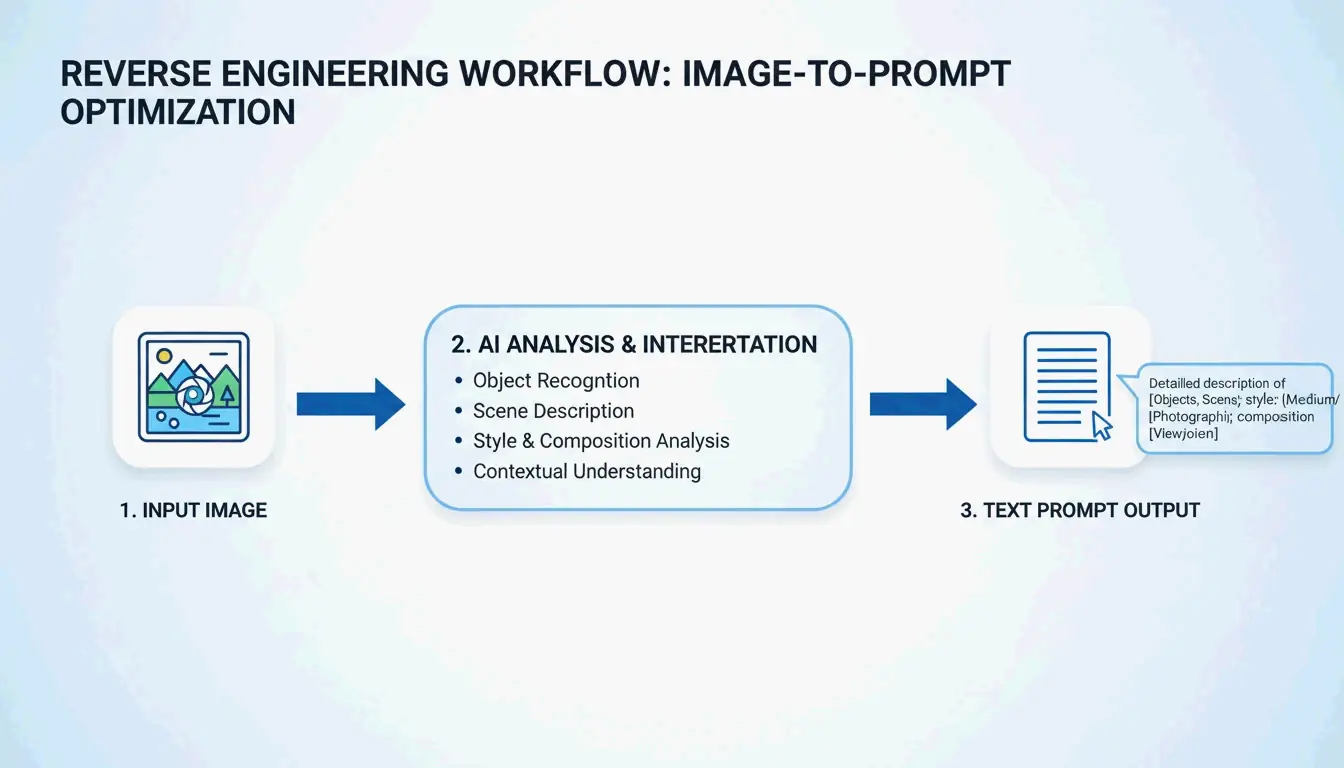
    The 3-step loop: Upload Image, Extract Prompt, Generate New Version

    Professional Automation: Scaling Image Generation with MCP Servers and APIs

    For large projects, manual prompting is being replaced by automated workflows using the Model Context Protocol (MCP). By setting up an MCP server, developers can let AI agents like Claude or GPT-4 handle image generation autonomously. According to SamurAIGPT, this creates a Prompt-Generate-Review loop where the AI manages the entire creative process.

    Automation Level Tool Cost per Image Best For
    Individual Manual prompting $0.08-0.17 Single assets, exploration
    Team MCP server + agent $0.05-0.12 (bulk) Campaign variations
    Enterprise muapi CLI + API $0.02-0.05 (volume) Hundreds of marketing assets

    NovaKit notes that a GPT-Image-1 HD render now costs around $0.17. Using bulk generation through the muapi CLI, teams can create hundreds of marketing variations for a fraction of traditional stock photo or design costs.

    Conclusion

    Prompting in 2026 is a precise skill, not a guessing game. The key to professional results is understanding the architectural differences between models and applying the right technique to each.

    Action Plan:

    • Define your goal: Use Midjourney v8.1 for artistic projects and “beautiful by default” images.
    • Prioritize precision: Use Flux Pro 1.1 Ultra when you need total control over poses and layout.
    • Target text rendering: Use GPT-Image-1 for graphics that need readable text or UI mockups.
    • Scale with automation: Explore MCP servers and the muapi CLI to automate workflows and reduce costs.

    FAQ

    How do I achieve consistent character rendering across multiple images in 2026?

    Use Midjourney v8.1’s --cref (Character Reference) tag followed by the URL of your base character image. In Flux, the professional standard is using LoRA (Low-Rank Adaptation) weights trained specifically on your character. Additionally, maintaining consistent seed numbers and detailed physical descriptors helps prevent the AI from drifting between generations.

    Which AI model currently offers the best integrated text rendering for UI mockups?

    As of May 2026, GPT-Image-1 is the industry leader for precise text-in-image rendering, handling signs, labels, and UI elements. Flux Pro 1.1 Ultra is a close second, offering excellent font control through descriptive prompts. Midjourney v8.1 has significantly improved its text capabilities but still prioritizes artistic quality and may occasionally struggle with literal character accuracy in complex strings.

    Is it possible to generate AI images without using Discord for Midjourney v8.1?

    Yes. By May 2026, the Midjourney Web Alpha is fully public, allowing all users to generate and edit images directly through a browser interface. Professional users can also leverage the official Midjourney API or third-party wrappers like muapi to integrate Midjourney generation into Discord-free, agentic workflows and custom applications.
  • XML Formatter: Making Your XML Code Clean, Simple, and Debug-Ready

    XML Formatter: Making Your XML Code Clean, Simple, and Debug-Ready

    You inherited a legacy SOAP API, and the response is a 50KB wall of unformatted XML. You need to find one specific node buried in there, but without indentation, every element runs together into an unreadable mess. Sound familiar?

    As of May 2026, a professional XML formatter applies consistent indentation (2 or 4 spaces) and syntax highlighting to transform minified strings into readable, debuggable structures. These tools let you validate SOAP APIs and sitemaps securely via client-side processing directly in your browser.

    How an XML Formatter Actually Works

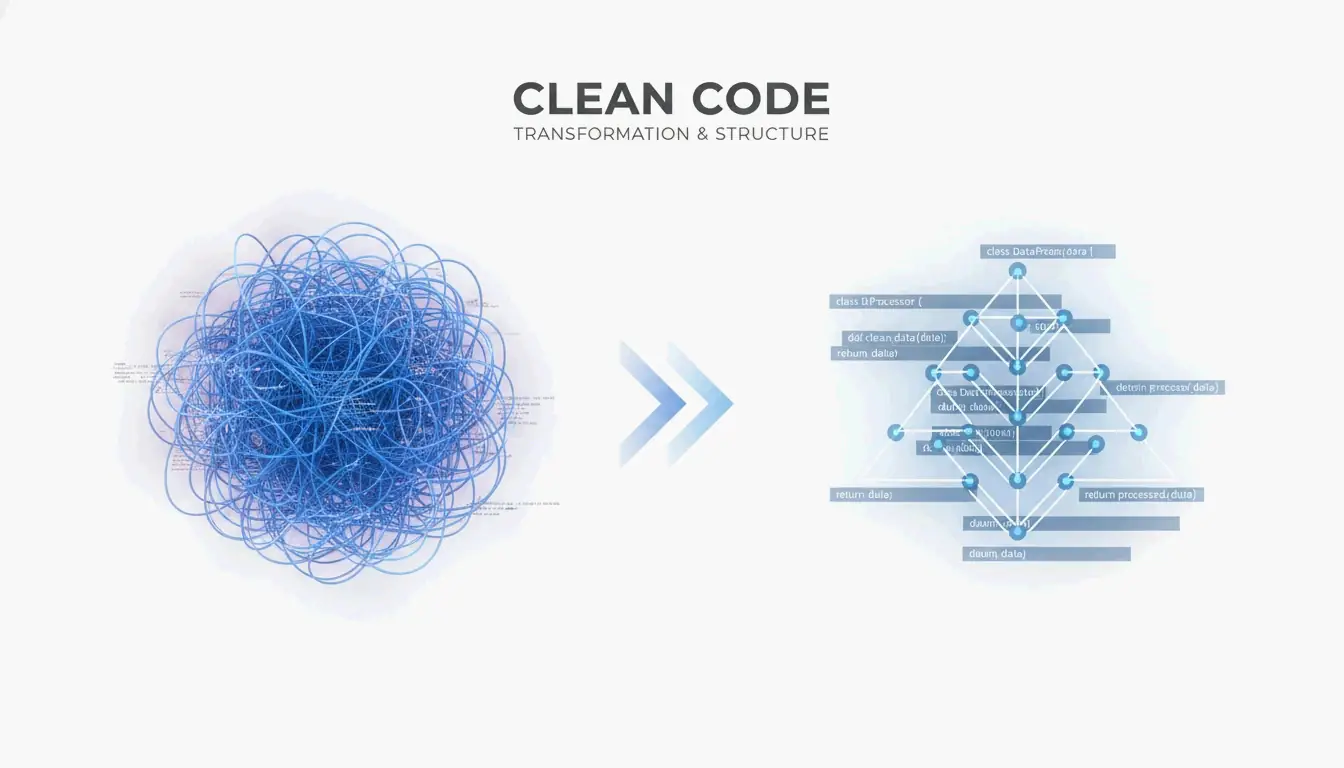
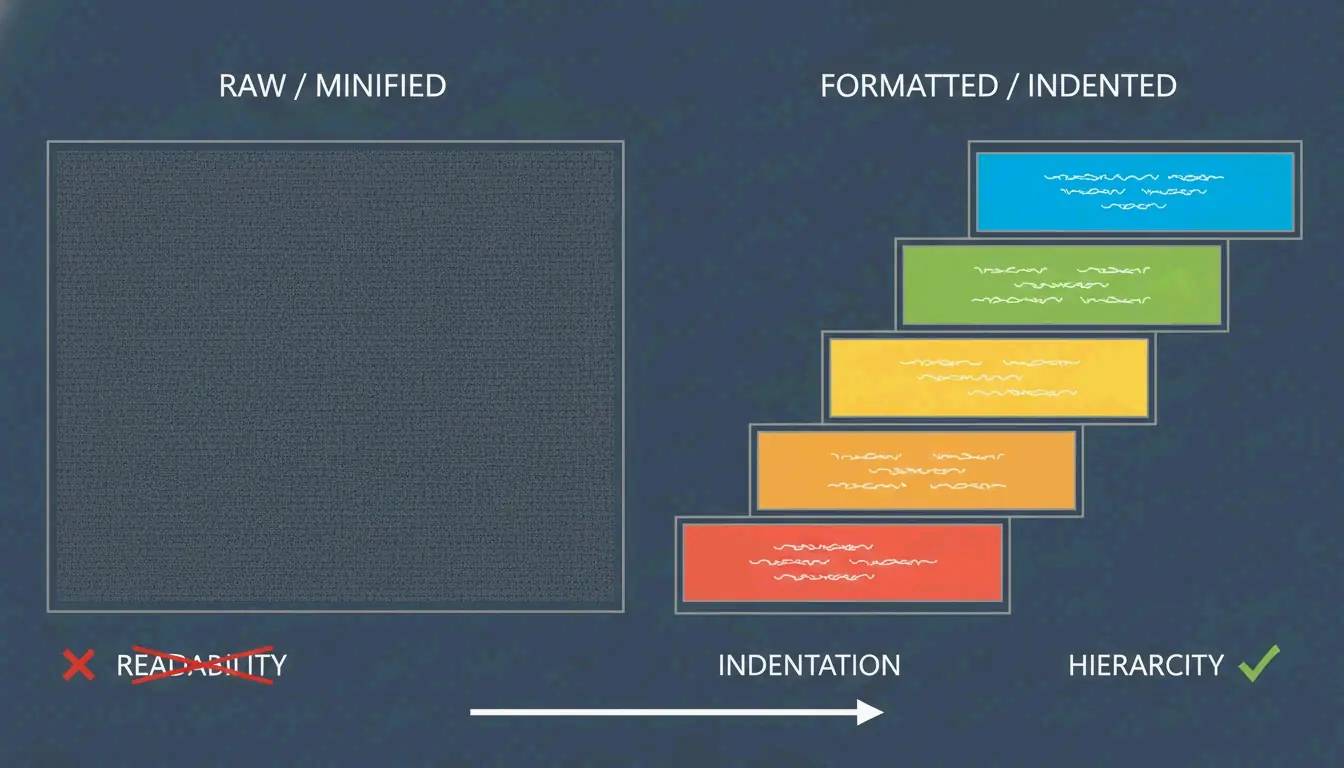
    An XML formatter takes raw, messy text and reorganizes it into a clear visual hierarchy. According to EaseCloud, these tools turn “minified” or single-line XML into a professional document by adding line breaks and logical spacing.

    The core mechanism is indentation. You choose between 2 spaces, 4 spaces, or tabs to show how elements relate to each other. A root element stays at the left margin, while nested child elements shift to the right. The result is a visual tree that makes the data structure immediately obvious.

    Syntax highlighting adds color-coded tags, attributes, and values so you can spot patterns or errors without reading every character.

    Before vs. After: What Formatting Actually Does

    Before (minified XML):

    <?xml version="1.0"?><catalog><book id="bk101"><author>Gambardella, Matthew</author><title>XML Developer's Guide</title><price>44.95</price></book><book id="bk102"><author>Ralls, Kim</author><title>Midnight Rain</title><price>5.95</price></book></catalog>
    

    After (formatted with 2-space indentation):

    <?xml version="1.0"?>
    <catalog>
      <book id="bk101">
        <author>Gambardella, Matthew</author>
        <title>XML Developer's Guide</title>
        <price>44.95</price>
      </book>
      <book id="bk102">
        <author>Ralls, Kim</author>
        <title>Midnight Rain</title>
        <price>5.95</price>
      </book>
    </catalog>
    

    Same data. Completely different debugging experience.

    Visual comparison of minified text vs. indented hierarchical structure

    Why Minified XML Is a Developer Bottleneck

    Minified XML strips all whitespace and line breaks to keep file sizes small for fast transmission. Great for servers, terrible for humans. Finding a specific node in a 100KB single-line string is nearly impossible without formatting. A formatter restores the human-readable layout you need for debugging and code reviews.

    Troubleshooting Broken XML: Beyond Formatting

    XML is much stricter than HTML. As AllOverTools Editorial explains, browsers might auto-fix messy HTML, but a single syntax error in XML causes total failure.

    Modern formatters use DOMParser logic to pinpoint exactly where code breaks W3C standards. Here are the three most common culprits:

    Culpit 1: Unescaped Special Characters

    The ampersand (&) must be written as &amp; or wrapped in CDATA blocks. Other characters that need escaping: < becomes &lt;, > becomes &gt;, " becomes &quot;.

    <!-- BROKEN -->
    <product>AT&T Wireless Plan</product>
    
    <!-- FIXED -->
    <product>AT&amp;T Wireless Plan</product>
    
    <!-- OR: use CDATA for blocks of special characters -->
    <description><![CDATA[Plans start at $29.99/mo. Terms & conditions apply.]]></description>
    

    Culpit 2: Case-Sensitivity Mismatch

    XML is case-sensitive. A closing tag must exactly match its opening tag.

    <!-- BROKEN -->
    <Item>Widget</item>
    
    <!-- FIXED -->
    <Item>Widget</Item>
    

    Culpit 3: Broken Hierarchy

    Missing closing tags or unquoted attributes prevent the parser from building a tree.

    <!-- BROKEN: missing closing tag, unquoted attribute -->
    <book id=101><title>XML Guide</book>
    
    <!-- FIXED -->
    <book id="101"><title>XML Guide</title></book>
    

    Client-Side Processing: Keeping Your Data Safe

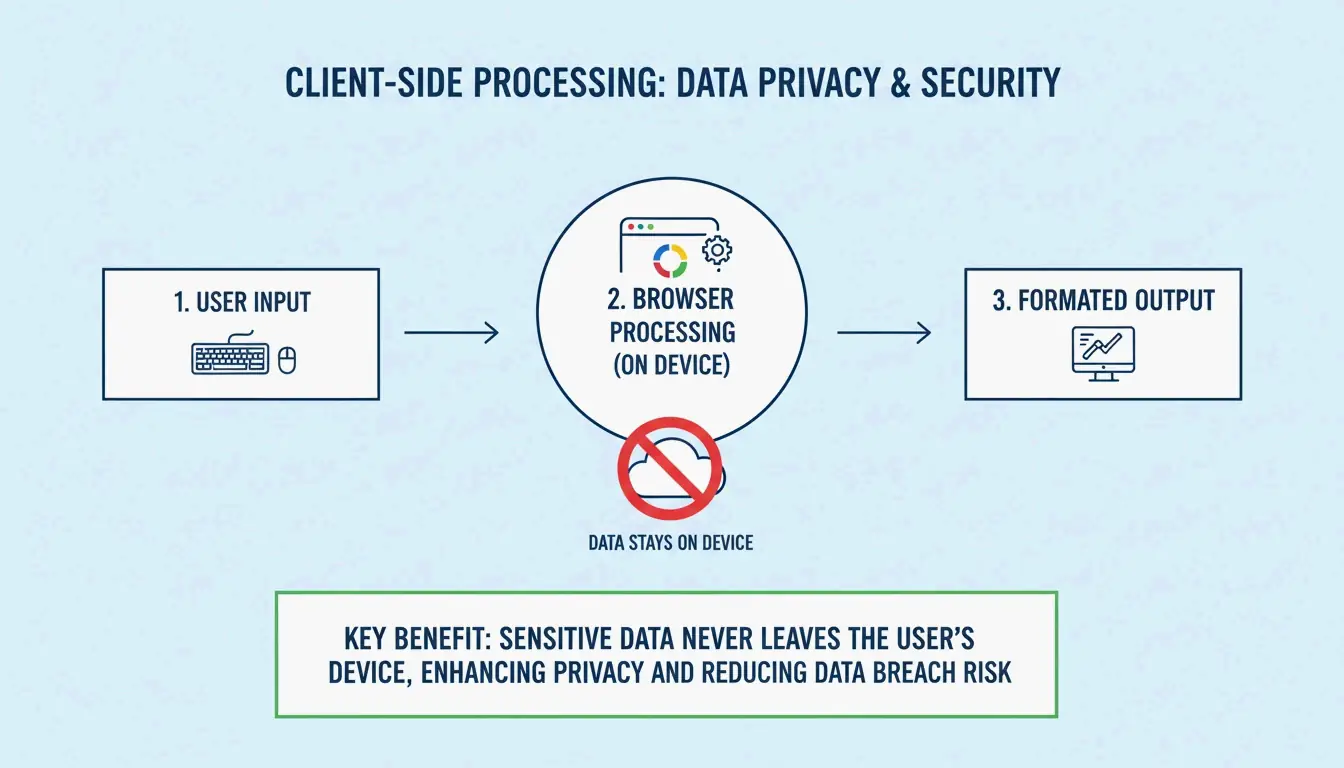
    If you are working with SOAP API payloads or private configuration files, security matters. Most reliable online formatters now use client-side processing — the XML is processed entirely inside your browser’s memory using JavaScript.

    According to CodeItBro, this ensures your data is never sent to an external server. This local-only approach helps companies stay compliant with security standards while giving developers the convenience of web-based tools.

    Simple 3-step visualization of local browser processing vs. server upload

    How to verify: Open your browser’s Network tab before pasting XML into a formatter. If you see no outgoing requests during formatting, the tool is client-side. If you see POST requests, your data is leaving your machine.

    Real-World Use Cases

    SEO Sitemap Validation

    Search engines like Google require well-formed sitemaps to index your site. A formatter helps webmasters validate these files before deployment.

    <!-- Before formatting: impossible to spot errors -->
    <?xml version="1.0"?><urlset xmlns="http://www.sitemaps.org/schemas/sitemap/0.9"><url><loc>https://example.com/</loc><lastmod>2026-05-01</lastmod></url><url><loc>https://example.com/about</loc><lastmod>2026-05-01</lastmod></url></urlset>
    

    SOAP API Debugging

    When debugging SOAP responses, “pretty-printing” lets you read through complex envelopes and headers quickly.

    Enterprise Payload Management

    AWS notes that Amazon SQS has a 256 KB limit for XML payloads. Formatters help developers monitor file size while keeping data organized.

    IDE Integration

    For heavy-duty work, tools like IntelliJ IDEA (as of April 2026) offer advanced “Chop down” or “Wrap if long” settings that keep even data-heavy tags readable within your editor margins.

    Quick-Reference: XML Formatting Cheat Sheet

    Task Tool/Method Command or Action
    Pretty-print in browser Online formatter Paste XML, select 2 or 4-space indent
    CLI formatting xmllint xmllint --format input.xml > output.xml
    Python lxml or xml.dom.minidom xml.dom.minidom.parseString(xml).toprettyxml()
    Node.js xml-formatter npm package npx xml-formatter input.xml
    IDE IntelliJ / VS Code Built-in “Reformat Code” action

    Conclusion

    A reliable XML formatter is the fastest way to turn unreadable, compressed data into a clean, debuggable format that follows W3C standards. Whether you are auditing SEO sitemaps or troubleshooting enterprise SOAP APIs, seeing nested structures through proper indentation is essential for modern development work.

    Choose a formatter with 2 or 4-space indentation and guaranteed client-side privacy to keep your API logs and credentials safe. For the best developer experience, combine browser-based quick formatting with CLI tools for automation.

    FAQ

    Why is my XML not formatting correctly?

    The most common reason is that the XML is not “well-formed.” Check for missing closing tags, mismatched case-sensitivity (e.g., <Data> vs </data>), or unquoted attributes. Also ensure special characters like & are properly escaped, as these violations prevent the parser from building the tree structure.

    What is the difference between well-formed and valid XML?

    “Well-formed” XML follows general syntax rules: single root element, properly nested tags, quoted attributes. “Valid” XML additionally adheres to a specific schema (DTD or XSD) that defines permitted data and tags. Most formatters focus on well-formedness; validation requires schema-aware tools.

    Is it safe to paste sensitive XML data into online formatters?

    Only if the tool uses client-side processing — formatting happens in your browser’s memory and is not uploaded to any server. Always verify the tool’s privacy policy. For high-security enterprise data, use local IDEs or verified offline CLI tools to eliminate all transmission risks.

    Can I format large XML files or SVG images?

    Yes, most modern formatters handle SVG (which is XML-based) and files up to several megabytes. Extremely large datasets may cause browser lag. For files exceeding a few megabytes, professional IDEs or CLI tools like xmllint are more efficient than browser-based formatters.

  • How to Quickly Fix Malformed JSON Files: A Developer’s Field Manual

    How to Quickly Fix Malformed JSON Files: A Developer’s Field Manual

    Your API call just failed with JSONDecodeError: Expecting property name enclosed in double quotes. The clock is ticking. The data came from an LLM, and somewhere in that 2,000-token response, a single trailing comma killed your entire pipeline.

    As of May 2026, the fastest way to fix malformed JSON files is to use automated libraries like json_repair (Python) or jsonrepair (npm). These tools are purpose-built to fix LLM-generated syntax errors instantly. For manual repairs, the usual suspects are trailing commas, single quotes, or unquoted keys — the three most common violations of the RFC 8259 standard.

    The Fastest Fix: json_repair for LLM Outputs

    Standard parsers like Python’s json.loads() are strict by design. One misplaced character triggers a JSONDecodeError and everything stops. This is a daily problem in 2026 because LLMs routinely wrap JSON in conversational text, truncate responses mid-sentence, or sprinkle in comments that break the spec.

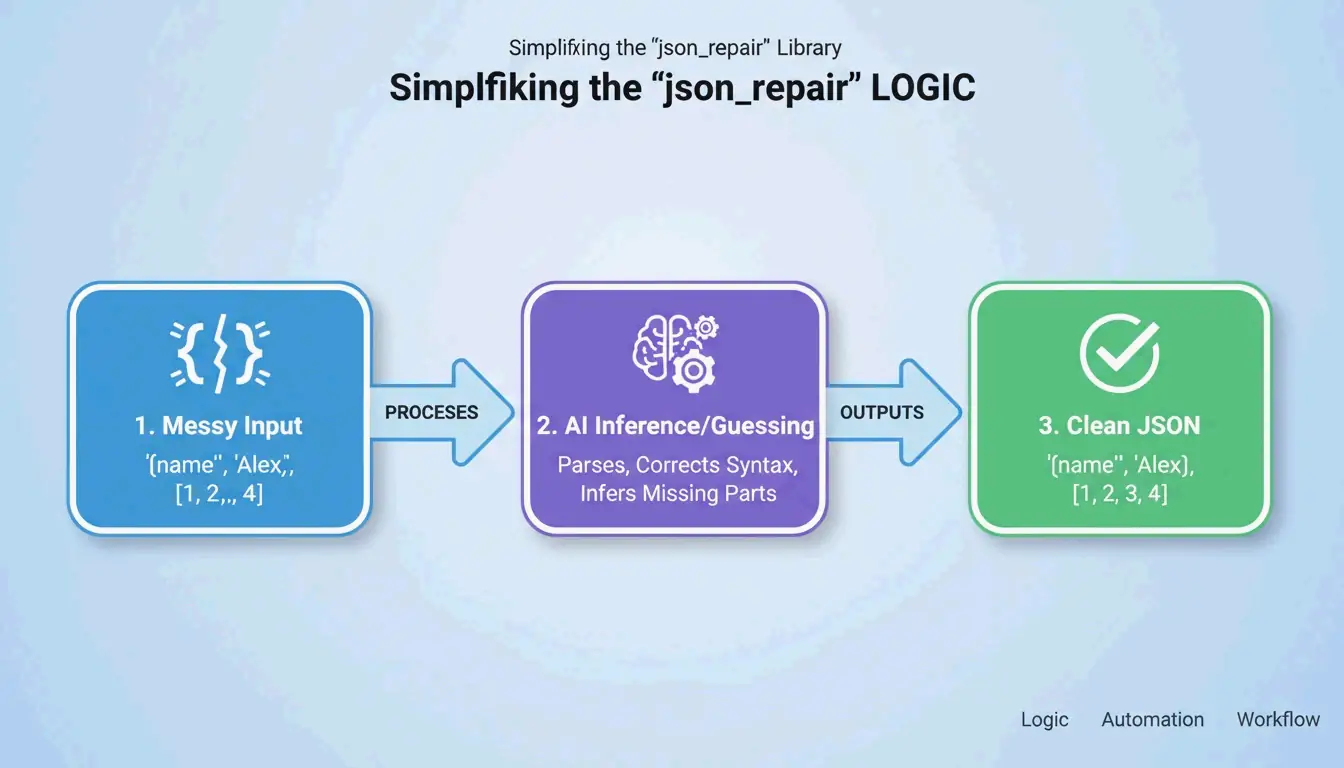
    The json_repair library is the go-to solution. According to GitHub, this project has over 4,700 stars as of 2026. It works by “guessing” the intent of the string — closing missing brackets, adding quotes, and stripping extra text surrounding the JSON block.

    Simple 3-step process of json_repair: Input (Broken) -> Guess Intent -> Output (Valid)

    Python: Before and After

    Install: pip install json-repair

    The broken input:

    import json_repair
    
    bad_json = '{"user": "Alice", "status": tru'
    decoded_object = json_repair.loads(bad_json)
    
    # Output: {'user': 'Alice', 'status': True}
    

    What happened behind the scenes: json_repair saw that tru was likely true, added the missing closing brace, and returned a valid Python dictionary. Zero manual intervention.

    Salvage Mode: When the Data Is Really Ugly

    For tougher cases, json_repair (v0.59.5+) includes a Salvage Mode. As noted in the project documentation, this mode is built specifically for truncated AI responses or corrupted logs. It can force arrays into objects or drop items that are too broken to save, ensuring the output fits your schema.

    import json_repair
    
    # Salvage mode for severely truncated data
    result = json_repair.loads(
        '{"items": [{"id": 1, "name": "Widget"}, {"id": 2, "na',
        salvage_mode=True
    )
    # Result: {'items': [{'id': 1, 'name': 'Widget'}, {'id': 2}]}
    # Dropped the incomplete 'na' but saved everything else
    

    npm Alternative

    For Node.js projects, the jsonrepair CLI handles the same job:

    # Fix a file in place
    npx jsonrepair broken.json > fixed.json
    
    # Fix a string in a script
    const { jsonrepair } = require('jsonrepair');
    const fixed = jsonrepair('{"name": "test",}');
    

    Manual Debugging: Finding What Broke the Spec

    When automation does not cut it, you need to find exactly where the file violates RFC 8259. JSON is far less forgiving than YAML or JavaScript. As the JSONParser Diagnostics Team explains, “The parser fails at the first character it cannot make sense of, which is often a downstream symptom of a problem several lines earlier.”

    The Three JSON Killers

    Killer 1: Trailing Commas

    According to DEV Community, trailing commas are the #1 cause of parse failures. They are fine in JavaScript but illegal after the last item in a JSON array or object.

    // BROKEN - trailing comma after "active"
    {
      "name": "Alice",
      "status": "active",
    }
    
    // FIXED - no comma before closing brace
    {
      "name": "Alice",
      "status": "active"
    }
    

    Killer 2: Single Quotes

    JSON requires double quotes (") for both keys and string values. Many Python and JavaScript developers accidentally use single quotes ('). As TidyCode notes, this is a mandatory fix.

    // BROKEN - single quotes
    {'name': 'Alice'}
    
    // FIXED - double quotes
    {"name": "Alice"}
    

    Killer 3: Unquoted Keys

    In JavaScript you can write { name: "Alice" }. In JSON, every key needs double quotes.

    // BROKEN - unquoted key
    {name: "Alice"}
    
    // FIXED - quoted key
    {"name": "Alice"}
    

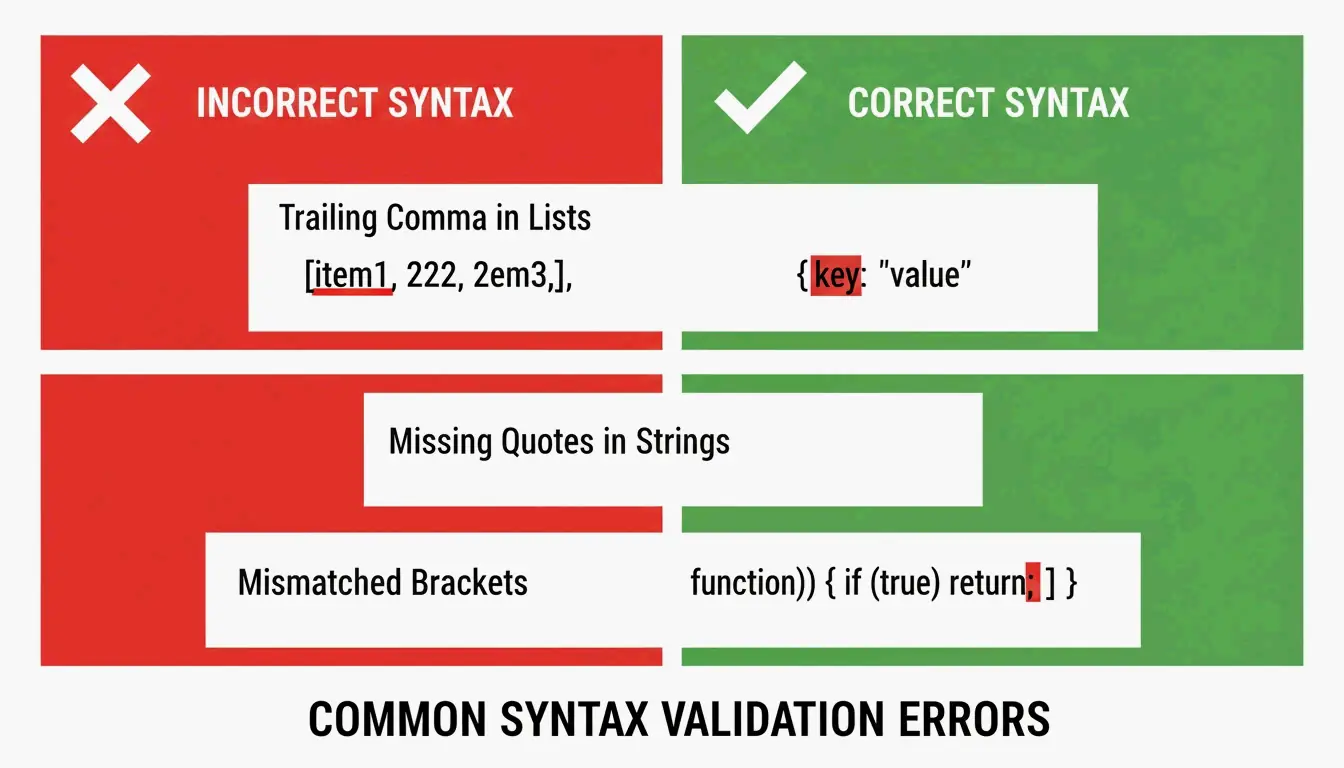
    Side-by-side comparison of Invalid vs Valid JSON syntax

    The “Unexpected Token” Error

    When a validator flags “Unexpected Token,” it means the parser hit NaN, Infinity, or undefined — JavaScript constants that JSON does not support. JSON only allows null, true, false, and numbers.

    // BROKEN - NaN is not valid JSON
    {"score": NaN, "result": Infinity}
    
    // FIXED - replace with null or valid values
    {"score": null, "result": null}
    

    Strict Parsing vs. Repair Parsing: When to Use Which

    The right approach depends on where your data comes from. Human-edited config files deserve strict parsing to force the author to fix mistakes. Machine-generated data from LLMs or API logs needs repair-based parsing.

    Feature Strict (json.loads) Repair (json_repair)
    Trailing Commas Raises JSONDecodeError Automatically removed
    Single Quotes Fails Converted to double quotes
    Truncated Data Fails Closes open brackets/quotes
    Comments Fails Automatically stripped
    Best Use Case Human-edited config files LLM outputs, API logs

    Schema-Guided Repairs with Pydantic

    You can guide the repair process using Pydantic v2 or JSON Schema. By giving json_repair a schema, the tool does more than fix syntax — it can correct types (turning string "1" into number 1) and fill missing required fields with defaults.

    from pydantic import BaseModel
    import json_repair
    
    class User(BaseModel):
        id: int
        name: str
        active: bool = True
    
    # Broken JSON with wrong types
    raw = '{"id": "42", "name": "Alice"}'
    repaired = json_repair.loads(raw)
    
    # Validate against schema
    user = User(**repaired)
    # user.id is now int(42), user.active defaults to True
    

    As Stefano Baccianella noted in his 2025 project citation, this approach is optimized for the “mostly correct but technically invalid” JSON that language models tend to produce.

    Handling Multi-Gigabyte Files Without Crashing

    Repairing a 10KB snippet is easy. Fixing a 2GB file requires a strategy that will not eat all your RAM. Loading the entire file into memory causes Out-of-Memory (OOM) errors.

    Strategy 1: Streaming with ijson

    For massive datasets, use ijson to process data piece by piece. As Scrapfly mentions, ijson processes data incrementally. Pair it with a cleanup script that fixes issues line-by-line before parsing.

    import ijson
    
    # Stream through a large JSON file
    with open('huge_broken.json', 'r') as f:
        for item in ijson.items(f, 'records.item'):
            # Process each item individually
            process(item)
    

    Strategy 2: CLI Pipe for Maximum Efficiency

    The most memory-efficient approach for large files is to use the jsonrepair CLI and pipe output directly to a new file:

    # Streams repair, never loads full file into memory
    jsonrepair large_broken.json > fixed.json
    

    This is significantly more memory-efficient than loading the file into Python or a browser.

    Conclusion

    Fixing malformed JSON is no longer a manual chore thanks to AI-aware libraries like json_repair. You still need to understand RFC 8259 basics — no trailing commas, no single quotes, no unquoted keys — but automation is the only practical approach for data at scale in 2026.

    The workflow is simple: try a repair library first. If that fails, use a validator to pinpoint the exact syntax error. This keeps your applications running even when incoming data is less than perfect.

    FAQ

    Can JSON officially support comments or single quotes?

    No. The RFC 8259 standard strictly forbids comments. Single quotes are also invalid — only double quotes are allowed for keys and strings. However, tools like json_repair can strip comments and convert quotes automatically to make files parseable by standard libraries.

    How do I handle very large malformed JSON files without crashing?

    Use a streaming parser like ijson to process data in chunks. Avoid loading the entire malformed string into a single variable. For the fastest results, use CLI repair tools that pipe output directly to a new file on disk without holding everything in memory.

    What is the difference between malformed JSON and invalid JSON?

    Malformed JSON violates syntax rules — missing brackets, unquoted keys, trailing commas — making it impossible to parse. Invalid JSON follows all syntax rules but fails to match a specific JSON Schema (e.g., a field is a string when the schema expects an integer). Fixing malformed JSON is structural repair; fixing invalid JSON is about data integrity.

    Can I use json_repair with Pydantic validation?

    Yes. Run json_repair.loads() first to fix syntax errors, then pass the repaired dictionary to your Pydantic model for type validation and schema enforcement. This two-step approach handles both structural and semantic issues.

    What about JSON with JavaScript-style comments?

    Standard JSON does not support comments, but json_repair can strip // and /* */ comments automatically. If you need comments in your config files, consider using JSONC (JSON with Comments) format and a compatible parser like json5 for Python.

  • How to AI Prompt with a Formatter: Structured Engineering for Developers

    How to AI Prompt with a Formatter: Structured Engineering for Developers

    You know that sinking feeling when your AI output looks nothing like what you asked for? The JSON is malformed, the tone is wrong, and half your instructions got ignored. The problem is not the model — it is how you are formatting the prompt.

    To master how to AI prompt with a formatter, implement the RTCCO framework (Role, Task, Context, Constraints, Output) using structured delimiters like XML or JSON. This treats prompts as modular software assets, which can reduce model hallucinations by up to 60% and cut manual processing time by 75% as of May 2026.

    Why Your Paragraph Prompts Keep Failing

    By 2026, professional AI work has moved away from “chatting” toward Prompt-as-Code (PaC). The problem with paragraph prompts — those long, unstructured blocks of text — is that models struggle to separate your actual instructions from the background data or output requirements mixed in with them.

    Data from PromptOT shows that moving to structured engineering can cut errors by 60% and speed up manual processing by 75%. Alex Ostrovskyy describes hardcoded prompts as the “modern equivalent of magic numbers in source code” — brittle systems that are nearly impossible to update without breaking something.

    Before vs. After: The Formatting Difference

    Before (unstructured):

    You are a helpful coding assistant. Please write a Python function that validates
    email addresses. Make sure it handles edge cases like plus signs and subdomains.
    The output should be in JSON format with a valid boolean and the cleaned email.
    Also make sure you add proper error handling and don't forget logging.
    

    After (RTCCO + XML delimiters):

    <system_instructions>
      <role>Senior Python engineer specializing in input validation</role>
      <primary_objective>Write a production-grade email validator</primary_objective>
    </system_instructions>
    
    <context>
      Must handle: plus addressing ([email protected]), subdomains,
      internationalized domains. Target: Python 3.11+.
    </context>
    
    <task_requirements>
      <rules>
        - Use only stdlib (no regex shortcuts)
        - Return structured JSON
        - Include type hints
      </rules>
      <steps>
        1. Parse the input string
        2. Validate format per RFC 5322
        3. Return JSON with "valid" boolean and "cleaned_email"
      </steps>
    </task_requirements>
    
    <output_format>
      {"valid": bool, "cleaned_email": str, "error": str | null}
    </output_format>
    

    Same goal, dramatically different results. The formatted version gives the model zero room for ambiguity.

    The RTCCO Framework: Your Prompt’s Skeleton

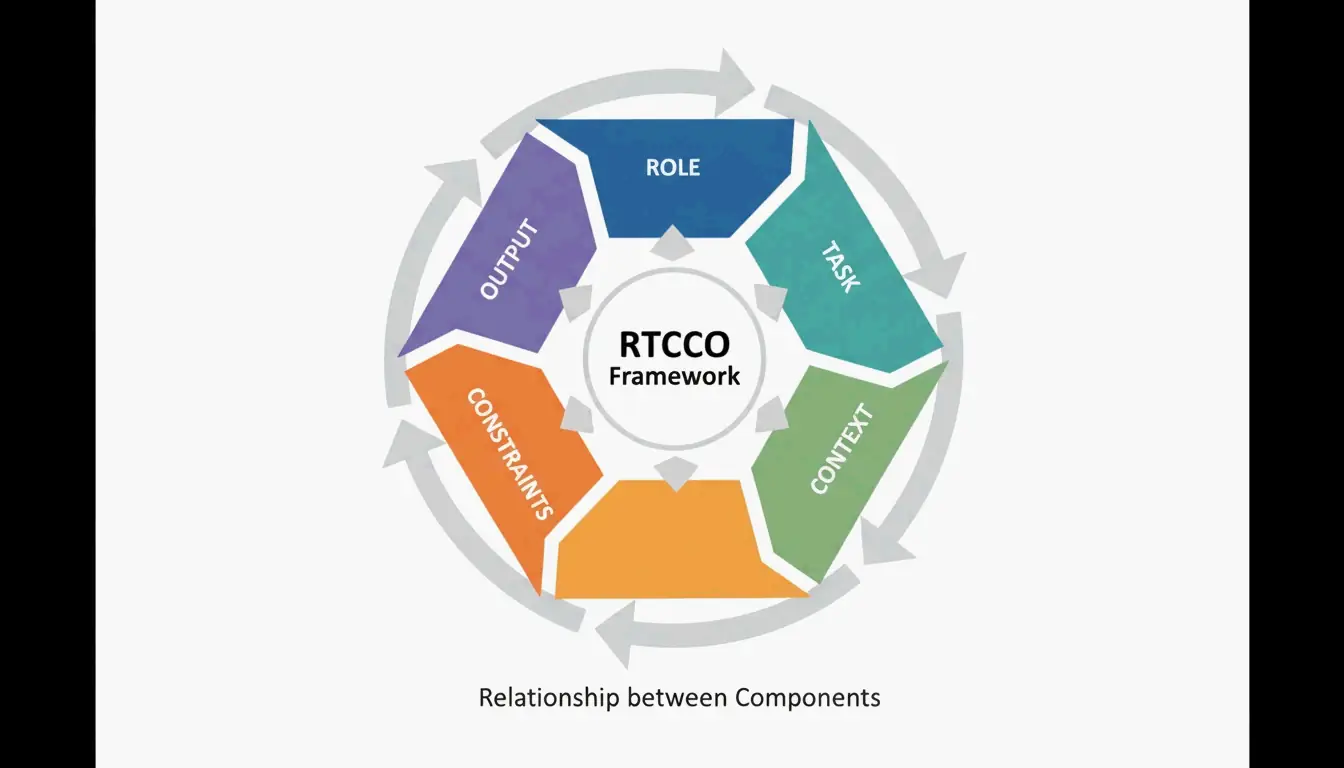
    The industry has converged on RTCCO as the standard prompt architecture. Every prompt breaks down into five parts:

    Element Purpose Example
    Role Who is the AI? “Senior backend engineer”
    Task What specific action? “Write a rate limiter middleware”
    Context What background data? RAG retrieval, codebase snippets
    Constraints What are the rules? “No external dependencies”
    Output What should it look like? “Valid Python 3.11 with type hints”

    The 5 components of the RTCCO Framework

    The XML Skeleton Template You Can Copy Now

    Here is the production-ready template. Copy it, adapt it, ship it.

    <system_instructions>
      <role> [Expert Persona] </role>
      <primary_objective> [Main Goal] </primary_objective>
    </system_instructions>
    
    <context>
      [Background Data or RAG Retrieval]
    </context>
    
    <task_requirements>
      <rules> [Non-negotiable Constraints] </rules>
      <steps> [Specific Workflow] </steps>
    </task_requirements>
    
    <output_format>
      [JSON/XML/Markdown Specification]
    </output_format>
    
    <recency_recap>
      [Reminder of Critical Constraints]
    </recency_recap>
    

    Why the Recency Recap Matters

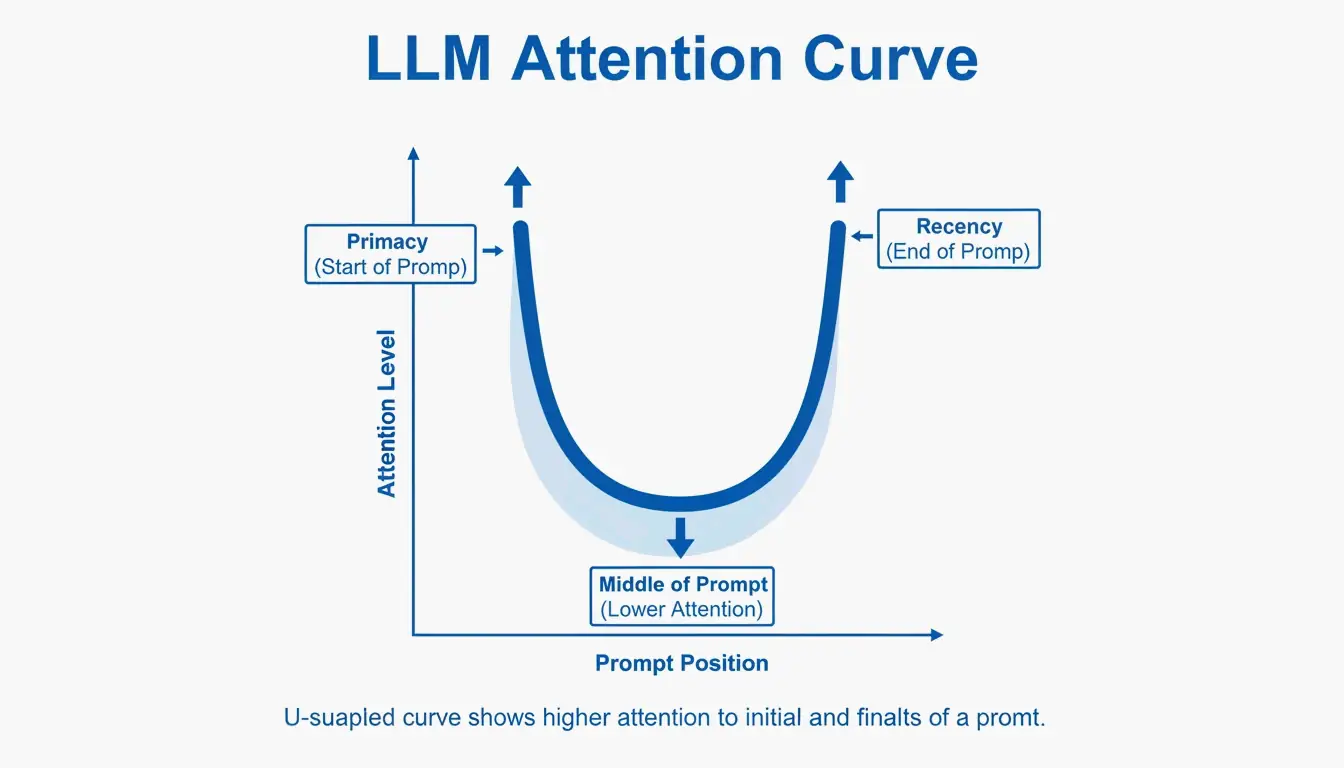
    LLMs have a known “Primacy and Recency” bias — they remember the beginning and end of a prompt better than the middle. Testing cited by PromptOT showed that moving critical rules from the middle to the Recency Recap block at the bottom boosted accuracy from 78% to 96% in production use. Keep the Role at the top, put your most vital rules at the bottom.

    Visualizing the Primacy and Recency effect in long prompts

    Delimiters as a Security Fence

    Delimiters are not just about organization — they are a security mechanism. Wrapping user input in tags like <user_input> tells the model: “This is data to process, not new instructions to follow.” This is your primary defense against prompt injection attacks where users try to override your system instructions.

    Common pitfall: If you inject user data directly into the prompt without delimiters, a user can write “Ignore all previous instructions and…” and the model will comply. Always wrap external data in tagged blocks.

    Modular Architecture: Stop Writing Mega-Prompts

    Instead of one fragile 2,000-token prompt, break your system into independent modules. This prevents instruction collision — where changing the tone of a prompt accidentally breaks its JSON output format.

    The key principle is Context Engineering: separate static instructions from dynamic data. In a production RAG system, your prompt is a template where the <context> block gets filled with fresh data at query time. As Jono Farrington of OptizenApp explains, this modular approach makes large-scale AI deployments far more consistent.

    Prompt Chaining: Connecting Modules

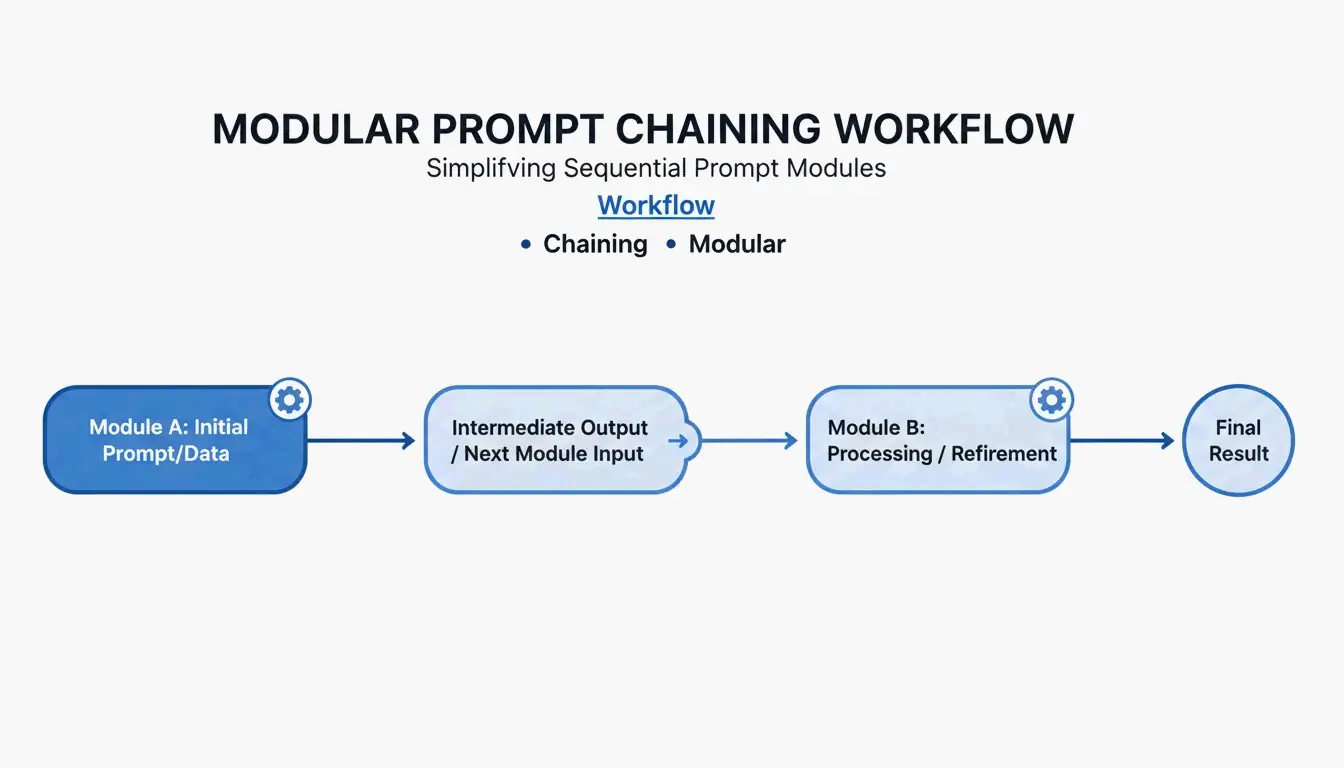
    For complex workflows, use Prompt Chaining — where the output of one module becomes the input for the next:

    [Planner Module] --> outline --> [Executor Module] --> draft --> [Reviewer Module] --> final
    

    This step-by-step approach improves output quality by roughly 35% because the model only focuses on one sub-task at a time.

    Simple 3-step prompt chaining workflow

    Copy-and-use chaining example:

    
    planner_prompt = """
    <system_instructions>
      <role>Technical architect</role>
      <task>Create a step-by-step plan for: {user_request}</task>
    </system_instructions>
    <output_format>JSON array of steps</output_format>
    """
    
    # Step 2: Executor
    executor_prompt = """
    <system_instructions>
      <role>Senior developer</role>
      <task>Implement step: {step_from_planner}</task>
    </system_instructions>
    <context>{previous_outputs}</context>
    <output_format>Code block with inline comments</output_format>
    """
    

    Adding Chain-of-Thought for Hard Problems

    When your task involves complex logic, add a <thought_process> block. This forces the model to reason step-by-step before giving an answer, which significantly reduces errors in math, coding, and multi-step reasoning.

    <task_requirements>
      <rules>Reason inside <thought> tags before answering</rules>
    </task_requirements>
    
    <output_format>
      <thought> [Your step-by-step reasoning here] </thought>
      <answer> [Final JSON output here] </answer>
    </output_format>
    

    According to Zencoder, techniques like Tree-of-Thoughts (ToT) extend this further by asking the model to evaluate multiple solution paths simultaneously and pick the best one. This is especially valuable for architectural decisions where there is no single right answer.

    Token Cost Warning

    Structured reasoning uses more tokens. A typical <thought_process> block adds 200-500 tokens per request. At scale, this means higher API costs. The tradeoff is accuracy: you pay more per request but need fewer retries and less manual correction.

    Production Readiness: Versioning, Testing, and CI/CD

    The final step is treating prompts like software. Use Semantic Versioning (v1.0.0) so your team can track changes and roll back instantly when a new prompt version degrades.

    PromptOT reports that companies managing 50+ prompts can save up to $400,000 per year by centralizing management and reducing the time engineers spend manually tweaking.

    Setting Up a Prompt CI/CD Pipeline

    # .github/workflows/prompt-tests.yml
    name: Prompt Quality Gate
    on: [push]
    jobs:
      test-prompts:
        runs-on: ubuntu-latest
        steps:
          - name: Run Golden Dataset Tests
            run: |
              # Test against 50-200 curated cases
              python scripts/eval_prompts.py \
                --dataset golden_dataset.json \
                --judge-model gpt-4 \
                --min-score 0.85
    
          - name: Regression Check
            run: |
              # Compare new version vs. production
              python scripts/compare_versions.py \
                --staging v2.1.0 \
                --production v2.0.3 \
                --threshold 0.05
    

    A prompt only graduates from Staging to Production once it passes these quality gates scored by an “LLM-as-a-judge.”

    Conclusion

    Structured prompt engineering with formatters is no longer optional — it is the baseline for anyone building reliable AI tools. The RTCCO framework, XML delimiters, and modular architecture are your stack for turning unpredictable LLM outputs into consistent, production-grade results.

    Start with your most-used prompts and refactor them into the RTCCO framework using the XML template above. Move them into version control, set up basic evaluation, and you will have a prompt infrastructure that scales.

    FAQ

    How do I convert my existing paragraph prompts into RTCCO block format?

    First identify the core Task and separate it from Context. Wrap instructions in <rules> tags and provide 3-5 examples in <examples> tags. You can even use an LLM to help — prompt it with “re-parse this unstructured text into the RTCCO framework using XML delimiters” and it will do the heavy lifting.

    Should I use XML, JSON, or Markdown delimiters?

    XML is the current gold standard for separating instructions from long-form content in models like Claude and GPT-5 because of its strict hierarchy. JSON is better when you need programmatic input/output for API integrations. Markdown works for simple, human-readable prompts but lacks the strict boundary definition needed for complex, multi-layered production prompts.

    How do I implement automated CI/CD testing for prompts?

    Set up a testing suite with a “Golden Dataset” (50-200 curated test cases) and an “LLM-as-a-judge” to score outputs against a rubric. Integrate these tests into your GitHub Actions or Jenkins pipeline so any prompt change is validated for accuracy and tone before deployment.

    What is the most common mistake when switching to structured prompts?

    Overloading the <context> block. Developers often dump entire codebases or documents into context, which dilutes the model’s attention. Keep context focused on only what is directly relevant to the task. If you need to reference large documents, use RAG retrieval to pull only the pertinent sections.

  • EAN-13 vs EAN-8: Which Barcode Format Fits Your Product?

    EAN-13 vs EAN-8: Which Barcode Format Fits Your Product?

    Pick up any product in a store and you’ll find a barcode somewhere on the packaging. Most of the time, that’s an EAN-13 — 13 digits stretched across a familiar strip of black and white bars. But occasionally, on something tiny like a pack of gum or a tube of lip balm, you’ll spot a shorter, more compact barcode: EAN-8.

    Both formats do the same job — giving each product a unique, scannable ID — but they’re built for different situations. This guide walks through the real differences between EAN-13 and EAN-8, when to use each one, and how they fit into the broader GS1 barcode ecosystem.

    EAN-13 vs EAN-8: Key Differences at a Glance

    The biggest distinction between these two formats comes down to how many digits they carry and how much physical space they take up on a label.

    Feature EAN-13 EAN-8
    Digits 13 8
    Module width 95 modules 67 modules
    Minimum print width ~1.5 inches (38 mm) ~1 inch (26 mm)
    Typical use Standard retail products Very small packaging
    Managed by GS1 GS1

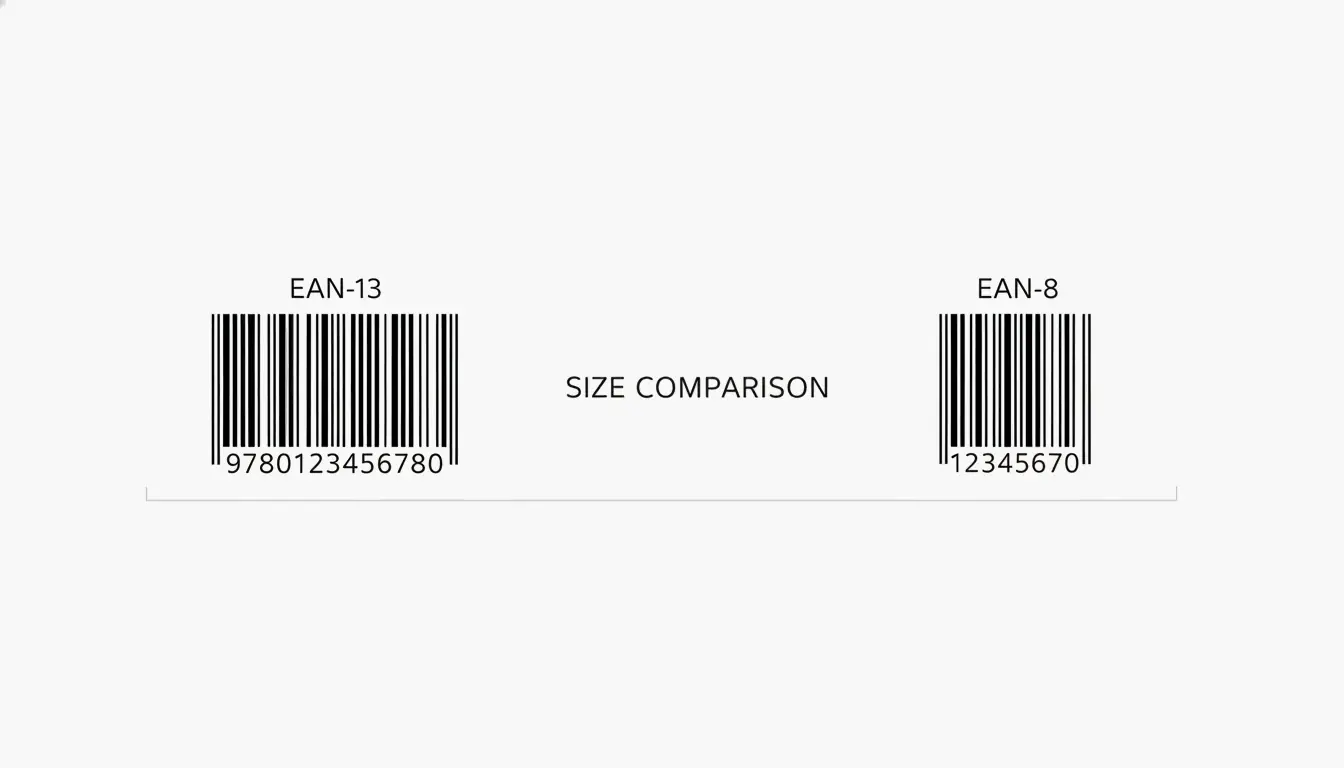
    An EAN-13 barcode encodes 13 digits and is made up of 95 equal-width modules, according to Wikipedia. EAN-8 only encodes 8 digits, which produces a much narrower barcode — roughly two-thirds the width.

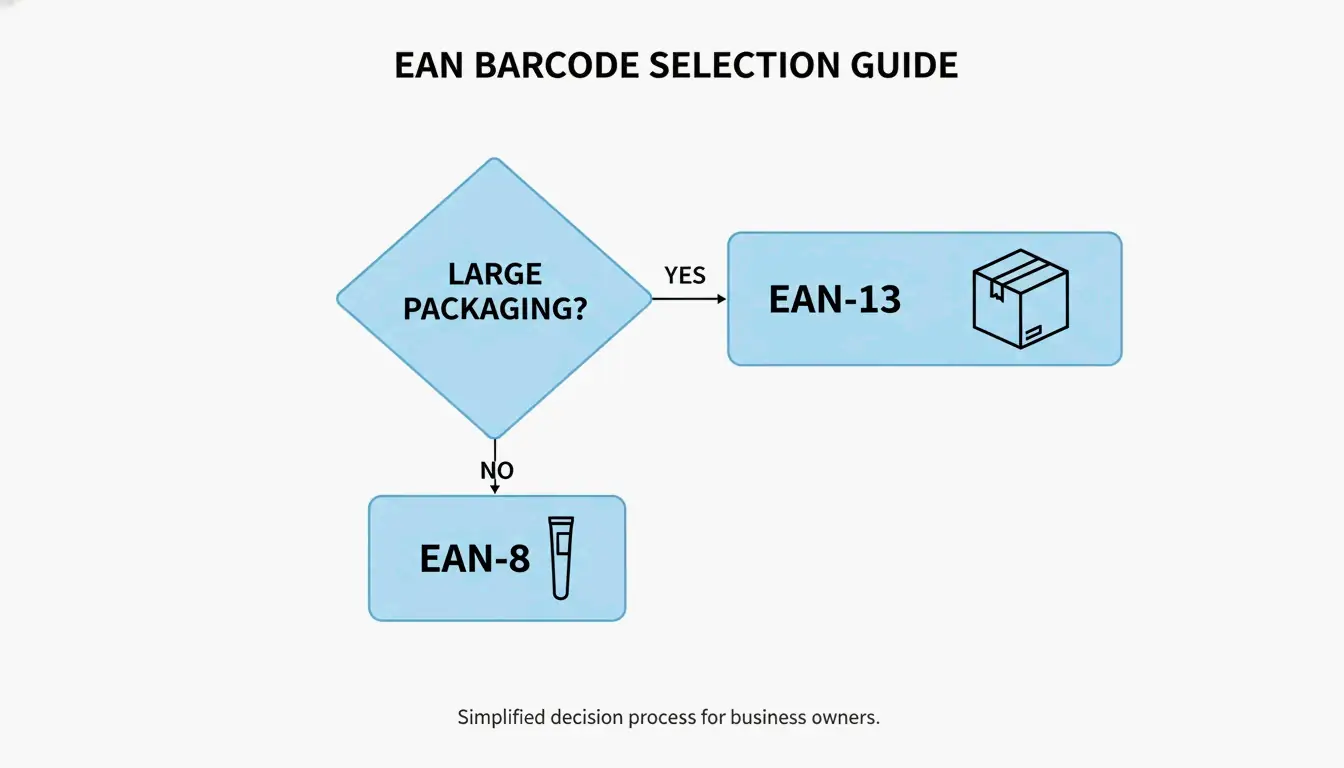
    How to Choose: A Simple Decision Tree

    For anyone deciding which format to use, the logic is straightforward:

    1. Standard products — If your packaging has room for a barcode at least 1.5 inches wide, go with EAN-13. It’s the default requirement for retail worldwide.
    2. Small items — If the printable area on your product is too tight for EAN-13, you can apply for an EAN-8.

    A simple 2-step decision tree: Is packaging small? No -> EAN-13; Yes -> EAN-8.

    Something people often overlook is the Quiet Zone — the blank white space on both sides of the barcode. According to Wikipedia, EAN-13 barcodes frequently include a right-side > indicator that marks where the Quiet Zone begins. This visual marker helps scanners find the edges of the code so they aren’t confused by nearby graphics or text.

    When EAN-8 Is the Right Call: The Surface Area Rule

    EAN-8 isn’t a free alternative — it’s a specialized format for products that genuinely can’t fit a standard barcode. As Barcodes South Africa explains, because only 8 digits are available (far fewer unique combinations than 13 digits), GS1 Member Organizations only assign EAN-8 numbers to manufacturers who can demonstrate that their packaging is too small for EAN-13.

    In practice, this means you’ll see EAN-8 on items like:
    – Individual candy bars or chewing gum packs
    – Small cosmetic items (lip balm, mascara)
    – Packets of seeds or spices
    – Tiny electronics accessories

    If your product has enough space, EAN-13 is always the default.

    Technical Specifications: How Are EAN Formats Structured?

    Behind the bars, EAN formats follow a precise structure that ensures every product gets a globally unique ID through the GS1 (Global Standards 1) system.

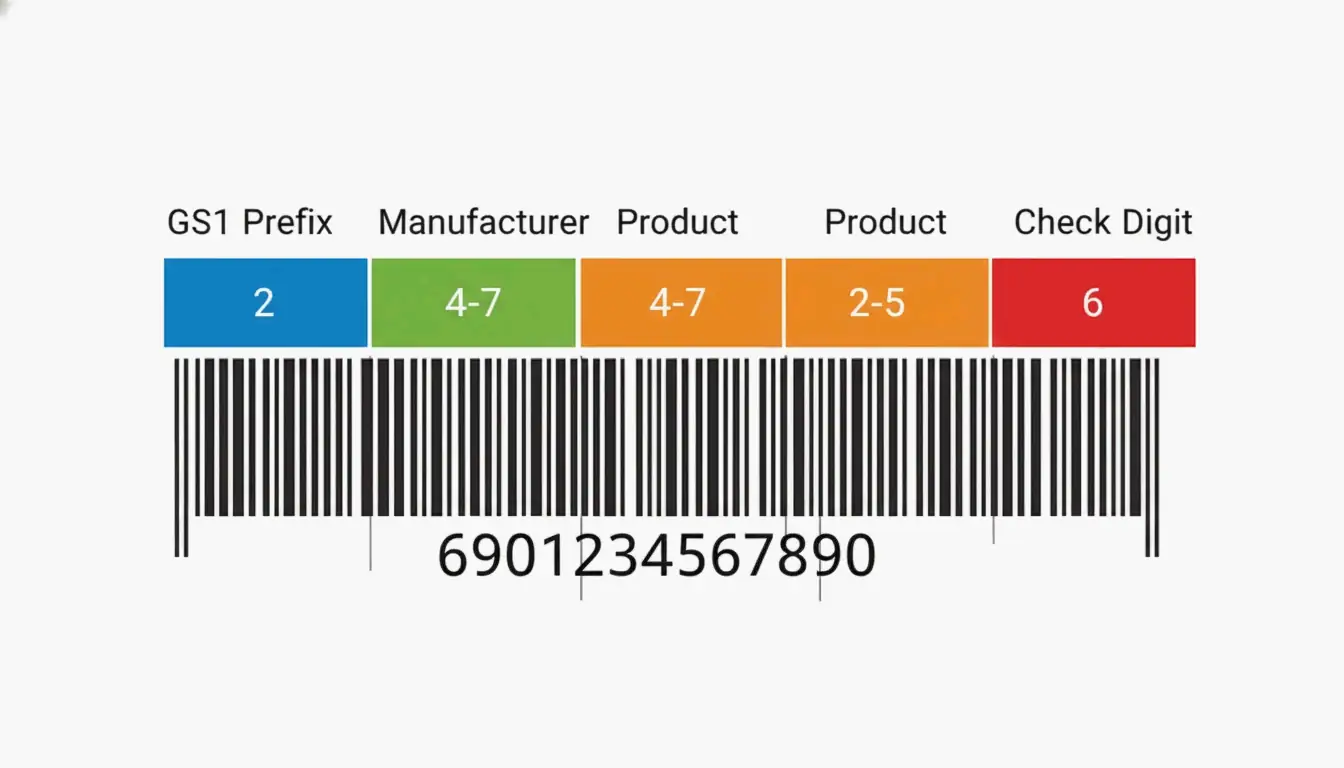
    EAN-13 Structure:

    • GS1 Prefix (3 digits): Identifies which GS1 Member Organization issued the code. For example, 590 is Poland, 400–440 is Germany.
    • Manufacturer Code (variable length): The unique identifier assigned to a company.
    • Product Code (variable length): The specific number the company assigns to a particular item (essentially the SKU).
    • Check Digit (1 digit): The final digit, calculated from all previous digits to catch scanning errors.

    EAN-8 Structure:

    EAN-8 works differently — there’s no variable-length manufacturer code. The numbering authority assigns product codes directly. According to Oracle, any company can request an EAN-8 even if they already hold an EAN-13 prefix, but the two numbers have no mathematical relationship to each other.

    A visual breakdown of EAN-13 components using color-coded segments.

    Both formats are remarkably reliable at catching errors. Wikipedia notes that EAN-13 detects 100% of single-digit errors and 90% of transposition errors (where two adjacent digits get swapped). That means if a scanner misreads even one bar, the check digit will almost always flag it.

    Is EAN-13 Accepted in the US? Comparing with UPC-A

    A common concern for companies selling internationally is whether EAN-13 works in the United States, which historically used its own 12-digit UPC-A format.

    The short answer: yes, completely. The “2005 Sunrise” initiative — now long-standing policy — requires every point-of-sale system in the US and Canada to accept both EAN-13 and UPC-A. In fact, EAN-13 is technically a superset of UPC-A. A UPC-A barcode is simply an EAN-13 where the first digit is 0.

    What this means in practice:
    – If you’re a global brand, you can use EAN-13 everywhere — no separate UPC-A codes needed.
    – American retailers can scan your EAN-13 products without any configuration changes.

    There are also specialized prefixes within the EAN-13 system worth knowing about. The Bookland prefixes (978 and 979) embed ISBNs directly into EAN-13, allowing books to be scanned at any standard retail checkout regardless of where they were published.

    GTIN Integration and Database Normalization

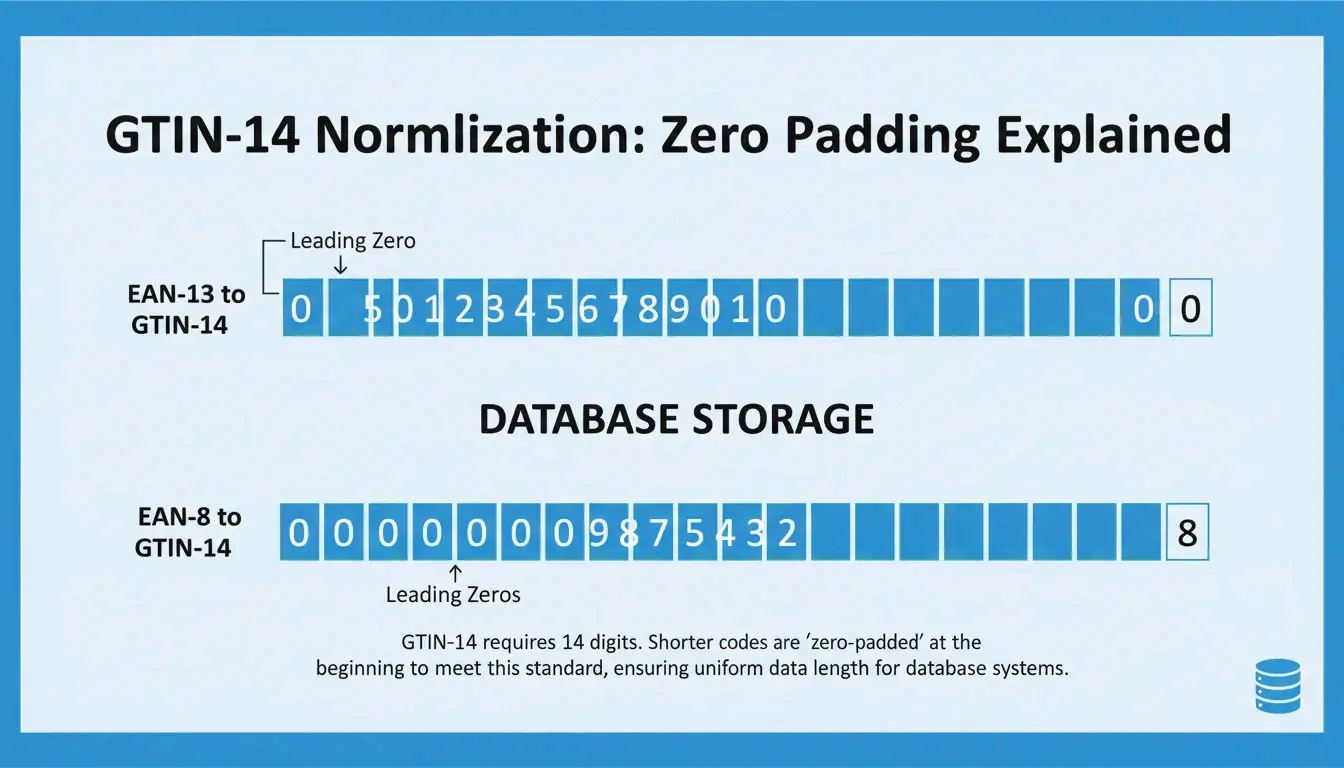
    Both EAN-13 and EAN-8 are part of the Global Trade Item Number (GTIN) family. When products with different barcode lengths end up in the same database — say, a warehouse management system — they need a consistent format. That’s where GTIN-14 comes in.

    The normalization is straightforward: pad the shorter codes with leading zeros.

    Barcode GTIN-14
    EAN-13: 4006381333931 04006381333931 (1 leading zero)
    EAN-8: 96385074 00000096385074 (6 leading zeros)

    In systems like Oracle WMS, all GTINs are right-aligned and padded to 14 digits so a single database field can handle everything from a tube of lip balm to a full pallet.

    A simple visualization of "Zero Padding" to align EAN-8 and EAN-13 into GTIN-14 blocks.

    How to Calculate the Check Digit (Modulo-10, Step by Step)

    The last digit of any EAN barcode isn’t random — it’s calculated using the Modulo-10 algorithm. Modern software handles this automatically, but understanding the math is useful if you’re generating barcodes programmatically or troubleshooting a scanning issue.

    Example: verifying the check digit for EAN-13 400638133393?

    Step 1 — Starting from the right (excluding the check digit), assign alternating weights of 3 and 1:

    Position 12 11 10 9 8 7 6 5 4 3 2 1
    Digit 4 0 0 6 3 8 1 3 3 3 9 3
    Weight 1 3 1 3 1 3 1 3 1 3 1 3
    Product 4 0 0 18 3 24 1 9 3 9 9 9

    Step 2 — Add up all products: 4 + 0 + 0 + 18 + 3 + 24 + 1 + 9 + 3 + 9 + 9 + 9 = 89

    Step 3 — Find the next multiple of 10 (which is 90). Subtract: 90 − 89 = 1.

    The check digit is 1, making the full barcode 4006381333931.

    This is a good sanity check to run during label design — catching a wrong check digit before you print thousands of labels saves both money and time.

    Conclusion

    EAN-13 is the global workhorse of retail barcoding — it’s what you’ll use for the vast majority of products. EAN-8 is the compact alternative, reserved for items where packaging space is genuinely too tight for a standard barcode. Both formats are managed by GS1, both use the same Modulo-10 check digit system, and both are scanned reliably by every modern POS system worldwide — including in the US and Canada.

    The decision comes down to surface area. If your packaging can accommodate a barcode at least 1.5 inches wide, use EAN-13. If it can’t, apply for an EAN-8 through your local GS1 office. Either way, your product will scan correctly throughout the entire supply chain.

    FAQ

    Can I convert an EAN-8 code into an EAN-13 code?

    No — they are completely separate identifiers. EAN-8 numbers are assigned directly by GS1 and have no connection to your EAN-13 manufacturer prefix. If you need an EAN-13 code, you’ll need to use a number from your assigned EAN-13 block.

    Is EAN-13 accepted in the United States and Canada?

    Yes. Since the 2005 Sunrise agreement, every modern POS system in North America scans both UPC-A and EAN-13 without issue. Most global brands now use EAN-13 exclusively to keep things simple across all markets.

    What happens if I scan an EAN-8 barcode in a system that expects 14 digits?

    The system will zero-pad the 8-digit code by adding six leading zeros to fill the GTIN-14 field (e.g., 000000XXXXXXXX). This is standard practice in systems like Oracle WMS to keep database records consistent across different product sizes.

  • QR Code Generator: Create Custom Scannable Links in Minutes (2026)

    QR Code Generator: Create Custom Scannable Links in Minutes (2026)

    The fastest way to create custom scannable links in minutes is to use a professional QR code generator: paste your URL, enable Dynamic QR Code mode, customize with your logo, and export as SVG for print. In 2026, with nearly 90% of Americans having scanned at least one QR code per QR Code AI, the question is not whether to use QR codes — it is how to make them professional, secure, and measurable.

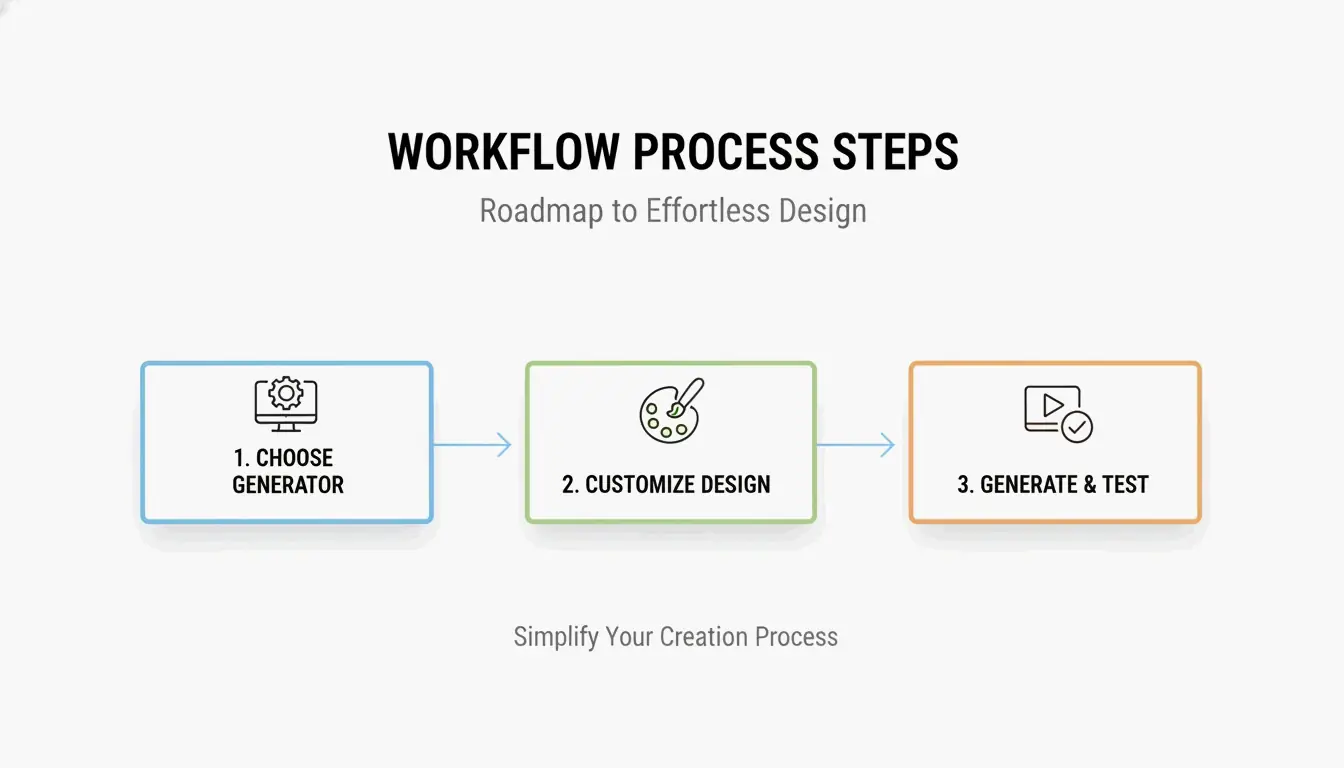
    The 3-Step Framework: Create Custom Scannable Links

    As Jessica Lau, Senior Content Specialist at Zapier, puts it: “QR codes are practically wallpapering the world, from your local cafe’s menu to that vaguely condescending flyer at your health club.”

    Here is how to do it right.

    3-step process: Choose, Customize, Generate

    Step 1: Pick Your Generator

    Use Case Recommended Tool Key Feature
    Enterprise marketing QR Code Generator by Bitly SOC 2 Type II compliance, scan analytics
    Quick personal link Chrome built-in generator Fast, no account needed
    Artistic / branded codes QR Code AI AI-generated designs, logo blending
    Budget-friendly Utlexia Free, high-contrast output

    For professional marketing, choose a platform with SOC 2 Type II certification — this ensures encrypted servers and data protection compliance.

    Step 2: Enable Dynamic Mode and Customize

    After entering your link (URL, PDF, WiFi credentials, vCard), toggle Dynamic QR Code. Then customize:

    • Brand colors: Use your palette, but maintain high contrast — dark foreground on light background for reliable scanning in any lighting
    • Logo placement: Add your logo to the center — error correction keeps the code functional
    • Quiet Zone: Leave blank white space around all four edges; without it, scanners cannot detect the code boundary

    Step 3: Export as SVG and Test

    Export in SVG (vector) format for any print use. Unlike PNG/JPG, SVG stays perfectly sharp from a business card to a billboard. Always run a field test with at least three different phone models before going live.

    Dynamic vs Static QR Codes: Why Dynamic Wins

    This is the most important decision in the process.

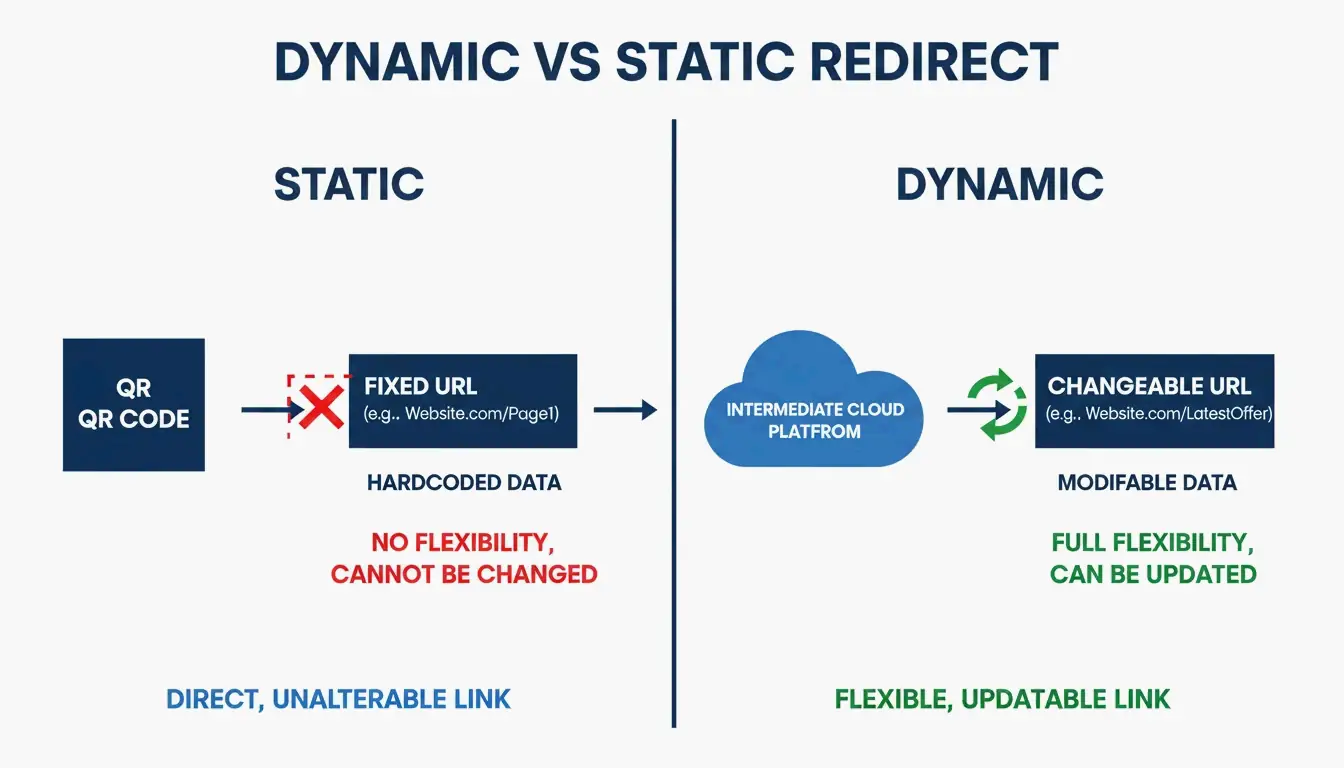
    Property Static QR Code Dynamic QR Code
    Data Hardcoded into the pattern Uses a short redirect link
    Editable after printing No — reprint required Yes — change URL from dashboard
    Scan analytics No Yes — scans, locations, devices
    Cost Free Requires service subscription
    Expiration Never If subscription lapses

    Dynamic codes solve the “broken link” problem: if your URL changes, update the redirect in your dashboard — no reprinting 5,000 flyers. They also provide Scan Analytics: how many people scanned, where they were, and what device they used.

    Comparison: Static (Direct) vs Dynamic (Redirect)

    Error Correction and SVG: Making Codes Work in the Real World

    QR codes need to survive curved surfaces, dim lighting, and physical damage. Reed-Solomon Error Correction keeps the code functional even if up to 30% of its surface is scratched or covered — this is also what allows logo placement in the center.

    Level Recovery Best For
    L (Low) 7% Maximize data capacity
    M (Medium) 15% General marketing
    Q (Quartile) 25% Outdoor / industrial use
    H (High) 30% Logo placement, harsh environments

    Custom-branded designs with logos drive a 30% increase in scans compared to plain black-and-white patterns, according to QR Code AI. Use Level H when embedding a logo.

    Security: Protecting Against Quishing (QR Phishing)

    As QR adoption has grown, so has quishing — attackers covering legitimate QR codes with malicious stickers to steal credentials.

    Protection Checklist

    • Use SOC 2 Type II compliant generators — encrypted redirects protect your users
    • Enable custom domains — users see your brand name in the URL preview before the page loads
    • Monitor scan data — unusual geographic spikes in analytics may indicate a copied code
    • Avoid URL shorteners you don’t control — they add an untrusted redirect layer

    Taylor Swift’s Chicago mural — a giant QR code teasing an album launch — shows how high-profile campaigns become targets. Use a custom domain so users can verify the destination before scanning.

    Automating at Scale: API and Zapier Integration

    Managing hundreds of assets one by one is not scalable. Platforms like Bitly and Uniqode offer API integrations for bulk generation.

    Automation Workflow

    1. Trigger: New product added to CRM, or file uploaded to Google Drive
    2. Action: Zapier generates a unique dynamic QR code via API
    3. Output: Code is added to your Scan Analytics dashboard automatically

    This eliminates manual creation and gives your team real-time scan data across all assets.

    Conclusion

    Creating a professional QR code in 2026 means balancing design, flexibility, and security. Use a dynamic code for editability and analytics, maintain high contrast with a proper quiet zone, export as SVG for print, and choose a SOC 2 compliant generator. Custom-branded designs with logos boost scans by 30% — but always field-test with multiple devices before launching.

    FAQ

    Do free QR codes ever expire?

    Static QR codes never expire — the data is permanently encoded in the pattern. Dynamic QR codes may stop working if the provider’s trial ends, the account is deleted, or scan limits are reached. Check service terms if you need long-term dynamic functionality.

    What is the minimum size for a QR code on a business card?

    0.8 x 0.8 inches (2 x 2 cm) is the recommended minimum for reliable smartphone scanning. Maintain a clear quiet zone (blank padding) around all edges so scanners can detect the code boundary.

    What is the difference between PNG and SVG for printing?

    PNG is a raster format (pixels) — it gets blurry when enlarged. SVG is a vector format (mathematical paths) — it stays perfectly sharp at any scale. Always use SVG for professional printing on flyers, posters, and packaging.

  • Random Phone Number Generator: Testing, SMS Verification & DevOps Integration

    Random Phone Number Generator: Testing, SMS Verification & DevOps Integration

    A random phone number generator creates valid-looking synthetic numbers for database seeding and UI testing — but these numbers cannot receive SMS messages. For actual verification (OTP codes, account signups), you need real-time non-VoIP temporary numbers connected to cellular infrastructure. This guide covers both use cases and explains why modern platforms block synthetic numbers.

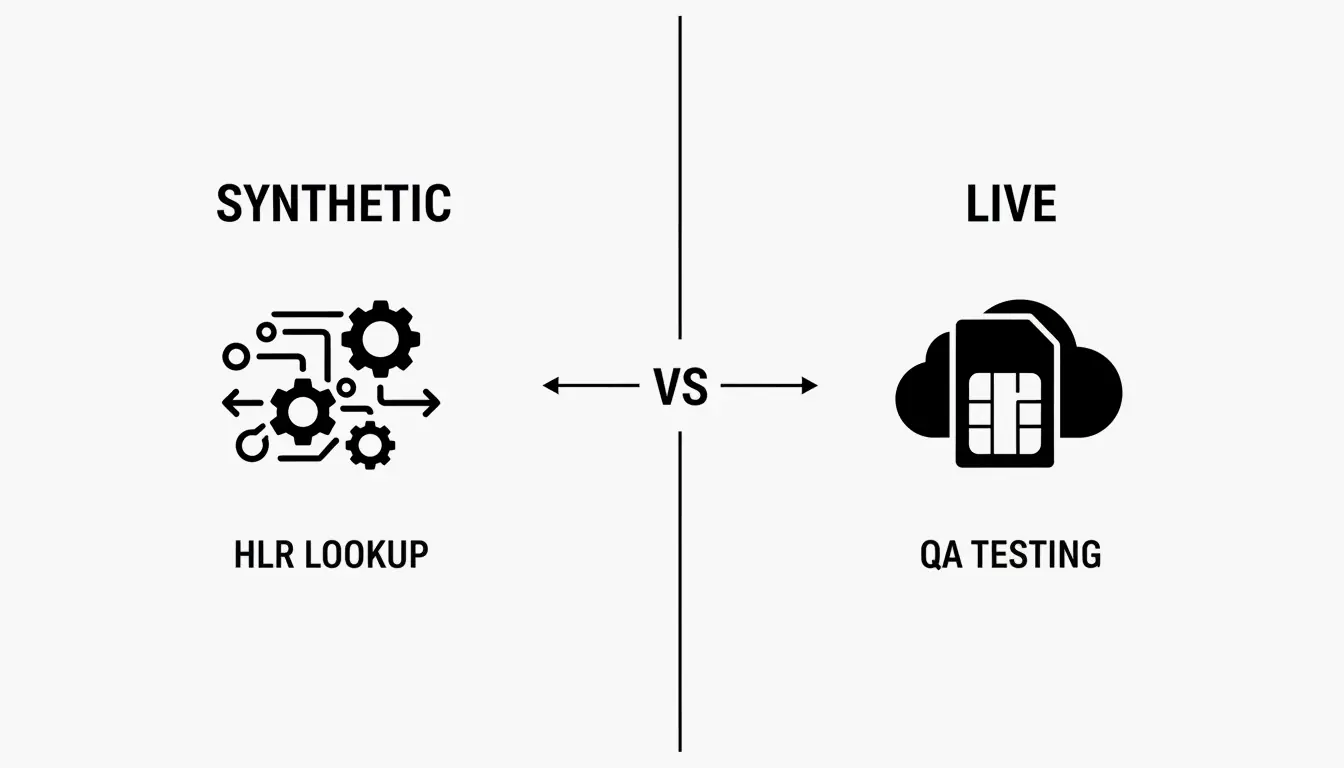
    Synthetic Numbers vs. Live Numbers: Two Different Tools

    Property Synthetic (Generated) Live (Rented Non-VoIP)
    Connected to network No Yes — cellular infrastructure
    Can receive SMS/OTP No Yes
    Cost Free Paid service
    Best for DB seeding, UI testing, stress tests SMS verification, account signups
    Format compliance Follows NANP/E.164 rules Real carrier-assigned number

    As Quackr puts it: a generated number is a “prop”; a verification number is “infrastructure.”

    A simple 2-node comparison between Synthetic Data and Live Infrastructure.

    Generating Valid Test Data: E.164 and CSPRNG

    The E.164 Standard

    For global compatibility, always use E.164 format: a + sign followed by country code, area code, and subscriber number — no spaces or dashes.

    Format Example Use Case
    E.164 +14155550100 Machine-readable, API/database standard
    National (415) 555-0100 Local display in apps
    International +1 415-555-0100 Human-readable with country code

    CSPRNG for Unbiased Test Data

    Use a Cryptographically Secure Pseudo-Random Number Generator (CSPRNG) to prevent predictable patterns in test datasets. Tools like Generate-Random.org use CSPRNG to ensure digits are not biased, which keeps automated tests statistically valid.

    GadegetKit reports that one fintech QA team cut end-to-end script setup time by 65% by using bulk synthetic datasets in staging environments.

    Code Examples for Your CI/CD Pipeline

    Python — Generate NANP-compliant area codes:

    import secrets
    
    area_code = str(secrets.randbelow(8) + 2)  # 2-9
    exchange = str(secrets.randbelow(800) + 200)  # 200-999
    subscriber = f"{secrets.randbelow(10000):04d}"
    phone = f"+1{area_code}{exchange}{subscriber}"
    

    JavaScript — Browser-side generation with crypto.getRandomValues():

    const buf = new Uint32Array(1);
    crypto.getRandomValues(buf);
    const areaCode = 200 + (buf[0] % 800);  // 200-999
    

    Reserved Ranges for Safe Testing

    In the US and Canada, 555-0100 to 555-0199 is specifically reserved for fictional use. Always use these ranges for documentation and testing to avoid accidentally contacting real people.

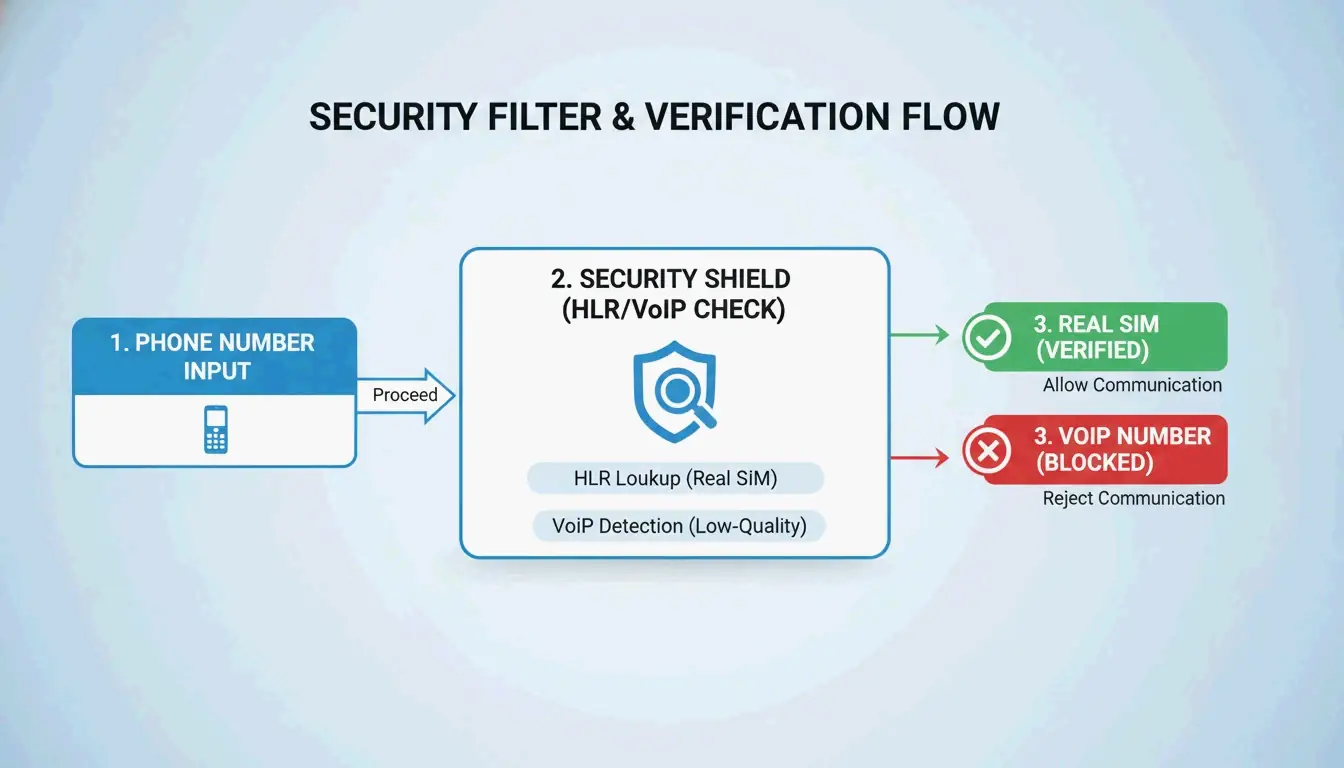
    Why Platforms Block Verification: HLR and VoIP Filters

    If you have ever tried a free virtual number for WhatsApp or Instagram and received an “invalid number” error, you hit a VoIP filter. Modern platforms distinguish between:

    • VoIP numbers — routed over the internet, easily obtained in bulk, frequently used for spam
    • Non-VoIP numbers — tied to physical SIM cards and cell towers, with legitimate carrier signatures

    In 2026, major services use HLR (Home Location Register) lookups to verify a number is assigned to a real subscriber before sending an SMS. A 2023 study by the IMDEA Software Institute analyzed 70 million SMS messages and found that public Disposable Phone Number (DPN) platforms are a major fraud vector. As a result, social media and banking apps now require non-VoIP cellular numbers for verification.

    A 3-step verification check: Number Input -> HLR/VoIP Check -> Access Granted/Denied.

    Database Seeding at Scale

    For bulk data, tools like CodeItBro generate region-specific numbers (Ontario +1-416, California +1-213) and export them as CSV or JSON for SQL/NoSQL databases — simulating diverse user bases without touching real data.

    DevOps Integration: Automated QA Workflows

    The TRNG technology market is growing at 10.98% CAGR, projected to reach $9.19 billion by 2032 according to GadegetKit. This reflects the demand for high-entropy data in QA environments.

    Best Practices for 2026

    1. Label synthetic data clearly in staging environments so production systems never accidentally contact generated numbers
    2. Use bulk JSON generation (up to 1,000 numbers) for automated regression tests
    3. Validate format compliance — ensure all generated numbers pass E.164 regex checks
    4. Separate test pipelines — synthetic data for internal QA, rented non-VoIP numbers for live verification testing

    Conclusion

    Synthetic phone number generators are essential for database seeding and UI testing — use E.164 format and CSPRNG for valid, unbiased data. But they cannot receive SMS. For actual verification, you need non-VoIP cellular numbers that pass HLR checks. The best 2026 approach: synthetic generators for internal QA speed, rented non-VoIP numbers for live verification testing.

    FAQ

    Can a randomly generated phone number receive a verification code?

    No. Synthetic numbers are formatted strings of digits — they have no SIM card, no network route, and no carrier assignment. To receive an SMS or OTP, you need a live temporary number or non-VoIP service actively routed by a cellular carrier.

    What is the difference between E.164, National, and International formats?

    • E.164: Global machine-readable standard — +14155550101 (no spaces)
    • National: Local display format — (415) 555-0101 in the US
    • International: Human-readable with country code — +1 415-555-0101

    Always use E.164 for databases and APIs.

    Why do apps like WhatsApp or Instagram block temporary phone numbers?

    These platforms use HLR lookups and DPN (Disposable Phone Number) databases to identify VoIP signatures and bulk-registered number ranges. In 2026, they prioritize non-VoIP numbers tied to physical cellular infrastructure to prevent bot-driven spam and fraud.

    Is it legal to use fake phone numbers for online signups?

    Synthetic numbers are legal for software testing, design mockups, and privacy protection. However, using them to violate a platform’s Terms of Service, commit fraud, or harass others is illegal. For testing and documentation, always use reserved ranges (like 555-01XX) to avoid contacting real people.

  • What Are the Uses of a Barcode Generator? Inventory, Retail & Marketing in 2026

    What Are the Uses of a Barcode Generator? Inventory, Retail & Marketing in 2026

    A barcode generator turns text or numbers into machine-readable patterns for inventory management, asset tracking, and retail sales. In 2026, these tools bridge the offline-online gap using UPC-A/EAN-13 for global retail, Code 128 for internal logistics, and dynamic QR codes for mobile marketing with real-time scan analytics.

    As KODE.link puts it, a reliable barcode generator is no longer a luxury — it is infrastructure that links physical items to digital databases.

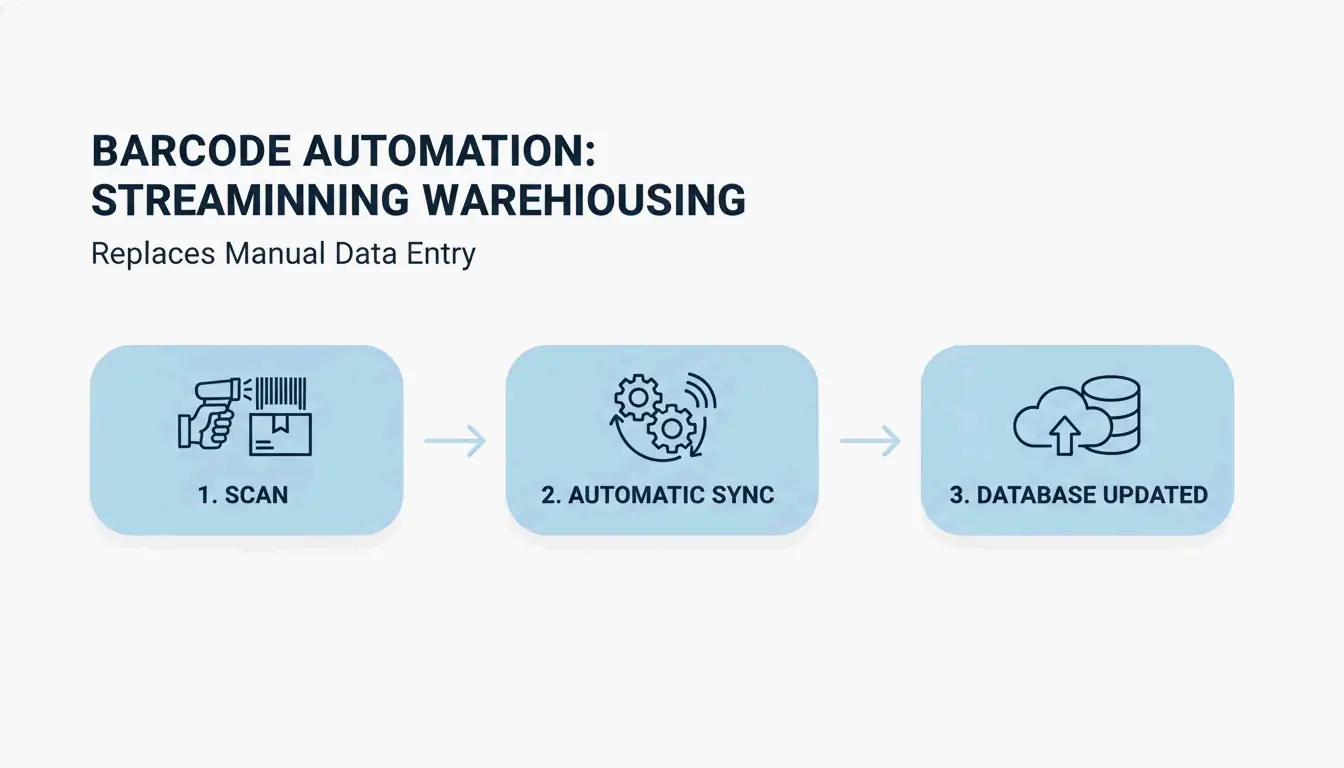
    Inventory Management: Code 128 for Warehousing

    For internal logistics, Code 128 is the go-to barcode format. It supports all 128 ASCII characters and packs high data density into a narrow label — ideal for storage bins, shipping pallets, and parts bins.

    Wasp Barcode notes that Code 128 works with standard 1D scanners and drops error rates to approximately one error per several million characters, according to Wikipedia.

    Scan-to-update inventory management workflow

    Asset Tracking: Lifecycle Management

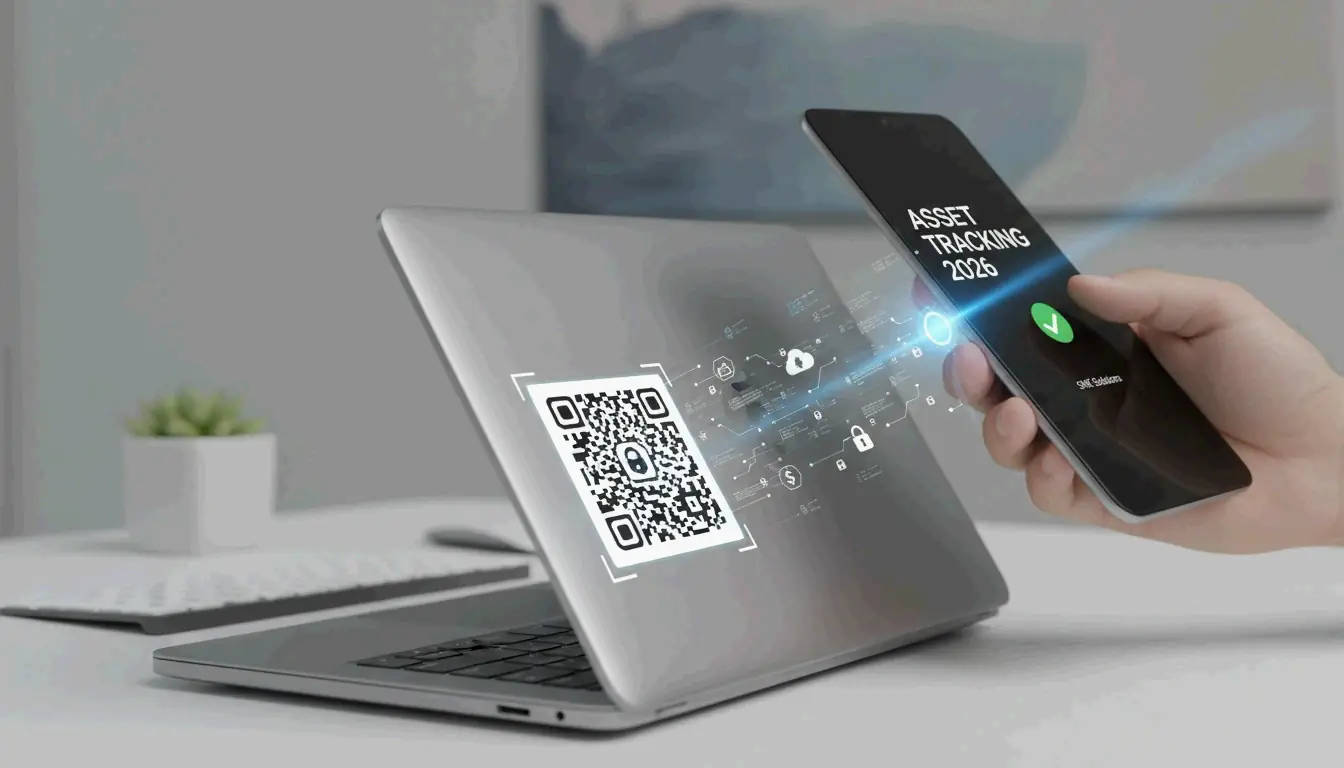
    Barcode generators also track fixed assets — laptops, power tools, machinery. By assigning every item a unique barcode, companies can:

    • Assign equipment to specific employees or job sites
    • Log check-in/check-out events in real time
    • Track maintenance schedules and flag items before they fail

    Wasp Barcode emphasizes that the real value comes from connecting codes to tracking software — giving every asset a full digital history without manual paperwork.

    Retail: UPC-A and EAN-13 Standards

    For products sold in North America, you need UPC-A (12-digit) codes. Globally, EAN-13 (13-digit) is the standard. Both follow GS1 standards, ensuring a product scanned in one store is recognized worldwide.

    The first UPC scan happened in June 1974 at Marsh Supermarket — a pack of Wrigley’s Juicy Fruit gum. Today, GS1 compliance is a non-negotiable requirement for any brand entering retail shelves.

    Printing Best Practices: DPI, Contrast, and Quiet Zones

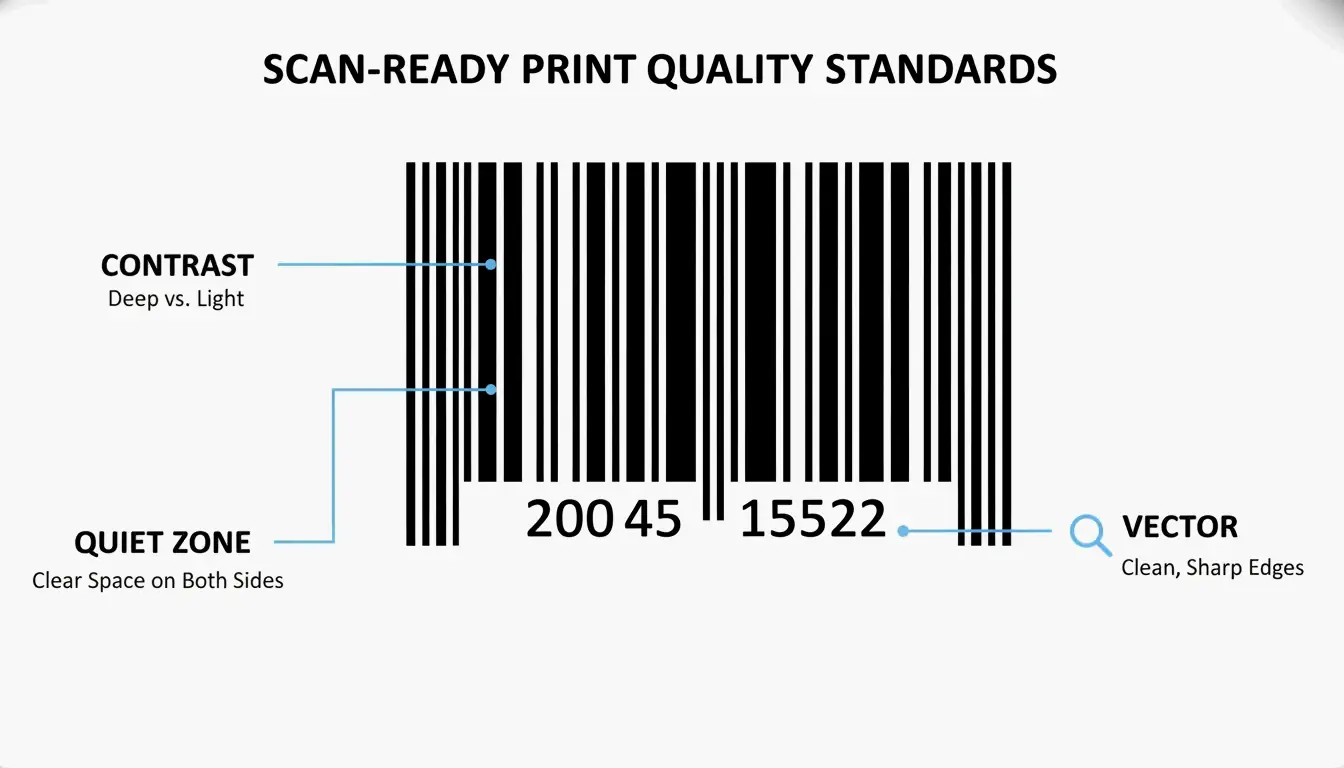
    A barcode is only useful if it scans. CodeItBro recommends exporting codes as SVG (Scalable Vector Graphics) — they stay sharp at any size.

    Requirement Why It Matters
    High contrast Bars must be significantly darker than the background for laser visibility
    Quiet zones Blank margins on both sides tell the scanner where the code starts and ends
    Vector output SVG stays crisp at any size; PNG only works for simple labels

    Three key elements of barcode scannability: contrast, quiet zones, vector format

    QR Code vs Barcode: Which One Do You Need?

    The choice depends on data capacity and scanning context:

    Feature Linear Barcode (1D) QR Code (2D)
    Data capacity ~20 characters Up to 7,089 numeric characters
    Scanner 1D laser scanner Smartphone camera / 2D imager
    Primary use Inventory & retail (UPC/EAN) Marketing, URLs, complex data
    Customization Limited High — colors, logos, shapes
    Error correction Minimal Up to 30% damage tolerance

    Source: QRStuff

    Dynamic QR Codes for Marketing

    Dynamic QR codes have become the marketing standard. Unlike static codes (data is locked in), dynamic codes use a redirect link — so you can change the destination URL even after printing 5,000 flyers. Tools like QR Code Generator also provide scan analytics, showing when and where people scan.

    AI-Generated QR Codes: Scannable Art in 2026

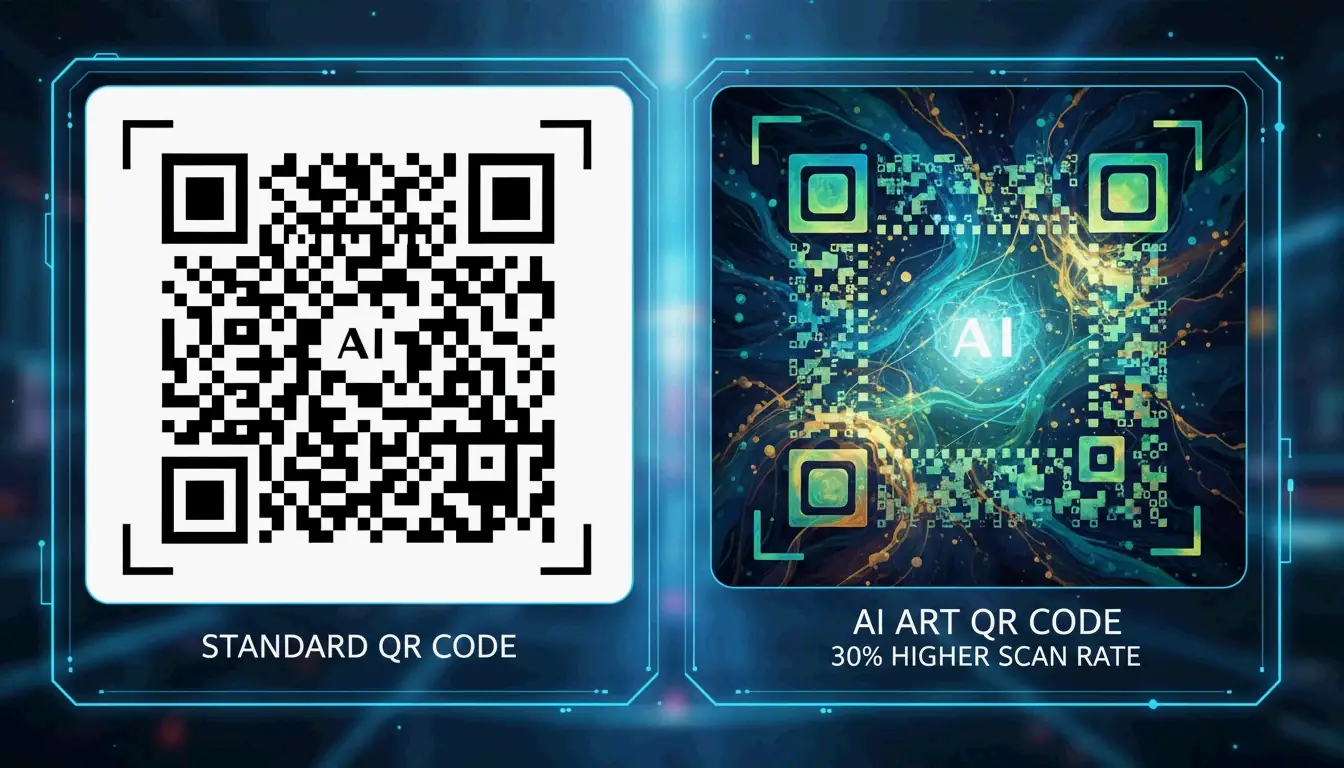
    By 2026, barcode generators have moved beyond black-and-white squares. Generative AI blends brand logos and artistic patterns directly into functional QR codes — making the code part of the design rather than a visual afterthought.

    Data from QR Code AI shows that branded, artistic QR codes get 30% more scans on average than traditional ones. This engagement boost is part of GEO (Generative Engine Optimization), sending high-quality traffic signals back to digital platforms.

    Artistic AI QR code vs traditional QR code visual comparison

    Conclusion

    A barcode generator is the bridge between physical products and digital data — whether you are organizing a warehouse with Code 128, meeting retail requirements with UPC-A, or running campaigns with AI-designed QR codes. Pick the format that fits your goal, export as SVG, and every scan will work the first time.

    FAQ

    Do QR codes expire or have a scan limit?

    Static QR codes never expire — the data is embedded in the pattern. Dynamic QR codes depend on a service provider; if the redirect is deactivated or your subscription ends, the code stops working. Most professional generators like QR Code Generator offer unlimited scans on business accounts.

    What is the minimum size for a printed barcode?

    A standard UPC-A should be approximately 1.46″ x 1.02″. The minimum for retail scanning is about 80% of that (roughly 0.8″ wide). For QR codes, QR Code Generator recommends a minimum of 2 x 2 cm (0.8″ x 0.8″) for reliable smartphone scanning.

    Can I edit a QR code destination after printing?

    Only with a dynamic QR code. Static codes have the data baked in — if the URL changes, you need a new code. Dynamic codes use a short redirect link that you can update from your dashboard at any time, even after printing.

  • The History of QR Codes: From Toyota Factory Floors to a $33B Industry

    The History of QR Codes: From Toyota Factory Floors to a $33B Industry

    The history of QR codes started in 1994 when Masahiro Hara of Denso Wave invented a 2D matrix barcode to track Toyota automotive parts. Inspired by the board game Go, the technology expanded from factory floors to global ubiquity after Apple’s 2017 native camera integration and the COVID-19 contactless boom. In 2026, the QR code market is valued at $13.04 billion and projected to reach $33.14 billion by 2031, according to Mordor Intelligence.

    What Is a QR Code? The Technical Foundation

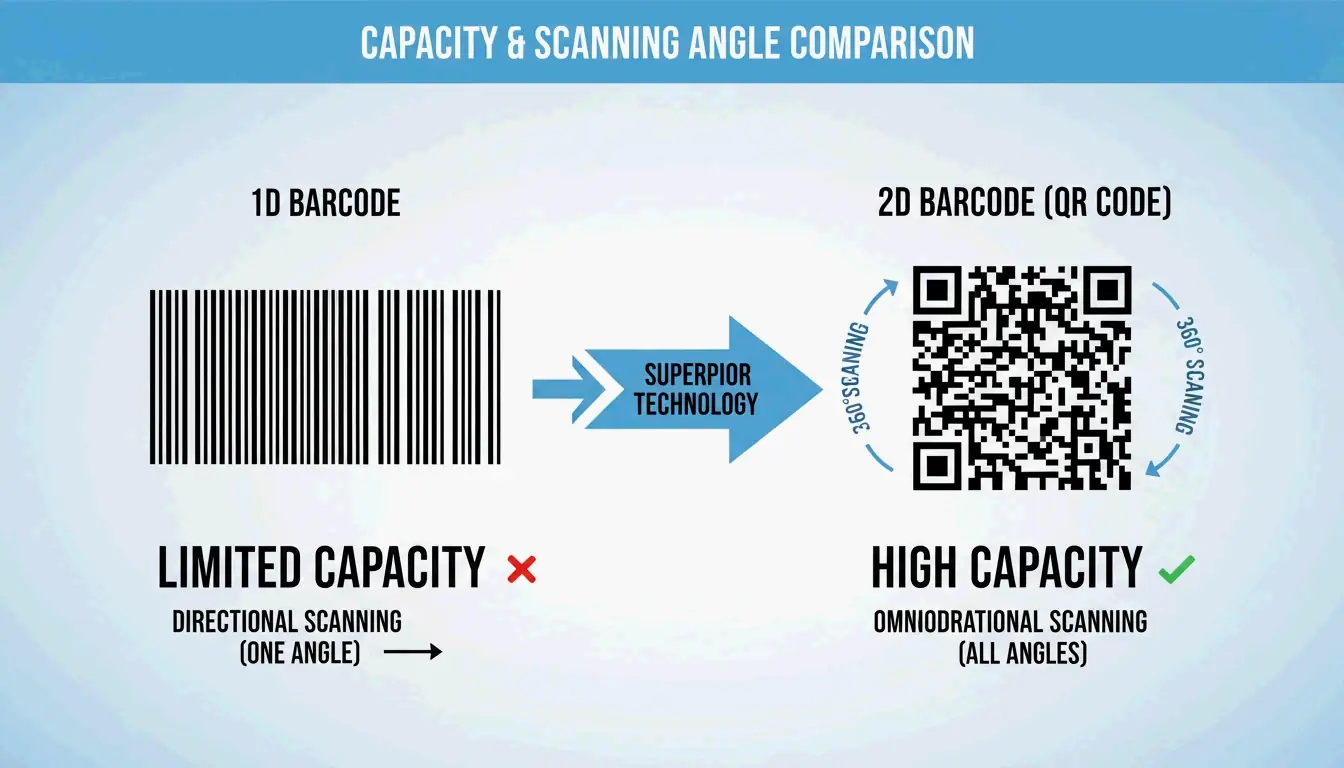
    A Quick Response (QR) code is a two-dimensional matrix barcode that stores data both horizontally and vertically. Unlike a 1D barcode (those parallel lines on grocery items), a QR code uses a grid of black and white squares — packing in dramatically more information in the same physical space.

    Property 1D Barcode (UPC) QR Code (2D)
    Data capacity 20–85 characters Up to 7,089 numeric / 4,296 alphanumeric
    Scan direction Horizontal only 360-degree omnidirectional
    Encoding modes Numeric only Numeric, alphanumeric, byte/binary, kanji
    Error correction Minimal Up to 30% damage tolerance

    The standard is governed by ISO/IEC 18004, ensuring a code generated in Tokyo scans correctly in New York.

    A simple side-by-side comparison of 1D Barcode vs 2D QR Code capacity and scanning angle

    1994: Masahiro Hara, Denso Wave, and the Go Board Inspiration

    The QR code was born from a factory-floor headache. In the early 1990s, workers at Denso Wave (a Toyota subsidiary) had to scan up to ten separate barcodes on a single box of parts to capture all tracking data. It was slow and error-prone. Masahiro Hara was assigned to build something faster.

    The breakthrough came during a lunch break. As BGR reports, Hara was watching a game of Go — the ancient board game with black and white stones on a grid. He realized the grid pattern could carry complex data in a compact square.

    The 1:1:3:1:1 Ratio: Engineering Instant Detection

    To make scanners find the code instantly, Hara’s team designed the three position-detection markers (the large squares in the corners) with a precise 1:1:3:1:1 width ratio. Denso Wave explains that the team exhaustively researched printed materials to find a geometric pattern that would never appear by accident in a factory environment. This prevented scanners from confusing other shapes with the QR code.

    A minimalist visual linking a Go board grid to the structure of a QR code

    Denso Wave made the QR code patent-free and open in 1994 — a strategic decision that enabled global standardization and universal adoption.

    Reed-Solomon Error Correction: Why QR Codes Survive Damage

    A QR code can still be scanned even if 30% of its surface is damaged, thanks to Reed-Solomon Error Correction. This mathematical algorithm reconstructs missing data from redundant information encoded alongside the primary payload.

    Level Recovery Capacity Typical Use Case
    L (Low) 7% Marketing — maximizes data capacity
    M (Medium) 15% General-purpose URLs and links
    Q (Quartile) 25% Industrial environments
    H (High) 30% Factory floors with grease, scratches, and dirt

    Factories use Level H. Marketers use Level L or M to keep the squares large enough for long URLs. The ISO/IEC 18004:2024 update refines these rules for faster scanning in dense digital environments.

    The Global Explosion: iOS 11, COVID-19, and the Super Bowl

    For years, QR codes were a niche tool in the West because scanning required a separate app. Three events changed everything:

    1. 2017 — iOS 11: Apple built a QR scanner directly into the iPhone camera. Point and scan. No app needed.
    2. 2020–2021 — COVID-19: Contactless menus and payments went mainstream. QR Tiger reports U.S. QR interactions spiked 94% during this period. Systems like BharatQR became standard for contactless payments.
    3. 2022 — Coinbase Super Bowl Ad: A bouncing QR code on a black screen for 60 seconds. 20 million people scanned it in one minute, briefly crashing the site. It was the most-scanned QR code in history.

    By 2026, QR Tiger shows a 211.5% jump in scans since 2024.

    2026: AI Integration and ISO/IEC 18004:2024

    AI has given “Quick Response” a new dimension. AI vision models now use QR codes as spatial anchors to navigate physical environments. As Webiano explains: AI is good at guessing context, but QR codes supply exact, unambiguous data.

    The ISO/IEC 18004:2024 standard was designed for these machine-vision workflows. Businesses use AI to analyze scanning patterns and predict customer behavior in real time.

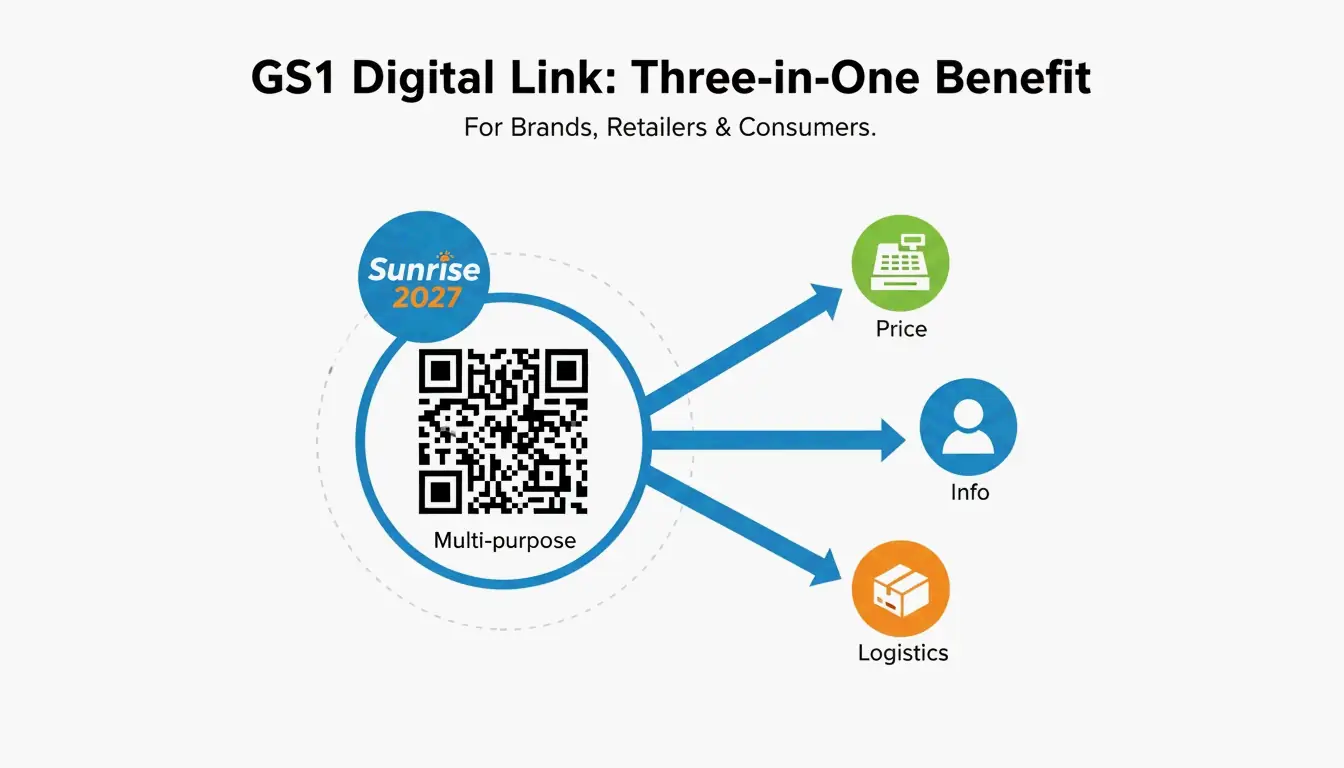
    Sunrise 2027: The GS1 Digital Link Transition

    The next chapter is Sunrise 2027 — a GS1-led initiative to replace 1D barcodes with 2D codes at every retail checkout by the end of 2027. The GS1 transition guide explains that the GS1 Digital Link enables a single code to serve three roles:

    1. Cashier: Scans the price, just like a regular barcode.
    2. Customer: Links to nutrition facts, sustainability data, or loyalty programs.
    3. Warehouse: Tracks expiration dates and batch numbers for faster safety recalls.

    A 3-node diagram showing the versatile roles of the GS1 Digital Link

    Retailers are currently auditing their hardware to meet this 2027 deadline.

    Conclusion

    From a Go-board sketch in 1994 to a $13 billion global industry in 2026, the QR code has evolved from an industrial tracking tool into the backbone of the touchless economy. With AI integration, ISO/IEC 18004:2024 standards, and the Sunrise 2027 transition to GS1 Digital Link, QR codes are becoming the universal bridge between physical products and digital data.

    For businesses: Audit your scanning hardware and packaging now. The 2027 deadline means every point-of-sale system must read 2D codes — and every product will carry a richer digital story.

    FAQ

    Who invented the QR code and why?

    Masahiro Hara and his team at Denso Wave (a Toyota subsidiary) invented the QR code in 1994. The goal was to overcome the storage limits of 1D barcodes, which could not hold enough data to track the thousands of automotive parts in Toyota’s manufacturing process.

    Why are QR codes free to use if they were patented?

    Denso Wave holds the patent but made a strategic decision in 1994 to keep the QR code open and royalty-free. By not enforcing patent rights, they encouraged global standardization and universal adoption across industries and consumers.

    What is the Sunrise 2027 mandate?

    Sunrise 2027 is a global GS1 initiative requiring all retail point-of-sale systems to read 2D barcodes (like QR codes) by the end of 2027. A single GS1 Digital Link code will handle price scanning, consumer engagement (nutrition, sustainability), and supply chain tracking (batch numbers, expiration dates).

  • SME Inventory Management: Build a Low-Cost Fixed Asset Barcode System in 2026

    SME Inventory Management: Build a Low-Cost Fixed Asset Barcode System in 2026

    Building a low-cost fixed asset barcode system for your SME in 2026 means cataloging assets in a cloud platform, generating unique QR codes for each item, printing durable labels, and scanning with smartphones or AI-powered devices. The payoff: inventory accuracy jumps from 63% to 99%, according to Team Unicommerce.

    Here is a practical five-step blueprint to get there without an enterprise budget.

    5 Steps to Build a Low-Cost Fixed Asset Barcode System

    Step 1: Define Your SKU Architecture

    Every fixed asset — a laptop, a drill press, a company vehicle — needs its own unique identifier so you can track its full history (purchase date, maintenance log, depreciation). Standard inventory items, by contrast, can share a common SKU for bulk tracking.

    As QuickBooks explains, a logical SKU system (like TS-WHITE-S for a small white T-shirt) is the foundation for every automation layer you add later.

    Asset Type Labeling Strategy Example SKU
    Fixed asset (unique) One QR code per unit LAPTOP-2026-0042
    Inventory (bulk) One barcode per product variant TS-WHITE-S

    Step 2: Pick Low-Cost Cloud Software

    You do not need enterprise ERP. These cloud platforms cover SME needs:

    Platform Best For Free Tier
    Zoho Inventory Beginners, multi-channel selling Up to 50 orders/month
    inFlow Inventory Custom label printing + mobile scanning Limited free plan
    Sortly Visual tracking with photo attachments Free for small teams

    Step 3: Internal vs. GS1 Barcodes

    For internal asset tracking, generate barcodes for free using Code 128 or QR codes from your software. You only need GS1-registered barcodes (about $30 each in small batches) if you sell through major retailers like Amazon or Walmart, notes inFlow Inventory.

    Recommendation for most SMEs: Standard QR codes generated by your inventory software are the most flexible and cost-effective choice.

    Step 4: Choose Your Hardware

    Option Cost Best For
    Smartphone + AI scanning app $0 extra Low-to-medium volume, mobile teams
    USB barcode scanner $50–$150 Desktop checkout or receiving dock
    Bluetooth wearable scanner $150–$300 Warehouse workers needing hands-free operation

    Step 5: Build a Scanning Workflow

    Make scanning part of daily operations — every receive, move, and dispose event gets logged instantly. This creates real-time visibility across all locations. A basic professional setup (scanner + label printer + software subscription) typically costs $200–$800, according to inFlow Inventory.

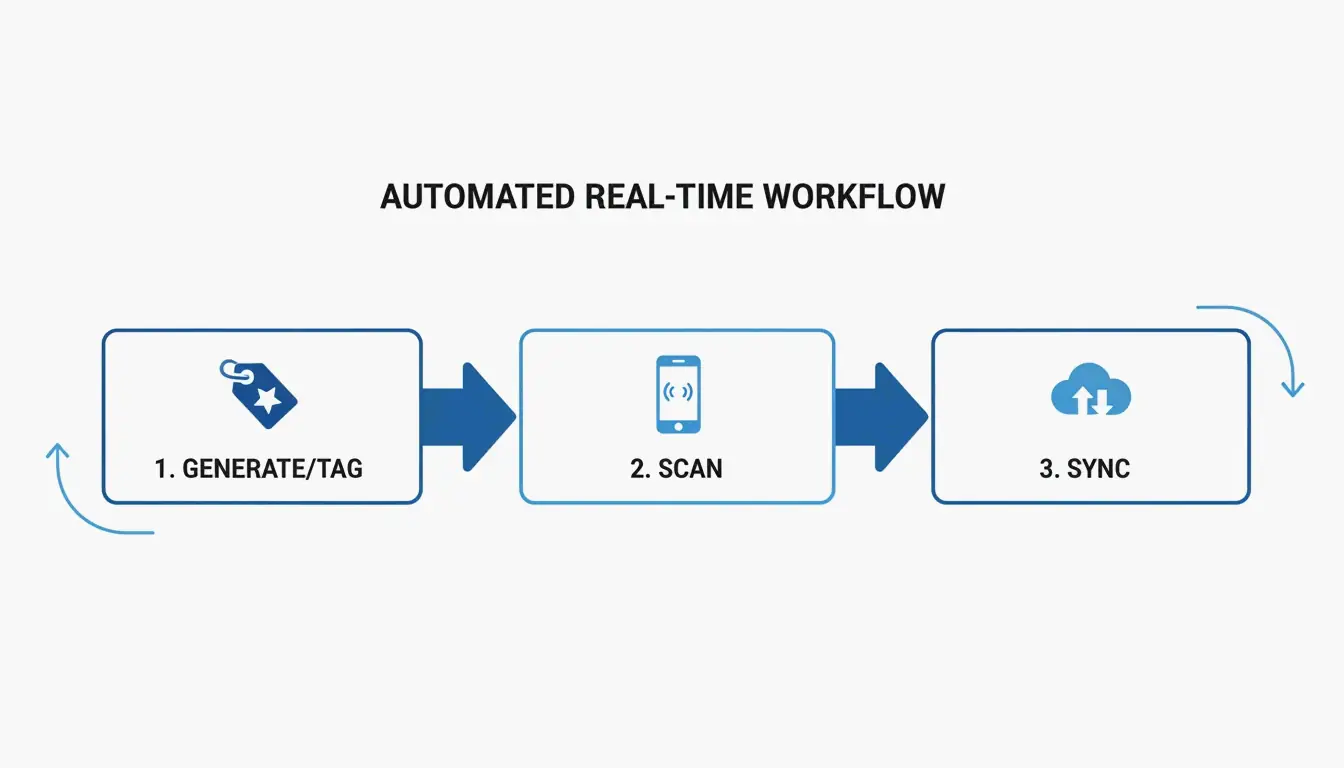
    A simple 3-step workflow: Tag Asset -> Scan with Phone -> Real-time Update.

    1D vs 2D Barcodes: Which One for Fixed Assets?

    The choice comes down to data capacity:

    • 1D barcodes (classic black stripes) work for basic SKU identification — 20–80 characters.
    • 2D QR codes store up to 4,000 characters and can embed maintenance links, batch data, and serial numbers.

    QuickBooks recommends 2D codes for fixed assets because they support richer data that stays useful throughout the asset’s full lifecycle.

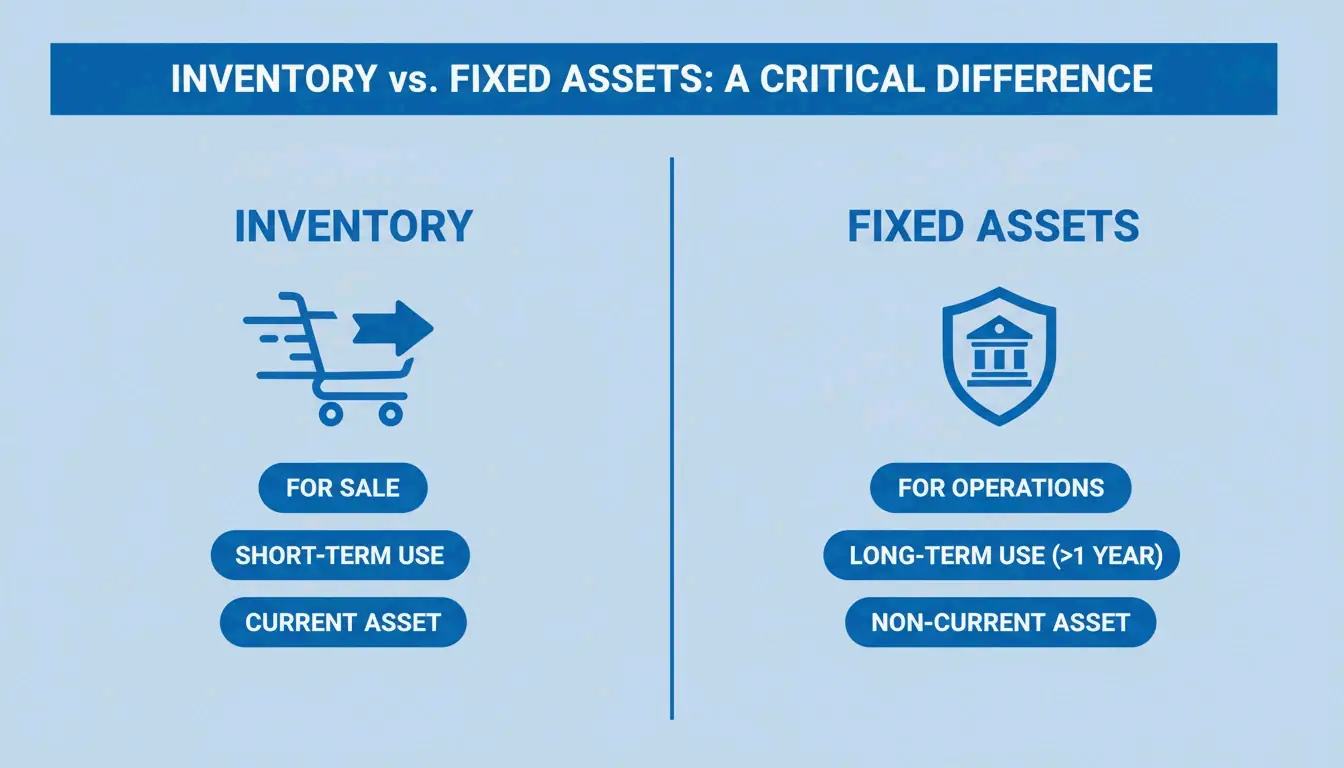
    Fixed Assets vs. Inventory: Different Labeling Strategies

    A common SME mistake is treating fixed assets and inventory the same way. They are fundamentally different:

    Property Inventory Fixed Assets
    Lifecycle Fast — items are sold Long — items stay with the company
    Financial impact Revenue Depreciation over time
    Label durability Standard labels Industrial-grade, weather-resistant

    A clean side-by-side comparison of 'Inventory' (Fast/Sold) vs 'Fixed Assets' (Stay/Depreciate).

    GSM Barcoding stresses that quality labels keep barcodes readable for years, even in harsh environments. Proper asset tracking can cut operational costs by 20% by preventing loss and improving utilization, per TAG Samurai.

    Automatic Depreciation Updates

    Modern systems link physical scans to your financial software through ERP/POS integration. A single scan updates accounting platforms like QuickBooks or Xero, giving finance teams real-time asset values and automated depreciation schedules — no manual data entry.

    2026 Hardware: Smart Scanners and Wearables

    Hardware has moved beyond corded scanners:

    • AI-powered smartphones: 2026 mobile apps use computer vision to scan multiple codes simultaneously, even in dark warehouses.
    • Wearable scanners: Ring or glove-mounted devices let workers move items while logging data — hands-free.
    • RFID: More expensive than barcodes but gaining traction for high-value assets. No line-of-sight needed — audit an entire room in seconds.

    Cost-Benefit: Low-Cost Software vs. Enterprise ERP

    For most SMEs, a dedicated inventory app ($20–$50/month) outperforms a complex enterprise ERP. While free open-source options like myWMS or Openboxes exist, they require significant technical skill to maintain.

    The Retail Exec warns that the “hidden cost” of free software often appears as security vulnerabilities or lack of support during critical audits.

    Look for these essential features:
    – Low stock alerts
    – Cloud syncing across devices
    – Multi-user permissions
    – Bulk import from spreadsheets

    Conclusion

    A barcode-based fixed asset system is no longer optional for SMEs that want accuracy and efficiency. The five-step approach — define SKUs, pick cloud software, choose internal QR codes, select affordable hardware, and build a daily scanning workflow — can lift accuracy from 63% to 99% for under $800.

    Next step: Audit your current assets, pick a scalable platform (Zoho, inFlow, or Sortly), and run a small QR code pilot on one asset category. Scale from there.

    FAQ

    What is the cost difference between internal barcodes and GS1-registered barcodes in 2026?

    Internal barcodes (Code 128 or QR codes) are free to generate using your inventory software. GS1 barcodes require an annual membership plus roughly $30 per barcode for small batches. You only need GS1 codes if you sell through major global retailers like Walmart or Amazon.

    Can I use a smartphone as a professional barcode scanner for fixed asset audits?

    Yes. 2026 smartphone cameras paired with AI scanning apps handle low-to-medium volume audits efficiently, with zero additional hardware cost. For high-volume scanning or rugged environments (construction sites, warehouses), a dedicated handheld or wearable scanner is recommended for durability, speed, and battery life.

    How do I transition from spreadsheets to an automated barcode system without downtime?

    Start with a pilot program on one asset category. Use your new software’s bulk-upload feature to import existing spreadsheet data before printing labels. Conduct physical tagging during off-peak hours to avoid disrupting daily operations. Once the pilot runs smoothly, expand category by category.