Blog

  • How to Convert PDF to Word: 2026 Methods Ranked by Accuracy

    How to Convert PDF to Word: 2026 Methods Ranked by Accuracy

    Use Microsoft Word for simple digital PDFs, Adobe Acrobat Pro for complex layouts with tables, or AI-powered tools (Copilot, PDNob) for scanned documents. The right method depends on whether your PDF is Native (selectable text), Scanned (image of text), or requires AI rebuilding.

    Decision Framework: Match PDF Type to Tool
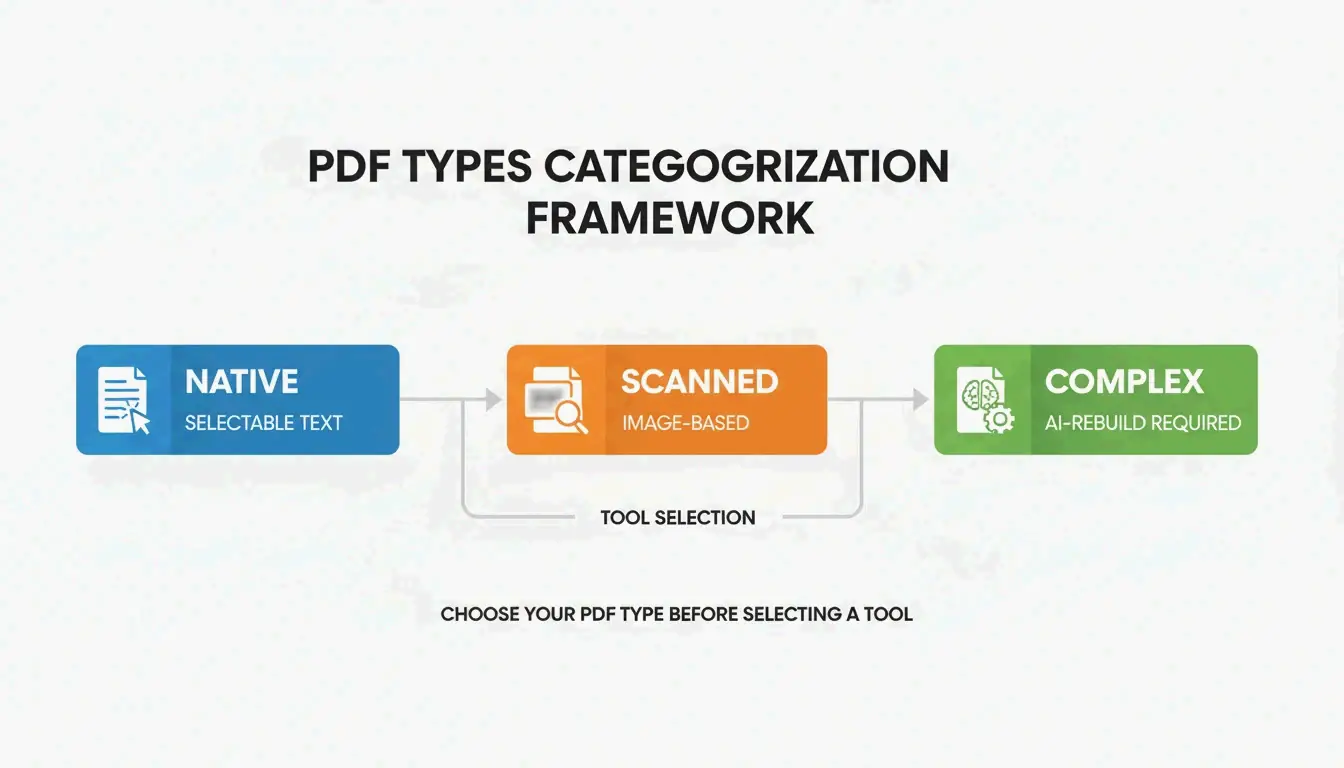
    A simple 3-node diagram showing the three types of PDFs: Native, Scanned, and AI-Rebuilt.

    PDF Type Characteristics Best Tool Expected Accuracy
    Native Selectable text, digital origin Microsoft Word (free) ~95%
    Scanned Image-based, no selectable text PDNob / Adobe Acrobat (OCR) Up to 99%
    Complex layout Nested tables, multi-column, graphics Adobe Acrobat Pro ~98%
    AI-rebuild needed Mixed content, broken formatting Microsoft Copilot ~97%

    Method 1: Microsoft Word — Best for Native PDFs

    For digitally-created PDFs with simple layouts, Microsoft Word is the fastest free option.

    Desktop: Right-click the PDF → “Open with” → Microsoft Word.

    Web: Open Word for the Web, go to “Open,” select your PDF. Word converts columns, spacing, and line breaks into editable text.

    Important: Word often opens converted files in “Compatibility Mode,” which blocks advanced editing features. Microsoft’s editorial team recommends saving immediately as .docx to unlock all formatting tools.

    Method 2: Microsoft Copilot — AI Document Rebuilding

    The 2026 shift is from reflowing text to rebuilding it. Copilot uses AI to understand document context — recognizing headers, footers, nested tables, and style hierarchies that traditional converters flatten.

    Workflow:

    1. Attach the PDF to a Copilot chat in Word.
    2. Copilot analyzes structure and rebuilds the document with organized headings and lists.
    3. Use natural language prompts to clean up conversion artifacts.
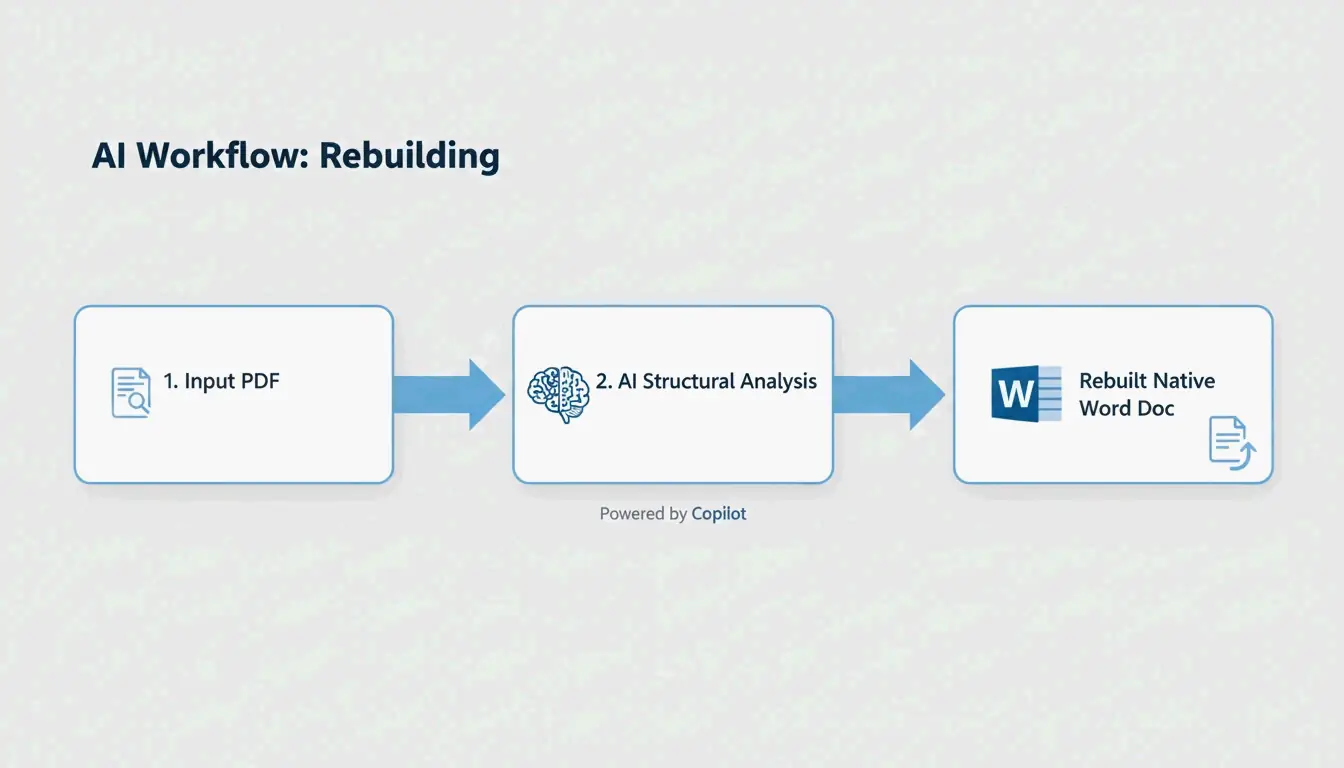
    A simple 3-step process: Upload PDF -> AI Context Analysis -> Rebuilt Word Doc.

    Cleanup prompts that work:

    • “Identify and fix broken line breaks and duplicated text, while adding bullet points and headings.”
    • “Review this document and suggest improvements to heading structure and table formatting for accessibility.”
    • “Identify and suggest corrections for spacing, uneven fonts, or incorrect list numbering.”

    Microsoft offers “Zero-Knowledge” cloud processing for enterprise users — confidential documents stay within your organization’s secure environment.

    Method 3: Adobe Acrobat Pro — Complex Tables and Layouts

    Adobe Acrobat Pro remains the industry standard for PDFs with complicated structures. Its layout-aware engine preserves borders, cell alignments, and multi-column formatting. Export to .docx through Acrobat handles graphics and nested tables better than free alternatives.

    Method 4: OCR for Scanned Documents

    Standard conversion cannot extract text from image-based PDFs. OCR (Optical Character Recognition) is required, and quality depends on scan resolution.

    Scan Quality DPI OCR Accuracy Use Case
    Low 150 DPI ~90% Quick text extraction
    Professional 300 DPI ~99% Legal, medical documents
    High 600 DPI 99%+ Archival, fine print

    According to PDNob, AI-driven OCR engines in 2026 achieve 99% precision at 300 DPI. PDNob PDF Editor offers batch processing — apply the same OCR settings to dozens of invoices or contracts at once.

    Method 5: Google Docs — Free Basic OCR

    Upload the PDF to Google Drive, right-click → “Open with” → Google Docs. A built-in OCR process converts image text to editable content.

    Limitations: Google Docs frequently fails to match original fonts and displaces images into text lines. Adequate for extracting plain text from simple pages; insufficient for branded documents or complex data tables.
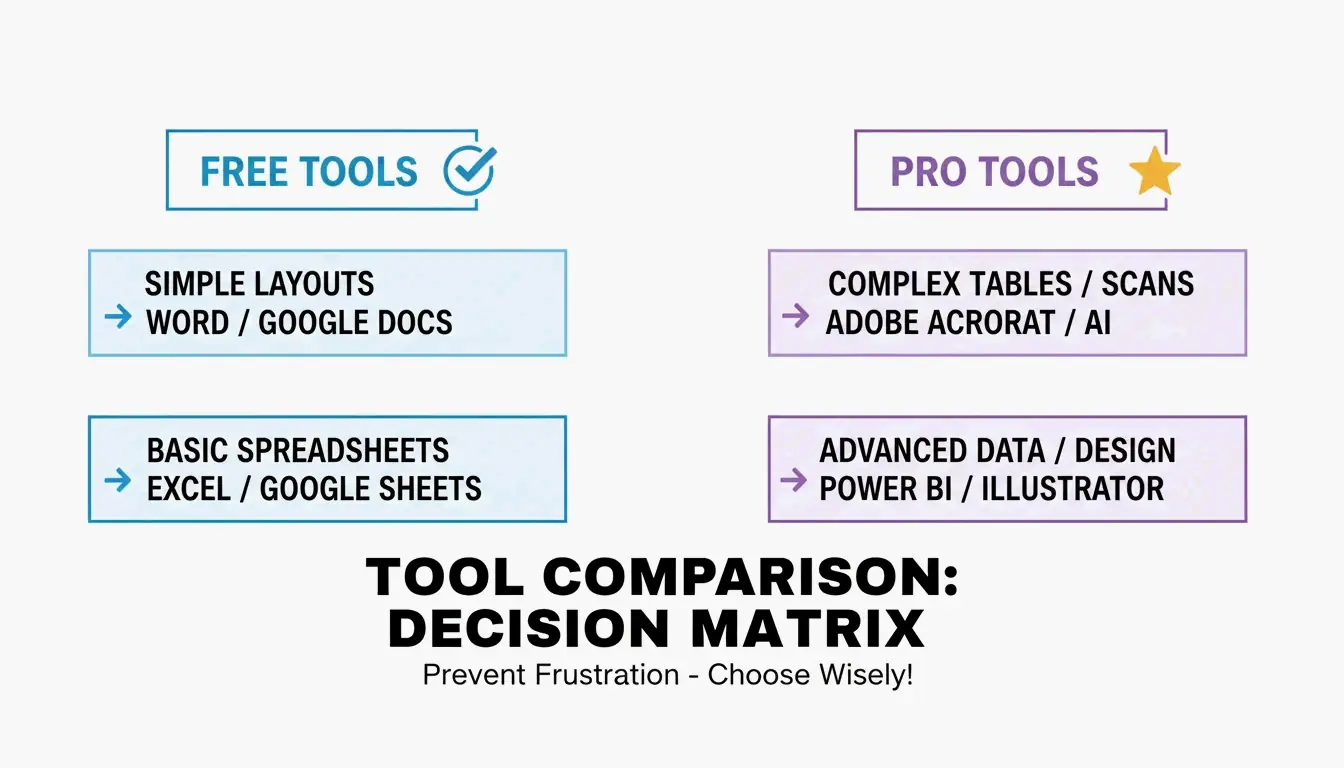
    A simple comparison visual showing 'Basic Tools' (Word/Google) vs 'Pro Tools' (Acrobat/AI) for layout complexity.

    Tool Comparison Summary

    Tool Cost Best For OCR Batch Privacy
    Microsoft Word Free Simple native PDFs No No Local
    Microsoft Copilot Subscription AI rebuilding No No Zero-Knowledge
    Adobe Acrobat Pro Paid Complex tables, layouts Yes (Pro) Yes Local/Cloud
    PDNob PDF Editor Freemium Scanned batch OCR Yes (AI) Yes Local
    Google Docs Free Quick text extraction Basic No Cloud

    Conclusion

    Match the tool to the PDF type: Word for native documents, Adobe Acrobat Pro for complex layouts, and AI-powered OCR (PDNob, Copilot) for scanned files. For professional results on scanned documents, ensure the source is at least 300 DPI. Always save the converted file as .docx immediately to exit Compatibility Mode and unlock full editing capabilities.

    FAQ

    Can I convert PDF to Word for free without losing formatting?

    Text-heavy native PDFs convert well with Word for the Web or Google Docs. Complex layouts with nested tables require Adobe Acrobat or AI-rebuilding tools to preserve structure. Free tools lack the advanced OCR engines needed to interpret spatial relationships in complex documents.

    Is it safe to use online PDF converters for sensitive documents?

    Security depends on the provider. Look for “Zero-Knowledge” cloud processing (Microsoft Copilot enterprise) or use local desktop software (Adobe Acrobat Pro, PDNob) for legal and medical files. Verify SOC2 compliance and AI data privacy labels before uploading sensitive content.

    How does AI improve PDF to Word conversion?

    AI tools like Copilot understand document structure beyond character recognition — they identify headers, footers, styles, and table hierarchies that traditional converters flatten. Natural language prompts let you fix specific formatting errors (broken line breaks, inconsistent fonts) without manual editing.

  • Timezone Converter: Accurate Global Time Scheduling with UTC and DST Handling

    Timezone Converter: Accurate Global Time Scheduling with UTC and DST Handling

    A professional timezone converter must sync with the IANA Time Zone Database (400+ zones), apply Daylight Saving Time (DST) automatically, and calculate UTC offsets down to the minute—including non-standard offsets like UTC+5:30 (India) and UTC+5:45 (Nepal). Tools like Time.now pair this data with visual meeting planners for reliable cross-timezone scheduling.

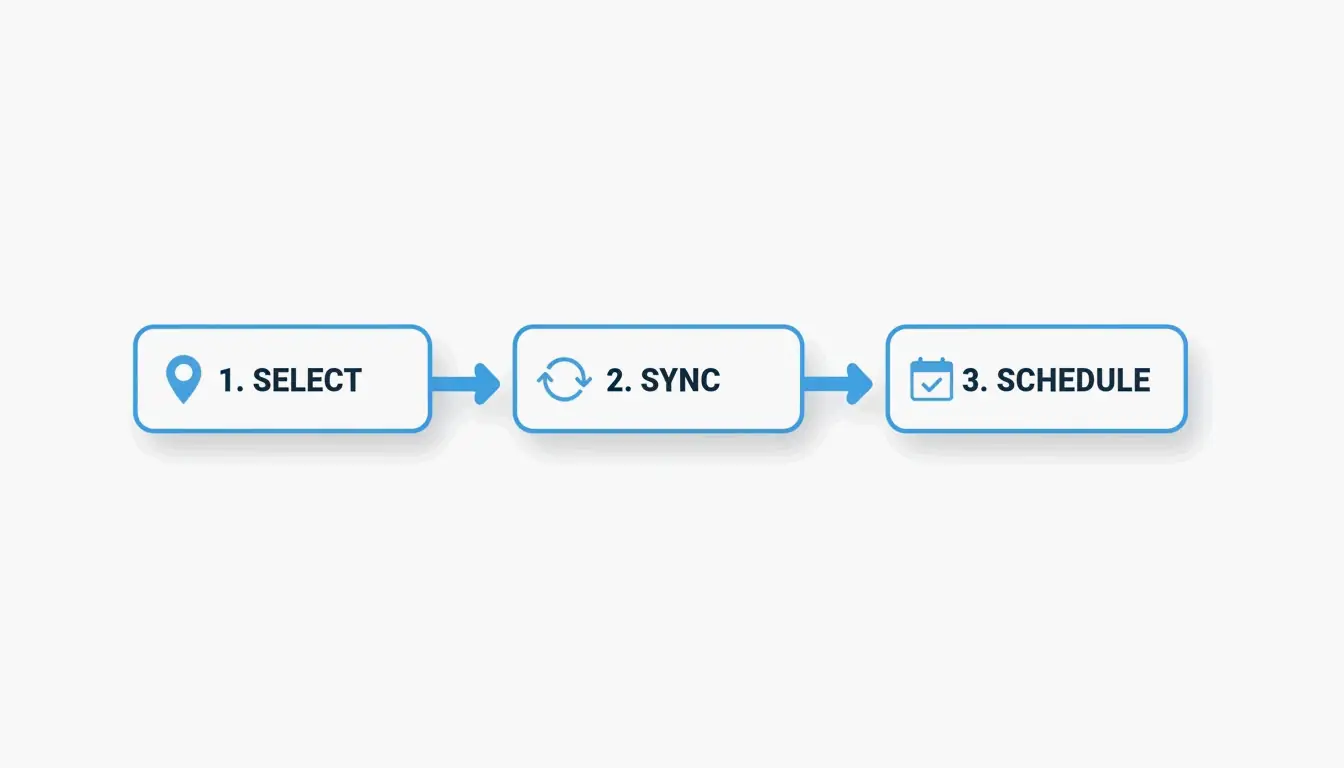
    3-Step Workflow: Select, Sync, Schedule

    The 3-step workflow: Select, Sync, Schedule.

    Step Action Why It Matters
    Select Choose source and target timezones IANA database tracks 400+ zones worldwide
    Sync Apply UTC offset + current DST status 62 locations observe DST as of May 2026
    Schedule Find overlapping “Golden Hours” Avoids midnight meetings and zoom fatigue

    Step 1: Establish the UTC Baseline

    UTC (Coordinated Universal Time) never shifts for DST. Use it as your anchor: Local Time = UTC + Offset + DST Adjustment. This formula stays correct even when local laws change clock rules.

    Step 2: Automate DST Adjustments

    As of May 7, 2026, Time and Date confirms 62 locations are observing DST. A reliable converter handles these shifts automatically—London switches between GMT (UTC+0) and BST (UTC+1) without manual intervention.

    Step 3: Find Golden Hours

    “Golden Hours” are overlapping windows where all participants are within working hours. For teams spanning EST (New York), PST (California), IST (India), and JST (Japan), visual grid planners highlight these slots instantly.

    UTC vs. GMT: Technical Distinction

    Property UTC GMT
    Definition Atomic time standard Time zone for UK/Europe/Africa
    Precision Millisecond-level Second-level
    DST affected Never Yes (UK switches to BST in summer)
    Required for Aviation, finance, servers General scheduling in UK/Africa

    As 24TimeZones notes, UTC and GMT are functionally identical for casual use. For technical logs, financial trades, and Unix systems, UTC is the required standard. Unix Time counts seconds since January 1, 1970 (Epoch), giving servers a timezone-independent reference.

    DST Status in 2026: What Still Changes

    Despite legislative efforts like the U.S. Sunshine Protection Act and EU proposals to end biannual clock changes, DST remains active in many regions.

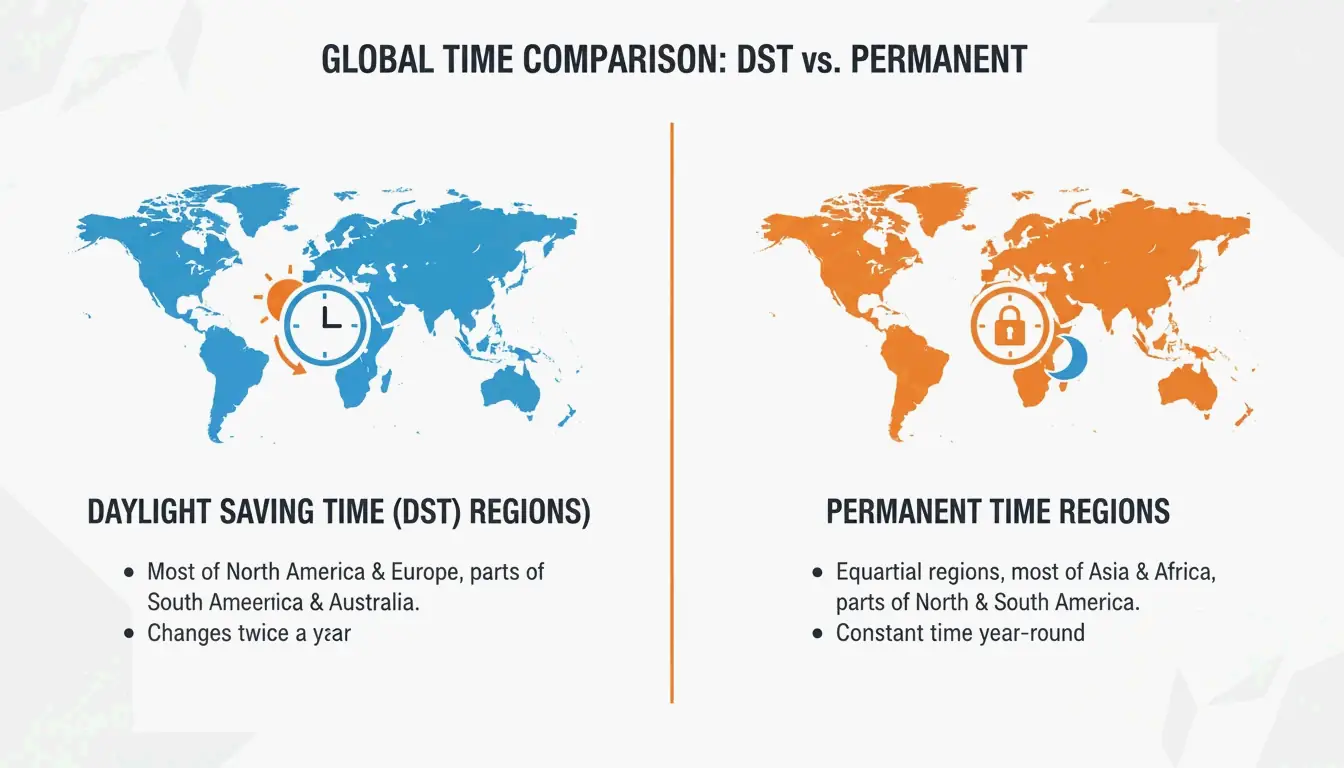
    Visual contrast between DST-observing regions and Permanent Time regions.

    Category Regions DST Status (May 2026)
    DST active US, Canada, EU, parts of Australia +1 hour offset applied
    Permanent Time Arizona (US), China, India, Japan, most of Africa/Africa No seasonal shift

    When using a converter, look for a “Permanent Time” label to confirm a location does not shift clocks.

    Non-Standard Timezone Offsets

    Not all timezones shift by whole hours. Common non-standard offsets:

    Offset Region Note
    UTC+5:30 India (IST) 30-minute offset
    UTC+5:45 Nepal (NPT) 45-minute offset
    UTC+9:30 Australia (ACST) Northern Territory, South Australia
    UTC+3:30 Iran (IRST) 30-minute offset

    Always verify these zones when scheduling “on the hour” — a meeting set for 9:00 AM in New York is 6:30 PM in Mumbai, not 7:00 PM.

    AI-Powered Timezone Workflows

    Modern teams use AI Time Assistants to eliminate manual conversion:

    • Natural language scheduling: “Schedule a 30-minute sync with Tokyo and London for next Tuesday morning” — the AI checks IANA data and finds the best overlap automatically.
    • Slack/Teams integration: Auto-update your status based on local time and working hours.
    • Offline sync: Apps like World Clock: Timezone Converter cache timezone data for use without Wi-Fi.

    For high-stakes coordination — like the Hubble 36th Anniversary scientific event — synchronized time standards are non-negotiable across global observatories.

    Conclusion

    Use an IANA-backed timezone converter that applies UTC offsets and DST adjustments automatically. For team scheduling, a visual “Golden Hours” planner outperforms a basic converter by showing overlapping working windows. For the highest throughput, integrate an AI Time Assistant into your existing Slack or Teams workflow. Always double-check non-standard offsets (UTC+5:30, UTC+5:45) before confirming meeting times.

    FAQ

    What is the difference between GMT and UTC?

    UTC is an atomic time standard with millisecond precision, used globally by technology and science. GMT is a specific timezone used by the UK (in winter) and parts of Africa. For scheduling, they are functionally identical. For aviation, finance, and server logs, UTC is the required standard.

    Which countries do not observe DST?

    Most of Asia (China, India, Japan), Africa, and South America do not observe DST. In the US, Arizona (except the Navajo Nation) stays on standard time year-round. Look for a “Permanent Time” label in your converter to confirm.

    How do 30-minute and 45-minute timezone offsets work?

    Regions like India (UTC+5:30) and Nepal (UTC+5:45) use fractional offsets. Modern converters using the IANA database handle these automatically. When scheduling across these zones, double-check the exact local time — a one-hour scheduling assumption can put you 30 minutes late.

  • TOML to YAML: Quick Conversion Guide with Syntax Map and Pitfalls

    TOML to YAML: Quick Conversion Guide with Syntax Map and Pitfalls

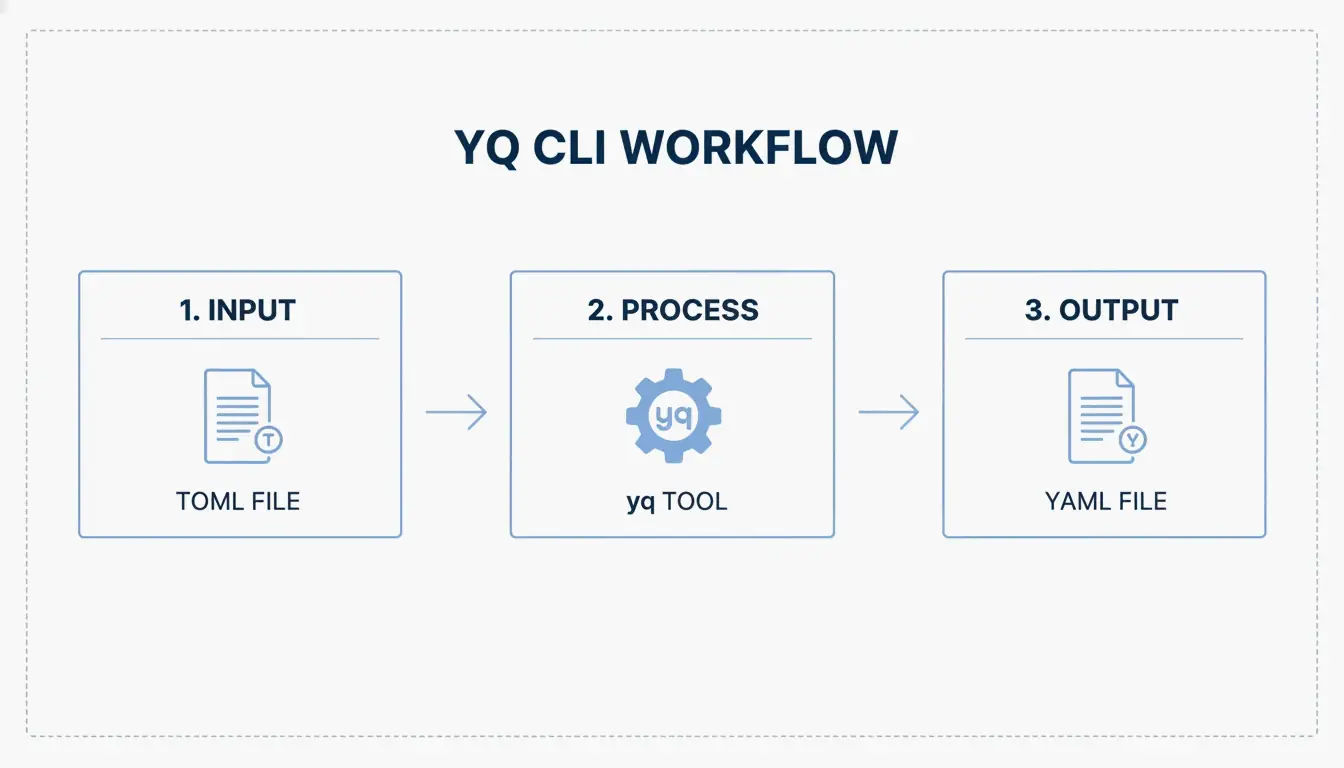
    The fastest way to convert TOML to YAML is yq -oy '.' file.toml. For manual conversion, map TOML [table] headers to YAML indented blocks, TOML arrays to dash-prefixed lists, and always quote ambiguous strings to avoid the “Norway Problem.”

    Quick Conversion: Using yq CLI

    TOML (Tom’s Obvious, Minimal Language) reached its v1.1.0 release in December 2025, but YAML remains the standard for CI/CD pipelines and Kubernetes manifests. The yq tool handles the conversion in a single command.

    Install yq

    Platform Command
    macOS/Linux brew install yq
    Windows choco install yq
    Python (pip) pip install yq

    The Go-based version by Mike Farah is preferred for speed. As noted in Mike Farah’s yq documentation, the tool decodes TOML structure and re-encodes it as clean YAML.

    Run the Conversion

    Display in terminal:

    yq -oy '.' your-config.toml
    

    Save to file:

    yq -oy '.' your-config.toml > your-config.yaml
    

    The -oy flag sets output format to YAML. This handles key-value pairs, nested tables, and arrays.

    Simple 3-step terminal conversion process

    Syntax Translation Map: TOML Structure to YAML

    Developer Drew DeVault has noted that while TOML is popular, YAML handles deep nesting more cleanly. Here is the exact mapping:

    Tables to Indented Keys

    TOML uses bracket headers; YAML uses indentation.

    TOML YAML
    [server] server:
    host = "127.0.0.1" host: 127.0.0.1
    port = 8080 port: 8080

    Critical difference: In TOML, indentation is cosmetic. In YAML, indentation is structural — one wrong space breaks the entire config.

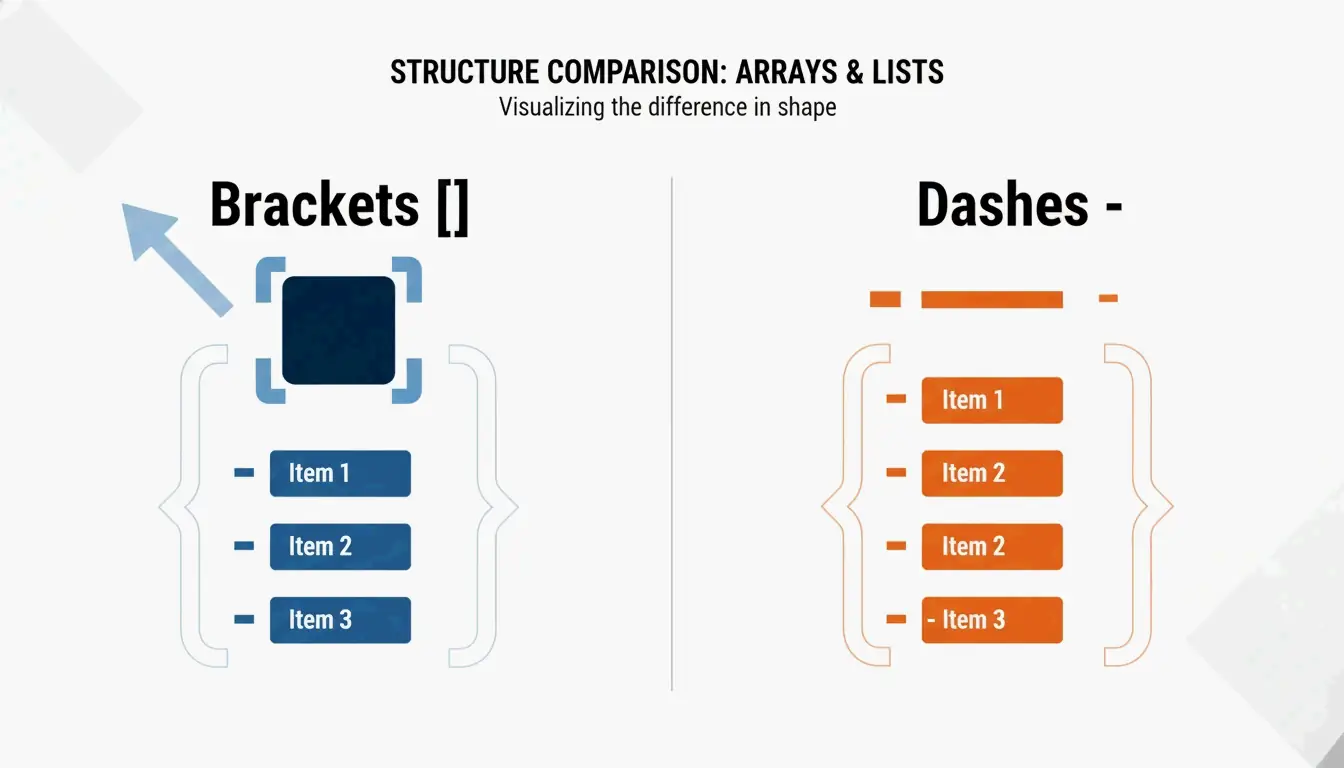
    Arrays to Dash-Prefixed Lists

    TOML: ports = [ 8000, 8001 ]

    YAML:

    ports:
      - 8000
      - 8001
    

    Side-by-side structural comparison of TOML vs YAML

    As Knightli.com explains, YAML’s “block style” makes lists readable, provided vertical alignment is consistent.

    Inline Tables and Dotted Keys

    TOML Construct YAML Equivalent
    [a.b.c] (dotted header) a: → b: → c: (nested indentation)
    point = { x = 1, y = 2 } (inline table) point: → x: 1 → y: 2

    Real-World Use Cases

    Hugo Static Site Configuration

    Hugo accepts hugo.toml, hugo.yaml, or hugo.json. Most projects start with TOML (the default), then migrate to YAML when config needs to align with deployment platforms like Netlify or GitHub Actions. Hammer Europe notes that the hugo command reads these files to determine how Markdown converts to a live site.

    Python Packaging: pyproject.toml to CI/CD YAML

    The Python community standardized pyproject.toml via PEP 518. These settings frequently need translation to YAML for GitHub Actions CI/CD workflows. For AI agent workflows, CocoIndex reports that optimized YAML configs can reduce token usage by up to 70%.

    The Norway Problem and Other Conversion Pitfalls

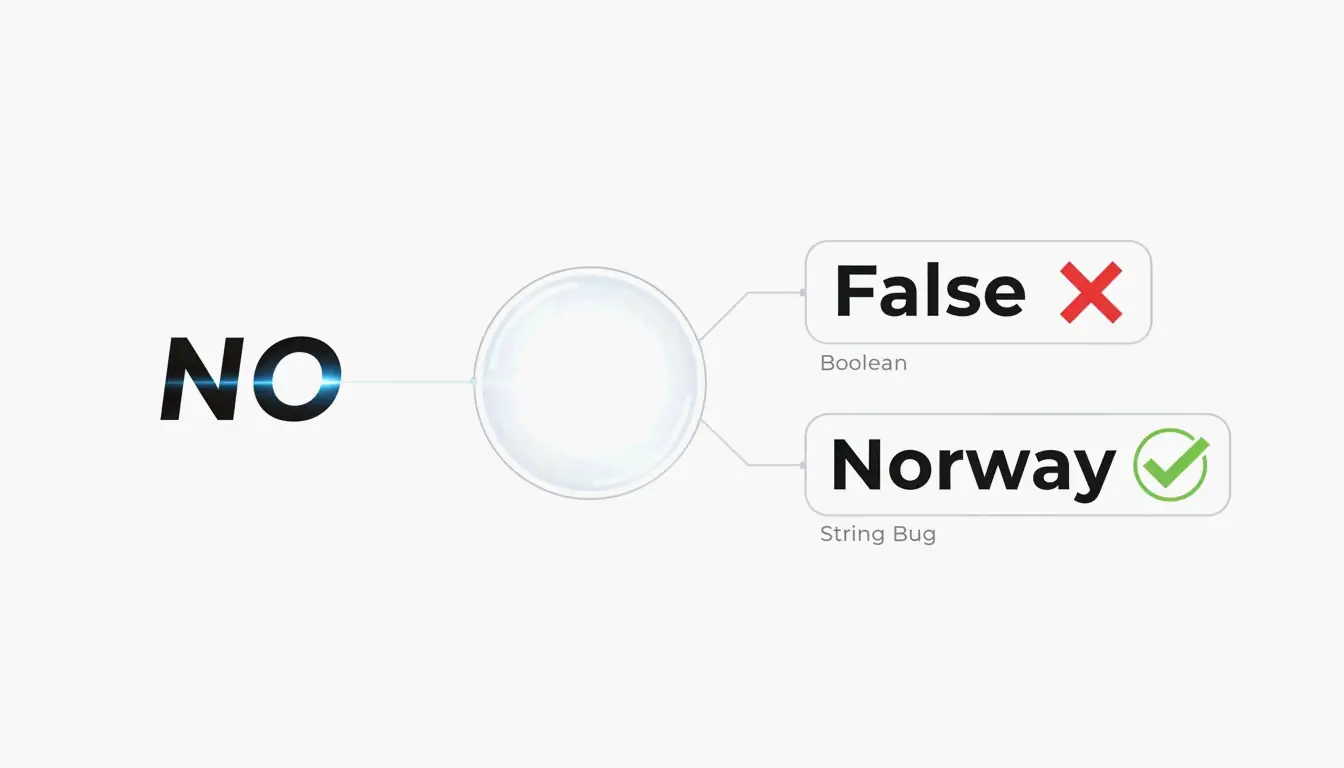
    The NO Country Code Bug

    In YAML 1.1, bare strings like NO, OFF, and YES are auto-coerced to boolean false or true. TOML avoids this by requiring quotes on all strings. When converting, always quote ambiguous values in YAML:

    Value YAML 1.1 Interpretation Fix
    NO false "NO"
    OFF false "OFF"
    YES true "YES"
    On true "On"

    YAML 1.2 (the current spec) fixes most of these coercions, but many parsers still default to 1.1 behavior.

    Visual metaphor for the 'Norway Problem' (Boolean vs String)

    Indentation Errors

    YAML parsers reject files with inconsistent indentation. Common mistakes:

    • Mixing tabs and spaces (YAML forbids tabs)
    • Using 3 spaces in one block and 2 in another
    • Misaligned list items

    AI-Assisted Generation

    Tools like AgentBuilder let you describe configuration in plain English and output validated YAML. This “describe → generate → validate” cycle helps avoid both indentation errors and the Norway Problem.

    Conclusion

    Use yq -oy '.' file.toml for automated conversion. For manual work, map TOML tables to YAML indentation, arrays to dash-prefixed lists, and always quote strings that could be mistaken for booleans. After any conversion, validate the YAML output before deploying — a single misaligned space or unquoted NO can break your entire pipeline.

    FAQ

    Does YAML support comments like TOML?

    Yes. Both use # for single-line comments. YAML comments can interfere with multi-line string parsing, so place them on separate lines when in doubt.

    What is the ‘Norway Problem’ in YAML?

    In YAML 1.1, bare strings like NO (Norway’s country code) are auto-converted to boolean false. TOML avoids this by requiring quotes on all string values. When converting TOML to YAML, wrap any potentially ambiguous string in quotes.

    Which format handles deep nesting better?

    YAML. TOML requires repeating long headers like [table.subtable.subsubtable] for each level, which becomes verbose. YAML represents the same hierarchy with indentation — more compact and readable at depth.

  • Best HEIC to JPG Converter Online for Windows Users: 5 Free Tools Compared

    Best HEIC to JPG Converter Online for Windows Users: 5 Free Tools Compared

    The best free HEIC to JPG converter for Windows in 2026 depends on your priority: Picovert for private browser-based conversion, iMazing HEIC Converter for offline batch processing, or the built-in Windows Photos app for occasional one-off files. All five methods compared below.

    Selection Criteria: What Makes a Top HEIC Converter in 2026?

    A professional-grade converter must satisfy three requirements:

    Criterion What to Look For Why It Matters
    Batch speed Process 100+ images in under 30 seconds Modern photo libraries contain thousands of files
    EXIF preservation GPS, timestamps, camera settings retained Essential for photo organization and legal metadata
    Privacy Client-side (browser-local) processing Prevents personal photos from reaching third-party servers

    As Arpit Kuzo notes: “Stop uploading private photos to shady servers! Learn how to batch convert HEIC to JPG locally in your browser.” Modern tools use WebAssembly to run the conversion entirely in your browser tab—no upload required.

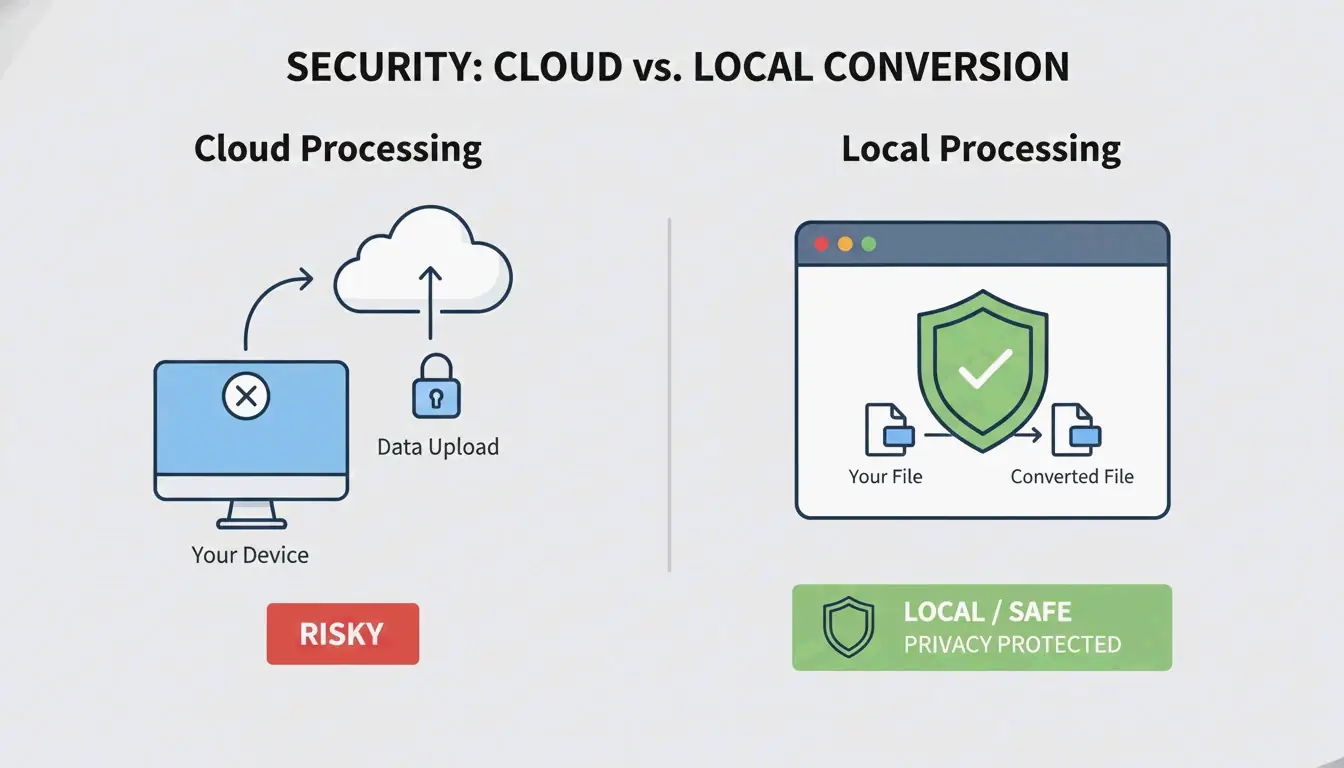
    Local Browser Processing vs Cloud Upload Comparison

    Method 1: Picovert — Secure Local Browser Conversion

    Picovert handles conversion entirely in your browser’s memory using WebAssembly. Files never leave your device.

    Steps (Windows 11, Chrome 105+ / Edge):

    1. Open the Picovert HEIC converter.
    2. Drag .heic files into the browser window.
    3. Set quality to 90% — the optimal balance between visual fidelity and file size.
    4. Click “Convert” — JPGs download instantly.

    Other tools using the same local-processing approach include Warpbin and SafeHEICtoJPEG.

    Method 2: iMazing HEIC Converter — Best Desktop Batch Tool

    For large offline archives, iMazing remains the benchmark. In a FileHulk Lab Test (April 2026), iMazing converted 30 iPhone photos in 11 seconds with a 100% success rate.

    Its key advantage is full EXIF metadata preservation — date taken, GPS coordinates, and camera settings survive the conversion. This is critical for photographers who rely on searchable, organized libraries.

    Method 3: Windows Photos App — Native HEIC Support

    Windows 11 can convert HEIC natively if you install two extensions:

    Extension Cost Purpose
    HEIF Image Extensions Free Thumbnail preview and basic HEIC rendering
    HEVC Video Extensions $0.99 Decode Apple’s specific compression codec

    Steps:

    1. Open the HEIC file in the Windows Photos app.
    2. Click the three-dot menu (…).
    3. Select “Save As” → “JPEG.”

    According to FileHulk, this works for approximately 93% of files. The main limitation: HDR color mapping can produce slightly washed-out results in some exports.

    Method 4: 4DDiG File Repair — Professional Batch with Repair

    4DDiG File Repair includes an AI-enhanced image format converter designed for high-throughput workflows. Its distinguishing feature is structural validation during conversion — it can often repair corrupted HEIC files that browser tools simply reject. Supports one-click bulk processing for thousands of images.

    Method 5: ImageMagick — Command-Line Power

    For developers and automation pipelines, ImageMagick offers the highest throughput. Install on Windows, then convert an entire folder:

    magick mogrify -format jpg *.heic
    

    No GUI, no click-through — just raw volume processing. Best suited for users comfortable with the command line.

    5 Methods at a Glance

    Method Privacy Batch Speed EXIF Preserved Best For
    Picovert Local (browser) Fast Yes Quick, private conversion
    iMazing Full offline 30 photos/11s Yes Large photo archives
    Windows Photos Offline Slow (one-by-one) Partial Occasional single files
    4DDiG Desktop Very fast Yes Corrupted files + bulk
    ImageMagick Full offline Fastest Configurable Developers, automation

    Should You Switch iPhone to ‘Most Compatible’?

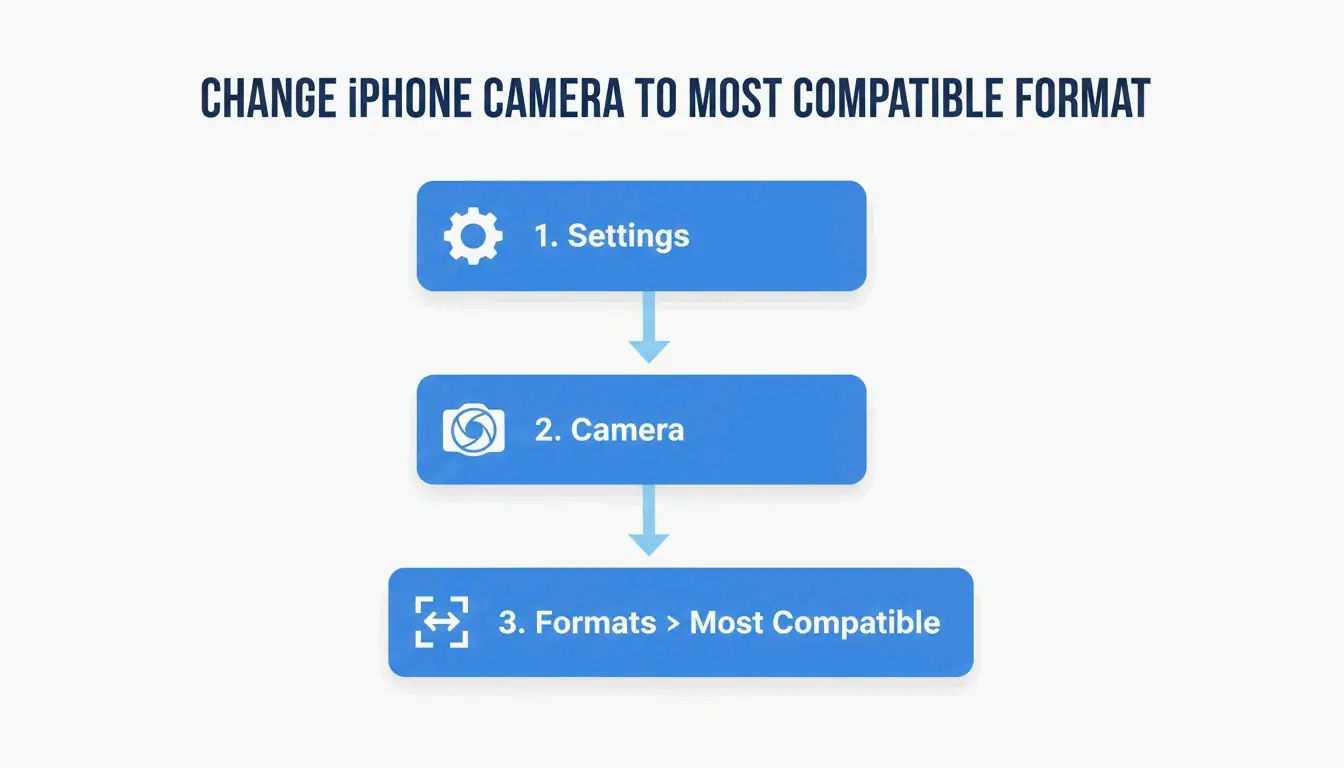
    If you want to eliminate HEIC entirely, change your iPhone camera settings:

    1. Settings → Camera → Formats
    2. Tap Most Compatible

    3-Step iPhone Camera Settings Change

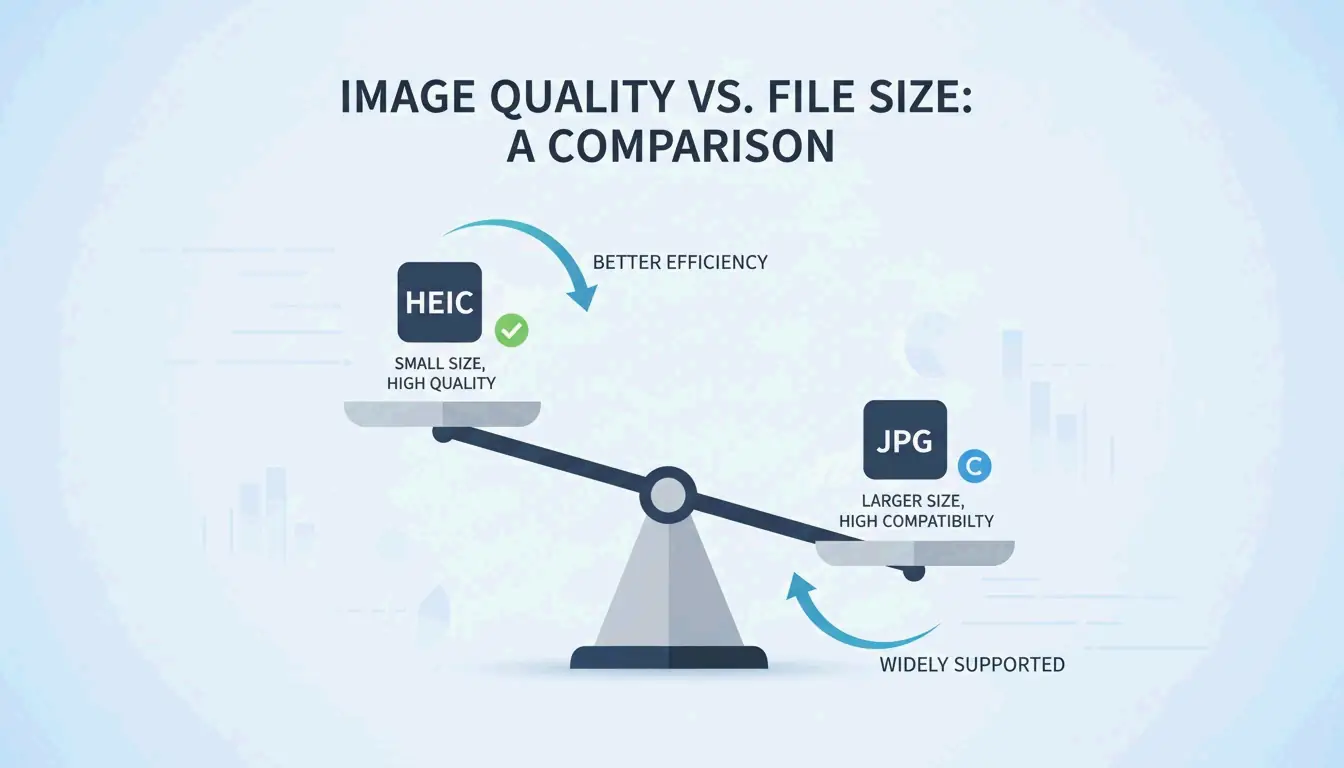
    Trade-off: A 2MB HEIC file becomes approximately 5MB as JPG, according to Freetoolonline. You lose roughly 50% storage efficiency but gain universal compatibility across all Windows devices and websites.

    Conclusion

    For most Windows users in 2026, the optimal setup is: use Picovert for quick, private conversions without installing software; use iMazing for batch-processing large photo libraries offline. If HEIC incompatibility is a recurring headache, switching your iPhone to “Most Compatible” mode is the simplest long-term fix — at the cost of 50% more storage per photo.

    FAQ

    Does converting HEIC to JPG reduce image quality?

    Yes — JPG is a lossy format, so some data is discarded during re-encoding. However, at 90%+ quality settings, the visual difference is imperceptible to the human eye. The trade-off is file size: the resulting JPG will be approximately 2× larger than the original HEIC.

    HEIC vs JPG: Quality & File Size Balance

    How do I preserve EXIF metadata during bulk conversion?

    Use iMazing HEIC Converter or Picovert — both offer explicit “Keep Metadata” or “Include EXIF” options. The Windows Photos “Save As” method typically retains the date but may strip GPS tags and HDR color data depending on your system configuration.

    Can I convert HEIC to JPG on Windows 11 without third-party software?

    Yes, using the built-in Photos app with the HEIF Image Extensions installed from the Microsoft Store. Open the image, use “Save As” and select JPEG. This method is slower for batching since files must be saved individually.

  • How to AI Prompt with BeConverter: Reverse Engineer Any Visual in 4 Steps

    How to AI Prompt with BeConverter: Reverse Engineer Any Visual in 4 Steps

    Upload an image to BeConverter, let its Vision-Language Model (VLM) decompose the visual into style tokens, then paste the extracted prompt into Midjourney, Stable Diffusion, or FLUX. That is the complete workflow for turning any visual into a reproducible AI prompt—no guesswork required.

    What Is Reverse Prompting and How Does BeConverter Work?

    Reverse prompting converts pixels back into text a generative model can understand. Instead of writing a prompt from scratch and hoping the output matches a reference, you start with the finished image and extract the exact keywords, lighting conditions, and aesthetic tags that define its look.

    BeConverter uses a Vision-Language Model (VLM) to analyze an image’s artistic properties. The model compares your photo against its training data to classify attributes like rendering style (3D vs. oil painting), lighting setup (volumetric vs. ambient), and composition. The result is a structured text prompt you can feed into any image generator.

    VLM vs. OCR: Why Standard Scanning Cannot Read Art

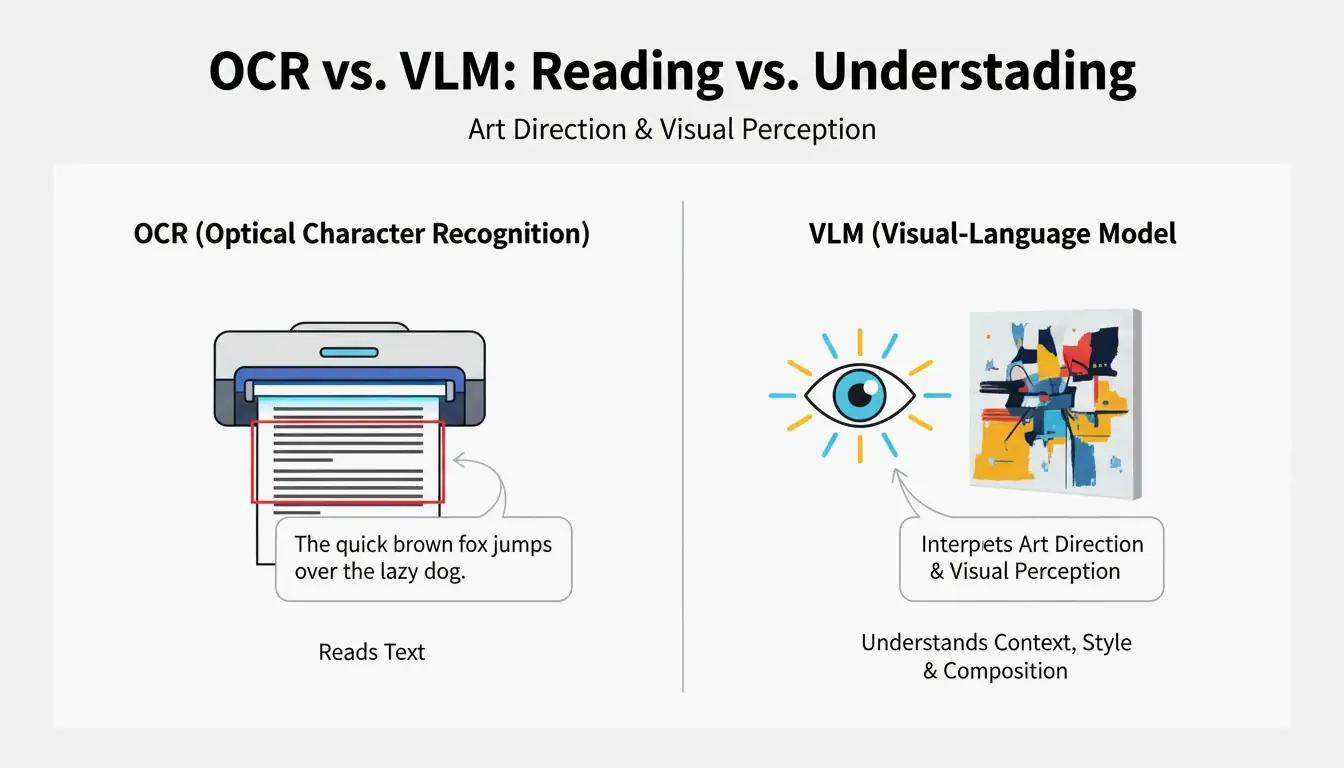
    Optical Character Recognition (OCR) reads text—letters, numbers, receipts. A VLM reads art direction. As PromptsEra explains, where OCR sees the word “STOP” on a sign, a VLM detects the octagonal shape, the faded red paint, the depth of field, and the angle of the sun—details essential for visual reproduction.

    Simple comparison between OCR (text focus) and VLM (artistic focus)

    Capability OCR VLM
    Reads text Yes Limited
    Identifies lighting No Yes
    Detects composition style No Yes
    Extracts color grading No Yes
    Outputs prompt-ready text No Yes

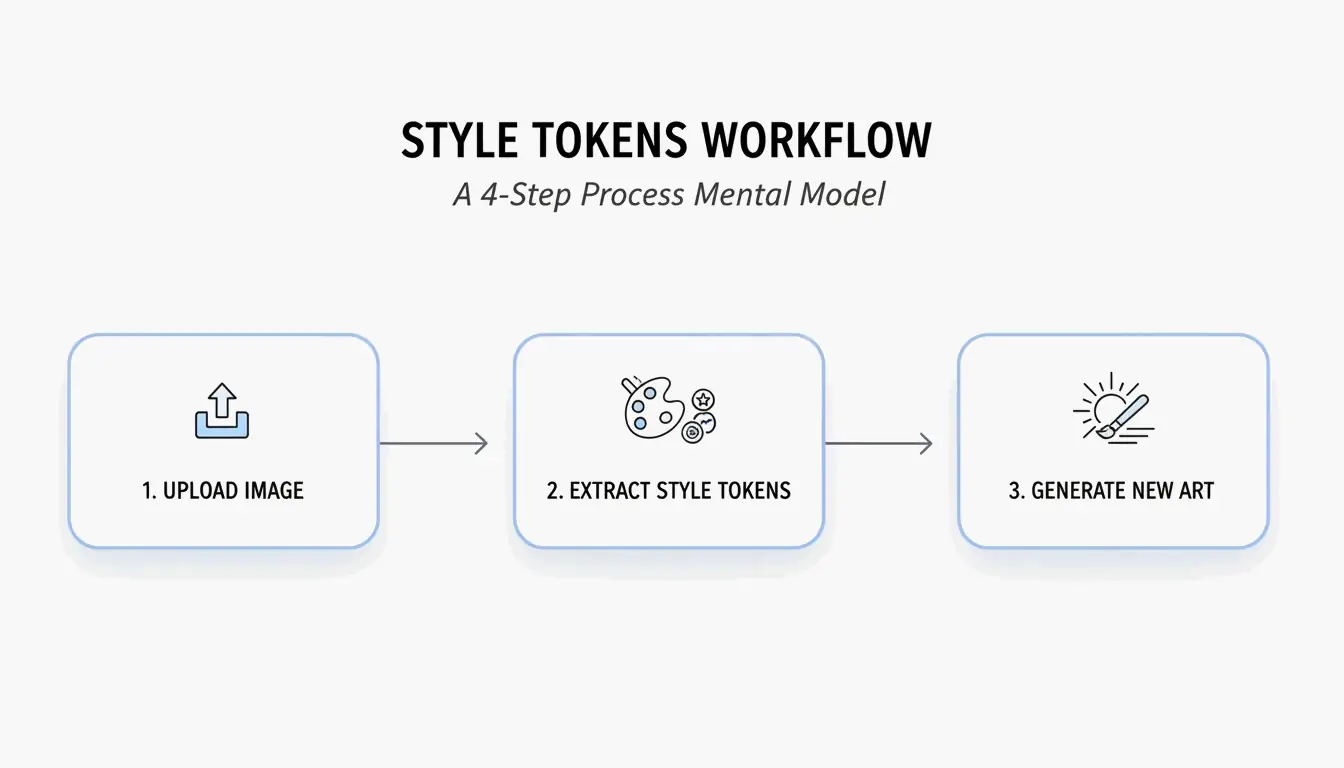
    4-Step Workflow: How to AI Prompt with BeConverter

    Based on the Style Token Isolation Strategy from PromptsEra, follow this sequence:

    1. Upload your source image — Use a high-resolution file. The VLM needs clear pixels to detect subtle attributes like “volumetric lighting” or “35mm lens grain.”
    2. Choose your interrogator — Select CLIP Interrogator for descriptive, poetic prompts (ideal for Midjourney) or DeepDanbooru for comma-separated tags (ideal for Stable Diffusion).
    3. Isolate style tokens — Delete the subject tokens (e.g., “a cat”) and retain only the style markers (e.g., “cyberpunk, neon rim lighting, 8k, cinematic depth of field”).
    4. Paste into your generator — Copy the cleaned tokens into Midjourney v7, Stable Diffusion, or FLUX and generate.

    3-step core workflow: Upload -> Extract Tokens -> Generate New

    Adapting Prompts for 2026 Models: FLUX vs. Midjourney

    Each model interprets prompts differently. PromptsEra notes that abstract descriptions like “melancholy atmosphere” work well in Midjourney but fail in FLUX, which requires literal spatial descriptions like “dark room with rain hitting the window, overhead fluorescent light casting long shadows.”

    Prompt Style Midjourney v7 FLUX Stable Diffusion
    Abstract/poetic Strong Weak Moderate
    Literal/spatial Moderate Strong Moderate
    Comma-separated tags Moderate Moderate Strong
    Negative prompts Supported (--no) Supported Supported

    The Frankenstein Strategy: Merging Styles from Multiple Images

    The most effective reverse engineering technique combines style tokens from different sources. Use BeConverter to extract lighting from Image A and subject rendering from Image B, then merge them into a single prompt.

    Key controls for consistent merging:

    • Aspect Ratio — Set explicitly (e.g., --ar 16:9 for Midjourney) since reverse tools cannot infer your intended canvas.
    • Negative Prompts — Always add exclusions like “blurry, deformed, low quality.” Reverse tools only detect what is present; they cannot identify what should be absent.

    As Andrew Lo, Director of MIT’s Laboratory for Financial Engineering, advises: “Always ask the LLM, what are you uncertain about? What information are you missing?” Apply the same principle—identify the gaps in your reconstructed prompt before generating.

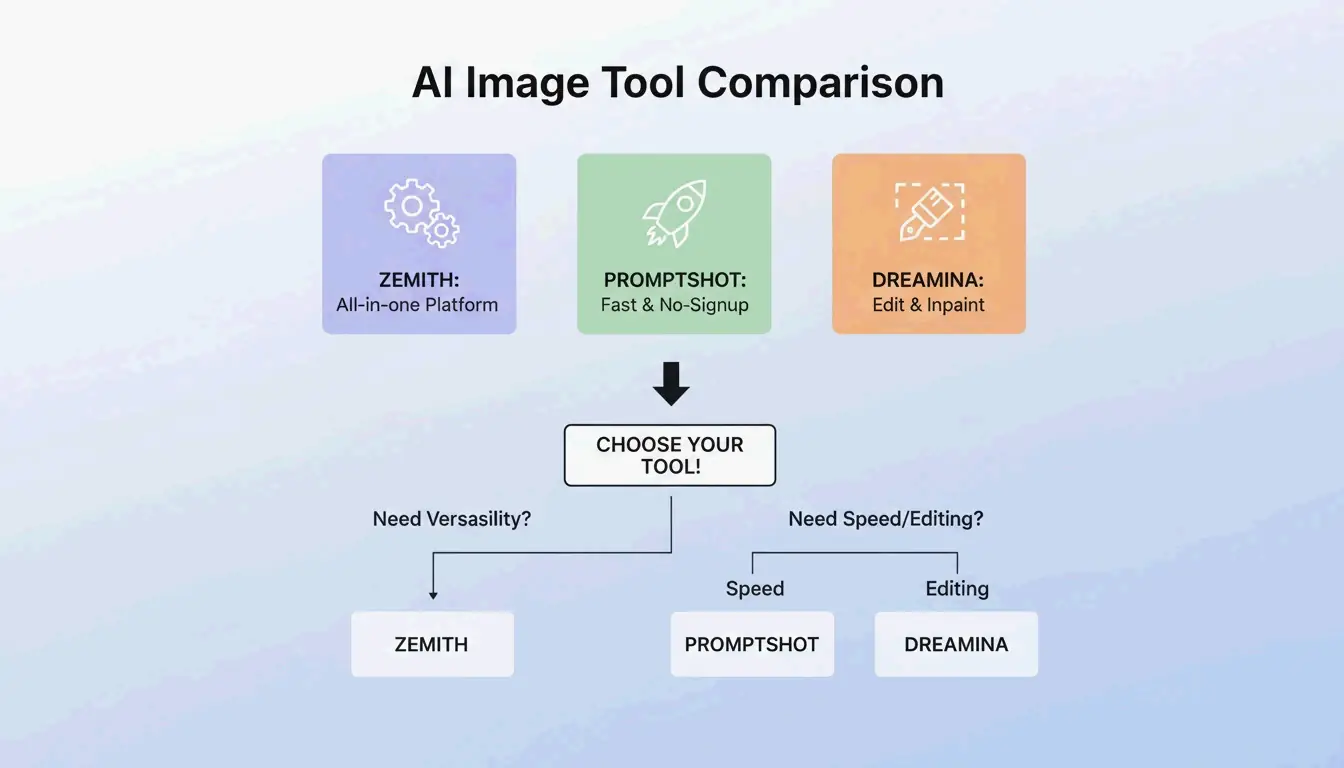
    BeConverter vs. Zemith vs. PromptShot: Tool Comparison (2026)

    Feature BeConverter Zemith PromptShot AI
    Interrogator modes CLIP + DeepDanbooru Multi-model (25+) Single-pass
    Daily free credits Yes 100 Unlimited
    Sign-up required No Yes No
    Best for Token isolation All-in-one workflow Quick extractions
    Output format Descriptive + tags Model-specific Prompt string

    Additional options worth noting:

    • Zemith — Over 30,000 users as of 2026. According to Zemith, it supports 25+ models including GPT-5.5 with 100 daily credits.
    • PromptShot AI — No account needed. PromptShot AI offers a 5-step process designed for creators who need to “recreate and improve” AI art quickly.
    • Dreamina (GPT Image 2) — Generate and edit in one window. According to Dailyhunt, the GPT Image 2 model supports inpainting and lighting adjustments directly after prompt generation.

    Key highlights/strengths of the three mentioned tools

    Conclusion

    Reverse prompting with BeConverter converts any reference image into a structured, reusable AI prompt in seconds. Upload your image, extract style tokens with CLIP or DeepDanbooru, isolate the artistic attributes, and paste into your generator of choice. For best results, adapt the prompt format to your target model—abstract for Midjourney, literal for FLUX, tag-based for Stable Diffusion—and always include negative prompts to maintain output quality.

    FAQ

    Can reverse prompting recover the exact original prompt used by another creator?

    No. It reconstructs a descriptive approximation based on visual analysis. Different VLM models prioritize different attributes, so the output is a high-quality reconstruction—not hidden metadata or keystroke recovery.

    Does image-to-prompt technology work on real smartphone photographs?

    Yes. PromptsEra notes that VLMs can identify real-world attributes like “golden hour lighting” or specific camera lenses and translate those textures into prompts for artistic reinterpretation.

    Is it legal to use prompts extracted from copyrighted artwork?

    Prompts are short text strings and are not typically covered by copyright. The ethical approach is to extract style tokens to inform your own original work. As PromptsEra points out, attempting to exactly replicate a protected character can create legal issues—use these tools to learn techniques, not to copy.

  • UTF-8 to Base64URL Converter Guide (2026)

    UTF-8 to Base64URL Converter Guide (2026)

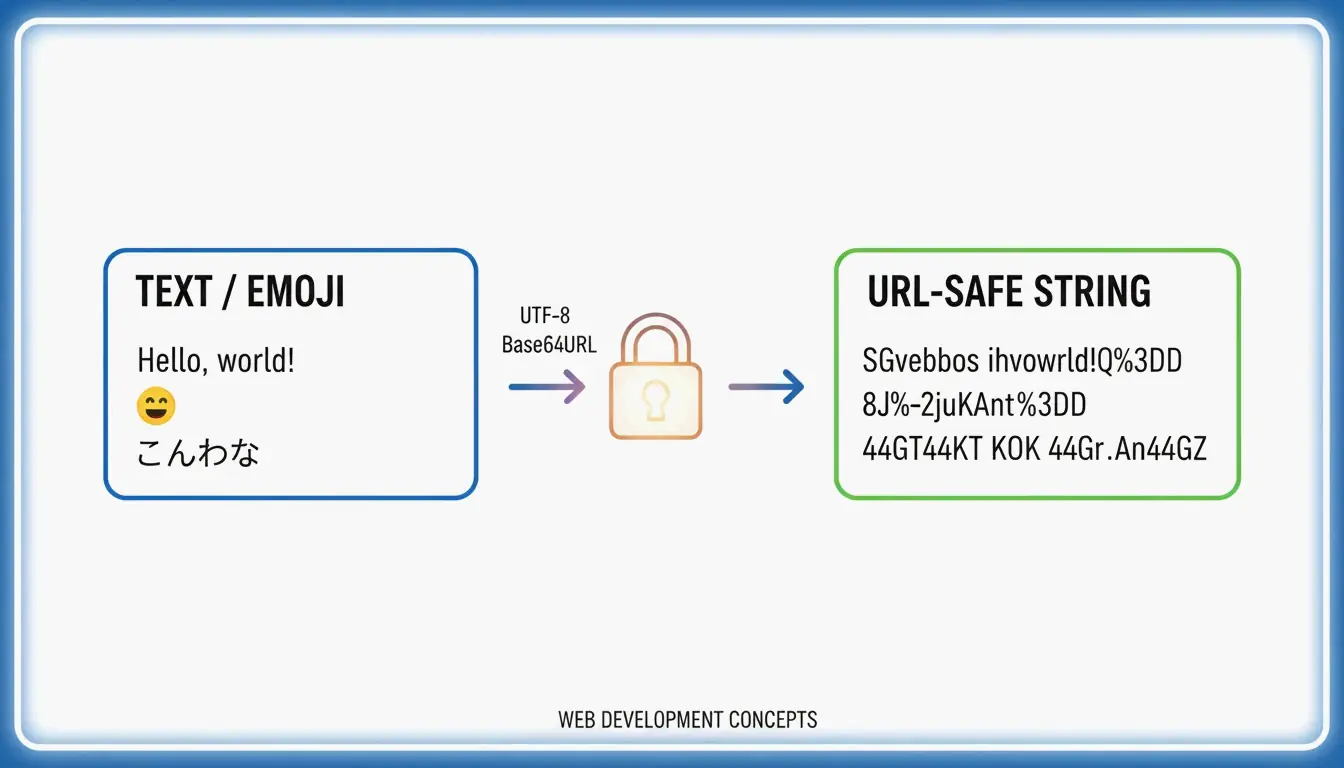
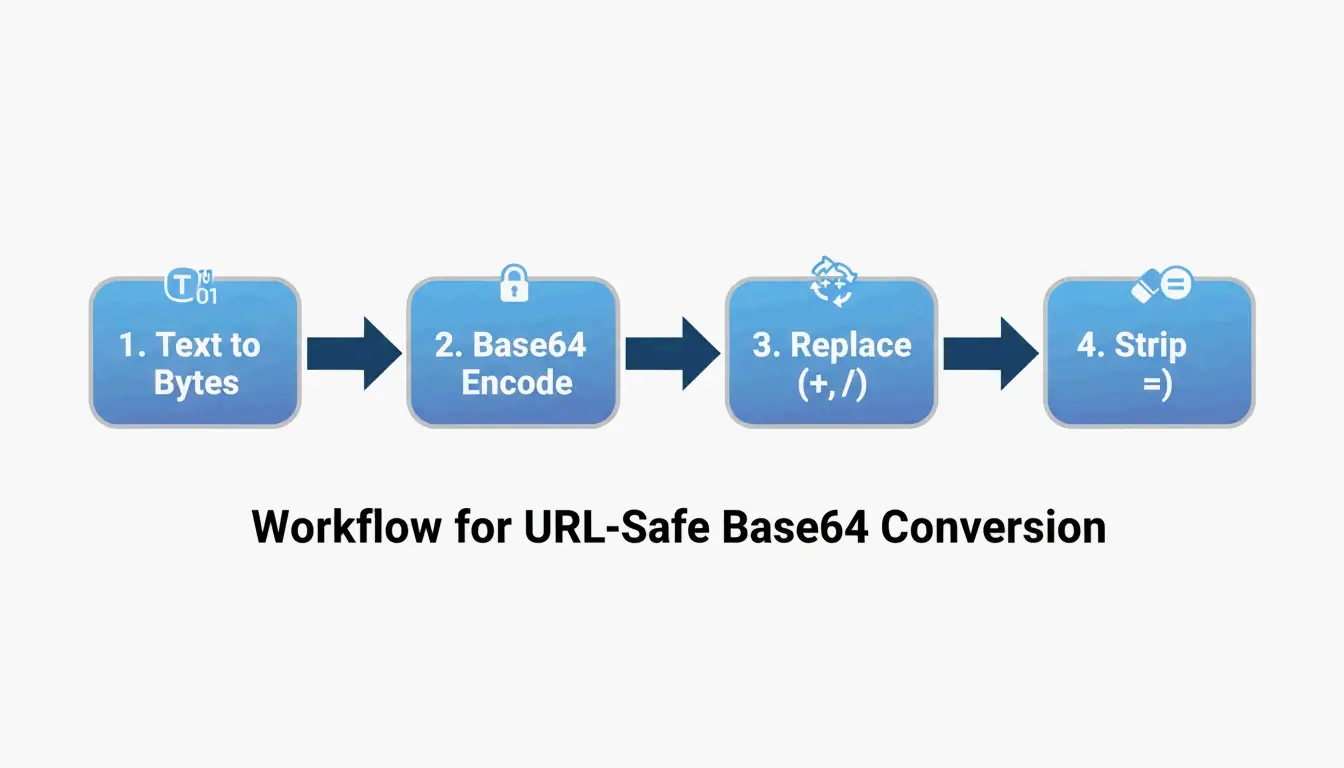
    To convert UTF-8 to Base64URL, follow 4 steps: (1) encode text to UTF-8 bytes, (2) apply standard Base64, (3) swap + → - and / → _, (4) strip trailing = padding. This produces a URL-safe string per RFC 4648, used in JWTs and API headers.

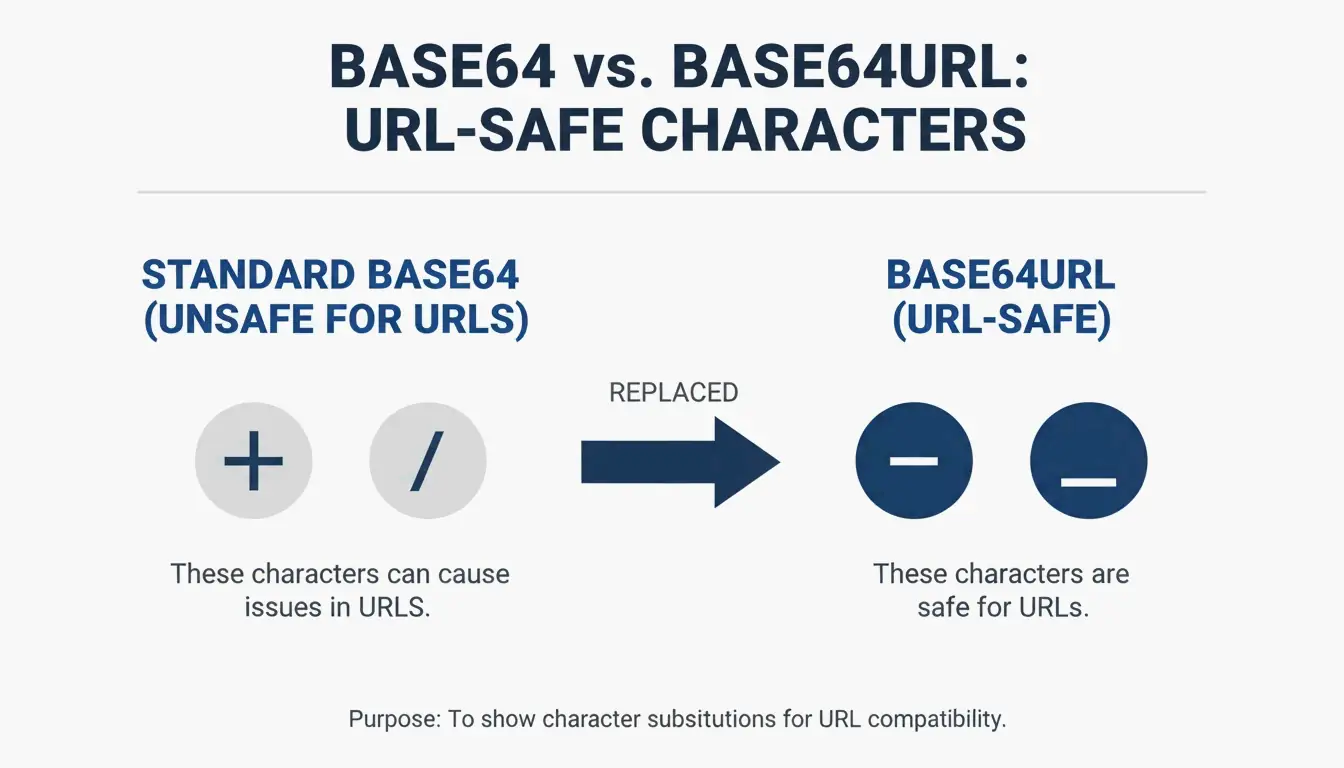
    Standard Base64 vs. Base64URL

    Character Standard Base64 Base64URL Why
    62nd character + - + means space in URLs
    63rd character / _ / is a path separator in URLs
    Padding = required Omitted = becomes %3D in URLs
    URL-safe No Yes Direct use in query strings, filenames

    Per RFC 4648 §5, this “URL and Filename Safe Alphabet” ensures cross-system compatibility.

    A simple side-by-side comparison of Standard Base64 vs Base64URL unsafe characters.

    The 4-Step Conversion Process

    Step Operation Example (“Hello”)
    1 UTF-8 text → bytes H e l l o → byte array
    2 Bytes → standard Base64 SGVsbG8=
    3 Swap + → -, / → _ No change needed here
    4 Strip trailing = padding SGVsbG8

    Base64 encoding increases data size by ~33% per Wikipedia.

    The 4-step conversion pipe: Text -> Bytes -> Base64 -> Base64URL.

    Unicode and Emoji Handling

    Per NextUtils, Base64 is encoding, not encryption — it moves data through text-only channels. To handle Unicode/emoji without corruption (“Mojibake”), always use TextEncoder to convert to UTF-8 bytes first.

    Input Without TextEncoder With TextEncoder
    Hello 世界! 🌍 Mojibake / TypeError Correct Base64URL

    Code Examples

    JavaScript (Browser) — Unicode-Safe

    function toBase64Url(str) {
        const bytes = new TextEncoder().encode(str);
        const base64 = btoa(String.fromCharCode(...bytes));
        return base64.replace(/\+/g, '-').replace(/\//g, '_').replace(/=+$/, '');
    }
    

    Python 3 — Standard Library

    Per AskPython:

    import base64
    
    data = "Hello 世界! 🌍"
    encoded = base64.urlsafe_b64encode(data.encode('utf-8')).decode('utf-8').rstrip('=')
    print(encoded)
    

    Node.js — Buffer Conversion

    const str = "API_Payload_Data";
    const base64url = Buffer.from(str, 'utf8')
        .toString('base64')
        .replace(/\+/g, '-')
        .replace(/\//g, '_')
        .replace(/=/g, '');
    

    Troubleshooting: Padding Errors

    Error Cause Fix
    binascii.Error: Incorrect padding Missing = padding Add = until length is multiple of 4
    TypeError with atob() Non-ASCII characters Use TextEncoder first
    Garbled output Skipped UTF-8 encoding Always encode to bytes before Base64

    Per AskPython, calculate missing padding: padding_needed = (4 - len(data) % 4) % 4, then append that many = characters.

    Use Cases: JWT and Data URIs

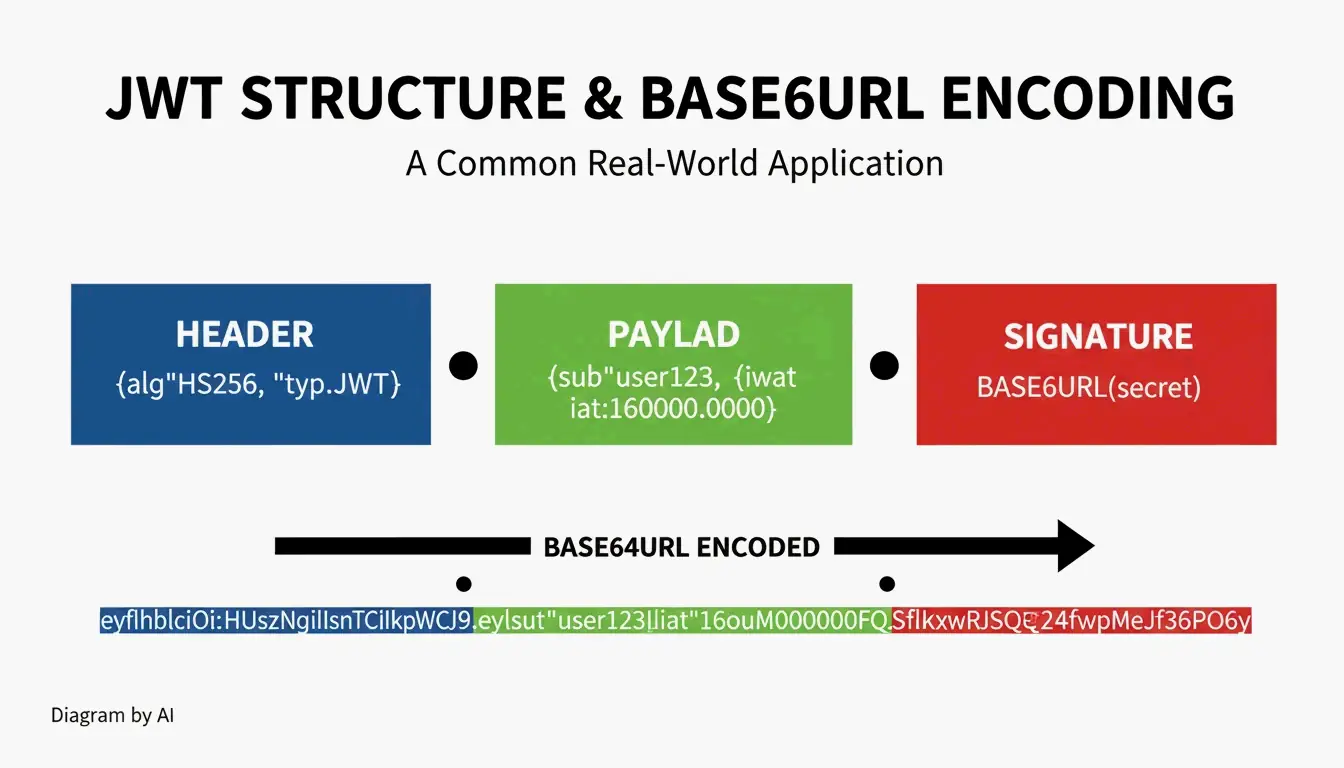
    JWT (JSON Web Token) Structure

    Part Content Encoding
    Header Algorithm + token type Base64URL
    Payload Claims (user data, expiration) Base64URL
    Signature HMAC or RSA signature Base64URL

    JWTs often start with eyJ — the Base64URL encoding of { (opening JSON bracket).

    A simple visualization of a JWT structure showing its 3 Base64URL parts.

    Base64 vs. Base64URL by Use Case

    Use Case Encoding Padding
    JWT tokens Base64URL Omitted
    Data URIs (embedded images) Standard Base64 Required
    HTTP Basic Auth Standard Base64 Required
    URL query parameters Base64URL Omitted

    Conclusion

    4 steps: UTF-8 bytes → Base64 → swap +/ to -_ → strip padding. Use TextEncoder in JavaScript, base64.urlsafe_b64encode() in Python, Buffer in Node.js. Follow RFC 4648 for cross-system compatibility. Base64URL is encoding, not encryption — use AES-256 or TLS for security.

    FAQ

    Is Base64URL the same as encryption?

    No. Base64URL is reversible encoding — anyone can decode it without a key. Use AES-256 or TLS/SSL for securing sensitive data.

    Why does Base64URL fail in a standard Base64 decoder?

    Standard decoders expect +, /, and = padding. Base64URL uses -, _, and omits padding. Reverse the character swaps and restore padding before decoding.

    Why is padding omitted in JWTs?

    The = character becomes %3D in URLs, making strings longer and harder to read. RFC 4648 allows omission because decoders can reconstruct the original length without padding markers.

  • Age Calculator: How to Find Your Exact Age in Years, Months & Days (2026)

    Age Calculator: How to Find Your Exact Age in Years, Months & Days (2026)

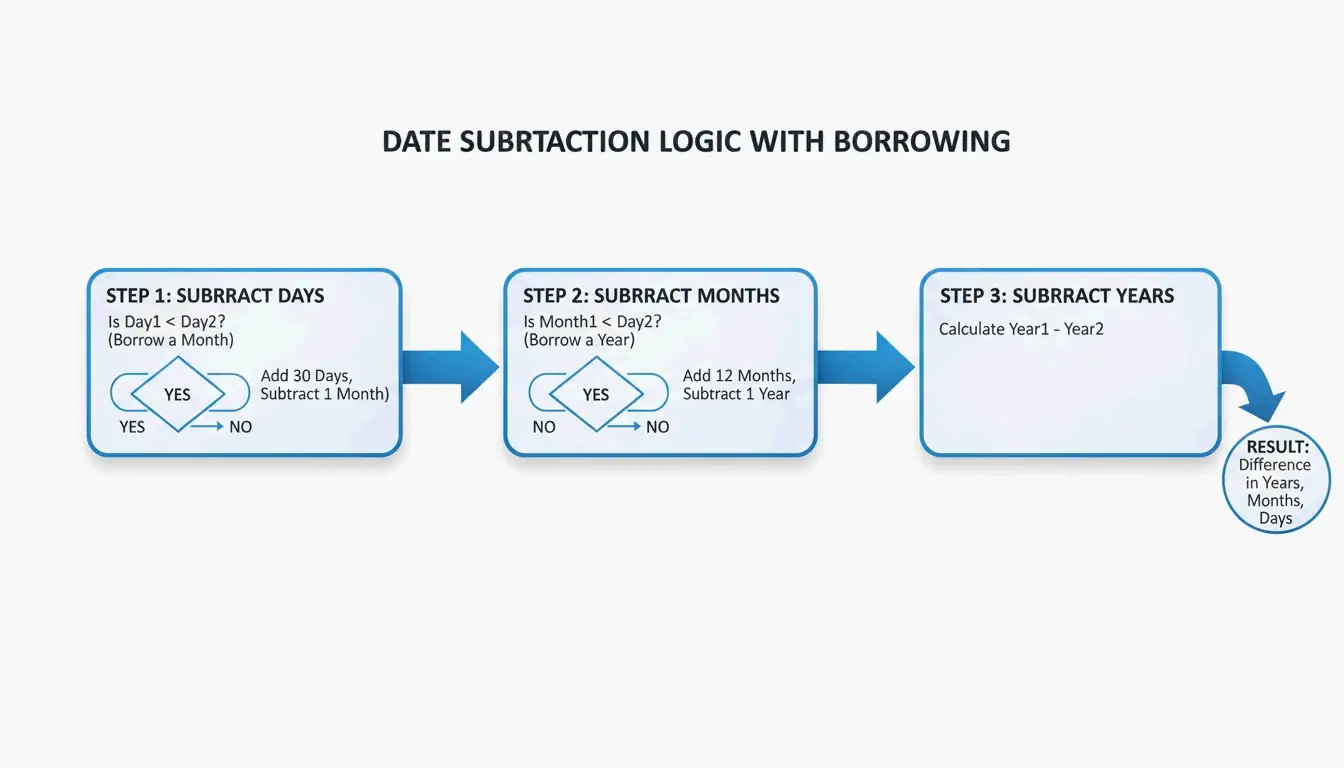
    To find your exact age, subtract birth date from current date — start with days, then months, then years, borrowing from the next larger unit when needed. A professional age calculator handles leap years and variable month lengths (28–31 days) automatically.

    The 3-Step Manual Calculation

    Step-by-Step Example

    DOB: July 15, 2016 | Today: May 7, 2026

    Step Operation Calculation Result
    1. Days Borrow 30 days from April (30 + 7) − 15 22 days
    2. Months Borrow 12 months (1 year) (12 + 4) − 7 9 months
    3. Years Subtract remaining years 2025 − 2016 9 years
    Result — — 9 years, 9 months, 22 days

    Per ChronoAge and AgeChronologicalCalculator, this method follows the Y;M;D standard notation: 9;9;22.

    Simple 3-step calculation order: Days → Months → Years

    Borrowing Rules by Month

    When borrowing days, add the exact number of days from the previous month:

    Previous Month Days to Borrow
    January, March, May, July, August, October, December 31 days
    April, June, September, November 30 days
    February (non-leap) 28 days
    February (leap year) 29 days

    Y;M;D Format for Clinical Assessments

    Per ChronoAge, the Y;M;D format is required for norm-referenced assessments since Pearson’s official age calculator is no longer available.

    Assessment Why Exact Age Matters
    WISC-V (IQ test) Determines correct normative scoring table
    CELF-5 (language) Age bracket placement — 1 day off = wrong bracket
    Brigance Requires “Total Months” count (e.g., 87 months)

    Standardized scoring depends on placing the child in the exact age bracket. Even a single day’s error can shift scores to the wrong norm group.

    Leap Year Rules

    Per Infinity Calculator:

    Year Type Rule Example
    Leap year Divisible by 4, except centuries unless divisible by 400 2024, 2028, 2000
    Common year All others 2025, 2026, 2100

    February 29 Birthdays

    People born on Feb 29 use March 1 as their legal birthday in non-leap years — ensuring the full 365-day cycle has elapsed before incrementing the year count.

    Adjusted Age for Premature Infants

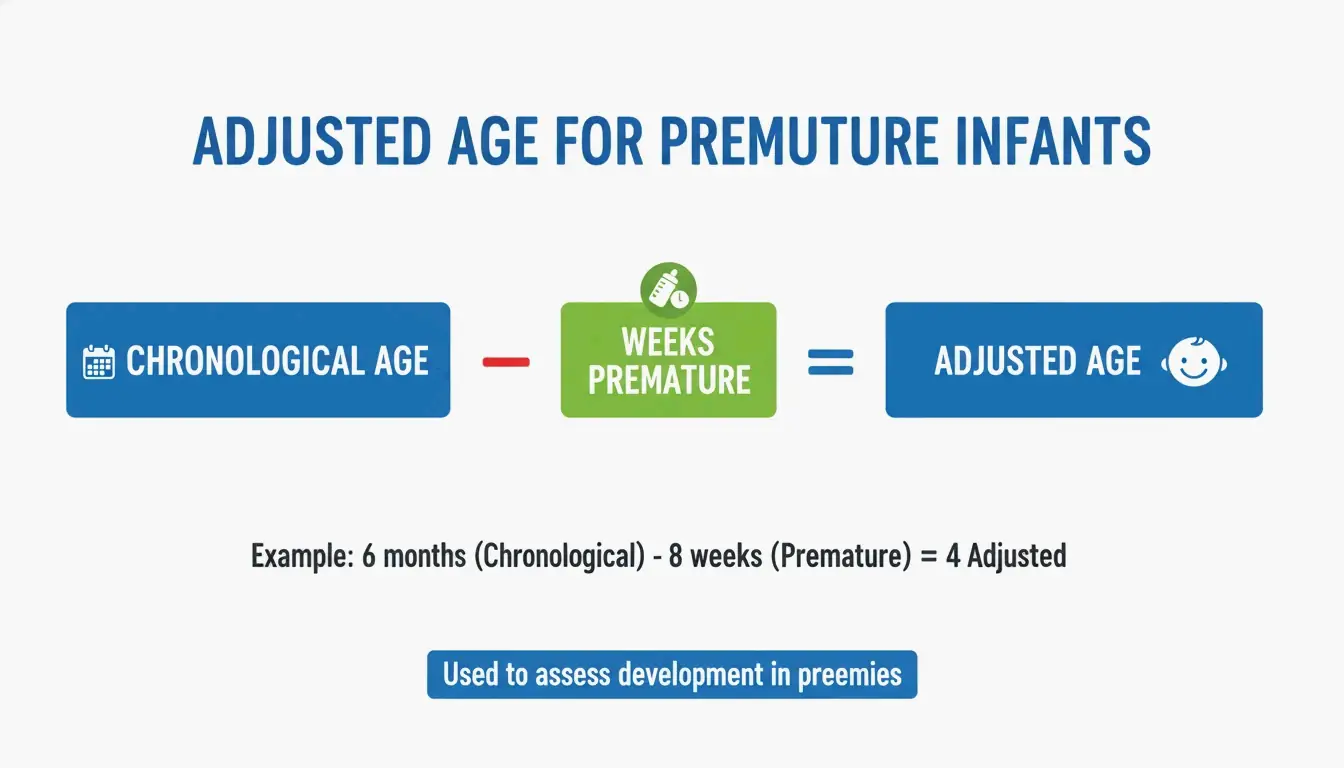
    Per ChronoAge, pediatricians use adjusted (corrected) age for developmental tracking until age 2.

    Formula: Adjusted Age = Chronological Age − Weeks/Months Born Early

    Example Calculation Adjusted Age
    6-month-old born 2 months early 6 months − 2 months 4 months
    12-month-old born 8 weeks early 12 months − 2 months 10 months
    18-month-old born 6 weeks early 18 months − 1.5 months 16.5 months

    Concept of Adjusted Age: Chronological Age minus Prematurity

    Cultural Age Systems

    System How It Works Used In
    International (standard) Age 0 at birth, +1 on birthday Global standard
    East Asian (traditional) Age 1 at birth, +1 every Lunar New Year Social settings (South Korea officially switched to international in 2023 per Calculatorr)

    Generation Classification (2026)

    Per Pew Research Center data:

    Generation Birth Years Age in 2026
    Millennials 1981–1996 30–45
    Gen Z 1997–2012 14–29
    Gen Alpha 2013–Present 0–13

    Age Measurement Precision

    Metric Value Source
    Average calendar year 8,766 hours Standard calculation
    Most precise measure Total days lived Rechneronline — avoids month/year length fluctuation

    Conclusion

    Days → Months → Years, borrowing from the next unit when needed. For clinical work, use the Y;M;D format to ensure correct assessment scoring. For premature infants, calculate adjusted age by subtracting weeks born early. For Feb 29 birthdays, use March 1 in non-leap years. An automated calculator eliminates manual borrowing errors.

    FAQ

    How does an age calculator handle February 29 birthdays?

    Most systems use March 1 in non-leap years as the legal birthday. This ensures the full 365-day cycle completes before incrementing the year count.

    What is the difference between chronological and biological age?

    Chronological age = time elapsed since birth (fixed, Y;M;D). Biological age = how old your cells/tissues appear based on health markers, lifestyle, and genetics (variable).

    How do I calculate adjusted age for a premature infant?

    Adjusted Age = Chronological Age − Weeks/Months Born Early. Example: a 6-month-old born 2 months early has an adjusted age of 4 months. Standard practice uses this until the child reaches 24 months.

  • Best Free Unit Converters You Need (2026)

    Best Free Unit Converters You Need (2026)

    The best free unit converters in 2026: Omni Calculator for technical depth (321+ calculators), UnitKick for fast daily use (90+ categories), and OANDA for currency (31+ years of data). Top tools use NIST-validated factors and browser-based processing for privacy.

    Top Converters Compared

    Tool Categories Best For Privacy Cost
    Omni Calculator 321+ calculators Engineering, physics, dimensional analysis Browser-based Free
    UnitKick 90+ categories Everyday use, kitchen, fast lookups Browser-based (offline) Free
    FastTool 70+ categories Precision work, digital units (px/em/rem) Browser-based Free
    Numeraty Multiple Data transfer (Mbps/Gbps), structured datasets Browser-based Free
    OANDA Currency Financial, historical FX data Server-side (SSL) Free
    UnitConvertNow Multiple AI-driven dataset conversion Varies Free

    Selection Criteria: What Separates Good from Great

    Criterion Why It Matters
    NIST/SI validation Ensures consistent results aligned with international standards
    Significant figures handling Prevents “false precision” — showing more decimals than input supports
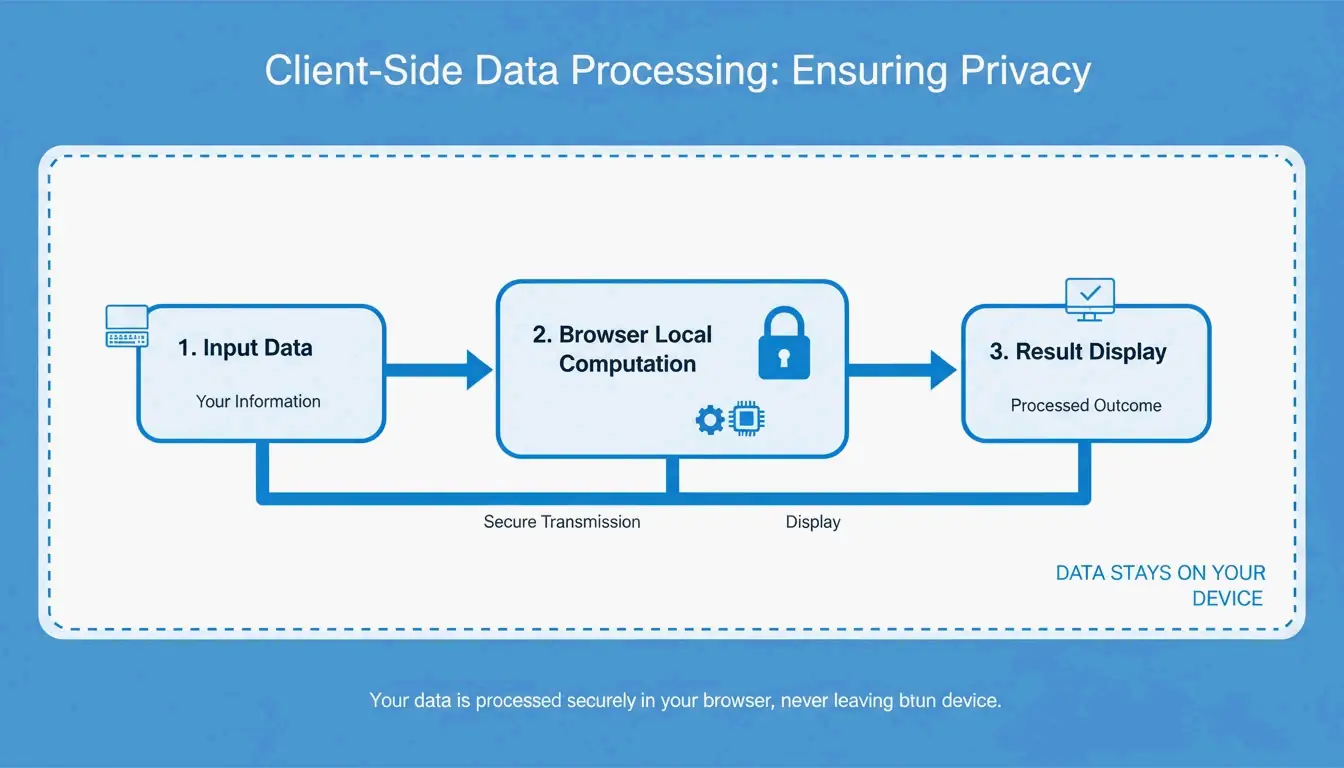
    Browser-based processing Data stays on your device; works offline after initial load
    Formula transparency Shows underlying math for manual verification
    Error handling Clear messages for edge cases (e.g., division by zero)

    Per FastTool: “False precision is a quiet credibility killer.” Reliable tools verify factors against NIST and BIPM standards.

    Browser-based processing privacy flow

    US Customary vs. Imperial Units: A Critical Trap

    Units with the same name but different volumes:

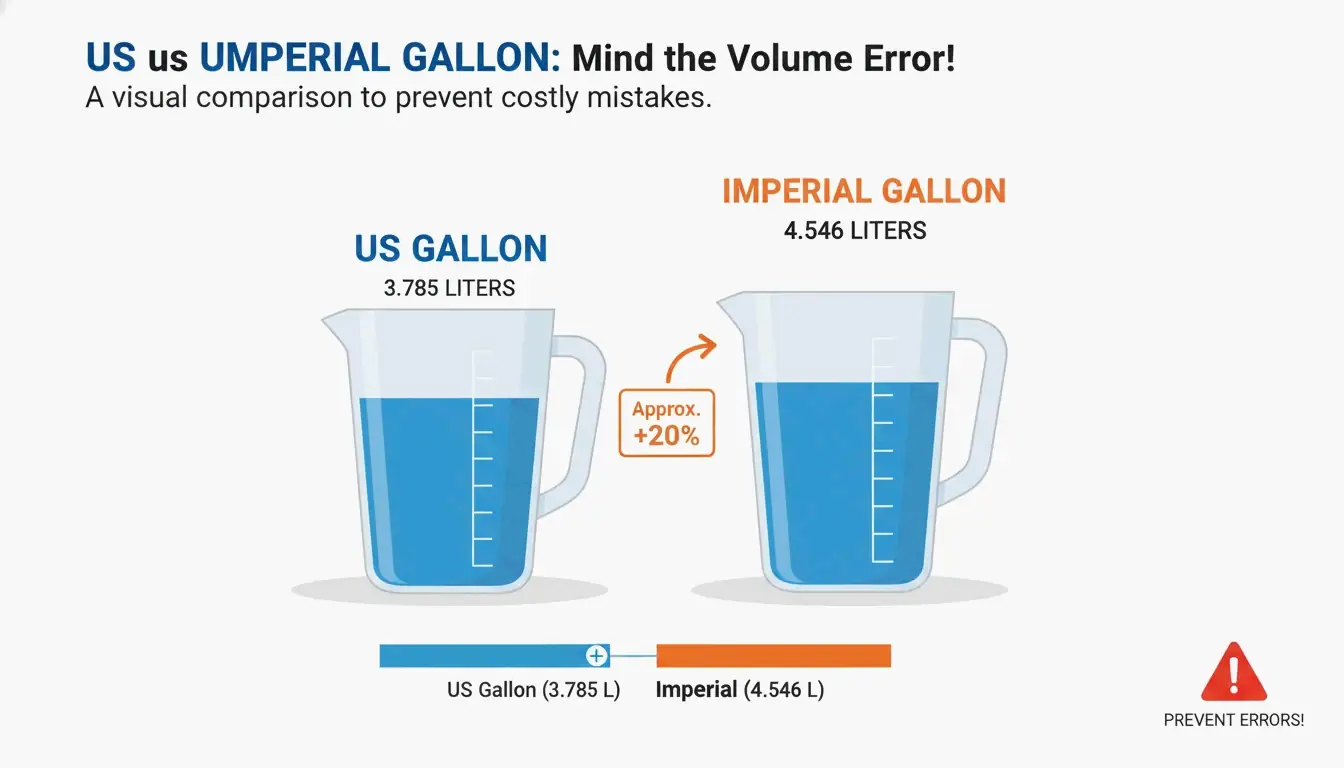
    Unit US Customary Imperial (UK) Difference
    Gallon 3.785 L 4.546 L +20% larger
    Fluid Ounce 29.573 mL 28.413 mL −3.9% smaller
    Cup 236.588 mL 284.131 mL +20% larger
    Pint 473.176 mL 568.261 mL +20% larger

    US gallon vs Imperial gallon visual comparison

    Mixing these up causes 20% volume errors — catastrophic in fuel, chemical, and logistics industries.

    Historical Conversion Disasters

    Incident Year Error Cost
    Mars Climate Orbiter 1999 Pound-force seconds vs. newton-seconds $125 million lost per FastTool
    Gimli Glider (Air Canada) 1983 Kilograms confused with pounds for fuel Emergency landing

    Both caused by mixing metric and imperial without validated conversion tools.

    Tool Recommendations by Profession

    Profession Recommended Tool Why
    Engineer Omni Calculator Dimensional analysis, Newtons/Pascals/Joules, BIPM-aligned
    Web Developer FastTool / Omni Calculator px → em → rem → vw/vh conversions
    Chef / Home Cook UnitKick Volume-to-weight by ingredient density
    Network Engineer Numeraty / FastTool Mbps ↔ Gbps ↔ MB/s data transfer units
    Finance / Trading OANDA OANDA Rates™ trusted by corporations and auditors
    Student Omni Calculator Shows formulas for learning and verification

    2026 Trends: AI-Integrated Conversion

    • AI dataset conversion: Tools like UnitConvertNow convert entire structured datasets automatically
    • Data transfer units: Dedicated Mbps/Gbps converters for network engineering per Numeraty and FastTool
    • Precision note: Per FastTool, pi has trillions of known digits but “15 decimal places provide more than enough precision” for practical use

    Conclusion

    Bookmark UnitKick for daily tasks, Omni Calculator for complex projects, and OANDA for currency. Always verify whether you’re using US or Imperial units before finalizing calculations. Use NIST-validated tools to avoid the kind of costly errors seen in aviation and space exploration history.

    FAQ

    Are online unit converters accurate enough for professional engineering?

    Yes — if they use NIST-validated factors. Tools like Omni Calculator display the underlying formula for manual verification. Always maintain awareness of significant figures and rounding.

    What is the difference between a US Gallon and an Imperial Gallon?

    US Gallon = 3.785 L (United States). Imperial Gallon = 4.546 L (UK, ~20% larger). Using the wrong unit causes a 20% volume error — critical in fuel, chemical, and logistics.

    Do free unit converters store my data?

    Most reputable tools (UnitKick, Numeraty, FastTool) use browser-based processing — conversions happen on your device, data never reaches a server. Look for “no server-side storage” or “browser-based” claims in documentation.

  • Convert iPhone HEIC Photos to JPG: Simple Guide (2026)

    Convert iPhone HEIC Photos to JPG: Simple Guide (2026)

    To convert iPhone HEIC photos to JPG, use the iOS Files app: copy photos from the Gallery, paste into a Files folder — iOS auto-converts to JPEG. On Windows 11, use the Photos app “Save As” with HEIF extensions installed. On Mac, open in Preview → File → Export → JPEG.

    Conversion Methods Compared

    Method Platform Batch Cost Privacy
    iOS Files app iPhone/iPad Yes (select multiple) Free Full offline
    iOS Quick Actions iPhone/iPad Per file Free Full offline
    Windows 11 Photos Windows Per file Free Full offline
    Mac Preview macOS Per file Free Full offline
    IrfanView Windows 1,000+ files Free Full offline
    XnConvert Win/Mac/Linux 1,000+ files Free Full offline
    ImageMagick CLI (all) 10,000+ files Free Full offline
    WebAssembly tools Browser Varies Free Client-side (no upload)

    Method 1: iOS Files App (Built-in, Offline)

    Per MergeImages.net, the Files app auto-converts HEIC to JPEG during paste.

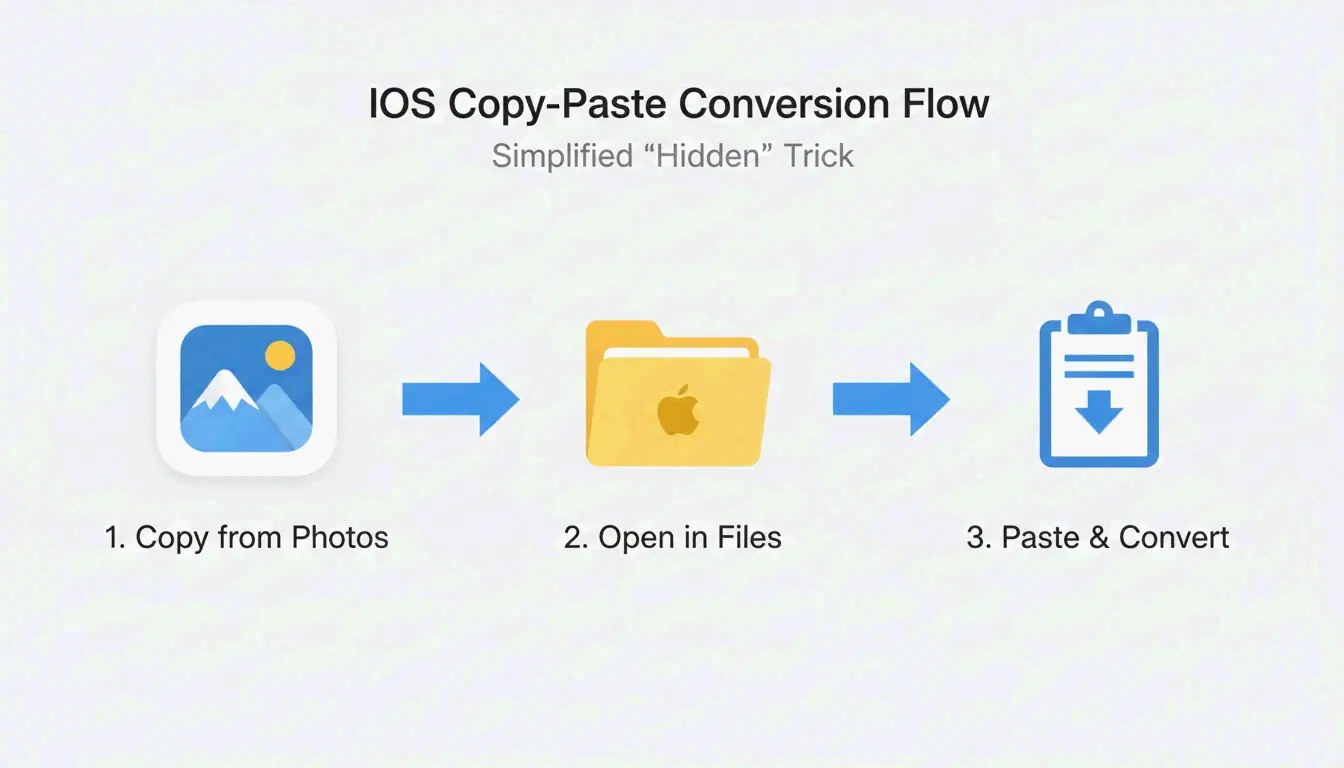
    1. Open Photos app → select images → tap Copy Photos
    2. Open Files app → navigate to a folder
    3. Long-press empty space → tap Paste
    4. Files appear as JPEGs

    Alternative: long-press a single file → Quick Actions → Convert Image → JPEG

    Simple 3-step process: Select/Copy Photos -> Open Files App -> Paste to Convert

    Method 2: Windows 11

    Prerequisites

    Extension Cost Purpose
    HEIF Image Extensions Free Thumbnail preview + basic viewing
    HEVC Video Extensions $0.99 Full codec support

    Install both from the Microsoft Store for native right-click conversion.

    Steps

    1. Open HEIC in Photos app
    2. Click ⋮ (three dots) → Save As
    3. Select JPEG format → Save

    Method 3: Mac Preview

    Per PDF Guru:

    1. Open HEIC files in Preview
    2. File → Export
    3. Select JPEG from format dropdown
    4. Adjust quality slider (balance file size vs. sharpness)
    5. Save

    Privacy: Client-Side vs. Server-Side Conversion

    Model How It Works Your Data
    Client-side (WebAssembly) Conversion runs in browser memory Never leaves your device
    Server-side Photos uploaded to remote server Stored temporarily on third-party server

    Per Ahmer Arain, tools using Canvas API + WebAssembly (like ConvertifyHub, Freetoolonline) process everything locally.

    Privacy Checklist

    Feature What to Look For
    Processing label “No-upload,” “Offline,” “Private”
    Speed Local tools are faster (no upload wait)
    EXIF control Option to keep or strip GPS/timestamp metadata

    HEIC vs. JPG: Technical Comparison

    Property HEIC JPG
    Compression efficiency 50% more efficient Baseline
    Color depth 16-bit 8-bit
    HDR support Yes No
    Live Photos Preserved Lost
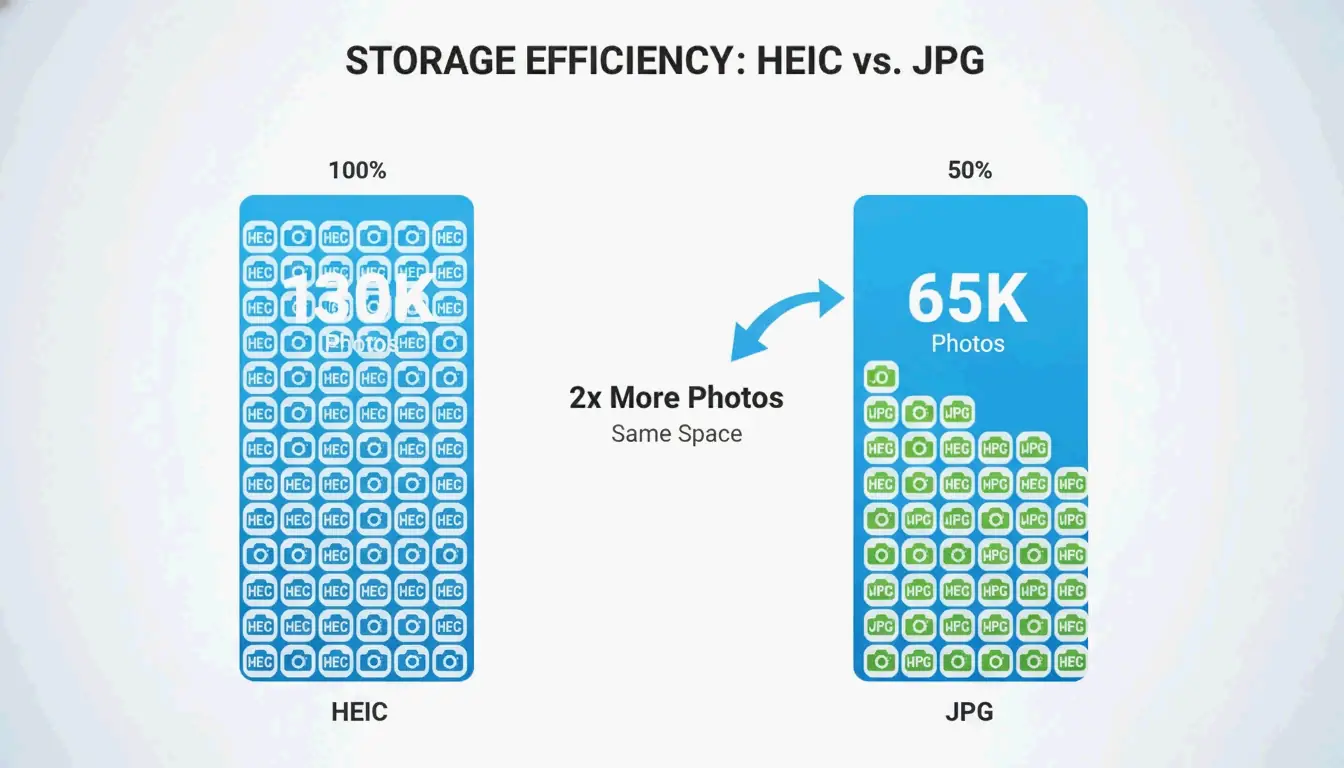
    256GB iPhone capacity ~130,000 photos ~65,000 photos
    Universal compatibility Limited Universal

    Per FyleTools, HEIC is 50% more efficient — a 256GB iPhone holds roughly 130,000 HEIC vs only 65,000 JPEG at equivalent quality.

    Comparison of storage capacity: HEIC vs. JPG on the same device

    Batch Tools for Large Libraries

    Tool Platform Max Batch Best For
    IrfanView Windows 1,000+ Speed per PicTomo
    XnConvert Win/Mac/Linux 1,000+ Preserves EXIF across file types
    ImageMagick CLI (all) 10,000+ Scripted automation

    iPhone Camera Settings: HEIC vs. Most Compatible

    Setting Format Storage Compatibility
    High Efficiency (default) HEIC 50% less space Apple ecosystem
    Most Compatible JPG More space Universal

    Settings → Camera → Formats to switch.

    Recommendation: Keep “High Efficiency” for daily shooting. Convert specific albums only when sharing with non-Apple users or printing.

    Conclusion

    Use the iOS Files app for quick offline conversions. Use IrfanView or XnConvert for batch jobs. For privacy, prefer WebAssembly-based browser tools. Keep HEIC for storage savings; convert to JPG only when compatibility demands it.

    FAQ

    Does converting HEIC to JPG lose quality?

    Yes — re-encoding is lossy. But at 90%+ quality, the difference is invisible. Per Freetoolonline, quality 95 produces a visually identical file ~30% larger than HEIC.

    Why does Windows 11 show blank HEIC thumbnails?

    Missing HEIF Image Extensions (free) or HEVC Video Extensions ($0.99) from the Microsoft Store. Install both to enable native thumbnails without converting.

    Can I convert HEIC to JPG without uploading?

    Yes. iOS Files app works fully offline. On desktop, use WebAssembly-based tools that process in browser memory — images never leave your device.

  • How to Listen to Articles: 7 Best Ways to Hear the Web in 2026

    How to Listen to Articles: 7 Best Ways to Hear the Web in 2026

    To listen to articles in 2026, use AI-driven tools like Speechify (1,000+ voices, 4.5x speed) or built-in browser TTS like Edge Read Aloud (free, natural-sounding). Modern neural TTS makes articles sound like professional podcasts, with conversational AI features for real-time Q&A.

    7 Methods Compared

    # Tool/Method Cost Best For Max Speed
    1 Speechify Freemium Professional productivity, multi-format 4.5x
    2 Noa (News Over Audio) Subscription Curated journalism (FT, Bloomberg, NYT) 2x
    3 Podcast Conversion Varies PDFs, long documents, students 2–3x
    4 Edge Read Aloud Free Quick browser listening, best free voices 2x
    5 Chrome “Listen to this Page” Free Mobile web browsing 2x
    6 News in Levels Free English learners (3 difficulty levels) Adjustable
    7 Pocket / Instapaper Freemium Save-for-later with audio sync 2x

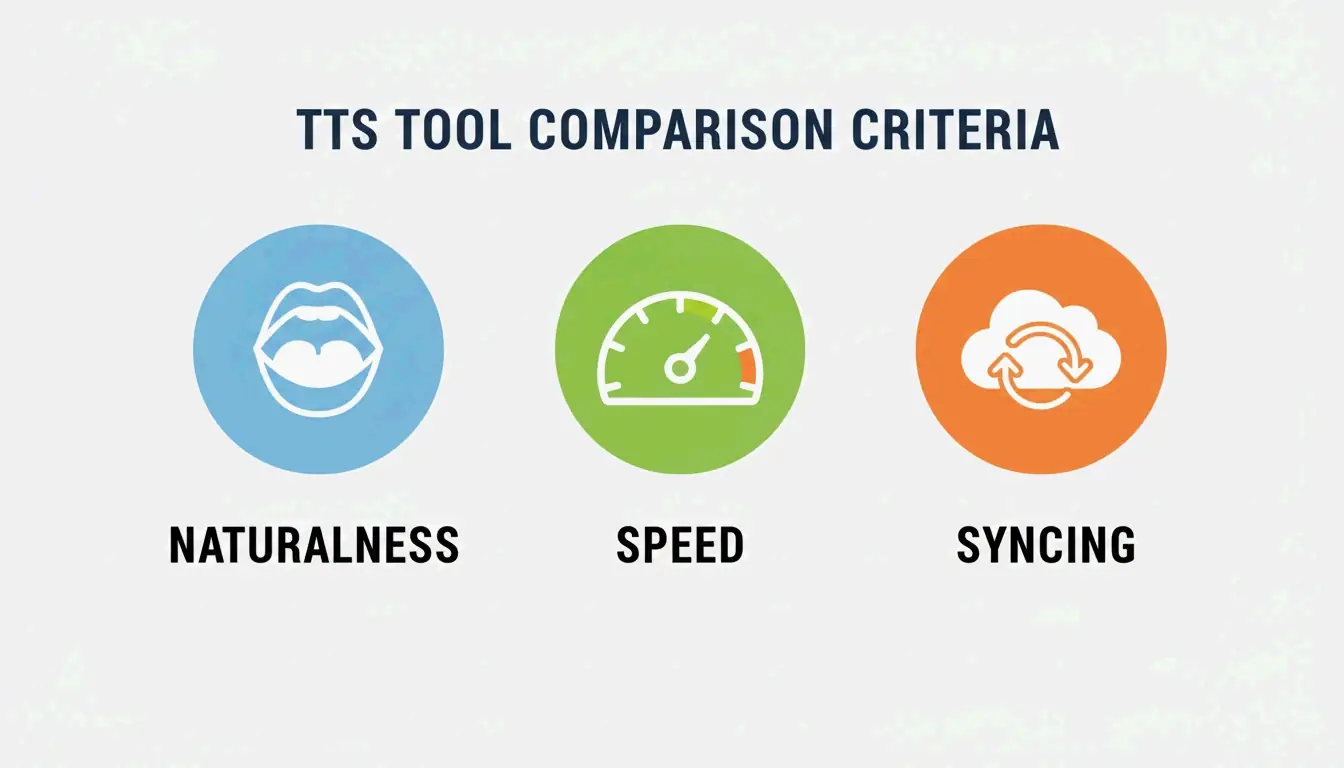
    A clean comparison of the three core evaluation pillars: Naturalness, Speed, and Syncing.

    Evaluation Criteria

    Factor What to Look For Why
    Voice naturalness Neural models with emotion and rhythm Handles jargon, sounds like a podcast
    Speed range Up to 4.5x without distortion Productivity expert Ali Abdaal advocates speed listening for efficient learning
    Cross-device sync Desktop ↔ mobile progress tracking Seamless transition between devices

    Method 1: Speechify — The Leader

    Per Speechify: 55 million users, 1,000+ voices, 60+ languages.

    Feature Detail
    Platforms iOS, Android, Mac, Windows, Chrome
    Input formats PDFs, emails, web articles, photos of text
    Celebrity voices Snoop Dogg, Gwyneth Paltrow, and others
    2026 additions Voice Typing (dictate while listening), Fast Answers (AI quizzes)
    Speed Up to 4.5x with clear articulation

    Method 2: Noa — Curated Journalism

    Noa provides human-narrated articles from premium publishers.

    Feature Detail
    Sources Financial Times, Bloomberg, The Economist, NYT
    Curation Human editors create themed “Series” (e.g., “The State of AI in 2026”)
    Best for Deep-dive journalism, multi-angle topic coverage

    Method 3: Podcast Conversion

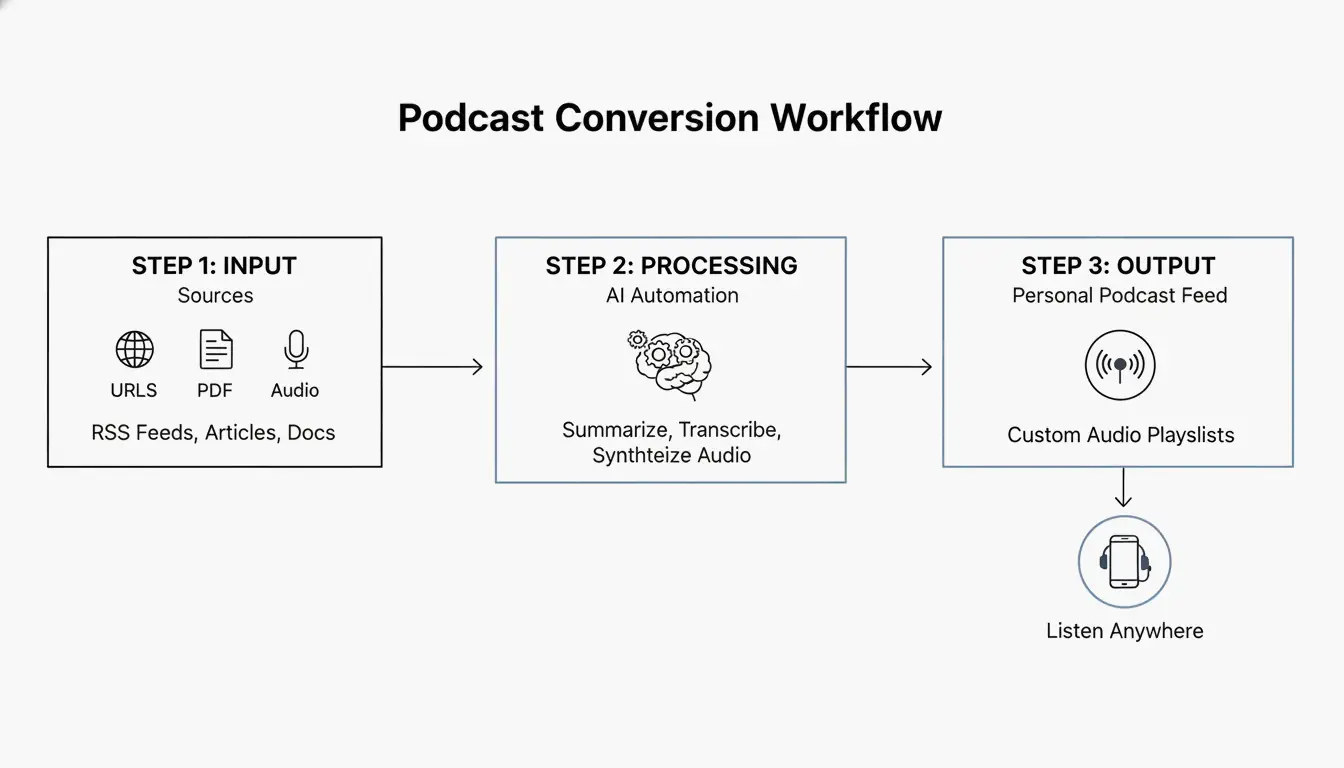
    Turn long documents into structured audio with intro, summary, and host narration.

    Feature Detail
    Input 50-page legal briefs, medical journals, research papers
    Output MP3 or private RSS feed for podcast players
    Voice cloning Record seconds of your voice → use as narrator
    Accessibility Helps dyslexia and visual impairment with familiar voices

    Build a Daily Audio Briefing (Pro Workflow)

    A 3-step workflow: Content Collection -> AI Processing/Summarization -> Audio Stream.

    1. Collect — RSS feeds, newsletters, saved links into one queue
    2. Summarize — AI generates 5-minute executive summary (like The Washington Post’s ‘The 7’ — 10-minute daily briefing)
    3. Listen — Private audio feed plays like a custom radio station
    4. Ask — “Ask While Listening” feature: interrupt for context, then resume

    Free Options: Built-in Browser TTS

    Browser Feature Voices Offline
    Microsoft Edge Read Aloud Natural voices (free) With language packs
    Google Chrome (mobile) “Listen to this page” Multiple regional accents Requires connection
    macOS/iOS Spoken Content (Accessibility) System voices Yes
    Android Select to Speak Google TTS voices With language packs

    Conclusion

    For maximum productivity, use Speechify at 4.5x speed. For curated journalism, use Noa. For free listening, Edge Read Aloud offers the best natural voices. Start by installing a browser extension and turn your next commute into a learning session.

    FAQ

    Can I listen to articles offline?

    Yes — Speechify and Noa support offline downloads via Wi-Fi. Browser TTS (Edge, Chrome) typically requires an active connection unless you download local language packs through OS settings.

    How do I turn a PDF into a podcast?

    Upload the PDF to Speechify or a podcast converter → use AI to generate a summary script → select “Export to Podcast” or “Create Audio File” → get an MP3 or private RSS feed for any podcast player.

    Are there free natural-sounding AI voices?

    Yes. Microsoft Edge “Read Aloud” offers free Natural voices comparable to paid services. Chrome mobile’s “Listen to this page” also provides high-quality narration. For technical users, open-source TTS models on Hugging Face generate quality audio without subscriptions.