Author: SectoJoy

  • Master AI Image Generator Prompts: The 2026 Framework for Pro Visuals

    Master AI Image Generator Prompts: The 2026 Framework for Pro Visuals

    Getting great results from an AI image generator isn’t about luck or typing “make it beautiful.” In 2026, professional visuals come from structured prompting — treating the AI like a camera and art director combined. The approach that’s emerged as the industry standard is the Six-Element Framework: Subject, Environment, Style, Lighting, Composition, and Quality Modifiers.

    This guide covers the full framework, compares the top models (GPT Image 2, Nano Banana 2, Flux 1.1 Pro, Midjourney), and shows you how to iterate from a rough draft to a production-ready image.

    The Six-Element Prompt Framework

    The key shift: stop describing and start instructing. Data from Adobe shows that by 2025, 67% of marketing teams had integrated AI generation into daily workflows — making prompt engineering a core professional skill.

    Here’s the framework that ensures every element of your image is a deliberate choice:

    Element What to Specify Example
    Subject Main focus with physical details “a slim silver laptop open at a 90-degree angle on a white oak desk”
    Environment Background or setting “minimalist studio with soft gray walls”
    Style Medium or visual genre “editorial photography,” “flat illustration,” “3D render”
    Lighting Direction, quality, temperature “soft natural window light from the left, warm tone”
    Composition Camera angle and framing “wide angle, eye-level perspective, shallow depth of field”
    Quality Technical output targets “4K, ultra-realistic, high-fidelity”

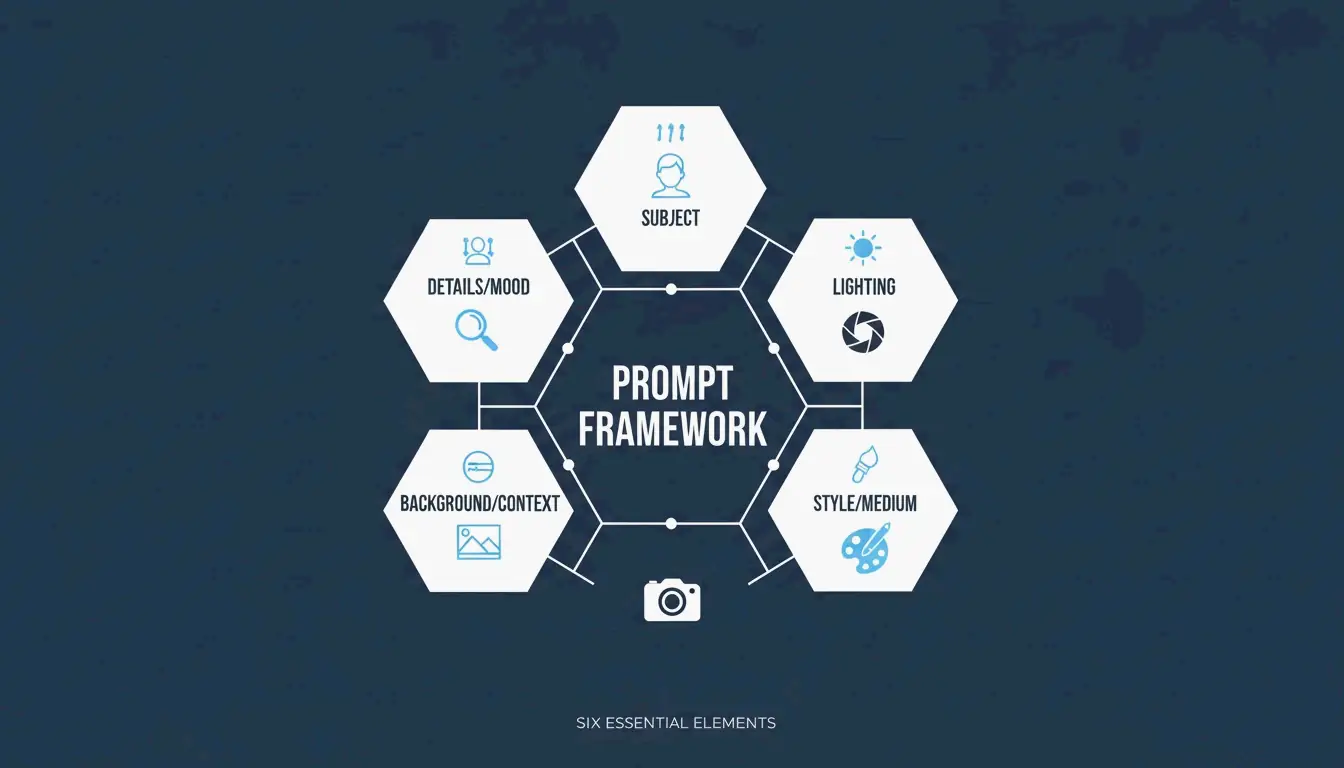
    A clean, minimalist diagram showing the 6 interconnected elements of the prompt framework.

    Why Precision Beats Adjectives

    Words like “stunning” or “beautiful” don’t tell an AI model anything useful. Specifying a “50mm lens” or “DSLR-style photography” forces the AI to simulate real-world optics — including natural background blur (bokeh). According to the ImagineArt Guide, controlling the lighting is the single most effective way to move from a “fake AI look” to a professional photograph.

    Case Study: 75% Cost Reduction in E-commerce

    This framework isn’t just about aesthetics — it’s changing the economics of content production. As reported by Pixazo, one e-commerce platform used structured prompting with Seedream 4.5 and 5.0 to generate over 10,000 product images per month. By replacing traditional photoshoots (typically $2,000–$10,000 each), the company cut creative costs by 75% and accelerated time-to-market.

    GPT Image 2: Typography and Complex Instructions

    GPT Image 2 is a 2026 breakthrough because it handles layered instructions and renders legible text within images — something earlier models struggled with. To get clean typography:

    • Put the desired text in quotes: "SALE 50% OFF"
    • Specify the font style: “bold sans-serif” or “thin serif”
    • Define placement: “centered on a white banner, top third of the image”

    The 2K Reliability Boundary

    Technical precision extends to resolution. While GPT Image 2 can target 4K (3840×2160), OpenAI’s documentation suggests treating anything above 2560×1440 (2K) as an “experimental boundary.” For consistent textures and logic in production, stay within 2K. Always ensure dimensions are a multiple of 16.

    Prompting for Brand Consistency

    GPT Image 2 is built for “Context-Rich Prompts.” Instead of just describing the image, tell the AI what it’s for. IndianPrompt recommends framing like: “Generate a professional image for a blog article about productivity… the mood should be optimistic.” This helps the model select color palettes and layouts that fit professional design standards automatically.

    Nano Banana 2 and Flux 1.1 Pro: Photorealism Leaders

    If your goal is absolute photographic realism, here’s how the top models compare:

    Model Strength Best For
    Nano Banana 2 (Gemini 3 Pro Image) Micro-textures: skin pores, fabric weaves, aged materials at 4K Architecture, product photography, hyper-realism
    Flux 1.1 Pro Natural light simulation — how light bounces, where shadows fall Developer pipelines, consistent lighting, high-volume work
    Midjourney Artistic mood, atmospheric imagery, editorial style Abstract concepts, brand storytelling, “feeling over accuracy”

    AIMLAPI notes that Nano Banana 2 is currently the most detailed model for architecture and product shots. Midjourney still holds a 26.8% market share in 2026 (Prodia), making it the go-to when you need an “artistic vibe” rather than a literal document.
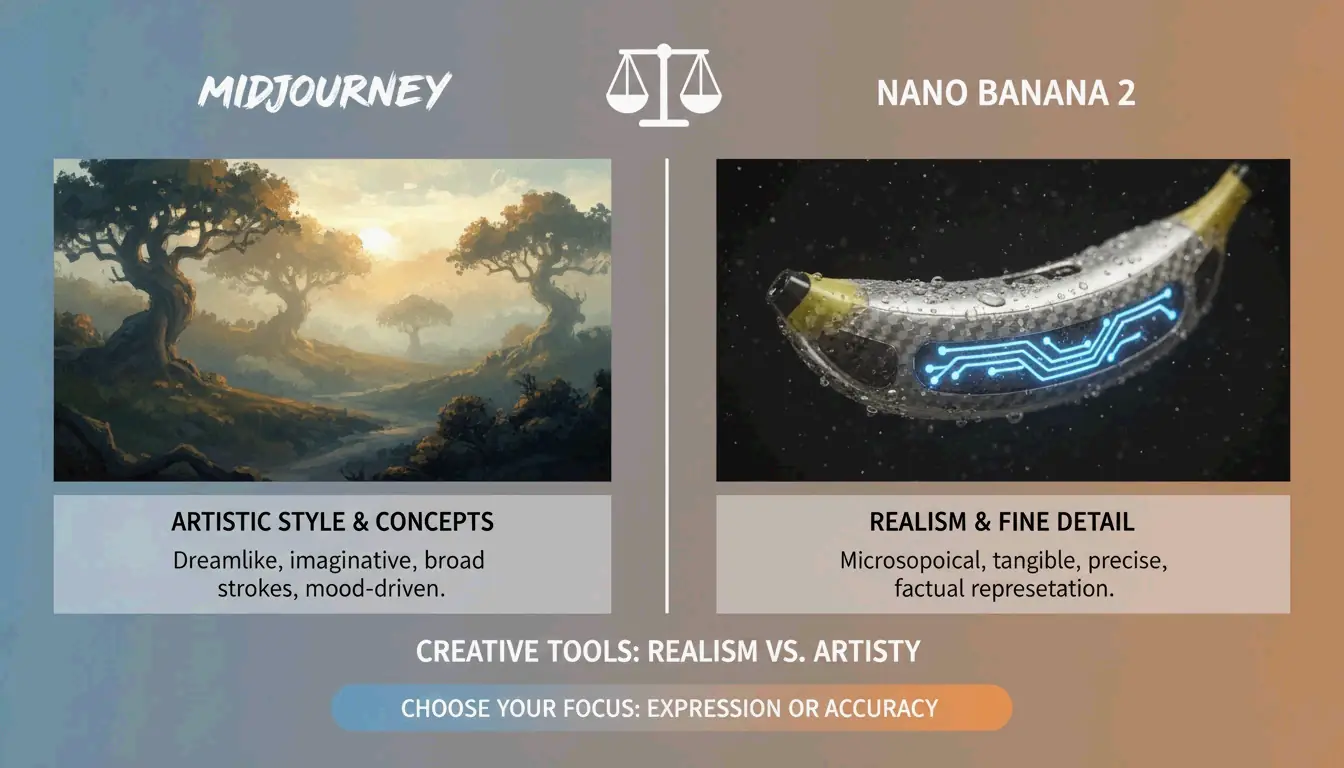
    A high-contrast comparison between 'Artistic Mood' (Midjourney) and 'Photorealistic Truth' (Nano Banana 2).

    Advanced Techniques: Iterative Refinement

    Professional AI images are rarely perfect on the first try. The industry standard is a 3–5 step refinement loop:

    1. Base prompt — Get the composition and subject right
    2. Refinement passes — Use targeted instructions like “change only the jacket color, keep the face identical”
    3. Final polish — Adjust lighting, fix artifacts, ensure brand alignment

    ImagineArt emphasizes the importance of restating invariants — explicitly telling the AI what should not change between iterations. Without this, the model tends to drift.
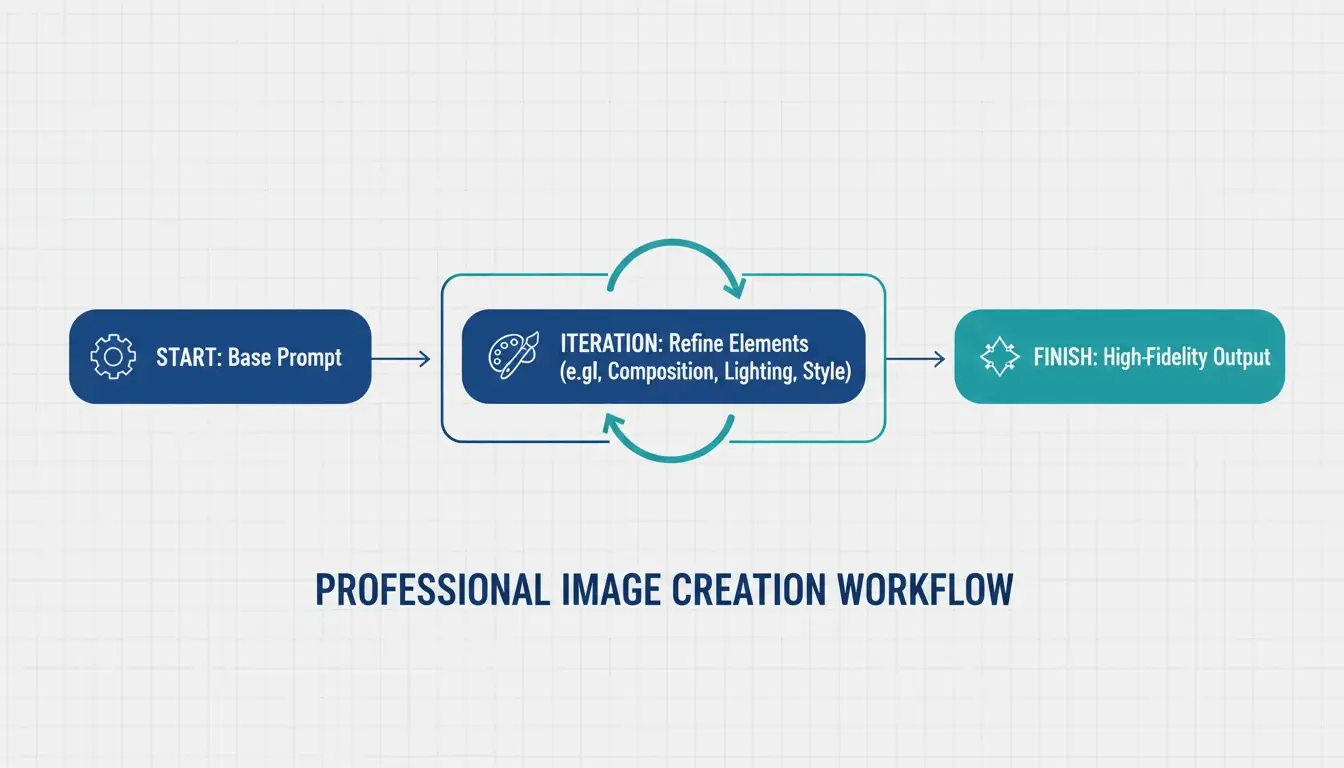
    A 3-step iterative loop: Base Prompt -> Refinement -> Final Polish.

    Negative Prompts for Quality Control

    Negative prompting remains essential — tell the AI what to exclude:
    – "extra fingers, extra limbs" — Classic AI artifacts
    – "text overlays, watermarks" — Unwanted additions
    – "stock photo aesthetic, over-smoothed skin" — The generic “plastic” look common in high-saturation outputs

    Preparing for Image-to-Video

    A major 2026 trend: generating static images optimized for video tools like Kling or Grok. When creating visuals for the Image-to-Video (I2V) pipeline, ensure high-resolution keyframes with consistent features so the AI can animate the scene without glitches.

    Specialized Workflows: SVG Output and Brand Consistency

    For designers who need scalable files, Recraft V4 is the standout — the only major model that outputs true SVG (scalable vector) files. According to AIMLAPI, its native brand kit support lets you upload your own color palettes and logos, ensuring every generation fits your company’s design language.

    Character Consistency Across Scenes

    Tools like Midjourney and Nano Banana 2 now support “Character Reference” (Cref) tags, allowing the same character to appear consistently across different scenes. Combined with a “Character Seed” prompt that defines fixed traits (age, hair color, clothing), this is a major win for brand storytelling.

    Legal Safety for Commercial Use

    Adobe Firefly, with over 6.5 billion visuals created, remains the top choice for enterprise use because it’s trained on licensed content and offers commercial protection that open-source models can’t match. Always verify the latest AI disclosure requirements for your market.

    Conclusion

    Professional AI imagery in 2026 has moved from creative guesswork to structured engineering. The practical approach:

    • Use the Six-Element Framework for every prompt — Subject, Environment, Style, Lighting, Composition, Quality
    • Choose the right model — GPT Image 2 for typography and layouts, Nano Banana 2 for photorealism, Midjourney for artistic mood
    • Iterate 3–5 times — Start with composition, refine details, then polish
    • Think beyond static — Optimize for the Image-to-Video pipeline when needed

    Mastering these technical instructions turns AI from a novelty toy into a high-performance digital studio.

    FAQ

    Which AI image generator is best for rendering clear text in 2026?

    GPT Image 2 is the current leader for typography (AIMLAPI). It follows complex layout instructions better than Nano Banana 2 or Midjourney. For best results, place text in quotes and specify font style and placement.

    Can I use AI-generated images for commercial marketing?

    Yes, but it depends on the tool’s license. Enterprise tiers of GPT Image 2 and Adobe Firefly generally allow commercial use. Prodia notes that Adobe Firefly is particularly safe as it’s trained on licensed content. Always check current AI disclosure requirements for your region.

    How do I maintain character consistency across multiple scenes?

    Use Character Reference (Cref) tags in Midjourney or Nano Banana 2. Create a “Character Seed” prompt defining fixed physical traits. ImagineArt suggests using iterative refinement to adjust backgrounds while keeping the subject static.

    What are the recommended resolution settings for GPT Image 2?

    For production use, stay at 2560×1440 (2K). While 3840×2160 (4K) is possible, OpenAI’s Cookbook treats the 3840px cap as experimental. Always ensure dimensions are multiples of 16.
  • What Is a Data Matrix Barcode? Definition, Specs, and Industrial Uses

    What Is a Data Matrix Barcode? Definition, Specs, and Industrial Uses

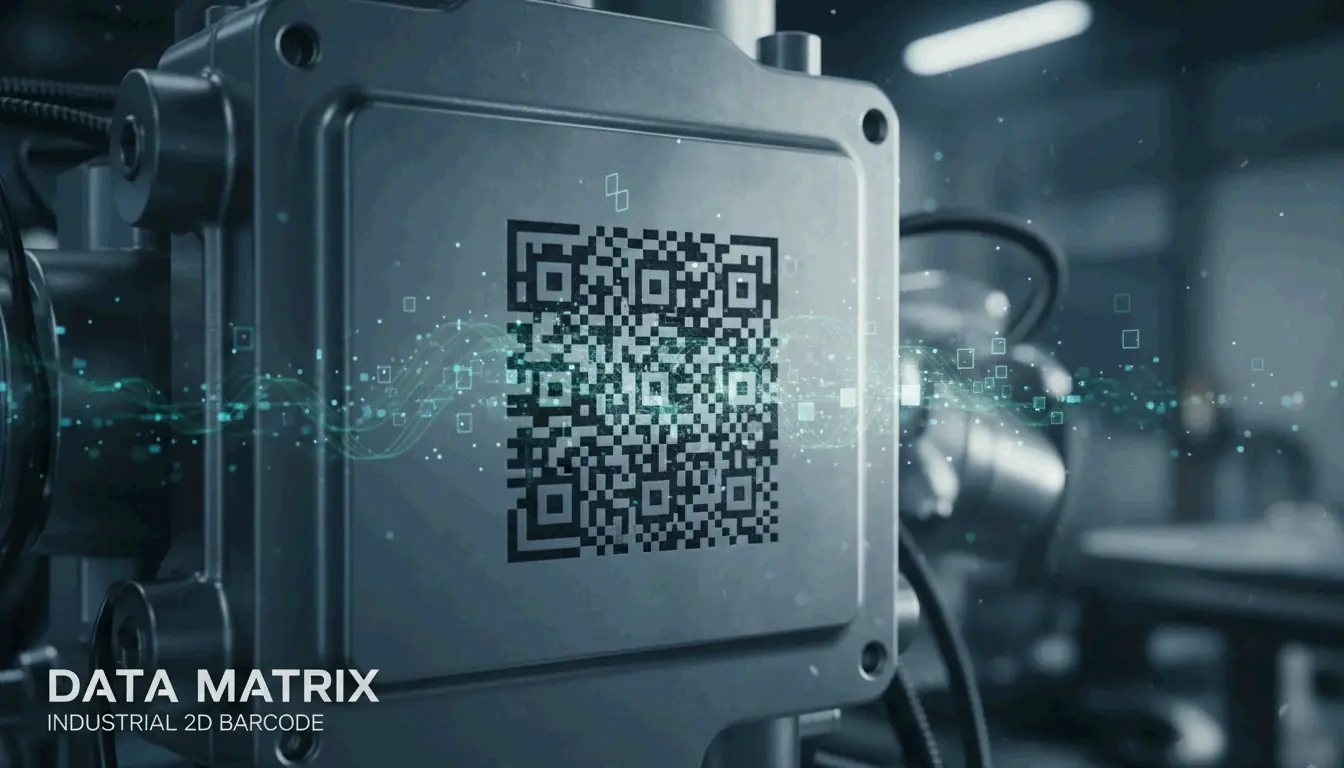
    A Data Matrix is a high-density 2D barcode — a grid of black and white cells arranged in a square or rectangle — defined by ISO/IEC 16022. It uses ECC200 (Reed-Solomon) error correction to remain readable even when damaged, and it can store up to 2,335 alphanumeric characters in a space smaller than a fingernail. As of 2026, it’s the global standard for marking small industrial components and regulated pharmaceutical items.

    This guide covers what a Data Matrix is, how it works technically, where it’s used in the real world, and how to choose between it and a QR code.

    Technical Definition: What Is a Data Matrix Barcode?

    Unlike traditional 1D barcodes that encode data in the width and spacing of parallel lines, a Data Matrix encodes information in both dimensions — horizontally and vertically. This 2D approach allows it to pack significantly more data into a much smaller physical footprint.

    Every Data Matrix features an L-shaped Finder Pattern — two solid borders that tell the scanner exactly where the symbol is and how it’s oriented, even if the code is upside down or tilted. According to Wikipedia, the current rules are defined by ISO/IEC 16022:2024 (Edition 3). The standard is in the public domain, so anyone can use it without paying royalties.

    Anatomy: Cells, Modules, and the Quiet Zone

    Component Purpose
    Finder Pattern (“L”) Two solid borders that help the scanner locate the code and determine orientation
    Timing Pattern Alternating dark/light cells opposite the “L” — tells the reader the grid dimensions
    Data Region The interior area where actual information is encoded (grows as data increases)
    Quiet Zone A mandatory blank margin outside the pattern that prevents nearby text/graphics from confusing the scanner

    The technology is remarkably scalable. Wikipedia notes that you’ll find Data Matrix codes as small as 300 micrometers etched onto silicon chips, and as large as one-meter squares painted on the roofs of train cars.

    Why ECC200 and Reed-Solomon Error Correction Matter

    Modern Data Matrix reliability comes from ECC200, which uses the Reed-Solomon algorithm to add redundant “backup” data to each symbol. This means the code still works even when part of it is scratched, dirty, or torn.

    Wikipedia reports that ECC200 can reconstruct the full data string even with up to 30% damage — as long as the L-shaped finder pattern remains visible. This makes it the top choice for harsh environments where parts face chemicals, heavy friction, or extreme heat.

    Feature ECC200 (Current Standard) ECC 000–140 (Legacy)
    Error correction Reed-Solomon Older methods
    Damage tolerance Up to 30% Lower
    Use today Global standard Only in closed systems
    Data capacity Up to 3,116 digits Lower

    Error rates are incredibly low. Wikipedia notes that scanners typically report only one error per 15,000 to 36 trillion characters, depending on code quality.

    Core Specifications: Capacity, Size, and Data Density

    The Data Matrix’s biggest advantage is data density — it holds a massive amount of information relative to its physical size.

    Data Type Maximum Capacity
    Alphanumeric characters 2,335
    Numeric digits 3,116
    Binary / byte data 1,556 bytes

    Grid sizes for ECC200 range from 10×10 up to 144×144 modules. The key measurement for calibration is the X-dimension — the size of a single module (dot or square). Most industrial scanners are calibrated for an X-dimension of at least 10 mil (0.254 mm) to ensure reliable reads.

    As Peak Technologies explains, the physical length of the code adjusts based on data content, and a checksum is always required. This flexibility lets manufacturers squeeze serial numbers, lot codes, and expiration dates onto something as small as the head of a screw.

    Industrial Uses: From Aerospace to Healthcare Compliance

    Data Matrix barcodes are the hidden engine behind global supply chains. Here’s where they show up in the real world.

    Pharmaceuticals: FDA Compliance

    In the U.S., the GS1 DataMatrix is the official standard for the FDA’s Drug Supply Chain Security Act (DSCSA). Pharmaceutical companies must mark every unit with a unique identifier to prevent counterfeit drugs from entering the market.

    Direct Part Marking (DPM) in Automotive and Electronics

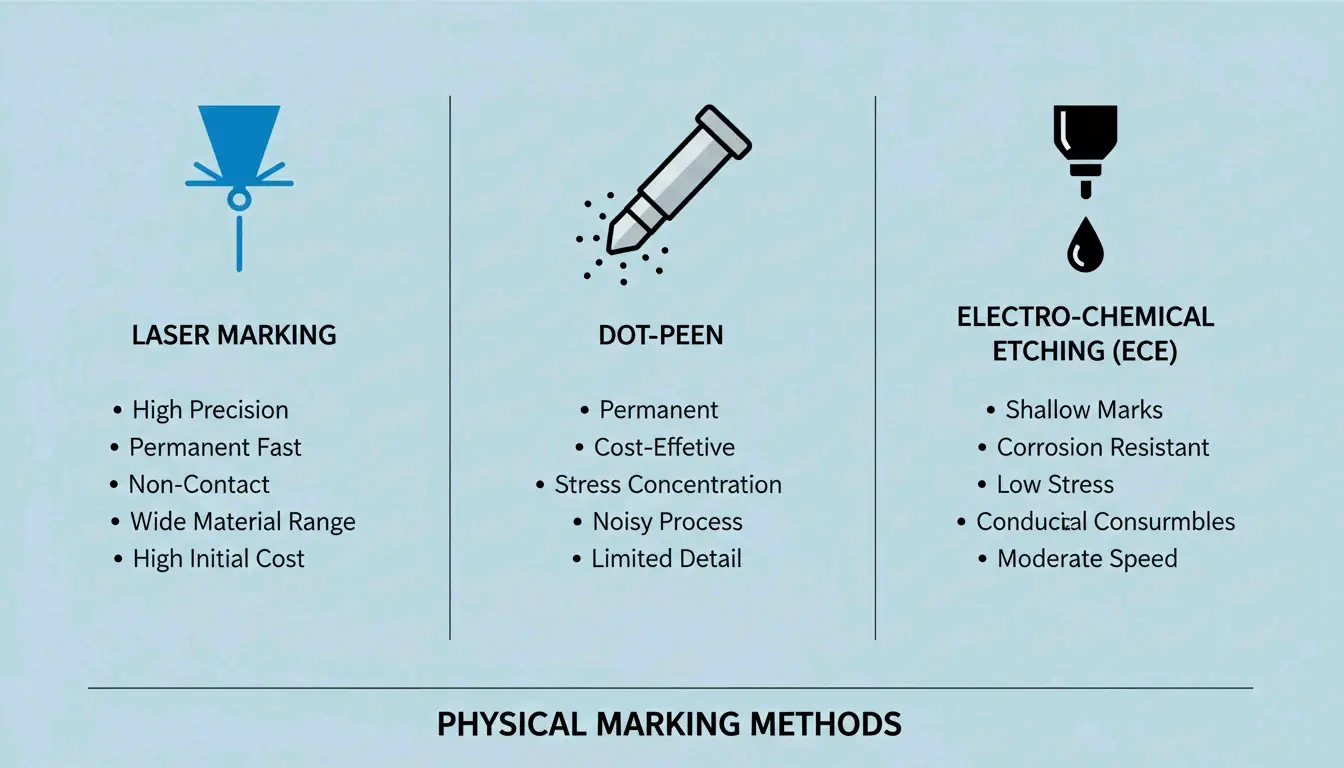
    For permanent part identification, Direct Part Marking (DPM) etches the code directly into the material rather than applying a label:

    Method How It Works Best For
    Laser marking Etches the code into metal or plastic with high-precision lasers Metal parts, plastics
    Dot-peen marking A metal stylus punches a grid of round dots into the surface Hard metals, harsh environments
    Electrolytic Chemical Etching (ECE) Chemical process creates a permanent mark on metal Conductive metals

    Comparison of different DPM marking methods

    Labels vs. Direct Marking: How to Choose

    When setting up a marking system, the choice depends on the application:

    1. Polyimide labels — Cleverence calls these the “gold standard” for circuit boards (PCBs) because they survive reflow ovens and chemical washes.
    2. Laser etching — The go-to for aerospace parts where labels might peel off, or for tiny silicon chips with no room for a sticker.
    3. Contrast requirements — No matter the method, Elmed emphasizes that you need sharp contrast between light and dark cells for camera-based scanners to read the code reliably.

    Data Matrix vs. QR Code: Which Should You Choose?

    Both are 2D barcodes, but they’re designed for different purposes:

    Feature Data Matrix QR Code
    Physical size (same data) Smaller Larger
    GS1-approved for healthcare Yes (only 2D code approved) No
    Smartphone scanning Requires specialized app Native on most phones
    Best for Industrial tracking, small parts, pharma Consumer marketing, URLs, menus
    Durability Excellent (DPM compatible) Lower (typically printed labels)

    For industrial tracking — where space is tight and environments are harsh — the Data Matrix wins due to its smaller footprint, higher durability, and DPM compatibility. For consumer-facing applications, QR codes are the practical choice because anyone with a smartphone can scan them.

    Conclusion

    The Data Matrix barcode remains the gold standard for high-density industrial tracking in 2026, backed by the updated ISO/IEC 16022:2024 standards. Its ability to encode thousands of characters into a microscopic footprint — and survive 30% damage through ECC200 error correction — makes it indispensable from factory floors to pharmaceutical supply chains.

    When implementing a system:
    – Always use ECC200 for global compatibility
    – Choose DPM (laser/dot-peen) for parts facing harsh conditions
    – Use polyimide labels for PCBs and high-temperature applications
    – Ensure strong contrast between light and dark cells for reliable scanning

    FAQ

    What is the maximum data capacity of a Data Matrix barcode?

    Under ISO/IEC 16022, a Data Matrix can store up to 2,335 alphanumeric characters or 3,116 numeric digits. The physical size of the code depends on the X-dimension (module size) chosen for the application and scanner capabilities.

    Can a Data Matrix barcode be read if it is partially damaged?

    Yes — provided it uses the ECC200 standard. The Reed-Solomon error correction algorithm allows the symbol to remain fully scannable even when up to 30% of the surface area is damaged or obscured. This makes it ideal for parts exposed to chemicals, abrasion, or high heat.

    Do I need a license to use Data Matrix barcodes?

    No. The Data Matrix symbology is in the public domain. The original patents (held by International Data Matrix, Inc.) have expired. The specifications are now governed by ISO/IEC standards, and any organization can generate and use Data Matrix barcodes freely without paying royalty fees.

  • ISBN 10 vs 13: Key Differences, Conversion Guide, and the 979 Prefix Explained

    ISBN 10 vs 13: Key Differences, Conversion Guide, and the 979 Prefix Explained

    Every book published today carries a 13-digit ISBN — the universal identifier that makes it scannable at any checkout counter worldwide. But if you’ve been around books long enough, you’ve probably seen the older 10-digit format too. Understanding the difference between them, how to convert between the two, and why the newer “979” prefix changes everything is essential knowledge for publishers, librarians, and anyone working with book metadata in 2026.

    This guide covers the structural differences, walks through the conversion math, explains why 979-prefixed ISBNs can’t go back to 10 digits, and breaks down what you’ll pay for ISBNs today.

    ISBN-10 vs ISBN-13: Core Differences

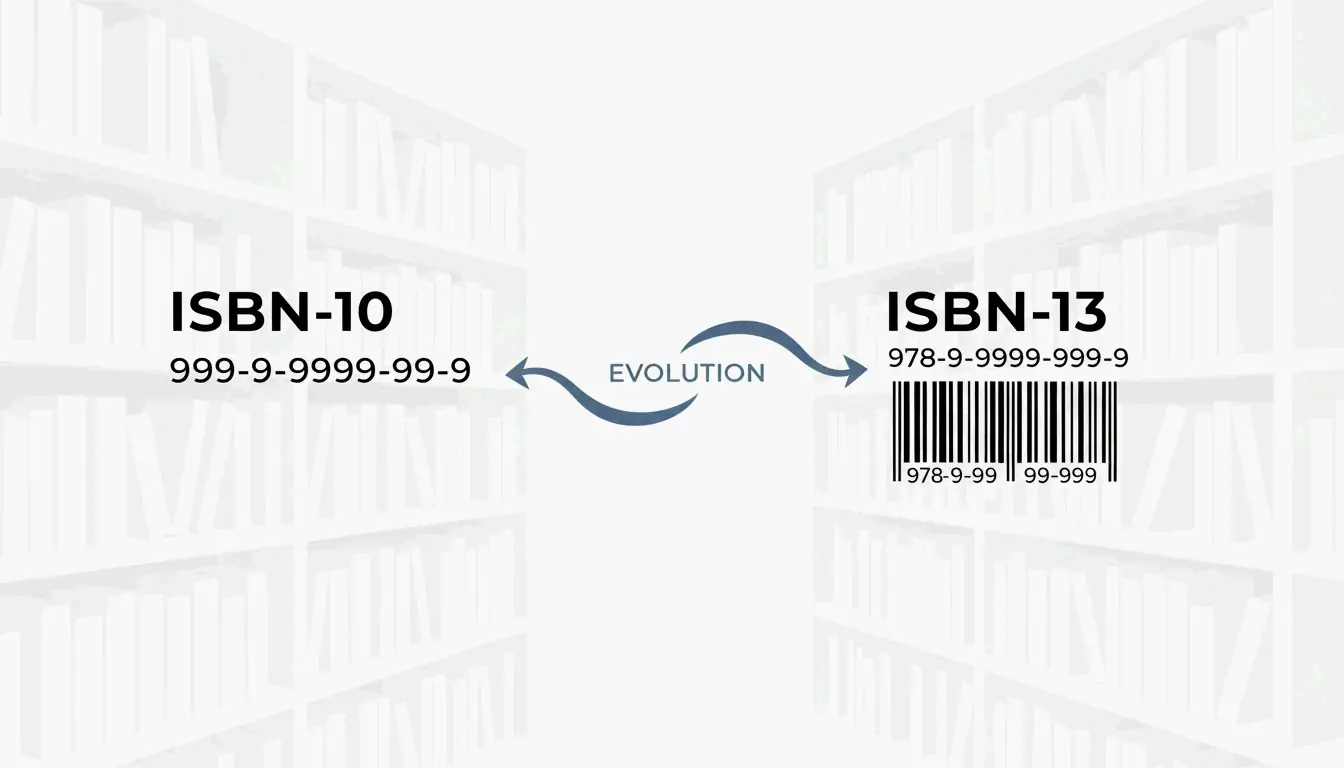
    The ISBN system’s biggest transition happened on January 1, 2007, when the industry moved from 10 digits to 13. As Wikipedia documents, the change served two purposes: expanding the pool of available numbers globally and aligning books with the EAN-13 barcode system used by virtually every retailer.

    Structural Breakdown

    Component ISBN-10 ISBN-13
    Total digits 10 13
    GS1 prefix None 978 or 979
    Registration group Language/country Language/country
    Registrant Publisher Publisher
    Publication Specific title/edition Specific title/edition
    Check digit Modulus 11 (0–9 or X) Modulus 10 (0–9 only)

    LiteDevTools notes that ISBN-13 is now required for modern inventory systems — it allows a book to be scanned at checkout using the same GTIN-13 data fields as any other consumer product.

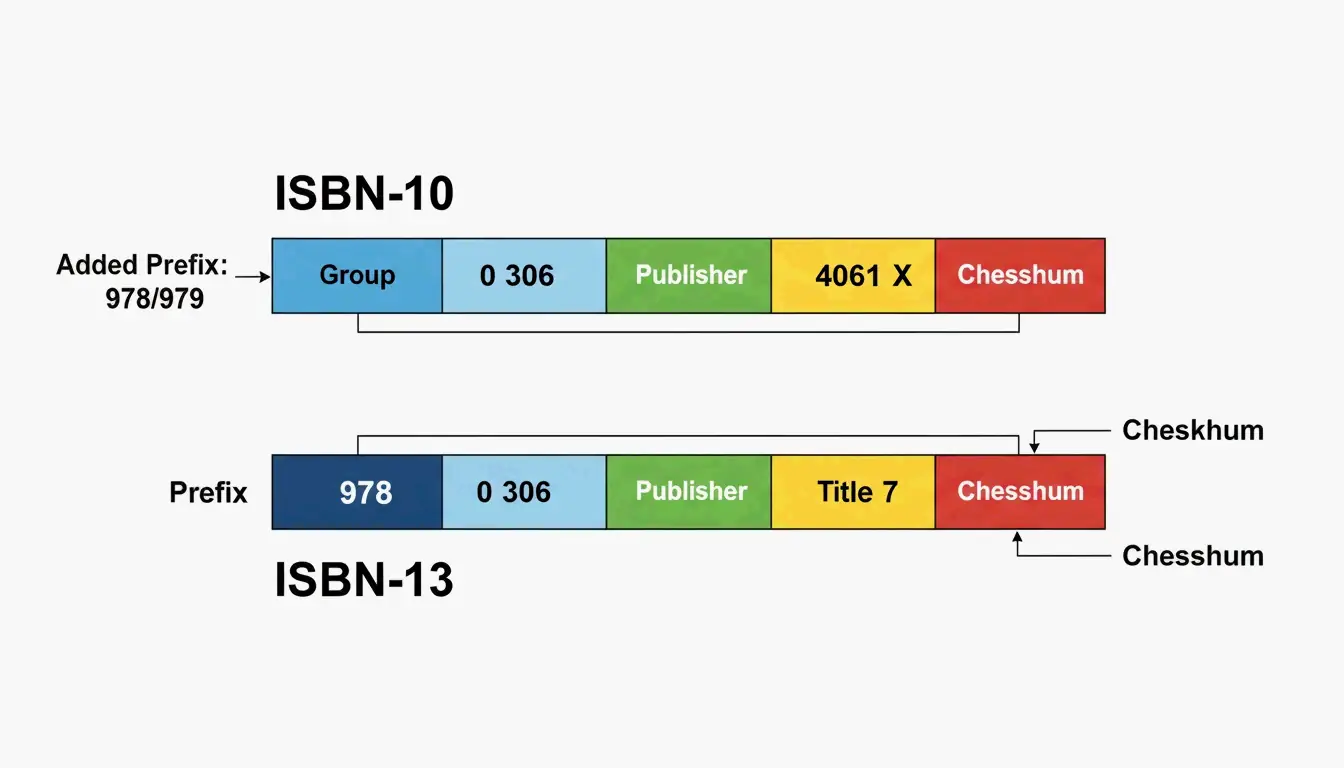
    ISBN-10与ISBN-13结构的直观对比

    When to Use Which Format

    • Modern publications — Any book published after 2007 must have an ISBN-13.
    • Legacy databases — ISBN-10 is still useful for tracking old backstock or organizing library catalogs.
    • Barcodes — The scannable EAN-13 barcode on a book’s back cover requires the 13-digit version.

    The 979 Prefix: Why You Can’t Convert It Back

    The “979” prefix was a turning point for the ISBN system. Originally, all 13-digit ISBNs started with “978” — essentially a bridge connecting the 10-digit world to the 13-digit one. But as the supply of 978 numbers began running out in certain regions, GS1 introduced the 979 prefix as a new namespace.

    Regional 979 Assignments (2026)

    According to EAN Check, specific 979 prefixes are now locked in for high-output regions:

    Prefix Region / Use
    979-8 United States
    979-10 France
    979-11 Republic of Korea
    979-12 Italy
    979-0 International Standard Music Numbers (ISMN)

    Why 979 Has No ISBN-10 Equivalent

    This is a common source of confusion. While 978-prefixed ISBNs have a direct mathematical link to a 10-digit equivalent, 979 ISBNs have no ISBN-10 counterpart. As Wikipedia explains, these registration groups never existed in the old 10-digit system. If your book is assigned a 979-8 prefix in the US, it exists only as a 13-digit identifier — there is no way to “downgrade” it.

    Step-by-Step ISBN Conversion Guide

    Converting an ISBN-10 to ISBN-13 isn’t just about adding “978” to the front — the final check digit must be recalculated from scratch.

    How to Convert ISBN-10 to ISBN-13

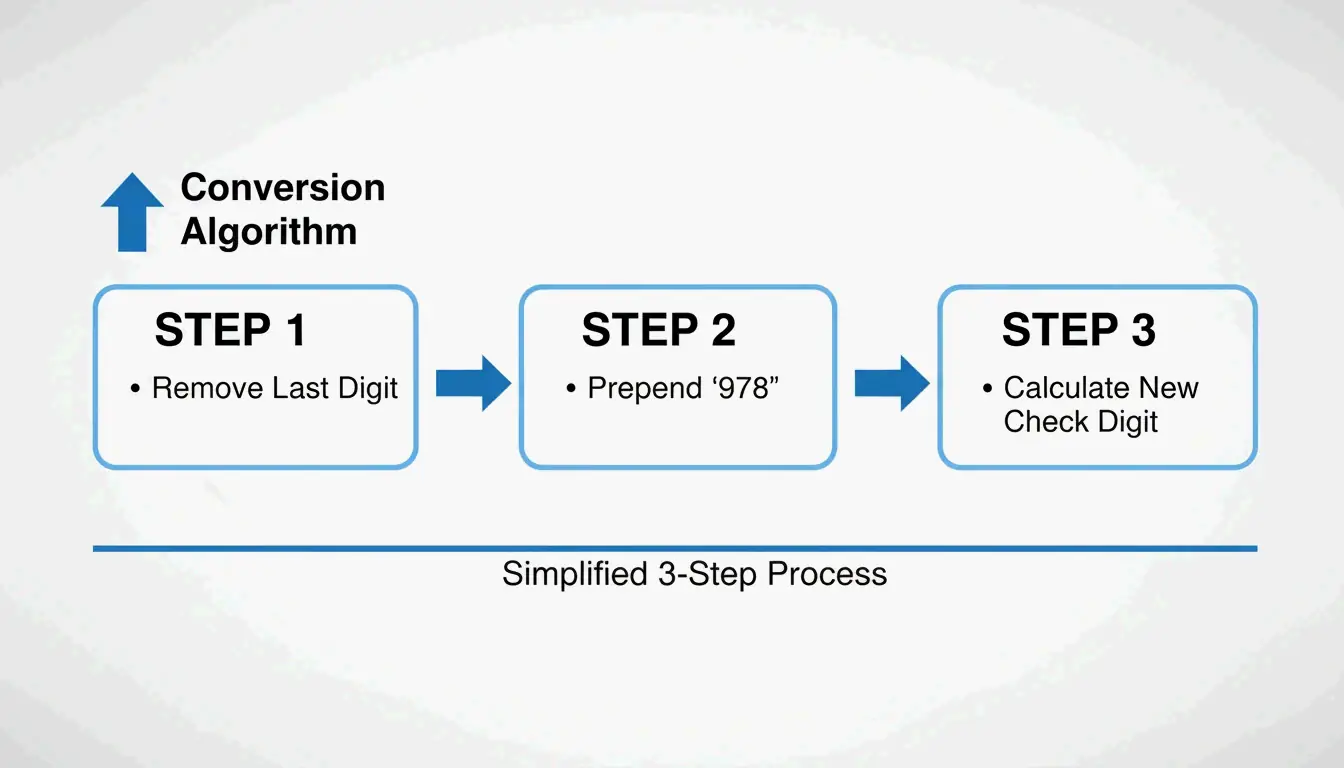
    1. Drop the check digit — Remove the last character (the 10th digit) from your ISBN-10.
    2. Prepend “978” — Add it to the front of the remaining 9 digits.
    3. Calculate the new check digit using the GS1 Modulo-10 algorithm:
    4. Multiply each of the 12 digits by alternating weights of 1 and 3 (starting with 1).
    5. Add up all the products.
    6. Find the remainder when divided by 10.
    7. Subtract the remainder from 10. (If the result is 10, the check digit is 0.)

    ISBN-10到13的转换三步法

    Worked Example

    EAN Check demonstrates that ISBN-10 0-306-40615-2 converts to ISBN-13 978-0-306-40615-7. Notice the check digit changed from 2 to 7 — this happens because the weighting and modulus are different between the two systems.

    Why the Check Digit Changes

    ISBN-10 uses Modulus 11 (which allows the letter “X” to represent 10), while ISBN-13 uses Modulus 10 (digits 0–9 only). Because the math and weights differ, the check digit almost always changes during conversion.

    2026 Publishing Standards: Costs and Requirements

    In the US, Bowker is the sole authorized ISBN agency. For self-published authors, the cost structure matters.

    Bowker Pricing (2026)

    According to Books.by:

    Quantity Price Per ISBN
    1 ISBN $125 $125.00
    10 ISBNs $295 $29.50
    100 ISBNs $575 $5.75

    Books.by points out that the $125 single-ISBN price is a bit of a trap — since every format of your book (paperback, hardcover, ebook, audiobook) needs its own ISBN, a 10-pack is almost always the smarter choice for indie publishers.

    You Need a Separate ISBN for Each Format

    Format ISBN Required? Notes
    Print (paperback/hardcover) Yes Required for bookstores and libraries
    Ebook (Amazon KDP) Optional Amazon assigns its own ASIN
    Ebook (other platforms) Yes OverDrive and library platforms require it
    Audiobook Yes Required by ACX, Findaway Voices

    International Comparison

    The US is unusual in charging for ISBNs. Wikipedia and Books.by report that ISBNs are free in Canada, India, and New Zealand, where the government manages the system directly.

    Conclusion

    The shift from ISBN-10 to ISBN-13 isn’t just a technical detail — it’s a requirement for getting your book into the modern supply chain. ISBN-10 remains useful as a historical tool for legacy databases, but the 13-digit format is the global language of the 2026 book market. The rise of the 979 prefix in the US and Europe reinforces this: the old 10-digit system has reached its limits.

    For most publishers, the practical takeaway is simple: buy ISBN-13 codes in bulk (10 or 100 packs) to cover every format, use validation tools to keep your metadata clean, and don’t try to convert 979-prefixed numbers back to 10 digits — it can’t be done.

    FAQ

    Why did the ISBN change from 10 to 13 digits in 2007?

    To prevent a shortage of available numbers as global book production grew, and to align the ISBN system with the GS1 EAN-13 barcode standard used by retailers worldwide. This allows books to be scanned using the same equipment as any other consumer product.

    Can every ISBN-13 be converted to an ISBN-10?

    No. Only ISBN-13 numbers beginning with “978” can be converted back to 10 digits. Numbers starting with “979” belong to a newer namespace that was never part of the 10-digit system — they have no ISBN-10 equivalent.

    What is the “X” found in some ISBN-10 numbers?

    The “X” represents the value 10 as a check digit. Because ISBN-10 uses Modulus 11 for error detection, there are 11 possible remainders (0–10). To keep the ISBN at exactly 10 characters, the Roman numeral “X” was adopted for a remainder of 10.

    Do I need a different ISBN for my ebook and my paperback?

    Yes. Every distinct format and edition — paperback, hardcover, ebook, and audiobook — requires its own unique ISBN. This allows retailers and libraries to track each product separately, even when the text content is identical.

    Where should the ISBN be placed on a physical book?

    According to the ISBN User’s Manual, the number must appear on the copyright page (verso of the title page) and on the lower section of the outside back cover. For print books, the ISBN is typically integrated into an EAN-13 barcode for retail scanning.

  • Everything About Your Xbox Gamertag: How to Change It, Rules for 2026, and the Asha Sharma Controversy

    Everything About Your Xbox Gamertag: How to Change It, Rules for 2026, and the Asha Sharma Controversy

    The Xbox ecosystem in 2026 looks very different from even a year ago. Under new CEO Asha Sharma, the brand has dropped the “Microsoft Gaming” label, restructured Game Pass pricing, and modernized its identity systems. Your gamertag now serves as a unified ID across consoles, PCs, phones, and cloud setups — part of a platform that has grown to over 500 million players.

    This guide covers everything: the 12-character naming rules, how to change your gamertag on any device, the new shared account policies, and the leadership changes reshaping Xbox.

    The Post-Spencer Era: Who Is Asha Sharma?

    In February 2026, the gaming world saw a major leadership shift when Asha Sharma replaced Phil Spencer as Xbox CEO. Coming from executive roles at Meta (VP of Messenger and Instagram Direct) and Instacart (COO), with a background leading Microsoft’s CoreAI division, Sharma was a surprising pick — beating out internal favorites like Sarah Bond.

    GeekWire reports her appointment was driven by a “Challenger Mindset” — a push for aggressive growth after years of flat console sales.

    The initial controversy centered on her background outside of gaming. Critics questioned whether someone from social media and grocery delivery could protect Xbox’s identity. Sharma addressed this directly in a company-wide memo, vowing to reject “soulless AI slop” and refocus on creators.

    As Asha Sharma wrote in her “We Are Xbox” message:

    “Xbox will be where the world plays and creates… we will build a global platform that connects players and creators everywhere.”

    The “We Are Xbox” Memo: 10 Core Principles

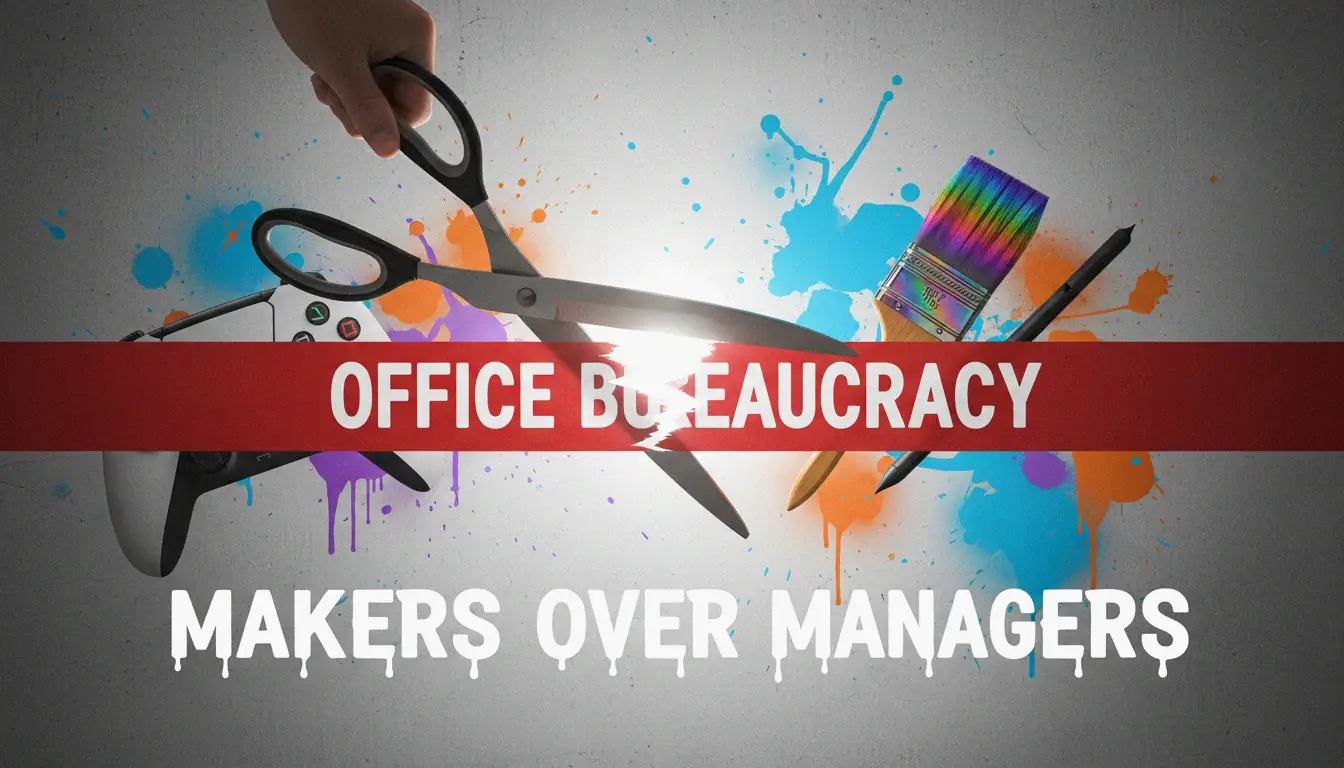
    Sharma and Chief Content Officer Matt Booty rolled out ten guiding principles for the team. The central theme: “Makers over managers” — cutting corporate red tape to prioritize game development and the player experience. With slogans like “Earn every player,” “Protect our art,” and “Stay rebellious,” the company is trying to recapture its 2001 roots as the scrappy underdog of the living room.

    "创作者优先"的视觉隐喻:打破官僚束缚

    Xbox Gamertag Rules for 2026

    By 2026, your Xbox gamertag functions as a single identity across the entire ecosystem. According to Xbox Wire, the updated system keeps your name, friends list, and progress synced across consoles, PCs, mobile apps, and cloud sessions.

    The core rules:

    Rule Detail
    Character limit 12 characters for the base name (spaces included)
    Suffix system If your name is taken, Xbox adds #1234 automatically — doesn’t count toward the 12-char limit
    International support Non-Latin scripts and alphabets supported
    Classic tags Legacy 15-character tags remain valid if never changed
    First change Free
    Subsequent changes $9.99 USD, with a 30-day cooldown

    The suffix system is especially important as Xbox expands into emerging markets like China — it allows millions of new players to use display names they want without global name conflicts.

    Personal vs. Shared: The New Account Policy

    A notable 2026 update addresses Personal Gamertags versus Shared Home Accounts. This became a talking point after a small controversy involving Sharma’s own tag, AMRAHSAHSA, which displayed a mix of achievements from different players. Sharma explained on X that she had been using a “shared home account” with her family.

    The 2026 rules now recommend:
    – Individual profiles for personal achievements and saves
    – “Project Helix” sharing to distribute your full game library to everyone in the household

    How to Change Your Xbox Gamertag in 2026

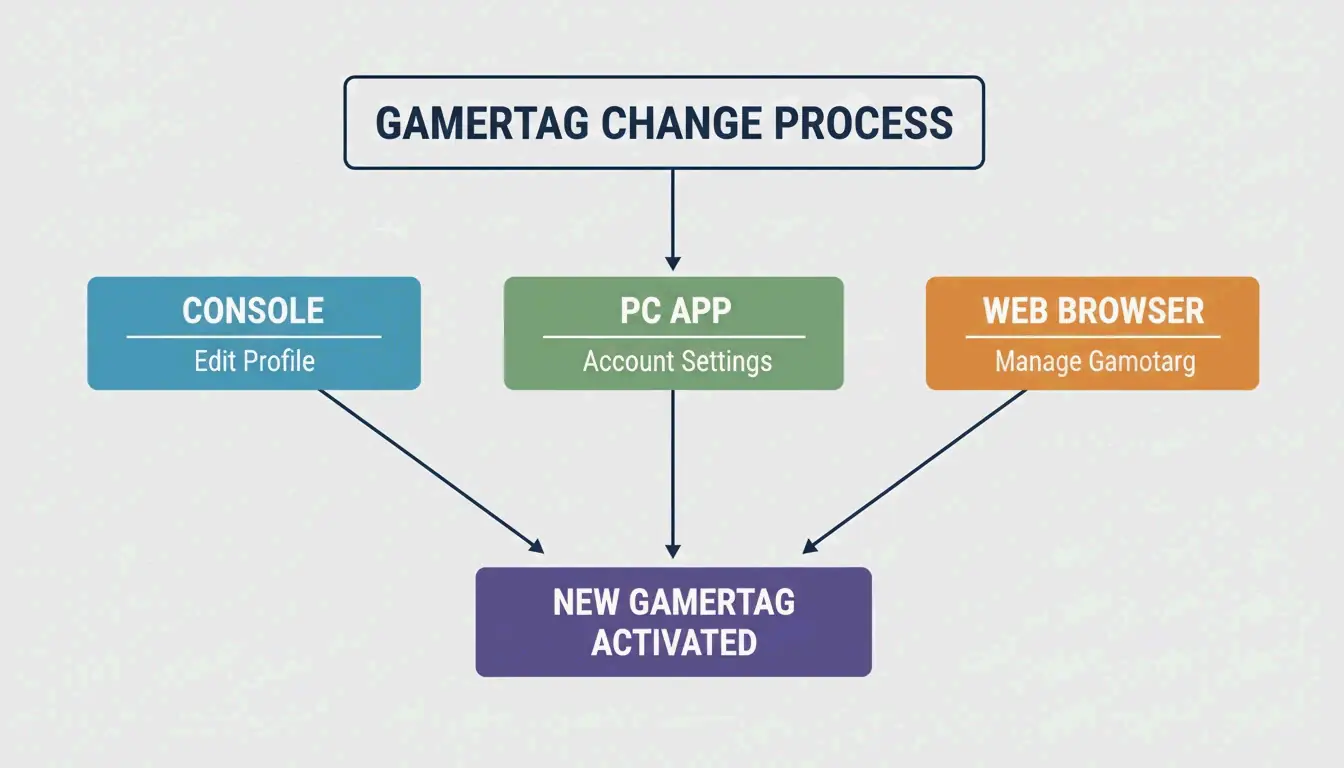
    The process works across all devices. Your cloud saves, friends list, and game purchases are tied to a hidden internal ID — changing your display name won’t affect any of them.

    On Console (Series X|S or Project Helix)

    1. Press the Xbox button to open the guide
    2. Go to Profile & system → select your profile
    3. Choose My profile → Customize profile
    4. Click your current gamertag and type the new one
    5. Confirm

    On PC (Xbox App)

    1. Click your profile photo (top-left corner)
    2. Go to Settings → Change Gamertag
    3. Complete the change on the secure web page

    On the Web

    1. Go to xbox.com and sign in
    2. Navigate to your profile and follow the prompts

    修改Gamertag的三个核心渠道流程

    Updating on Project Helix Hardware

    If you’re using Project Helix — the 2026 initiative to make consoles and PCs perform identically — name changes propagate instantly. Your updated gamertag appears in multiplayer lobbies and friend lists across all active sessions without needing a restart.

    Why Is Xbox Game Pass Changing?

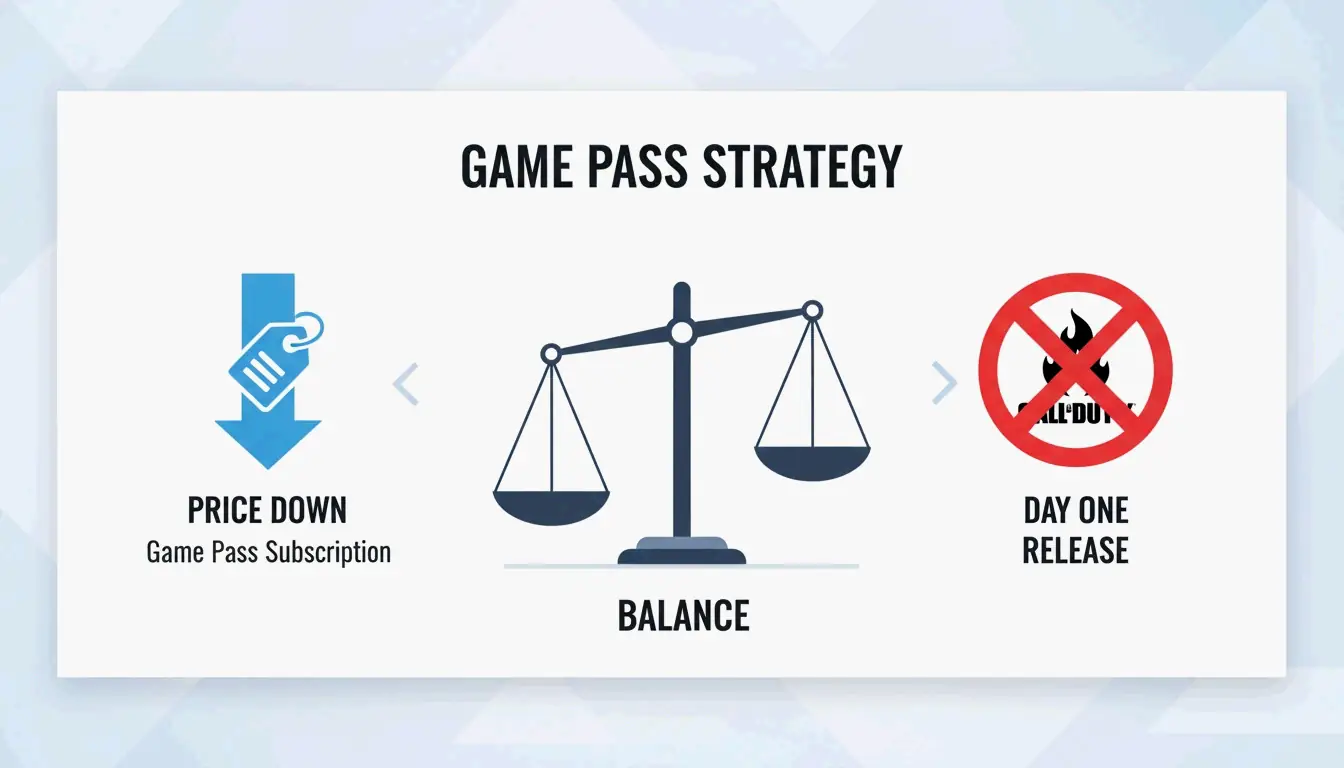
    Under Sharma, Game Pass has seen its biggest shake-up yet. The most controversial move: Microsoft stopped putting new Call of Duty games on the service on “Day One.”

    Change Detail
    Call of Duty on Game Pass No longer available on release day
    Reason Drive direct sales for Activision Blizzard titles, help recoup the $69.7B acquisition
    Subscription price Lowered in early 2026, reversing a 50% hike from 2025
    Success metric Shifted from subscriber count to daily active users (DAU)

    In Game News reports the CoD decision was made to increase direct sales. To offset the loss, Sharma lowered subscription prices — Pure Xbox notes the goal is to make Game Pass “affordable and open” again.

    2026年Game Pass策略对比:价格下降 vs 独占权调整

    Additionally, leadership is taking a “data-driven” approach to exclusives — evaluating which titles might perform better on other platforms to reach wider audiences, rather than locking everything behind the Xbox brand.

    Conclusion

    The 2026 Xbox era is defined by a return to the “Xbox” identity and a more sustainable business model. By moving away from the “Microsoft Gaming” corporate feel and adjusting Game Pass pricing, the company is trying to recapture its challenger energy.

    For players, it’s a good time to:
    – Review your gamertag settings — Make sure they align with the new shared home account rules
    – Reevaluate Game Pass — The 2026 price drops may change the value equation for you
    – Watch for Project Helix — Cross-device identity syncing is coming

    Even though losing Day-One Call of Duty is a disappointment for some, the focus on affordability and creators suggests a more stable path forward for the 500 million people playing on Xbox.

    FAQ

    Is Call of Duty still available on Xbox Game Pass on day one in 2026?

    No. Starting in early 2026, under CEO Asha Sharma’s new strategy, Call of Duty titles no longer launch on Game Pass on their release date. This change was made to increase direct sales for Activision Blizzard’s biggest games.

    Who is Asha Sharma and what is her professional background?

    Asha Sharma became Xbox CEO in February 2026, replacing Phil Spencer. Before this, she led Microsoft’s CoreAI division and held major leadership roles at Instacart (COO) and Meta (VP of Messenger and Instagram Direct).

    What is “Project Helix” and how does it affect Xbox hardware?

    Project Helix is a 2026 hardware initiative focused on unifying the experience across Xbox consoles and PCs. Players get the same performance, identity, and progress tracking on any high-end device — gamertag changes propagate instantly across all sessions.

    How much does it cost to change an Xbox Gamertag in 2026?

    Your first gamertag change is free. After that, it costs $9.99 USD with a 30-day cooldown between changes. Changing your name won’t affect your achievements, friends list, cloud saves, or game purchases.

  • No Photoshop? Compress TIFF Files in 1 Second with Web Tools (2026)

    No Photoshop? Compress TIFF Files in 1 Second with Web Tools (2026)

    To compress TIFF files without Photoshop, use browser-based tools that apply LZW (lossless, for color/grayscale) or CCITT Group 4 (for black-and-white documents). These web tools reduce TIFF file sizes by up to 80% in under a second, with no desktop software required.

    Quick Comparison: TIFF Compression Methods

    Method Type Best For Typical Reduction
    LZW Lossless Color photos, digital art, medical scans 40–60%
    CCITT Group 4 Lossless (bitonal) Text documents, invoices, legal contracts 70–90%
    PackBits Lossless (RLE) Simple graphics, screenshots 10–30%
    JPEG-in-TIFF Lossy Photos where some quality loss is acceptable 80–95%
    Uncompressed None When no compatibility risk is tolerated 0%

    The 3-Step Compression Workflow

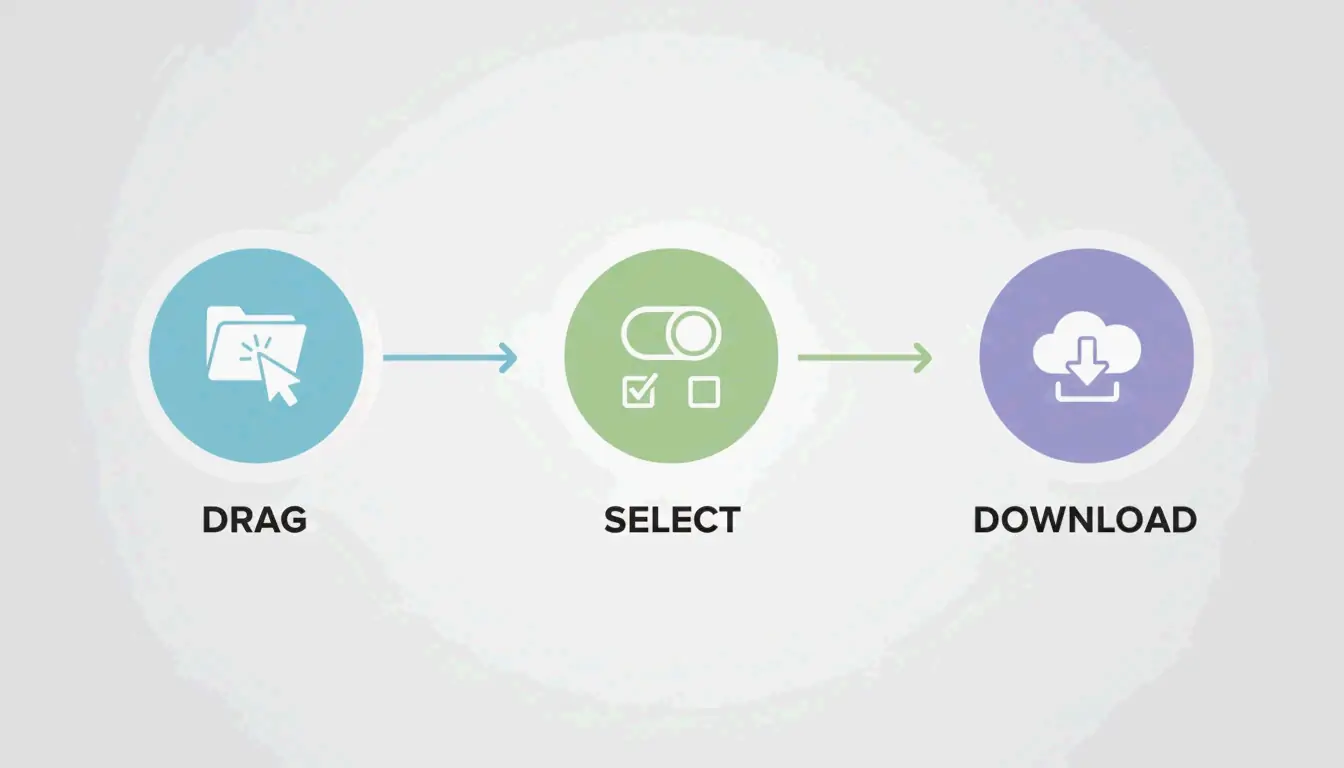
    Simple 3-step workflow: Upload, Process, Download

    1. Upload — Drag TIFF files into the browser. HitPaw supports batch processing for dozens of files at once.
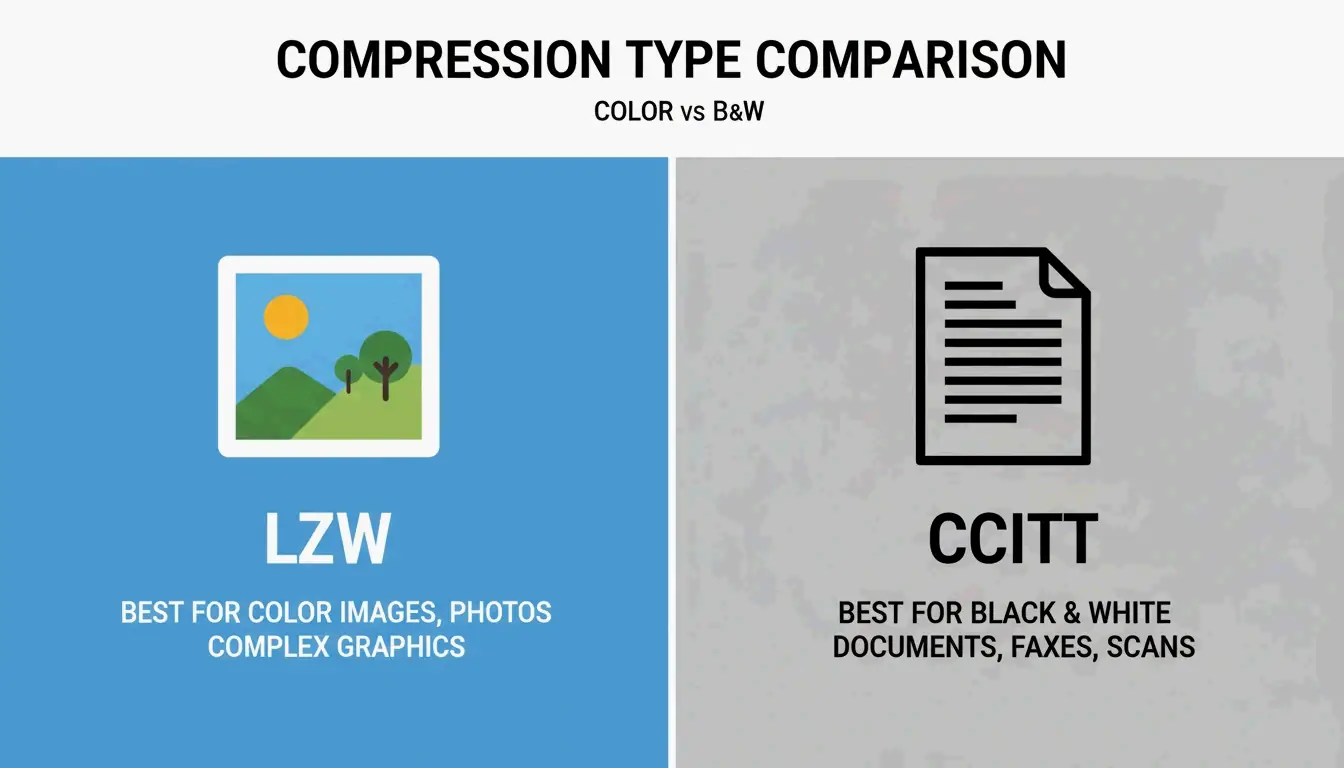
    2. Select Compression — Choose LZW for color images or CCITT Group 4 for black-and-white documents.
    3. Download — Hit “Compress” and save. Aspose notes processing typically takes under 1 second after upload completes.

    Online-Convert, which has processed over 1.9 billion files, confirms browser-based TIFF compression has replaced desktop software for most workflows.

    LZW vs. CCITT Group 4: When to Use Each

    LZW — Lossless Color Compression

    LZW (Lempel–Ziv–Welch) finds repeating data patterns without discarding any information. The image stays 100% pixel-identical to the original.

    Attribute Detail
    Type Lossless
    Best For Color photos, grayscale scans, digital art, medical imaging
    Fidelity Bit-identical to original
    Industry Use Medical and scientific imaging per Aspose — every pixel must remain for analysis

    CCITT Group 4 — Maximum Compression for Text

    Originally built for fax transmission, CCITT Group 4 is optimized for bitonal (pure black and white) images. It compresses text-heavy documents far more efficiently than LZW.

    Attribute Detail
    Type Lossless (bitonal only)
    Best For Invoices, legal contracts, historical records, scanned text
    Efficiency Much higher than LZW on monochrome content
    Technical Note reaConverter confirms Group 4 converts images to bitonal format, ideal for archiving thousands of documents

    Side-by-side comparison: LZW (Color) vs CCITT (B&W)

    Decision Guide

    Your Image Type Recommended Method Why
    Color photo or scan LZW Preserves all color data losslessly
    Grayscale X-ray / medical LZW Every pixel matters for diagnosis
    Black-and-white text document CCITT Group 4 Highest compression for bitonal
    Mixed content (text + images) LZW Group 4 would destroy color information

    Security: Client-Side vs. Server-Side Processing

    Model How It Works Privacy Level Tools
    Client-Side (WASM) Compression runs in your browser’s RAM Highest — file never leaves your device ToolsFlow
    Server-Side (SSL) File travels to remote server via encrypted connection High — files auto-deleted within 24 hours Aspose, Online-Convert

    For medical records, legal documents, or corporate data, prefer client-side tools. For general use, reputable server-side tools with SSL encryption and auto-deletion are safe.

    Technical Standards: TIFF 6.0 and BigTIFF

    Wikipedia documents TIFF as a flexible format supporting everything from simple scans to deep-color images.

    Standard Max File Size Use Case
    Baseline TIFF 6.0 4 GB Standard documents, photos, scans
    BigTIFF (64-bit offsets) 18 exabytes Geographic maps, scientific datasets

    Aspose.Imaging for .NET gives developers programmatic control over TIFF tags like StripOffsets to ensure files meet TIFF 6.0 specs for maximum compatibility.

    Web Tools for TIFF Compression

    Tool Method Batch Security Model
    HitPaw Smart auto-detect Yes Server-side
    Aspose LZW, CCITT, JPEG Yes Server-side (SSL + auto-delete)
    Online-Convert Multiple codecs Yes Server-side
    ToolsFlow Browser-based Yes Client-side (never uploads)

    Conclusion

    For color/grayscale TIFFs, use LZW compression — lossless and pixel-perfect. For black-and-white documents, use CCITT Group 4 — maximum compression for text. Both are available in browser-based tools that process files in under a second. For sensitive documents, choose client-side (WASM) tools where files never leave your device.

    FAQ

    Is it safe to compress sensitive TIFF documents online?

    Yes, with the right tool. Client-side tools process files in your browser’s memory — data never leaves your device. Server-side tools like Aspose use SSL encryption and auto-delete files within 24 hours. For medical or legal data, prefer client-side processing.

    What is the difference between LZW and CCITT Group 4?

    LZW is a lossless algorithm for color and grayscale images — preserves all pixels. CCITT Group 4 is designed for bitonal (black-and-white) images — achieves much higher compression on text documents but destroys color information.

    Can I compress TIFF files on mobile?

    Yes. All modern browser-based compression tools work on mobile via Safari or Chrome. Upload from phone storage or cloud drives. Processing speed remains under 1 second on 5G or Wi-Fi.

    What is BigTIFF and when do I need it?

    Standard TIFF uses 32-bit offsets with a 4 GB file size limit. BigTIFF uses 64-bit offsets, supporting files up to 18 exabytes. Only needed for massive geographic or scientific datasets exceeding 4 GB.

  • Compress PNG: Shrink Images Fast Without Losing Quality (2026)

    Compress PNG: Shrink Images Fast Without Losing Quality (2026)

    To compress PNG files without losing quality, use lossless DEFLATE optimization (bit-identical output) or 8-bit quantization (70–85% smaller, visually identical). Modern WASM-based tools process everything locally in your browser — no upload, no privacy risk, instant results.

    Compression Method Comparison

    Method Reduction Quality Best For
    Lossless DEFLATE 10–30% Bit-identical (SHA-256 verifiable) Archives, re-editable assets
    8-bit Quantization 70–85% Visually identical UI elements, logos, screenshots
    Metadata Stripping 50–200 KB per file No pixel change All PNGs (privacy + size)
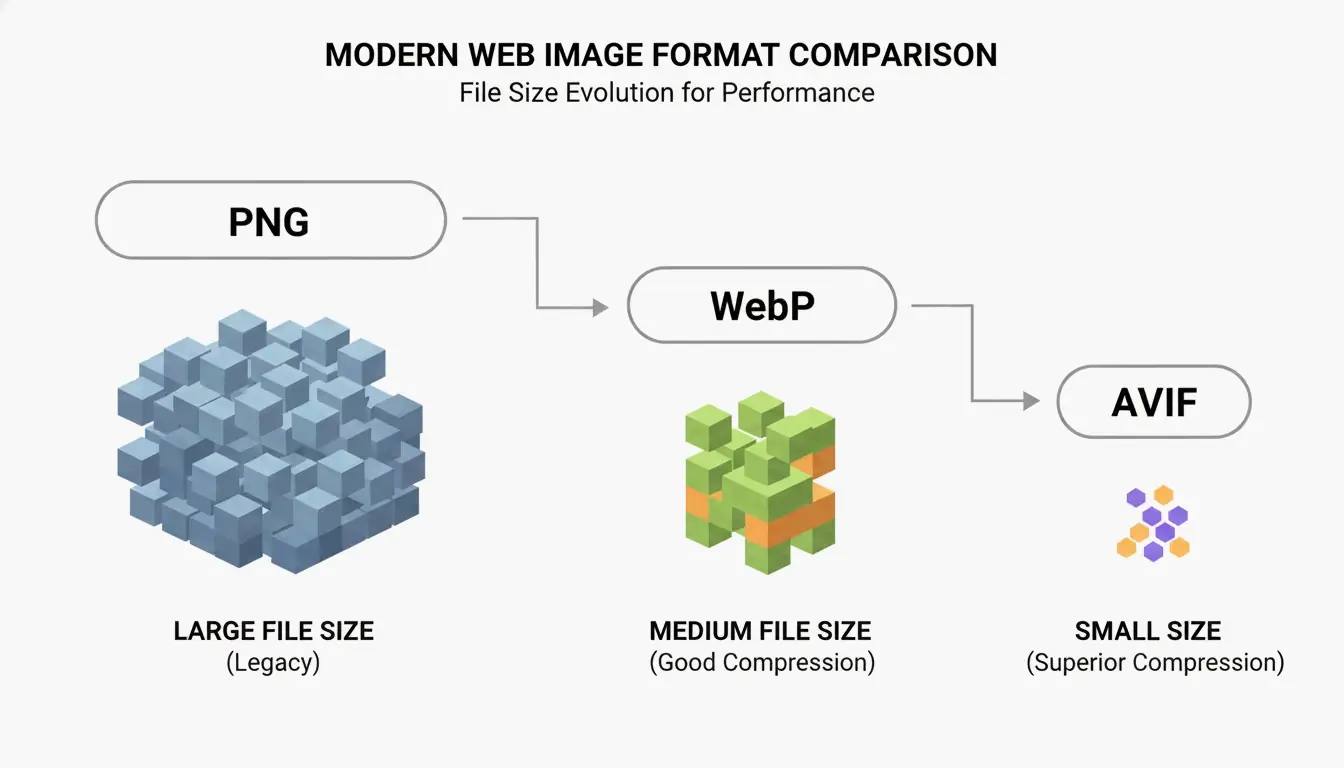
    WebP Conversion 25–35% smaller than lossless PNG Identical Web delivery
    AVIF Conversion 50%+ smaller than PNG Near-identical Modern browsers only

    Why PNG Compression Matters for SEO

    SammaPix reports that images are the Largest Contentful Paint (LCP) element on 70% of web pages. Slow-loading PNGs directly hurt Core Web Vitals and search rankings.

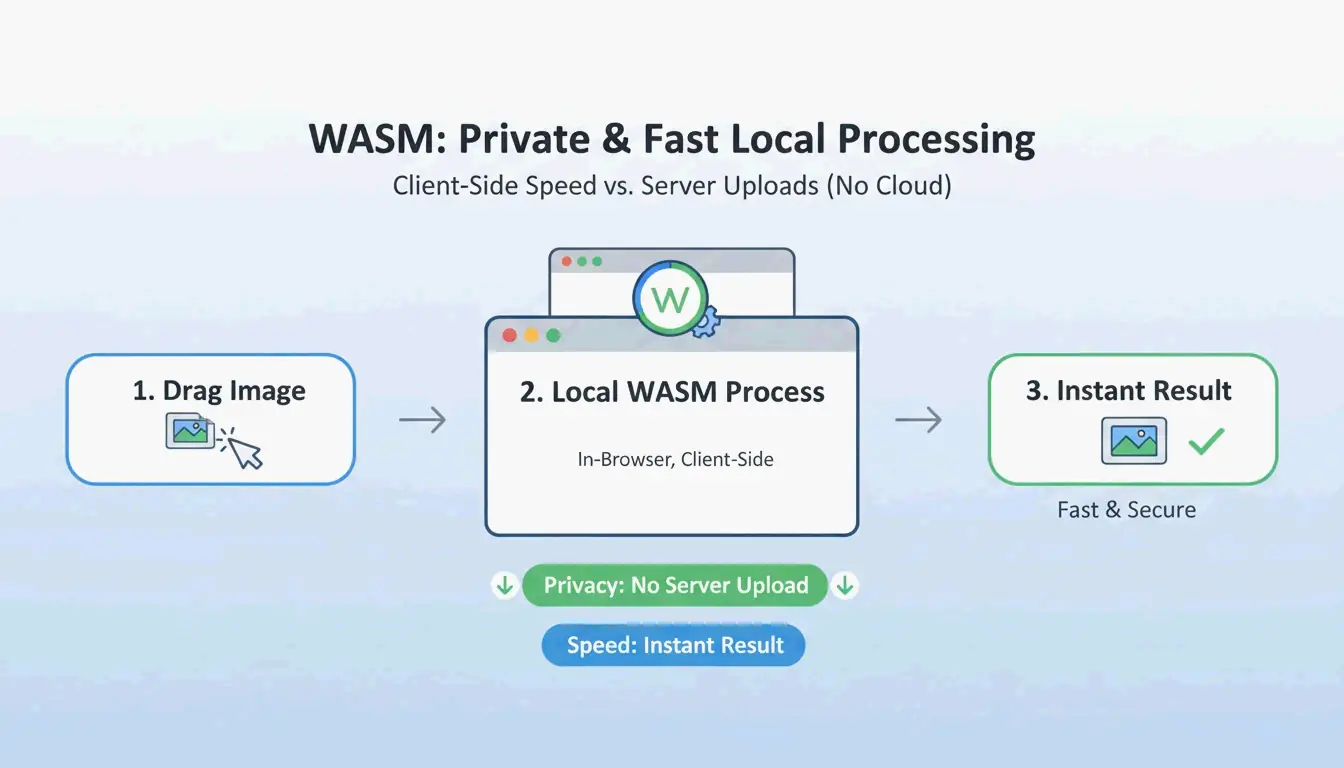
    Simple 3-step local processing workflow (Drag -> WASM Process -> Download)

    Method 1: Lossless DEFLATE Optimization

    Lossless compression repacks pixel data using the DEFLATE algorithm — no pixels change. As Let Compress describes it: “tidying up a suitcase without throwing anything away.”

    When to use: Professional archives, images you plan to re-edit, legal documents requiring bit-exact preservation.

    Verify with SHA-256

    To confirm a lossless tool truly preserves pixels, compare the SHA-256 hash of raw pixel data between original and compressed files. Use hash.ikit.app to run this check privately in your browser.

    Method 2: 8-Bit Quantization (70–85% Reduction)

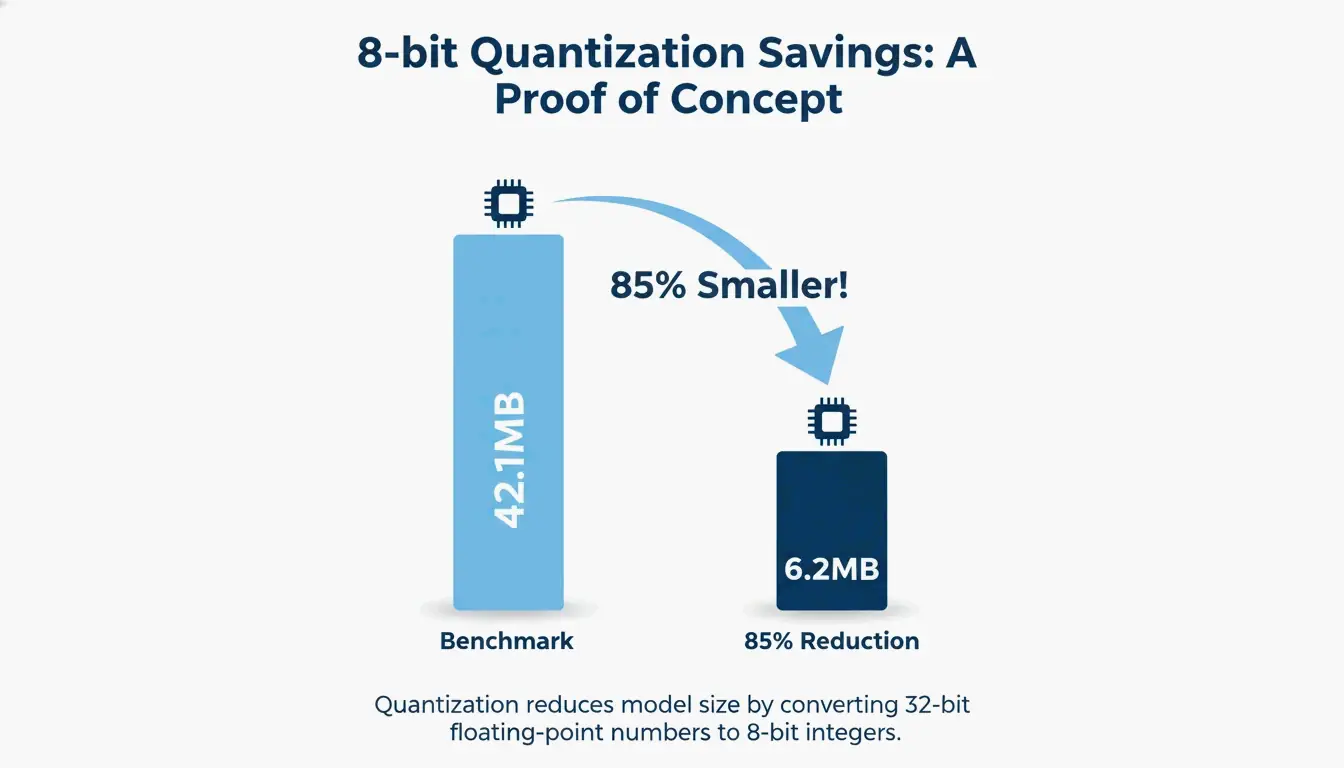
    PNG-24 holds millions of colors, but most UI designs and logos use fewer than 256 unique shades. Converting to an 8-bit indexed palette slashes file size with no visible difference at 1:1 zoom.

    iKit benchmark: a batch of UI screenshots reduced from 42.1 MB to 6.2 MB — an 85% reduction — while looking identical.

    A simple 1:1 comparison showing massive file size reduction with identical visual quality

    When to use: Website UI assets, logos, icons, screenshots — anything that doesn’t need millions of colors.

    Metadata Stripping: Free Size Reduction

    Design apps embed ICC color profiles, GPS data, timestamps, and creation metadata inside PNG files. iKit notes that stripping this data saves 50–200 KB per file with zero visual impact.

    Metadata Type Typical Size Privacy Risk
    ICC Color Profile 2–50 KB Low
    EXIF / GPS Data 0.5–5 KB High — exposes location
    Creation Timestamp 0.2–1 KB Medium
    Software Generator Tag 0.1–0.5 KB Low
    Thumbnail 5–50 KB Low

    Stripping EXIF is also a privacy best practice — it prevents accidental location sharing from screenshots.

    CLI Tools for Batch Processing

    Tool Language Method Command
    oxipng Rust Lossless DEFLATE oxipng --opt 4 --strip all *.png
    pngquant C Lossy 8-bit quantization pngquant --quality=65-80 *.png

    CI/CD Integration

    
    - name: Optimize PNGs
      run: |
        npm install -g oxipng
        find ./src -name "*.png" -exec oxipng --opt 4 --strip all {} \;
    

    Industry benchmarks show pngquant consistently achieves 60–80% reduction on UI assets.

    When to Use WebP or AVIF Instead

    Even optimized PNGs can’t match next-gen formats for web delivery.

    Format vs PNG Lossless Transparency Browser Support (2026)
    WebP 25–35% smaller Yes 97%+
    AVIF 50%+ smaller Yes 92%+

    A Google study confirmed WebP matches PNG’s lossless quality at significantly smaller sizes.

    Simple comparison of PNG vs WebP/AVIF file containers/sizes

    Best Strategy: Next-Gen Fallback

    Use the <picture> element with AVIF and WebP sources, falling back to PNG for older browsers. This pattern serves the smallest compatible format automatically.

    Serve AVIF/WebP to modern browsers, fallback to compressed PNG for older ones.

    PNG 3.0 (June 2025 Update)

    The PNG 3.0 specification added HDR image support and elevated Animated PNG (APNG) to a formal W3C Recommendation. For 2026 workflows, PNG 3.0 handles high-contrast visuals better while preserving the transparency features essential for UI design.

    Conclusion

    For maximum PNG compression: use 8-bit quantization for UI assets (70–85% smaller), lossless DEFLATE for archives, and strip metadata on all files. For web delivery, convert to WebP or AVIF with a <picture> fallback. Always verify lossless output with SHA-256 hash comparison.

    FAQ

    Does compressing a PNG make the image blurry?

    No. Lossless compression is bit-identical. 8-bit quantization uses a 256-color palette that remains perceptually identical for UI elements and logos. Blurriness only occurs with low-quality general lossy algorithms not designed for sharp edges.

    Why is my compressed PNG still too large?

    Three causes: (1) Oversized pixel dimensions — resize to actual display width (e.g., 1920px). (2) Complex noise/gradients that DEFLATE can’t simplify. (3) Heavy embedded metadata — enable “Strip Metadata” in your tool settings.

    Is it safe to use online PNG compressors?

    Only if the tool uses WebAssembly (WASM) for local browser processing — files never leave your device. Avoid upload-based compressors for sensitive documents, as files are processed on remote servers.

    What is the difference between oxipng and pngquant?

    oxipng performs lossless optimization — tests every filter combination for the smallest bit-identical file. pngquant performs lossy 8-bit quantization — converts 32-bit RGBA to 8-bit palette for 60–80% reduction. Use oxipng for archives, pngquant for web assets.

  • How to Reduce File Size: The Ultimate Guide to Shrinking PDFs, Images, and Videos (2026)

    How to Reduce File Size: The Ultimate Guide to Shrinking PDFs, Images, and Videos (2026)

    To reduce file size in 2026, apply the right strategy per file type: PDFs — downsample images to 150 DPI and enable font subsetting (up to 89% reduction). Images — export as WebP or JPEG at 80% quality (40–60% smaller). Videos — re-encode with H.265 at 2–5 Mbps (50% smaller than H.264).

    File Type Quick Reference

    File Type Best Tool Typical Reduction Key Setting
    PDF Adobe Acrobat Pro / Ghostscript 60–89% Downsample to 150 DPI
    Image WebP / JPEG 80% 40–60% Quality 80, resize to display dimensions
    Video Handbrake (H.265) ~50% vs H.264 Bitrate 2–5 Mbps (1080p)
    Multi-file 7-Zip archive Varies by content ZIP or 7z container

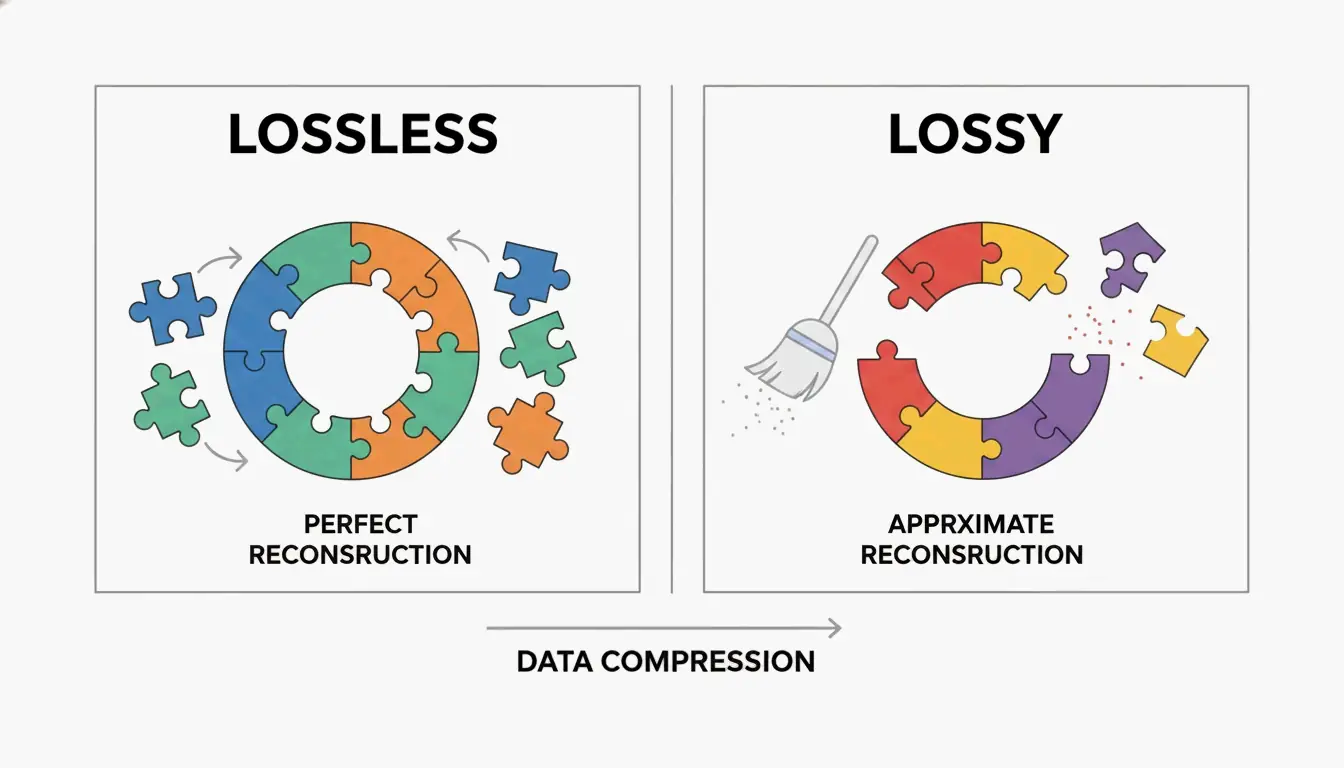
    Lossy vs. Lossless: When to Use Each

    Type How It Works Best For Quality Loss
    Lossless Removes redundant data patterns Text documents, archival photos, PNG None — pixels identical
    Lossy Discards data humans can’t perceive Web images, streaming video, email attachments Minimal at proper settings

    As SmartPDFSuite explains, failing to resize images to their final display dimensions before embedding creates “25× data bloat” — the single most common file size mistake.

    A simple side-by-side comparison of Lossless (identical) vs. Lossy (optimized) data structures.

    PDF Compression: Adobe Acrobat Pro and Alternatives

    PDFs are often the bulkiest office files because they bundle high-res images, fonts, and layers into one container. Smallppt reports that images typically make up 70% of a PDF’s total size.

    Adobe Acrobat Pro: PDF Optimizer

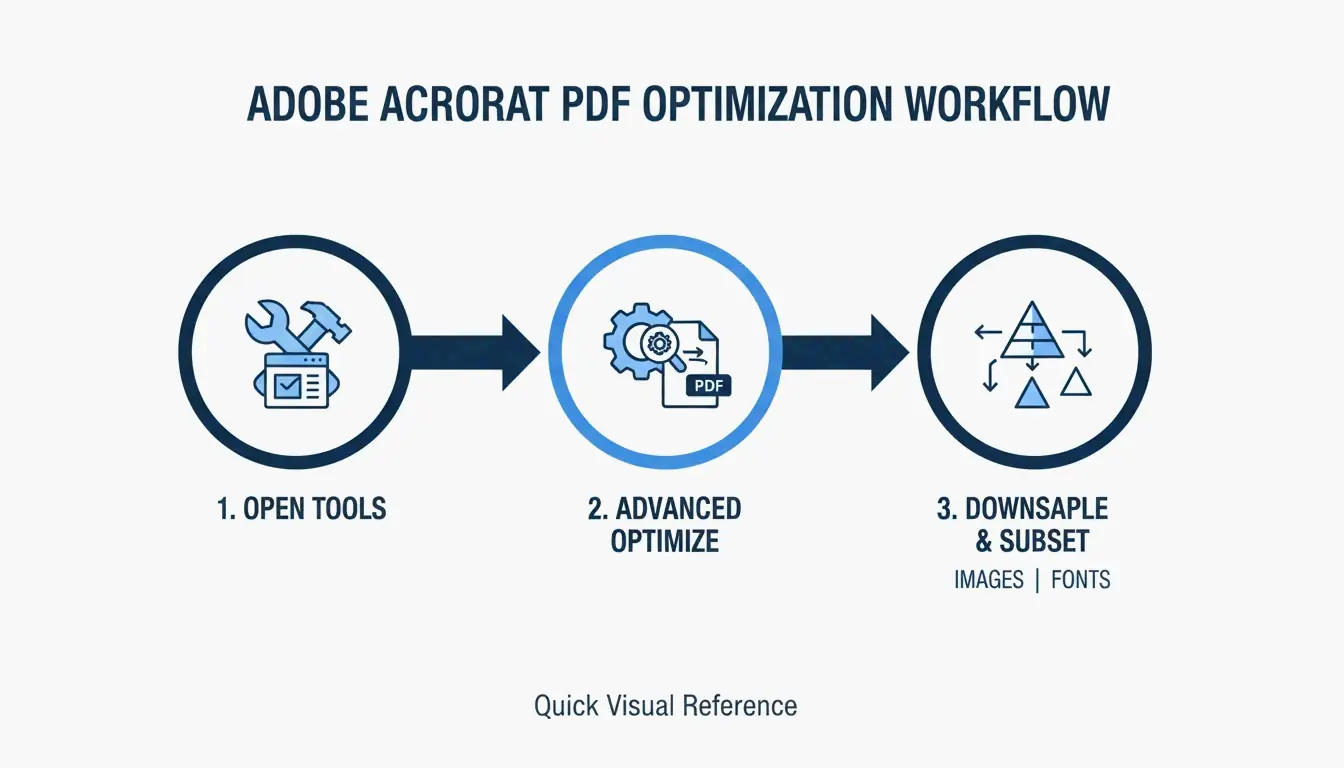
    1. Open PDF → All Tools > Compress a PDF
    2. Select Advanced Optimization
    3. Downsample images to 150 DPI (web) or 300 DPI (print)
    4. Enable Font Subsetting — embeds only used characters, cutting font weight by 80–90% per SmartPDFSuite

    A 3-step visualization of the PDF optimization workflow.

    Alternative PDF Tools

    Tool Reduction Best For
    Cisdem PDF Compressor Up to 89% Image-heavy PDFs on Mac
    pdfFiller Low/Medium/High presets Team batch processing
    Ghostscript (CLI) Up to 94.5% Automated large-volume jobs
    Mac Preview Up to 86% Quick single-file jobs

    Why Is Your PDF Still Large?

    Hidden Culprit Fix
    Embedded full fonts (not subsetted) Enable font subsetting
    Hidden editing layers / CAD data Flatten the PDF
    Scanned images instead of text Run OCR, then delete raster background
    Print-only metadata Use “Optimize PDF” to strip

    Image Optimization: JPEG, WebP, and AVIF

    The 80% Quality Rule

    SmartPDFSuite found that JPEG at 80% quality is visually indistinguishable from 100% but 40–60% smaller.

    Format Selection Guide

    Format Best For Transparency Size vs JPEG
    JPEG Photography No Baseline
    PNG Graphics, screenshots Yes 2–3× larger
    WebP Web standard (2026) Yes 30% smaller
    AVIF Maximum compression Yes 50% smaller
    SVG Icons, logos Yes Tiny (text-based)

    DPI Settings

    Target DPI Why
    Web / Screen 72–150 DPI IRCC Canada recommends 96–150 DPI for digital submissions
    Standard Print 150–200 DPI Balance of quality and size
    Professional Print 300 DPI Baseline for sharp physical output

    Video Compression: Codecs and Handbrake

    Video compression hinges on two factors: codec (the compression algorithm) and bitrate (data per second).

    H.264 vs H.265 (HEVC)

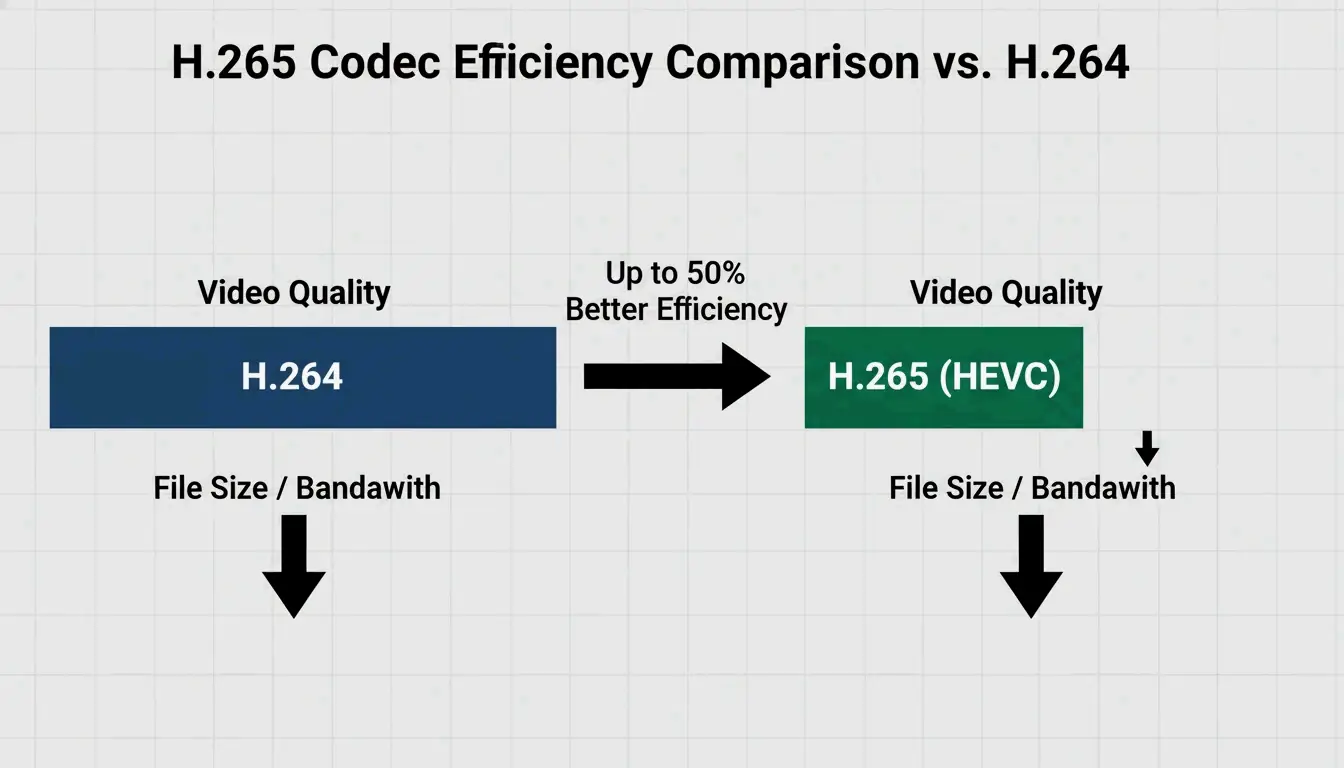
    Codec Quality at Same Size Size at Same Quality Compatibility
    H.264 Baseline Baseline Universal
    H.265 Better ~50% smaller 95%+ (2026)

    Bitrate Targets

    Use Case Resolution Bitrate
    Web / Social Media 1080p 2–5 Mbps
    Archival / High Def 1080p 10–20 Mbps
    4K Content 2160p 20–40 Mbps

    A comparison of H.264 vs H.265 showing the efficiency gain (same quality, smaller size).

    Handbrake: Batch Video Compression

    1. Open Handbrake → click “Open Source” to select files or folder
    2. Check Web Optimized
    3. Select H.265 (x265) video codec
    4. Set target bitrate (2–5 Mbps for web)
    5. Click Add to Queue → Start Encode

    Processes entire folders automatically.

    Built-in OS Shortcuts

    macOS Preview (Quartz Filter)

    1. Open PDF in Preview
    2. File → Export
    3. Select “Reduce File Size” from Quartz Filter dropdown
    4. Save

    Cisdem notes this achieves up to 86% reduction, but may over-compress or paradoxically increase size on already-optimized files.

    Windows Print-to-PDF

    “Printing” a PDF to a new file strips editing history and hidden objects, often producing a leaner version with zero tool installation.

    Conclusion

    Reduce file size by targeting the dominant bloat: images in PDFs (downsample + font subset), format choice for photos (WebP at 80% quality), and codec selection for video (H.265 at 2–5 Mbps). Always keep a high-res backup before applying lossy compression — once pixels are discarded, they can’t be recovered.

    FAQ

    How can I compress a PDF on my phone without an app?

    Use browser-based tools like Smallpdf, Adobe Online, or pdfFiller. On iOS, use the “Print” trick: open PDF → Share → Print → pinch to zoom on the preview — this creates a flattened, smaller copy you can save.

    Does reducing file size always lose quality?

    No. Lossless compression (PNG optimization, ZIP) removes redundant data with zero quality change. Lossy compression (JPEG 80%, H.265) discards data imperceptible to human eyes, achieving large reductions without visible degradation.

    Why is my PDF still large after compression?

    Check for un-subsetted fonts (embeds entire font libraries), hidden layers from editing software, scanned images that should be OCR text, or print-only metadata. Use “Advanced Optimization” in Acrobat Pro to strip these elements.

    What is the best video codec for smaller file size?

    H.265 (HEVC) delivers the same quality as H.264 at roughly half the file size. Use Handbrake with the H.265 (x265) codec and target 2–5 Mbps for 1080p web content.

  • Resize Image: Quick Photo Size Guide for Web & Social Media (2026)

    Resize Image: Quick Photo Size Guide for Web & Social Media (2026)

    To resize images without quality loss, lock the aspect ratio, set the correct pixel dimensions for your target platform (e.g., 1080×1350px for Instagram), and export as WebP for web or JPEG at 80% quality for photos. Proper resizing can shrink a 4MB photo to 200KB — an 80% reduction — with no visible difference on screen.

    The 3-Step Professional Workflow

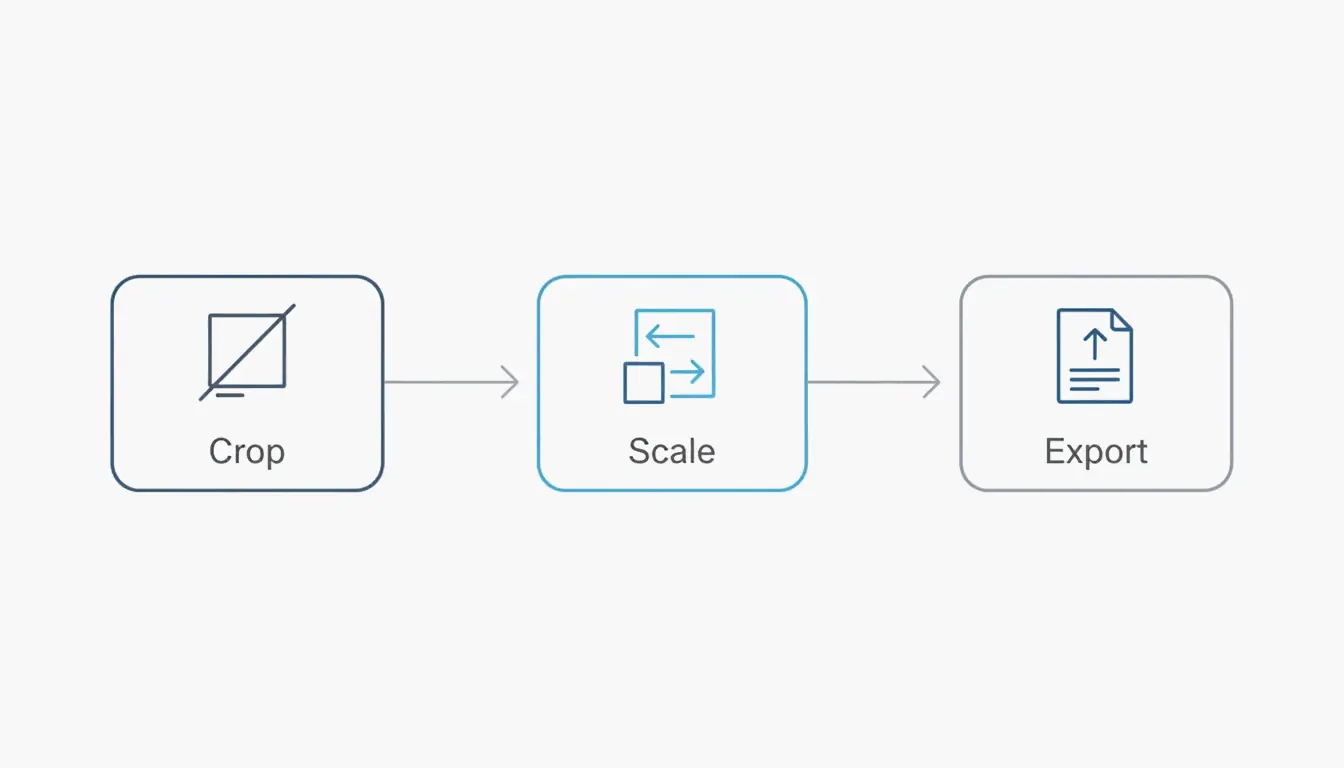
    Step Action Why
    1. Crop Trim to target aspect ratio Prevents stretching later
    2. Scale Resize to exact pixel dimensions Matches platform requirements
    3. Export Save in optimal format Minimizes file size

    The 3-step professional workflow: Crop > Scale > Export.

    O’Brien Media reports that proper resizing achieves 80% file size reduction — turning a 4MB photo into a lean 200KB file.

    2026 Standard Pixel Dimensions

    Platform Dimensions Aspect Ratio Notes
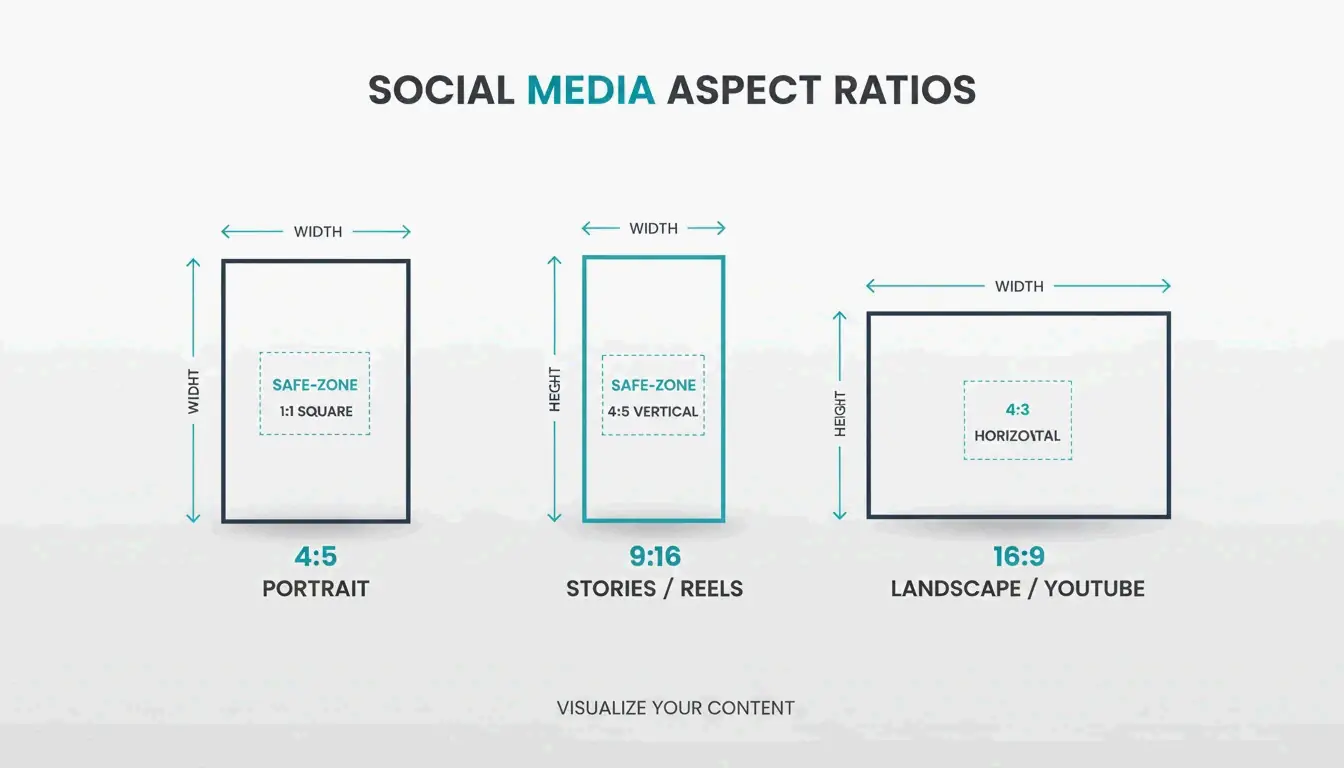
    Instagram Feed 1080 × 1350 px 4:5 Portrait Maximum screen real estate in feeds
    Instagram Square 1080 × 1080 px 1:1 Classic format
    TikTok / Reels 1080 × 1920 px 9:16 Vertical full-screen
    LinkedIn Profile 400 × 400 px 1:1 Headshot
    YouTube Thumbnail 1280 × 720 px 16:9 Click-through driver
    Web Hero Banner 1920 × 1080 px 16:9 Full-width desktop
    Blog Image 1200 px wide varies Sweet spot for performance
    Email Header 600 px wide varies Email client safe width

    Picssizer data shows the 4:5 Portrait (1080×1350) format drives the most engagement because it occupies maximum screen space in mobile feeds.

    The Safe-Zone Strategy for Vertical Content

    For Reels and Stories (1080×1920), keep text and faces in the center 1080×1420 px area. The edges get covered by UI buttons, captions, and profile icons.

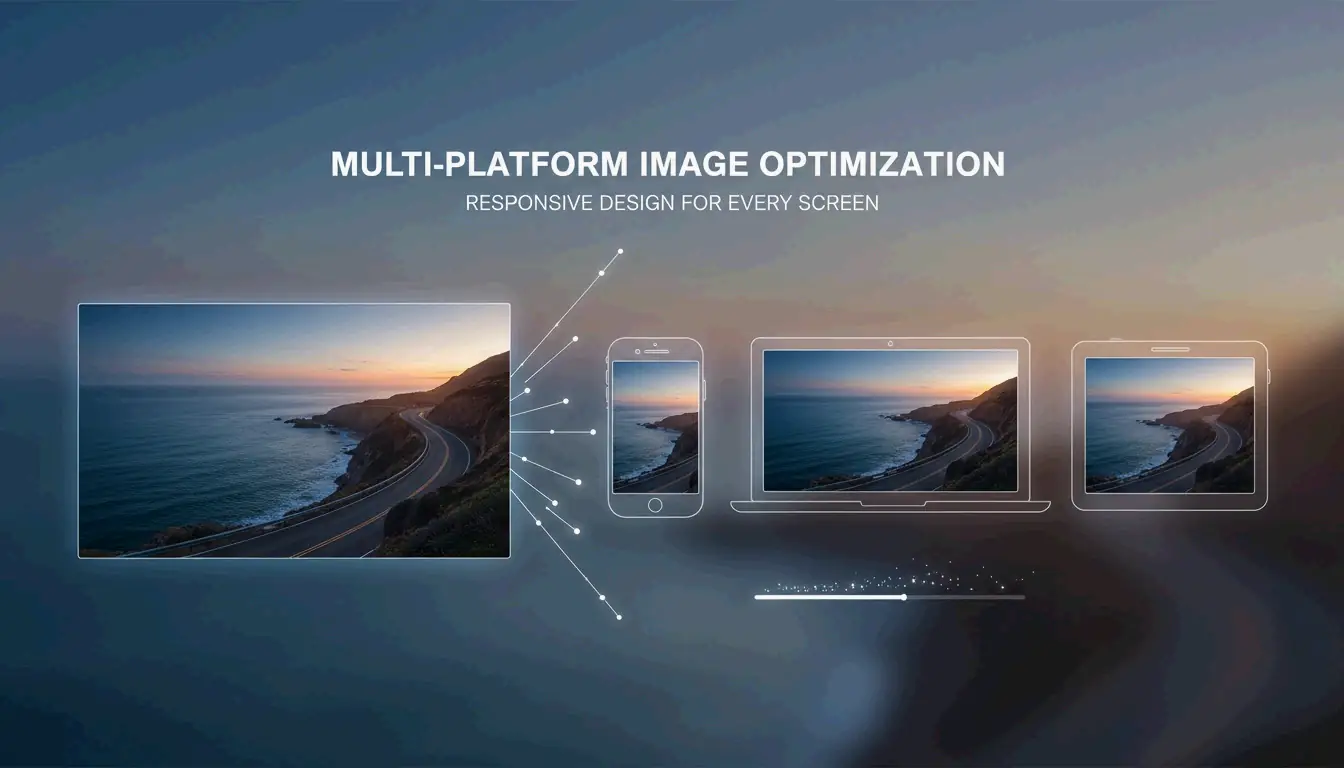
    A simple visual comparison of 4:5 Portrait vs 9:16 Vertical vs 16:9 Landscape.

    Format Comparison: JPEG vs PNG vs WebP vs AVIF

    Format Best For Transparency Typical Size vs JPEG Browser Support
    JPEG Photography No Baseline Universal
    PNG Logos, graphics Yes 2–3× larger than JPEG Universal
    WebP Web photos + graphics Yes 30% smaller than JPEG 97%+ (2026)
    AVIF Maximum compression Yes 50% smaller than JPEG 92%+ (2026)

    Recommended Export Settings

    Use Case Format Quality Dimensions
    Blog photos WebP or JPEG 80% 1200px wide
    Instagram JPEG 85% 1080×1350 px
    Logo / icon PNG or WebP Lossless Exact size needed
    Email attachment JPEG 70% 600–800px wide

    A case study found resizing a 5MB photo to 400KB (10:1 reduction) eliminates “message too large” email errors entirely.

    DPI: Web vs Print

    Target DPI Why
    Web / Screen 72 DPI Screens display at fixed resolution; higher DPI only inflates file size
    Print 300 DPI Required for sharp physical output

    Never use 300 DPI for web images — it quadruples file size with zero visual improvement on screen.

    Batch Resize Tools

    Processing images one by one is inefficient. Batch tools handle 100+ images in seconds.

    Tool Platform Method
    Adobe Express Browser Drag-and-drop, preset sizes
    Photo & Picture Resizer Android Quick Actions before sharing
    iOS Shortcuts iPhone Custom “Resize” automation to set width
    Quick Photo Resizer Desktop Folder drag-and-drop

    iOS Shortcut for Instant Resize

    In iOS 26, create a Shortcut: Photos → “Resize Image” → set width to 1080px → Save. Select photos from gallery and resize instantly without any app.

    Interpolation: Why Downscaling Looks Good but Upscaling Doesn’t

    Downscaling uses algorithms like Bicubic Sharper to cleanly remove pixels while recalculating remaining data — edges stay crisp. Upscaling forces software to invent new pixels, causing blurriness. Only AI-based generative upscalers can produce acceptable results when enlarging.

    Direction Quality Impact Recommendation
    Downscale Lossless appearance Safe at any ratio
    Upscale (standard) Pixelation, blur Avoid
    Upscale (AI) Acceptable with AI tools Use as last resort

    Conclusion

    Resize images to match your target platform’s exact pixel dimensions — 1080×1350 for Instagram, 1200px wide for blog images, 1920×1080 for hero banners. Always lock aspect ratio, export as WebP (or JPEG at 80%), and use batch tools for efficiency. Any image over 2MB on your website should be resized immediately for SEO and user experience.

    FAQ

    Why do my images look blurry after uploading to Instagram?

    Instagram compresses any image wider than 1080px. Resize to exactly 1080px wide before uploading, use 4:5 or 1:1 ratio to avoid cropping, and enable “High-quality uploads” in Instagram settings.

    What is the difference between resizing and cropping?

    Resizing changes total pixel count while keeping all content. Cropping removes outer edges to change composition or ratio. Best practice: crop to the correct ratio first, then resize to target dimensions.

    Can I enlarge an image without losing quality?

    Standard upscaling causes pixelation. In 2026, AI generative upscalers can recreate missing details, but the best practice is always to start from the highest-resolution source file and downsize.

    How do I resize photos on iPhone without a third-party app?

    Use the Shortcuts app to create a resize action, or email the photo to yourself — iOS prompts you to choose Small, Medium, or Large, effectively resizing the file.

  • SVG Compression Principle: How Vector Images Shrink Smartly (2026)

    SVG Compression Principle: How Vector Images Shrink Smartly (2026)

    SVG compression works because SVGs are text files (XML), not pixel grids. The principle is simple: strip redundant XML metadata, simplify path data precision, then apply server-level Brotli/Gzip encoding. Combined, these steps achieve 70–93% total size reduction with zero visual quality loss.

    How SVG Compression Works: 3 Layers

    Layer What Happens Typical Reduction
    1. Metadata removal Strip editor artifacts, comments, hidden layers 40–80%
    2. Path simplification Reduce coordinate precision, convert to relative deltas 10–30% additional
    3. Transfer encoding Brotli/Gzip compresses the text during delivery 15–20% beyond Gzip

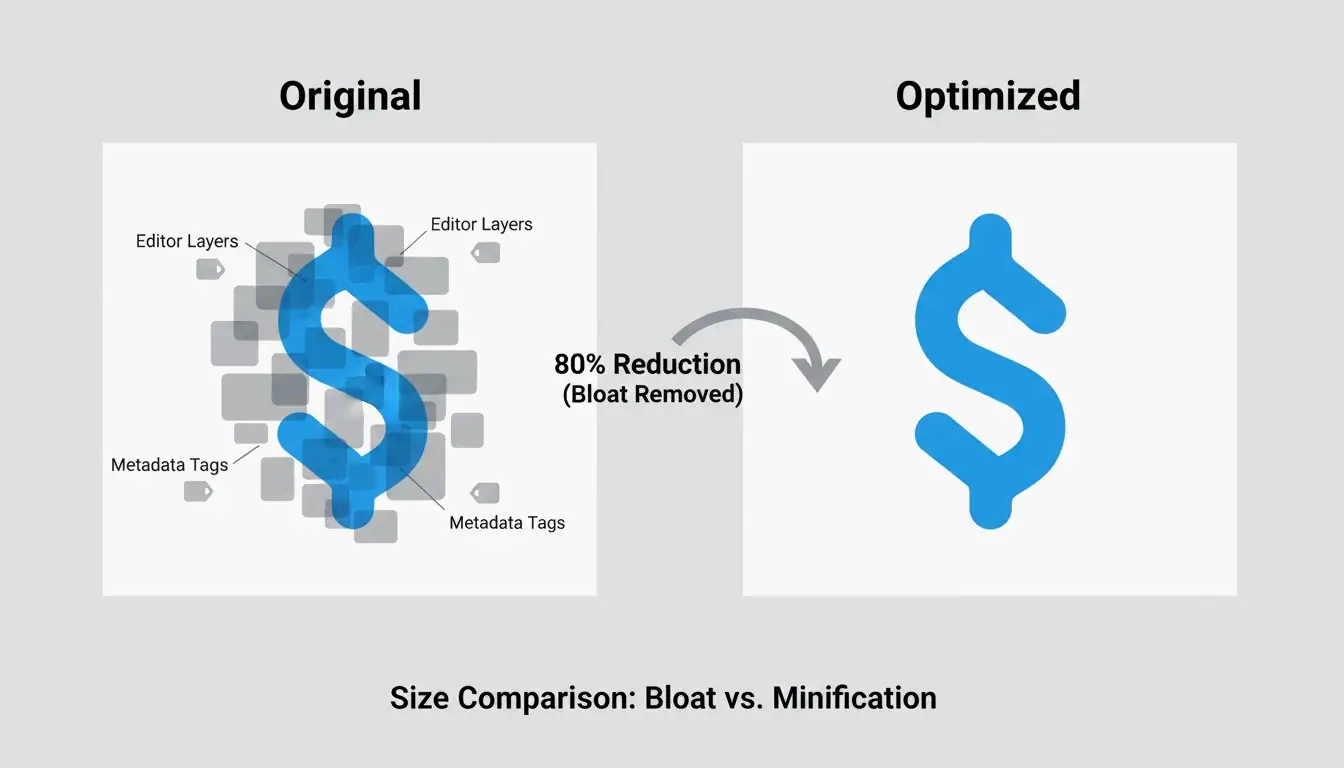
    According to DEV Community, a typical icon exported from Adobe Illustrator starts at 45 KB and drops to 8 KB after optimization — an 82% reduction.

    A simple comparison showing a 'Bloated SVG' (many layers/metadata) vs. a 'Clean SVG' (only core paths).

    Layer 1: Remove XML Metadata Bloat

    Design tools (Illustrator, Figma, Inkscape) embed proprietary metadata so designers can re-edit layers. This includes layer names, generator comments, workspace settings — all dead weight on the web.

    ToolPix highlights that cleaning these tags can cut file size by up to 80% while also reducing DOM footprint for faster browser rendering.

    What gets removed:

    Element Example Safe to Remove?
    Editor metadata <metadata> blocks Yes
    Generator comments <!-- Created with Illustrator --> Yes
    Hidden layers display="none" groups Yes
    Empty definitions Unused <defs> entries Yes
    Element IDs (unused) id="Layer_x0020_1" Only if not referenced by CSS/JS

    Layer 2: Simplify Path Data (the d Attribute)

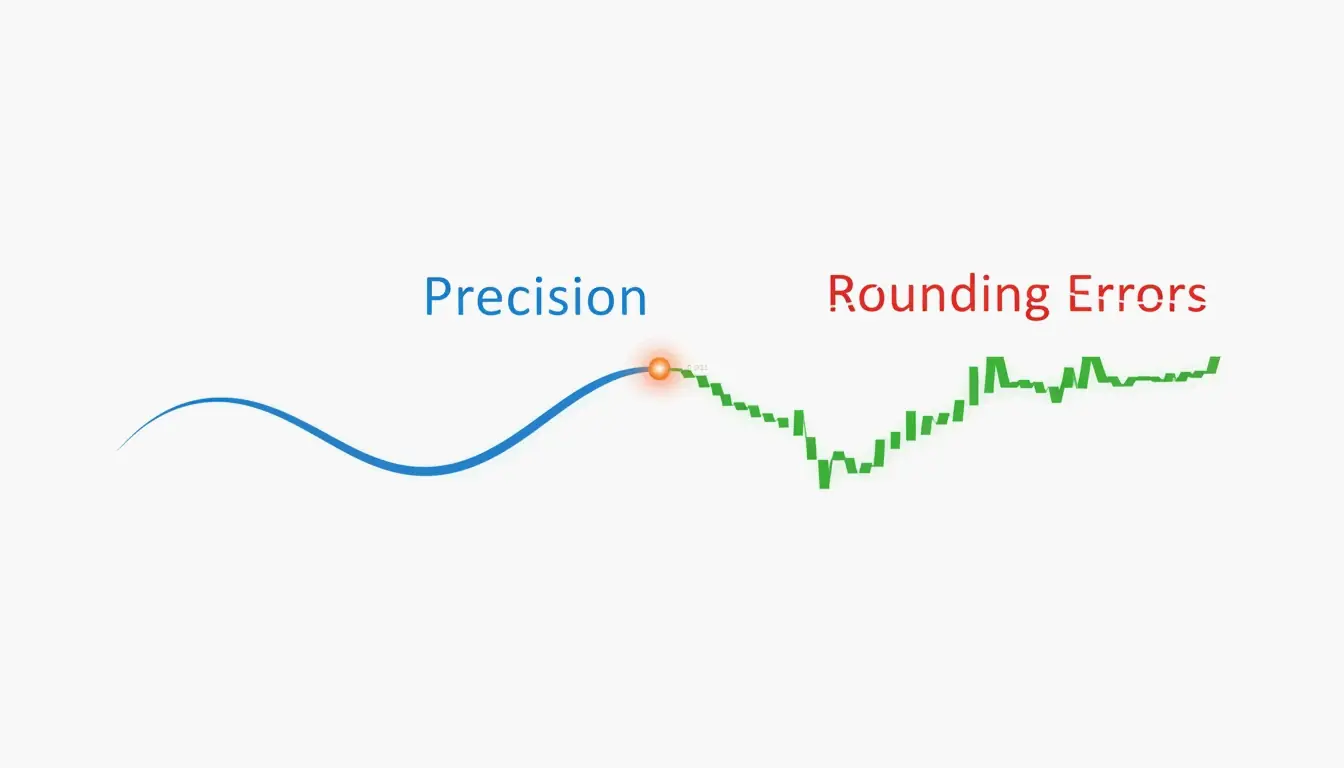
    The most effective optimization targets the path d attribute — the coordinate string defining shapes. These coordinates often carry 8 decimal places (e.g., 12.003906). Rounding to 2–3 decimals produces no visible change even on Retina displays but removes significant text.

    floatPrecision Settings by Use Case

    floatPrecision Best For Visible Impact
    1 Rarely recommended Gaps or jagged edges on curves
    2 Icons, logos, simple shapes None on standard screens
    3 Complex illustrations Safe for all displays
    4+ Technical/architectural drawings Preserves every decimal

    According to DEV Community, the two key techniques are rounding coordinates and converting absolute positions to relative deltas (shorter text).

    A visual metaphor of 'Precision vs. Quality' showing a smooth curve becoming jagged when decimals are removed.

    SVGO: The Standard Optimization Tool

    SVGO (SVG Optimizer) v3.3.2 is the industry standard for applying the SVG compression principle. It runs on Node.js v22+ and powers nearly every modern optimization workflow.

    Key SVGO Settings

    Setting Recommended Value Why
    multipass true Runs repeatedly until no more bytes to shave
    floatPrecision 2 (icons) / 3 (illustrations) Balance of size vs. quality
    removeViewBox false Preserves responsive scaling
    cleanupIDs true Removes unused IDs (skip if CSS/JS references them)
    removeScriptElements true Security: strips XSS vectors

    A case study on a UI icon set achieved 93.3% total reduction using SVGO combined with Brotli.

    SVGO Quick Start

    
    npm install -g svgo
    
    # Optimize a single file
    svgo input.svg -o output.svg
    
    # Optimize entire directory
    svgo -f ./src/icons -o ./dist/icons
    

    For a visual interface, SVGOMG (web-based SVGO playground) lets you toggle plugins and preview changes in real time.

    Layer 3: Brotli and Gzip Transfer Encoding

    SVGO cleans the file itself, but the final size reduction happens at the server level. Because SVGs are text, standard compression algorithms work exceptionally well.

    Algorithm SVG Reduction Notes
    Gzip 50–80% of original Long-standing standard
    Brotli 15–20% smaller than Gzip 2026 web standard for image/svg+xml

    Wikipedia notes that Gzip alone can shrink SVG to 20–50% of original size. Brotli consistently beats it by an additional 15–20%.

    Nginx Configuration

    # Enable Brotli for SVG
    brotli on;
    brotli_types image/svg+xml;
    brotli_comp_level 6;
    
    # Fallback Gzip
    gzip on;
    gzip_types image/svg+xml;
    

    DEV Community reports: an icon set of 50 files totaling 450 KB drops to under 30 KB with SVGO + Brotli combined.

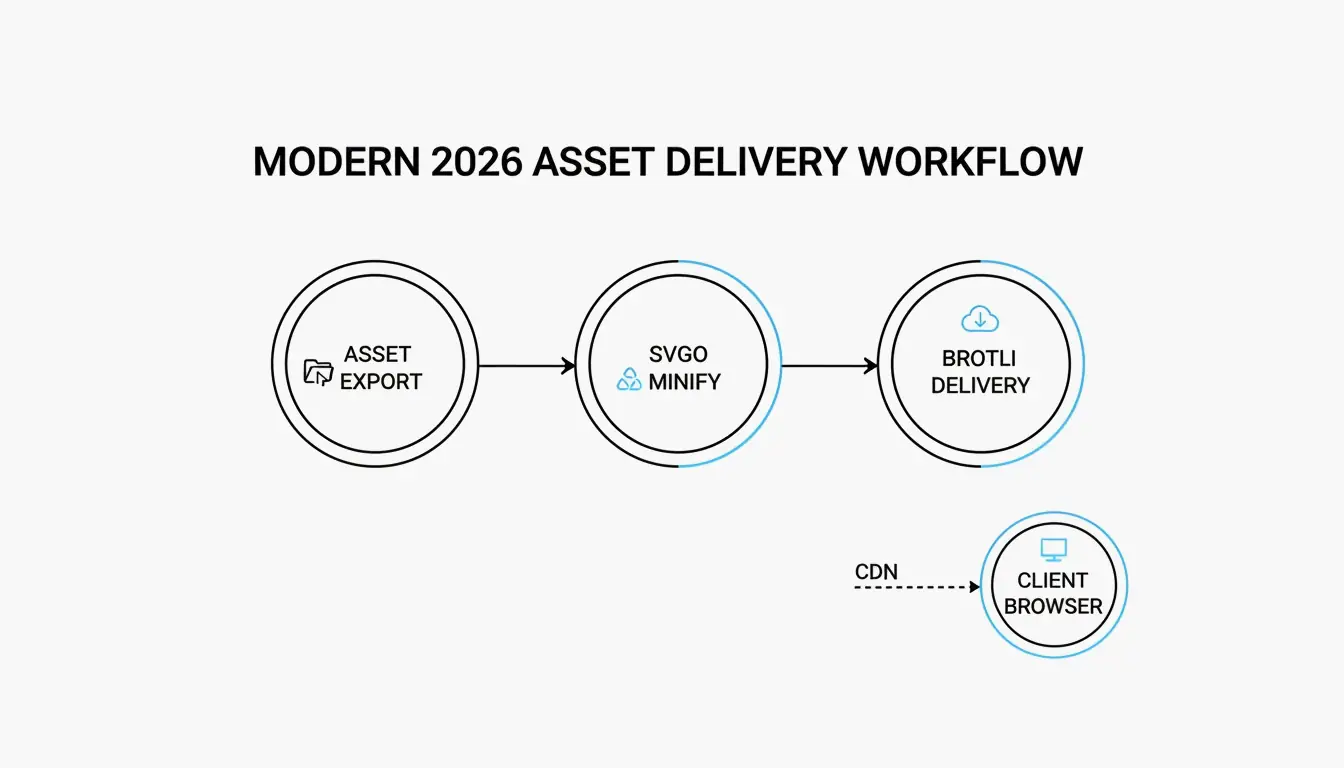
    The 2-step delivery process: Source SVG -> SVGO (Minify) -> Server (Brotli) -> Browser.

    Critical: Preserve the viewBox Attribute

    The viewBox attribute is the coordinate system that enables responsive scaling. If your optimizer strips it, the SVG defaults to fixed pixel dimensions and breaks your layout.

    Always set removeViewBox: false in SVGO. This is the single most important setting — it keeps your images scalable across all screen sizes.

    SVG Compression as a Security Layer

    SVGs are XML documents and can contain malicious <script> tags or foreignObject elements for XSS attacks. MDN Web Docs warns that SVGs can execute scripts when loaded directly in the browser.

    SVGO’s removeScriptElements plugin strips these vectors automatically. Optimization isn’t just about speed — it’s a sanitization step.

    Conclusion

    SVG compression is a two-part process: code minification (metadata + path simplification via SVGO) and server-side encoding (Brotli/Gzip). Start with SVGO v3.3.2 at floatPrecision: 2, keep viewBox intact, and enable Brotli on your server. This layered approach achieves 70–93% total reduction without visual quality loss.

    FAQ

    Does SVG compression reduce visual quality?

    No. Removing metadata and comments is fully lossless. Only reducing floatPrecision below 2 can cause visible rounding errors (jagged curves). Keep it at 2 or higher for all production assets.

    Why is my exported SVG larger than a PNG?

    Design tools embed proprietary XML data, thumbnails, and hidden layers. If your SVG also contains thousands of path nodes or embedded raster images, it can exceed an equivalent PNG. Run it through SVGO to strip the bloat.

    When should I avoid SVG path simplification?

    Skip heavy simplification for technical illustrations or architectural plans where every decimal matters. Also preserve element IDs if your SVG is manipulated by external CSS or JavaScript — removing them breaks code references.

    What does viewBox do in SVG compression?

    The viewBox attribute defines the SVG’s internal coordinate system for responsive scaling. Removing it locks the image to fixed pixel dimensions. Always set removeViewBox: false in your optimizer config.

  • How to Compress a PDF: 5 Free Ways to Reduce File Size on Mac/Windows (2026)

    How to Compress a PDF: 5 Free Ways to Reduce File Size on Mac/Windows (2026)

    To compress a PDF for free in 2026, Mac users can use the built-in Preview app’s Quartz Filter (up to 86% reduction), while Windows users can export from Microsoft Word with “Minimum Size” settings. For maximum compression, Ghostscript achieves up to 94.5% reduction via command line. Online tools like Smallpdf handle quick jobs in the browser.

    5 Free Methods Compared

    Method Platform Max Reduction Batch Privacy Best For
    1. Mac Preview macOS ~86% No Full (offline) Quick single-file jobs
    2. Microsoft Word Windows ~60% No Full (offline) Text-heavy reports
    3. Smallpdf Browser ~75% Limited Cloud (GPC/GDPR) Quick one-off jobs
    4. Ghostscript Mac/Win CLI ~94.5% Yes Full (offline) Large archives, batch
    5. 7-Zip Mac/Win Container only Yes Full (offline) Sending multiple PDFs

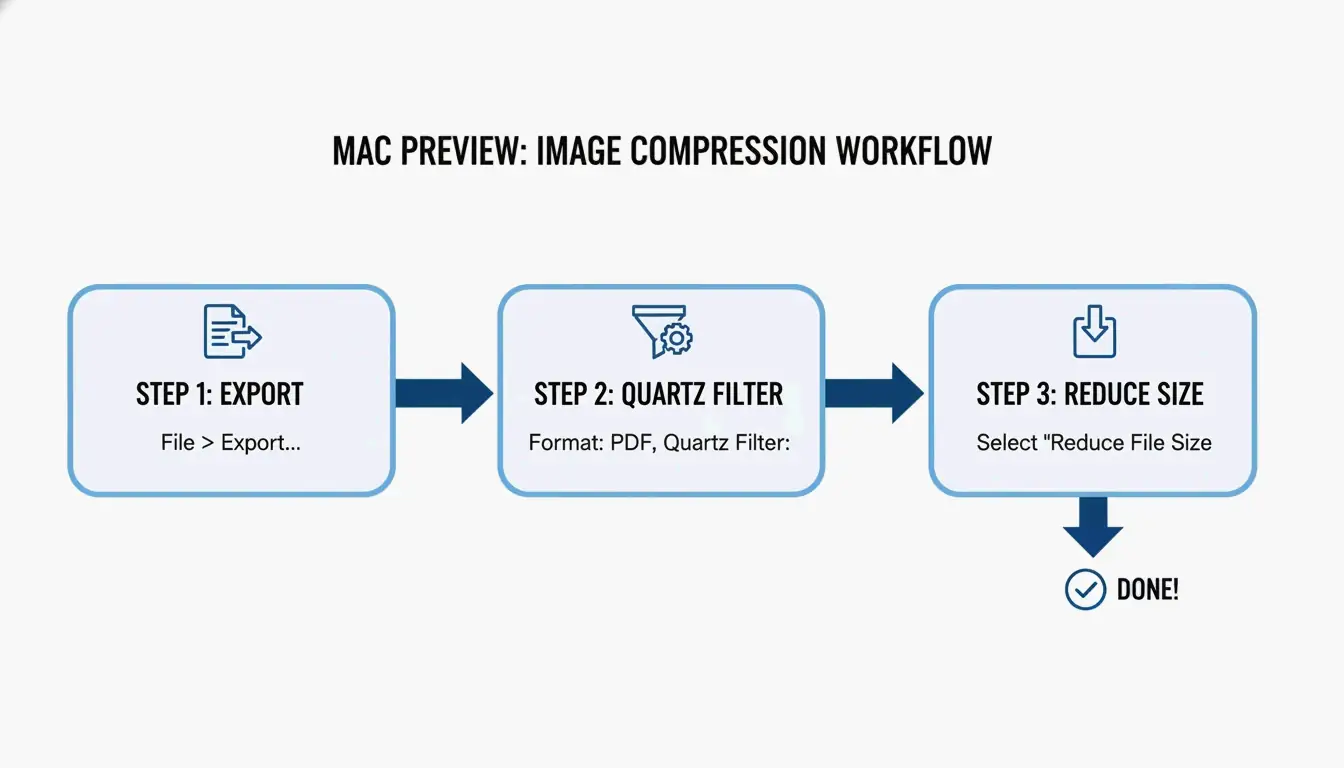
    Method 1: Mac Preview — Quartz Filter

    Cisdem reports up to 86.1% reduction on image-heavy PDFs using Preview’s built-in Quartz Filter.

    1. Open PDF in Preview
    2. Go to File → Export
    3. In the Quartz Filter dropdown, select “Reduce File Size”
    4. Click Save

    Simple 3-step workflow for Mac Preview compression

    Pro tip: Ensure source images are in RGB format (not CMYK) before exporting — this strips unnecessary color data while keeping visuals crisp.

    Troubleshooting: When Preview Makes Files Larger

    Sometimes “Reduce File Size” actually increases the file. This happens when Preview re-encodes already-optimized images or struggles with complex fonts. Cisdem notes quality may still drop. Switch to Ghostscript or Smallpdf in these cases.

    Method 2: Microsoft Word — “Minimum Size” Export

    Best for text-heavy reports that need to fit email or web upload limits.

    1. Open the document in Word
    2. Go to File → Save As
    3. Select PDF as file type
    4. Under “Optimize for,” choose “Minimum size (online publishing)”
    5. Click Save

    Word prioritizes text clarity while aggressively shrinking images to web standards.

    Method 3: Smallpdf — Online Compression

    Browser-based, no installation required. Works with Google Drive and Dropbox.

    1. Upload your PDF to Smallpdf
    2. Choose compression — Basic (balanced) or Strong (maximum)
    3. Download the optimized file

    Privacy: Reputable platforms follow GPC and GDPR, deleting files within an hour. Look for SOC2 certification. For sensitive business data, JOPDF recommends offline tools.

    Method 4: Ghostscript — Maximum Compression (94.5%)

    The most powerful free option for large-scale compression. Cisdem achieved 94.5% reduction on a 60MB file.

    Install

    
    brew install ghostscript
    
    # Windows — download from ghostscript.com
    

    Commands

    # Medium quality (150 DPI) — best balance
    gs -sDEVICE=pdfwrite -dPDFSETTINGS=/ebook \
      -dCompatibilityLevel=1.4 -dNOPAUSE -dQUIET \
      -dBATCH -sOutputFile=output.pdf input.pdf
    
    # Screen quality (72 DPI) — maximum compression
    gs -sDEVICE=pdfwrite -dPDFSETTINGS=/screen \
      -dCompatibilityLevel=1.4 -dNOPAUSE -dQUIET \
      -dBATCH -sOutputFile=output.pdf input.pdf
    
    # Print quality (300 DPI) — for archives
    gs -sDEVICE=pdfwrite -dPDFSETTINGS=/printer \
      -dCompatibilityLevel=1.4 -dNOPAUSE -dQUIET \
      -dBATCH -sOutputFile=output.pdf input.pdf
    
    Setting DPI Typical Reduction Best For
    /screen 72 ~95% Strict portal limits (100KB)
    /ebook 150 ~90% General sharing, email
    /printer 300 ~50% High-quality archives

    Processes a 1,000-page document in ~10 seconds.

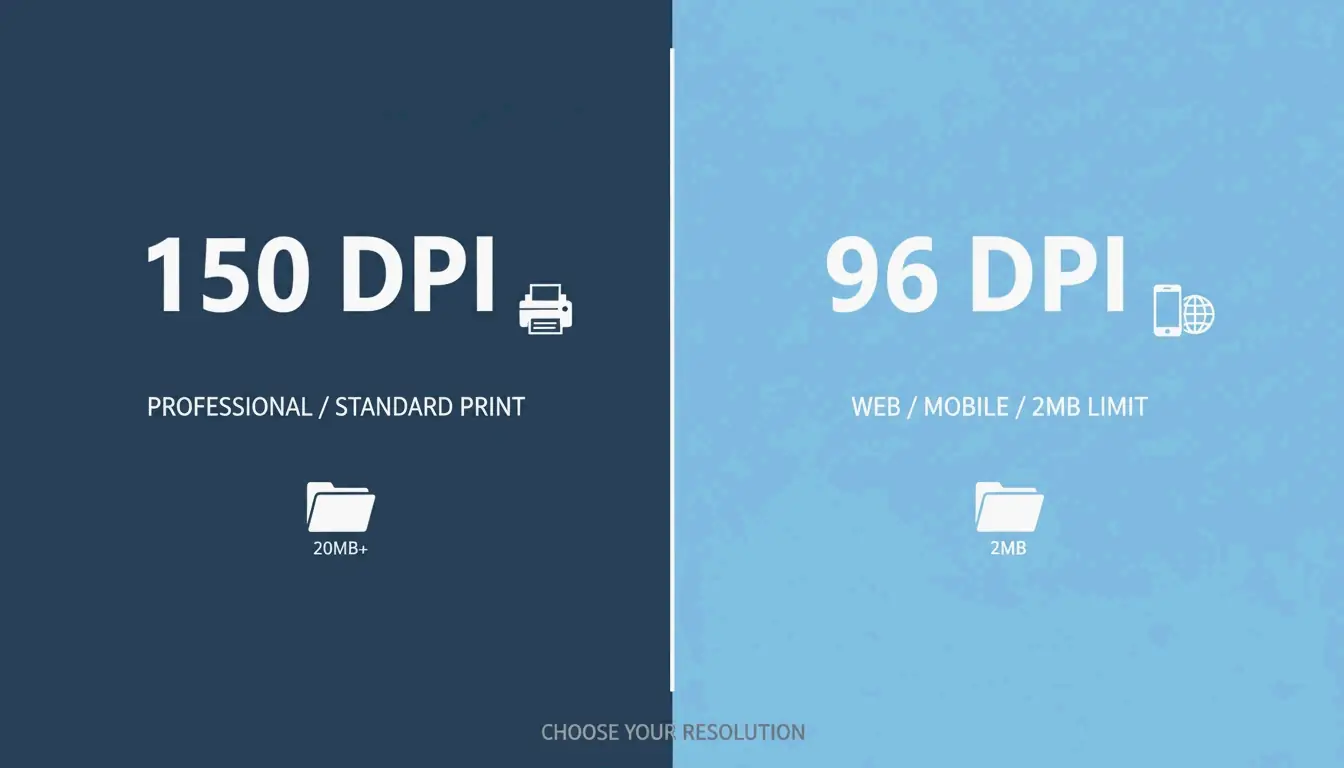
    DPI Guide for Quality

    Target DPI Use Case
    96 DPI Mobile/web viewing Government portals, strict 2MB limits
    150 DPI Professional standard Email, web sharing, printing
    300 DPI High-quality print Legal documents, blueprints

    IRCC Canada recommends 96–150 DPI for digital submissions.

    Comparison of 150 DPI vs 96 DPI for file size and clarity

    Method 5: 7-Zip — Archive Multiple PDFs

    When you cannot shrink individual PDFs further, or need to send a folder of them:

    1. Select PDF files → Right-click → 7-Zip → Add to archive
    2. Choose .zip or .7z format
    3. Send the archive

    Many government portals prefer archives because they preserve original high-resolution documents while bypassing file count limits.

    Conclusion

    For quick single-file compression, use Mac Preview or Microsoft Word. For maximum reduction (94.5%), use Ghostscript with /ebook settings. For sensitive documents, stick to offline tools. For multiple files, use 7-Zip archives. Always target 150 DPI for professional quality or 96 DPI for strict upload limits.

    FAQ

    Why does Preview sometimes make PDFs larger?

    Preview may re-encode already-optimized images inefficiently or duplicate embedded fonts and metadata during export. Use Ghostscript or Smallpdf instead when this happens.

    How do I compress a PDF to exactly 100KB?

    Use Adobe Acrobat’s “PDF Optimizer” or JOPDF with adjustable DPI. Lower resolution to 72–96 DPI and strip all metadata. For text-only documents, this reliably reaches under 100KB.

    Is it safe to upload confidential PDFs to online compressors?

    Reputable tools like Smallpdf honor GPC signals and delete files within an hour. For highly sensitive legal or financial documents, use offline tools (Ghostscript, Adobe Acrobat). Always verify SOC2 and GDPR certification before using any web-based service.