Author: SectoJoy

  • How to Zip a File on Mac and Windows: Complete Step-by-Step Guide (2026)

    How to Zip a File on Mac and Windows: Complete Step-by-Step Guide (2026)

    To zip files on Windows, right-click your selection in File Explorer and choose “Compress to ZIP file” (Windows 11) or “Send to > Compressed folder” (Windows 10). On Mac, right-click and select “Compress” via the built-in Archive Utility. No third-party software needed for basic compression.

    Quick Reference: Zip Files by OS

    OS Method Steps
    Windows 11 File Explorer → Right-click Select files → Compress to ZIP file
    Windows 10 File Explorer → Right-click Select files → Send to > Compressed (zipped) folder
    macOS Finder → Right-click Select items → Compress “[Name]”
    Windows (batch) PowerShell Compress-Archive -Path "C:\Source\*" -DestinationPath "C:\Backup.zip"

    How to Zip Files on Windows

    Windows 11

    1. Open File Explorer and select your files or folders
    2. Right-click the selection
    3. Click “Compress to ZIP file”
    4. A ZIP file appears in the same folder

    Windows 10

    1. Select your files in File Explorer
    2. Right-click → Send to → Compressed (zipped) folder
    3. Rename the ZIP if needed

    Compression Ratios by File Type

    PalmGear provides useful benchmarks:

    File Type Typical Compression Why
    Text (.txt, .html, .csv) 60–80% Highly repetitive data compresses well
    Documents (.docx, .xlsx) 30–50% Partially compressed already
    Images (.jpg, .png) Less than 5% Already compressed by their own codecs
    Video (.mp4, .mov) Less than 2% Already compressed
    RAW / uncompressed 40–70% Full data available for compression

    ZIP uses the Deflate algorithm — a lossless method. Your files remain identical after extraction.
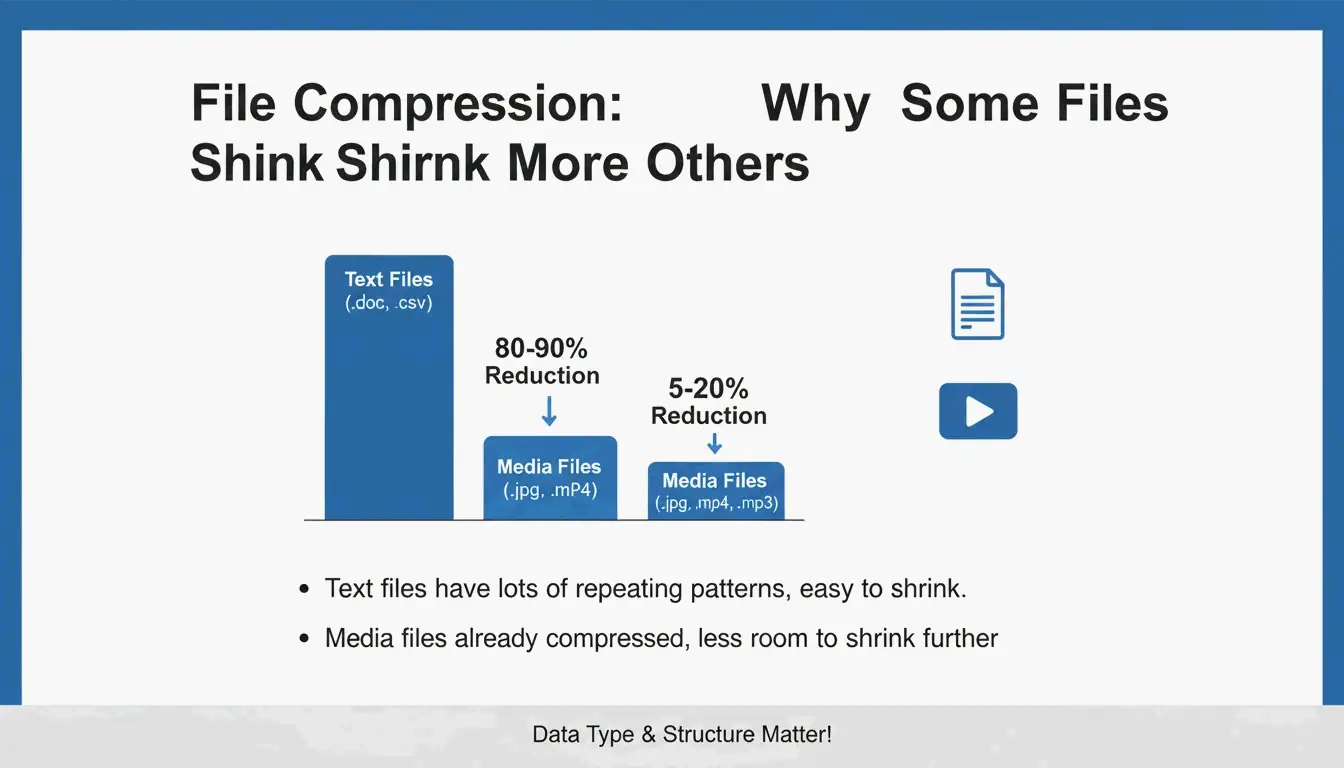
    A simple comparison of compression ratios for different file types

    PowerShell Batch Compression

    
    Compress-Archive -Path "C:\Source\*" -DestinationPath "C:\Backup.zip" -CompressionLevel Optimal
    
    # Fast compression (larger file, quicker)
    Compress-Archive -Path "C:\Source\*" -DestinationPath "C:\Backup.zip" -CompressionLevel Fastest
    
    # Append files to existing archive
    Compress-Archive -Path "C:\NewFiles\*" -Update -DestinationPath "C:\Backup.zip"
    

    A technician saved 39.5 minutes by zipping 200 driver files into one package for a 30-second upload, per PalmGear.

    Archive Verification

    Always double-click your new ZIP to verify files open correctly before deleting originals. This “archive hygiene” step prevents data loss.

    How to Zip Files on Mac

    Using Finder (Built-in)

    1. Select files or folders in Finder
    2. Right-click (or Control-click) → “Compress [Name]”
    3. An Archive.zip file appears (or named after selection if single item)

    macOS uses Archive Utility — built directly into Finder, no extra apps needed.

    ZIP64 Support

    Modern macOS handles ZIP64 extensions, supporting archives beyond the old 4 GiB limit. ZIP64 technically allows up to 16 EiB per Wikipedia.

    Terminal Alternative: ditto

    For reliable large-archive creation:

    ditto -c -k --sequesterRsrc --keepParent src_directory archive.zip
    

    Naming Best Practices

    Avoid generic names like archive.zip. Use descriptive labels:

    PROJECT_ClientName_2026.zip
    Photos_Vacation_2026-05.zip
    Backup_Financial_Q1.zip
    

    Password Protection with 7-Zip (AES-256)

    Neither Windows nor Mac built-in tools support password-protected ZIP files. For encryption, use 7-Zip:

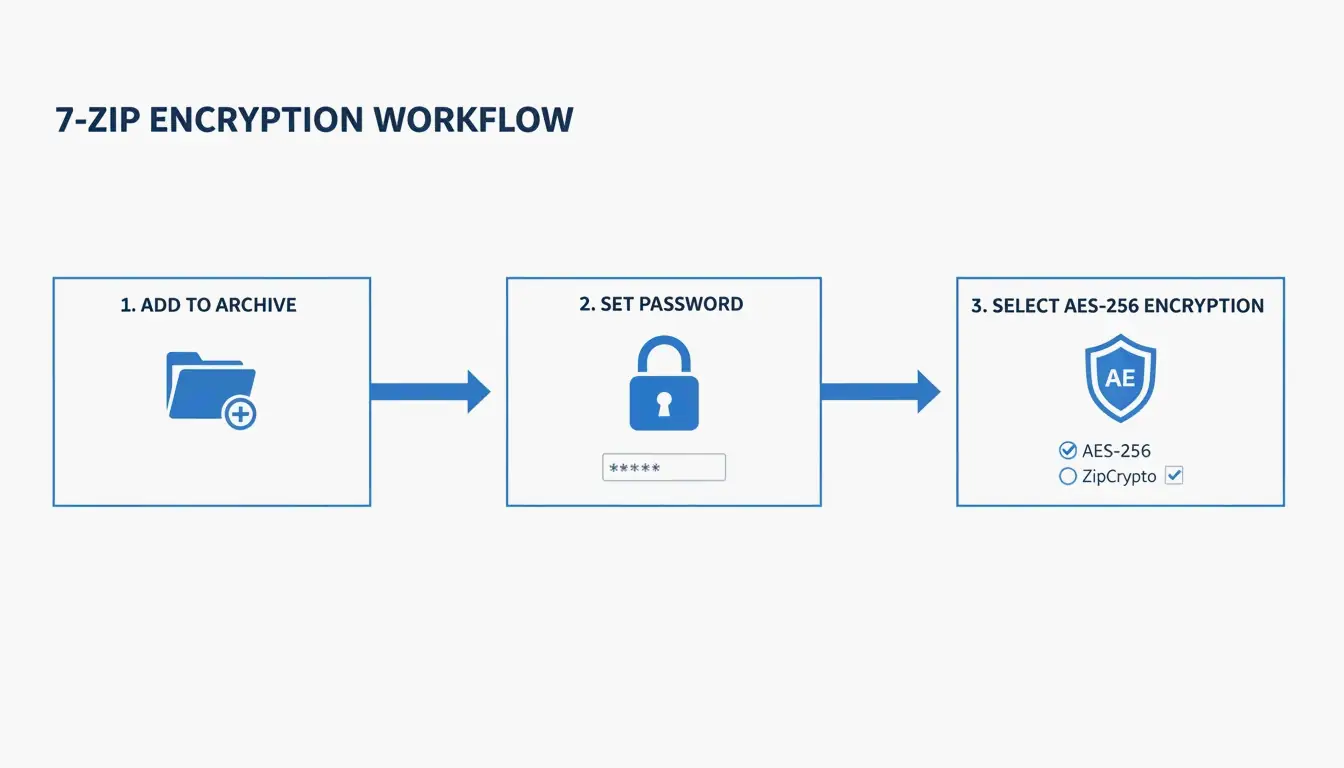
    1. Download and install 7-Zip
    2. Right-click files → 7-Zip > Add to archive
    3. In the Encryption section, enter a password
    4. Select AES-256 encryption
    5. Click OK

    A 3-step process for secure password protection

    ZIP Extractor explains: even if someone intercepts your file during a cloud transfer, AES-256 ensures they cannot access the data without the password.

    Format Comparison: ZIP vs. RAR vs. 7z

    Format Native Support (Win/Mac) Compression AES-256 Max Size Best For
    ZIP Both Good Requires 7-Zip 16 EiB (ZIP64) Universal sharing
    RAR Neither Better Built-in 16 EiB High compression, recovery records
    7z Neither Best (LZMA2) Built-in 16 EiB Maximum compression

    Unzipping: The Reverse Process

    OS Method
    Windows Right-click ZIP → “Extract All” → choose destination
    Mac Double-click the ZIP — Archive Utility extracts automatically

    Safari auto-unzip: If files unzip automatically when downloaded, disable at Safari → Settings → General → uncheck “Open safe files after downloading.”

    Conclusion

    Zipping files is a core 2026 data management skill. Use File Explorer (Windows) or Archive Utility (Mac) for everyday compression. For sensitive data, use 7-Zip with AES-256. For batch jobs, use PowerShell (Windows) or Terminal ditto (Mac). Always verify archives before deleting originals.

    FAQ

    Can I password-protect a ZIP without third-party software?

    No. Neither Windows File Explorer nor Mac Archive Utility supports password protection. Use 7-Zip (free) to apply AES-256 encryption.

    Why is my ZIP the same size as the original?

    This happens when the folder contains already-compressed files (JPG, MP4, PDF). The Deflate algorithm cannot further reduce these files — expect less than 5% savings.

    Does macOS automatically unzip downloads?

    Safari has “Open safe files after downloading” enabled by default. Disable it at Safari → Settings → General to prevent automatic unzipping.

    What is the difference between ZIP, RAR, and 7z?

    ZIP — Universal compatibility, built into Windows and Mac. RAR — Better compression, requires WinRAR. 7z — Best compression (LZMA2), requires 7-Zip. Both RAR and 7z support built-in AES-256 encryption.
  • How to Generate an ISBN Barcode: Bookland EAN Requirements (2026)

    How to Generate an ISBN Barcode: Bookland EAN Requirements (2026)

    To generate an ISBN barcode in 2026, purchase an official ISBN from Bowker, then encode your 13-digit number into the Bookland EAN-13 format using a free barcode generator. Place the scannable graphic on your back cover with proper quiet zones. This is required for selling through global retailers, libraries, and wholesalers.

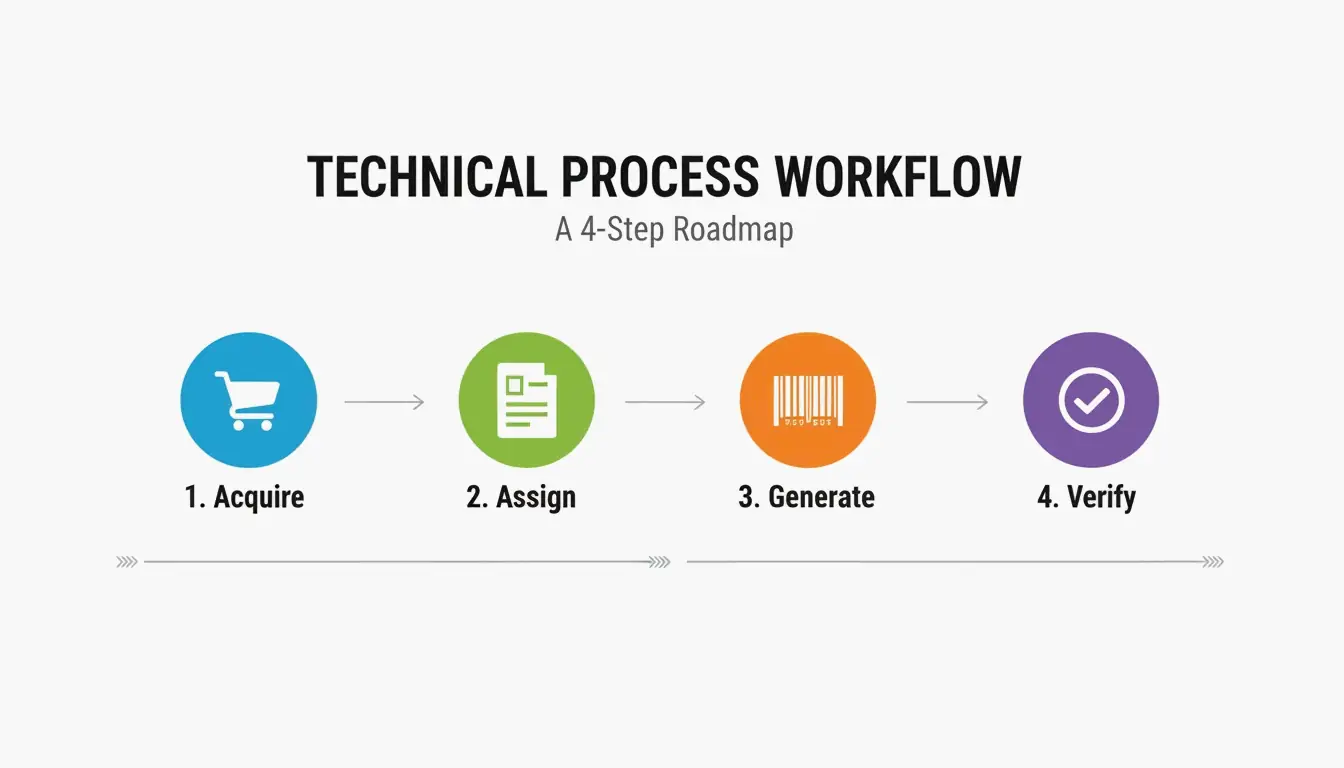
    The 4-Step ISBN Barcode Process

    Step Action Key Detail
    1. Acquire Buy ISBN from Bowker (MyIdentifiers.com) Only authorized U.S. source
    2. Assign Link ISBN to your book’s metadata Title, author, format (paperback/hardcover/ebook)
    3. Generate Create Bookland EAN-13 barcode graphic Free tools available — no need to pay Bowker $25
    4. Verify Test scan before printing Check readability and quiet zones

    Books.by reports that over 2.3 million ISBNs were issued in the U.S. in 2023 alone.

    Simple 4-step process: Acquire -> Assign -> Generate -> Verify.

    ISBN vs. Barcode: Understanding the Difference

    • ISBN — The unique 13-digit identifier (like a Social Security number for your book)
    • Barcode — The scannable graphic that represents that ISBN number

    Ash Davies, Founder of Books.by: “The ISBN is the number. The barcode is the scannable graphic. Most publishing platforms generate barcodes automatically and for free.”

    Free Barcode Generators

    Tool Cost Notes
    Author Media Free Reliable, no account needed
    Do Generator Free Specialized book barcode tool
    Bowker barcode service $25 Unnecessary — free tools work just as well

    Bookland EAN-13 Structure

    The Bookland EAN is a specialized EAN-13 barcode for books. It uses a 978 or 979 prefix that identifies the product as a book globally.

    Component Length Example Purpose
    GS1 Prefix 3 digits 978 or 979 Identifies “Bookland”
    Registration Group 1–5 digits 0 or 1 Country/language area
    Publisher Code Variable 237 Assigned by ISBN agency
    Publication Element Variable 45892 Specific title/edition
    Check Digit 1 digit 6 Catches scanning errors

    Check Digit Calculation (Modulo 10)

    1. Multiply each of the first 12 digits by alternating weights of 1 and 3
    2. Sum all products
    3. Take sum modulo 10 (remainder after dividing by 10)
    4. Subtract from 10 (if result is 10, check digit = 0)

    Wikipedia confirms this catches 100% of single-digit errors and most transposition errors.

    EAN-5 Price Extension

    Professional Bookland EANs often include a smaller EAN-5 supplemental barcode showing the retail price and currency.

    Price Currency Prefix EAN-5 Code
    $14.99 USD 5 51499
    $9.99 USD 5 50999
    £12.99 GBP 3 31299
    • USD prefix = 5, GBP = 3, CAD = 5, EUR = 3
    • Required by major U.S. retailers like Barnes & Noble
    • Optional for online-only sales (Amazon doesn’t require it)

    Back Cover Placement: Quiet Zone Requirements

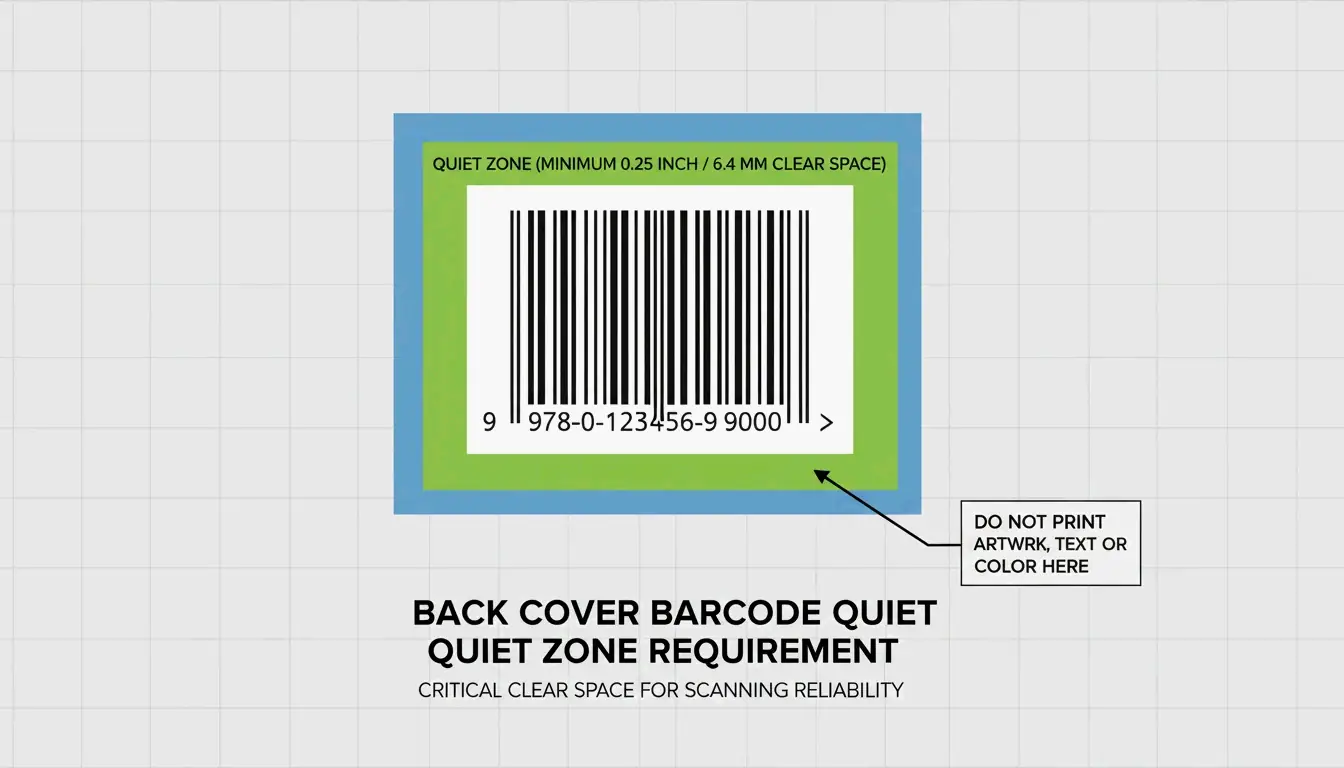
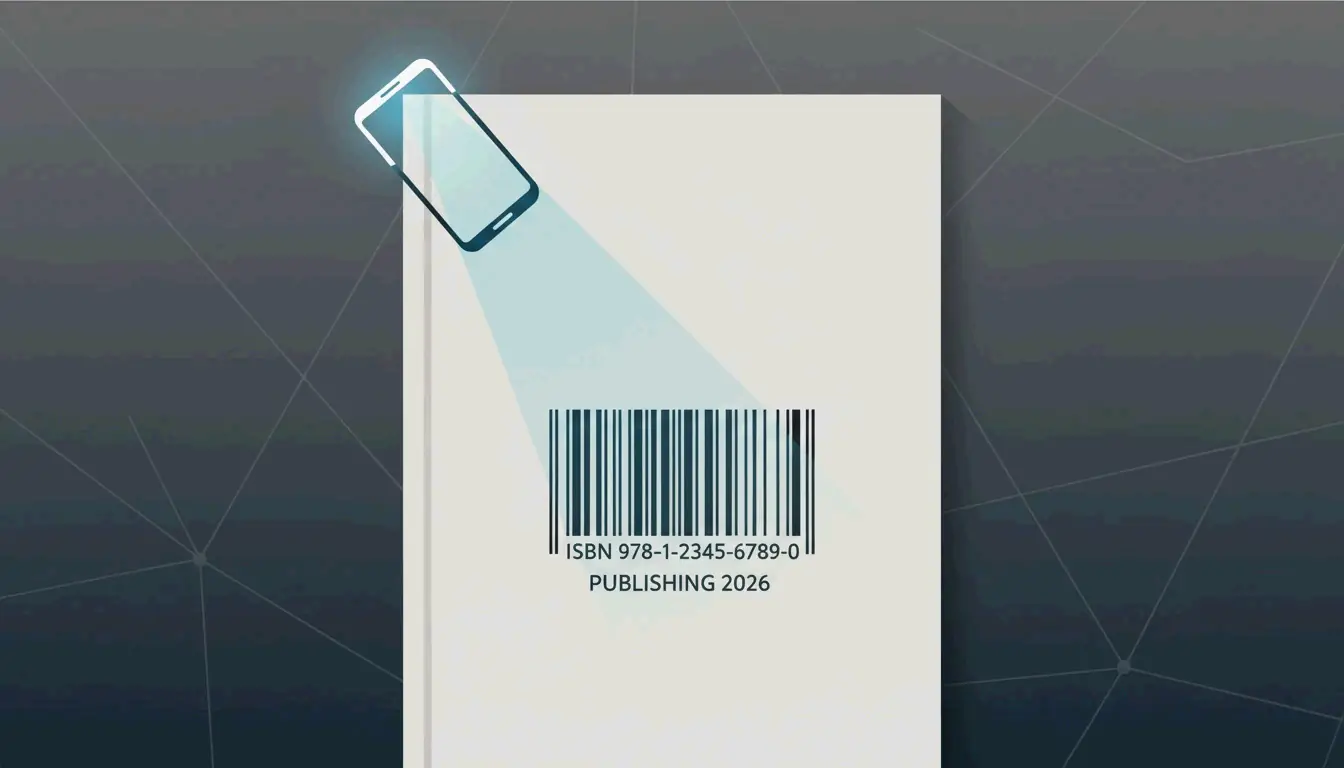
    Jason Pearce recommends placing the barcode in the bottom-right corner of the back cover with a white rectangle of at least 2 inches × 1.2 inches.

    Requirement Specification
    Location Bottom-right corner of back cover
    Minimum size 2″ × 1.2″ white rectangle
    Quiet zone Clear white margin on all sides of the barcode
    Resolution 300 DPI minimum for print

    Visualizing the 'Quiet Zone' and placement on the back cover.

    ISBN Costs: Why You Should Be the Publisher of Record

    Source Cost Publisher of Record
    Bowker (single) $125 You / your imprint
    Bowker (10-pack) $295 ($29.50 each) You / your imprint
    Amazon KDP (free) $0 “Independently Published”
    Other platforms (free) $0 The platform, not you

    SelfPublishing.com recommends buying your own ISBNs — many bookstores and libraries refuse to stock books with platform-assigned ISBNs.

    ISBN vs. ASIN

    Identifier Scope Use Case
    ISBN Global standard All retailers, libraries, distributors
    ASIN Amazon only Kindle ebooks sold exclusively on Amazon

    Physical bookstores and libraries require an ISBN — an ASIN is not sufficient.

    2027 Sunrise: Dual-Marking with GS1 Digital Link

    The industry is moving toward GS1 Sunrise 2027, transitioning from 1D barcodes to 2D codes. For 2026 book releases, use a dual-marking strategy:

    1. Traditional EAN-13 — Required for current checkout systems
    2. GS1 Digital Link QR code — Links to updated metadata, marketing materials, purchase links

    Automateed notes this moves beyond the limits of scan-only codes and prepares your book for modern inventory systems.

    Conclusion

    Generate your ISBN barcode by purchasing from Bowker, using a free Bookland EAN-13 generator, and placing it correctly on your back cover with quiet zones. Buy your own ISBNs to remain publisher of record. For 2026 releases, consider dual-marking with both EAN-13 and a GS1 Digital Link QR code to future-proof your book.

    FAQ

    Do I need a separate ISBN for ebook and paperback?

    Yes. International standards require a unique ISBN for every distinct format — hardcover, paperback, and epub each need their own number. This ensures accurate sales tracking across distributors.

    Can I use a free KDP ISBN for bookstores?

    Technically yes, but it lists “Independently Published” as the publisher. Many physical bookstores and libraries avoid stocking books with platform-assigned ISBNs. Buy your own ISBN to maintain professional credibility.

    What is the EAN-5 price extension?

    A small secondary barcode encoding the book’s retail price and currency (e.g., 51499 = $14.99 USD). Optional for online sales but required by major U.S. retail chains for physical shelf pricing.

  • Compress PNG: Shrink Images Fast Without Losing Quality (2026)

    Compress PNG: Shrink Images Fast Without Losing Quality (2026)

    To compress PNG files fast in 2026, use browser-native WebAssembly (Wasm) tools like iKit for private local processing. For maximum savings, apply lossy quantization (8-bit color palette, up to 85% reduction) or oxipng for lossless optimization that strips metadata and optimizes DEFLATE filters without changing a single pixel.

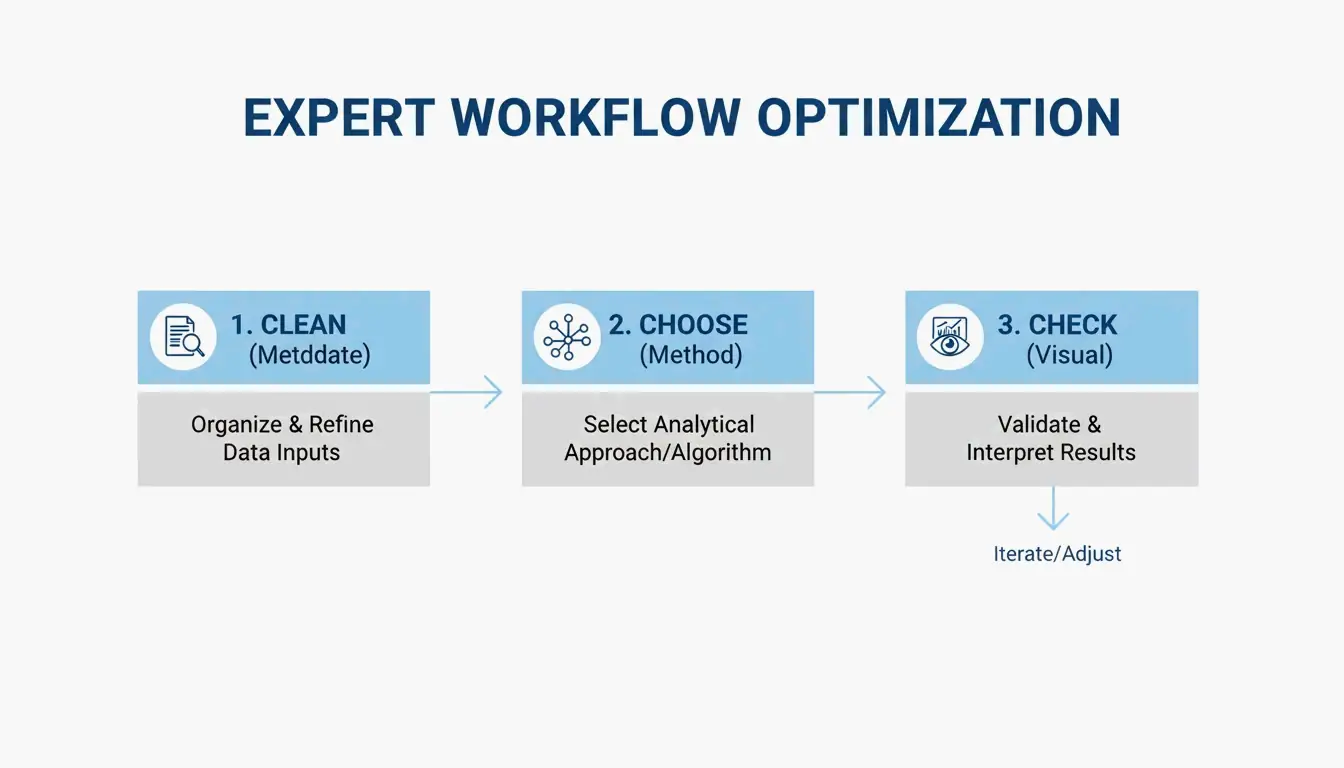
    The 3-Step Fast Compression Workflow

    1. Strip metadata — Delete hidden EXIF data and unnecessary color profiles (quick win: up to 200KB savings per file)
    2. Choose your method — Lossless (pixel-perfect) or lossy quantization (visually identical, much smaller)
    3. Visual check — Use side-by-side comparison before publishing

    3-step workflow: Clean, Choose, Check

    The ‘No-Upload’ Workflow: Wasm-Based Local Processing

    Modern tools like iKit and ToolTea use WebAssembly to process images entirely in your browser’s RAM. Your files never leave your device — faster processing and complete privacy.

    iKit notes that Photoshop metadata alone can add up to 200KB of bloat — data that does nothing for web viewers.

    Lossless vs. Lossy Quantization

    Method How It Works Typical Savings Quality Impact
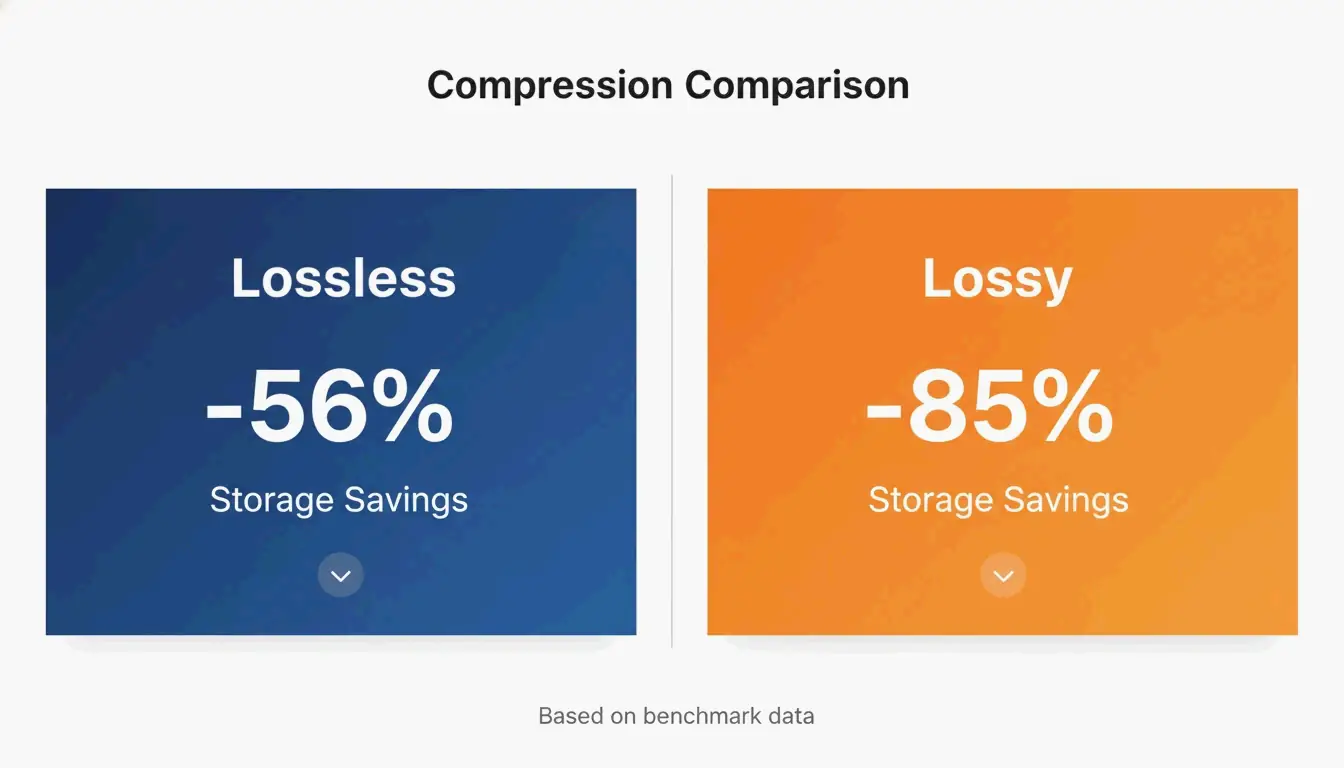
    Lossless (oxipng) Optimizes DEFLATE filters + strips metadata ~56% on UI screenshots Zero — every pixel unchanged
    Lossy Quantization (pngquant) Reduces 24/32-bit → 8-bit (256-color palette) ~85% on UI screenshots Visually identical to the naked eye

    iKit benchmarks confirm that lossy quantization achieves 85% reduction on UI screenshots with no visible difference, compared to 56% for lossless.

    Core comparison: Lossless (56% savings) vs Lossy (85% savings)

    Visual Artifact Guide

    Artifact Type Cause Where to Check
    Banding Aggressive color palette reduction Smooth gradients (blue skies, blurred backgrounds)
    Color bleeding Insufficient chroma subsampling Thin colored lines (use 4:4:4 to prevent)
    Edge softness Rare in PNG — mostly a JPEG issue Text and icon borders stay sharp in PNG

    Key advantage: Unlike JPEG compression, PNG quantization keeps text edges and icon borders perfectly crisp.

    When to Switch: PNG vs. WebP vs. AVIF

    Format vs. PNG Size Transparency Browser Support Best For
    PNG Baseline Yes Universal Logos, icons, pixel-perfect UI
    WebP 25–35% smaller Yes 97%+ General web images
    AVIF 50–70% smaller Yes 92%+ Maximum compression, photos

    SammaPix notes that WebP is 25–35% smaller than PNG at equivalent quality. AVIF beats WebP by another 20–30%. For pure web performance, consider converting.

    PNG 3.0 Update (June 2025)

    PNG is not standing still:

    Feature Impact
    HDR support High dynamic range for modern displays
    Official APNG Animated PNGs now a W3C Recommendation
    Improved Exif chunks Cleaner metadata handling

    CLI Batch Processing for Developers

    oxipng (v9.1.1) — Lossless Batch

    Built in Rust, significantly faster than older tools:

    
    oxipng -o max --strip safe *.png
    
    # Integrate into build pipeline
    find ./assets -name "*.png" -exec oxipng -o 4 --strip all {} \;
    

    pngquant (v3.0) — Lossy Batch

    Converts 32-bit PNGs to 8-bit palettes in bulk:

    # Batch compress to 256 colors
    pngquant --force --quality=65-80 --ext .png *.png
    
    # Target specific speed
    pngquant --speed 1 --quality=70-85 --output ./optimized/ *.png
    

    iKit recommends integrating these into your design system or CI pipeline so no unoptimized image reaches production.

    SEO Impact: Why PNG Compression Matters

    SammaPix reports that the LCP element is an image on 70% of all web pages. Heavy PNG files slow down LCP, hurting both user experience and search rankings.

    Action plan:
    1. Strip metadata for an instant win (up to 200KB per file)
    2. Use oxipng for logos and text graphics where every pixel matters
    3. Use pngquant for UI screenshots and illustrations (85% savings)
    4. For maximum web performance, convert to WebP or AVIF

    Conclusion

    PNG compression in 2026 means choosing the right algorithm: oxipng for lossless precision, pngquant for aggressive savings, and Wasm browser tools for private, fast processing. PNG 3.0 brings modern features, but WebP/AVIF remain superior for pure web performance. Integrate CLI tools into your build pipeline to ensure no unoptimized images reach production.

    FAQ

    Does compressing a PNG make it blurry?

    Lossless compression never causes blurriness — pixels are unchanged. Lossy quantization may cause “banding” in smooth gradients if the color palette is reduced too aggressively, but keeps text and icon edges perfectly sharp (unlike JPEG artifacts).

    How do I compress a PNG to exactly 20KB or 100KB?

    Use tools with a “target size” mode or quality slider. If lossless compression isn’t enough, resize pixel dimensions first (e.g., to 400×400px) then apply 8-bit quantization per Combine JPG.

    Is it safe to use online compressors for private images?

    Only if the tool uses local WebAssembly processing (e.g., iKit or ToolPix). These process in your browser’s RAM — files are never uploaded. Avoid any tool requiring a server upload for sensitive content.

  • Resize Image: Quick Photo Size Guide for Social Media, Web & Email (2026)

    Resize Image: Quick Photo Size Guide for Social Media, Web & Email (2026)

    To resize images correctly in 2026, upload to a tool like Adobe Express, set your target pixel dimensions (e.g., 1080×1350 for Instagram portraits), lock the aspect ratio to prevent distortion, and export as JPEG for photos or WebP for web. Resizing to exact display dimensions can cut file sizes by 80%+ per O’Brien Media.

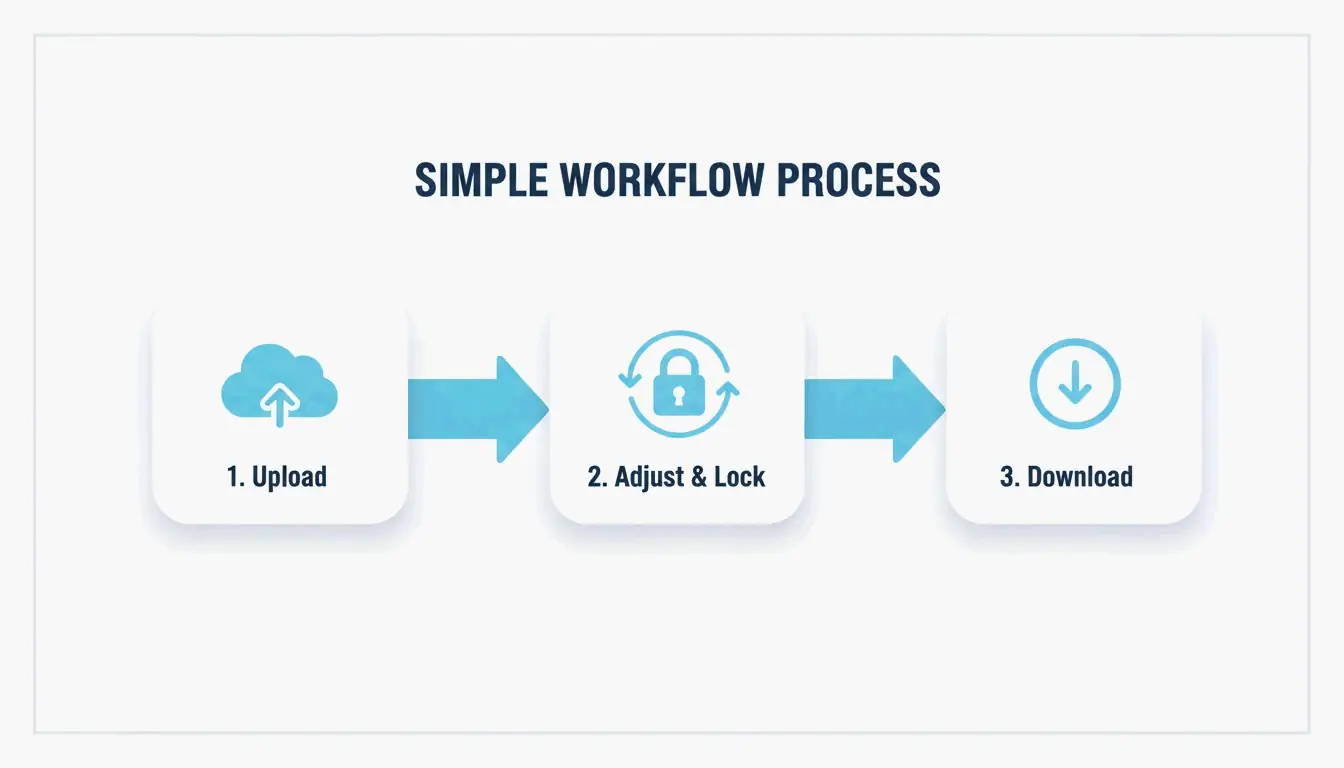
    3-Step Universal Resizing Workflow

    1. Upload — Drag your JPG, PNG, or WebP into a browser tool like Adobe Express
    2. Set dimensions and lock aspect ratio — Type your target width or height; the other adjusts automatically to prevent stretching
    3. Download — Save to a new file so your original stays intact

    3-step workflow: Upload -> Adjust (Lock Ratio) -> Download

    2026 Social Media Image Size Reference

    Instagram

    Format Dimensions Aspect Ratio Notes
    Portrait Feed 1080 × 1350 px 4:5 Best for engagement — takes up more screen space
    Square Feed 1080 × 1080 px 1:1 Classic grid format
    Landscape Feed 1080 × 608 px 16:9 Wider format
    Stories & Reels 1080 × 1920 px 9:16 Full-screen vertical
    Profile Photo 320 × 320 px 1:1 Displayed as circle

    Picssizer recommends the Portrait (4:5) format for feed posts — it occupies more vertical space, driving higher engagement.

    Safe Zones: Avoiding UI Overlap

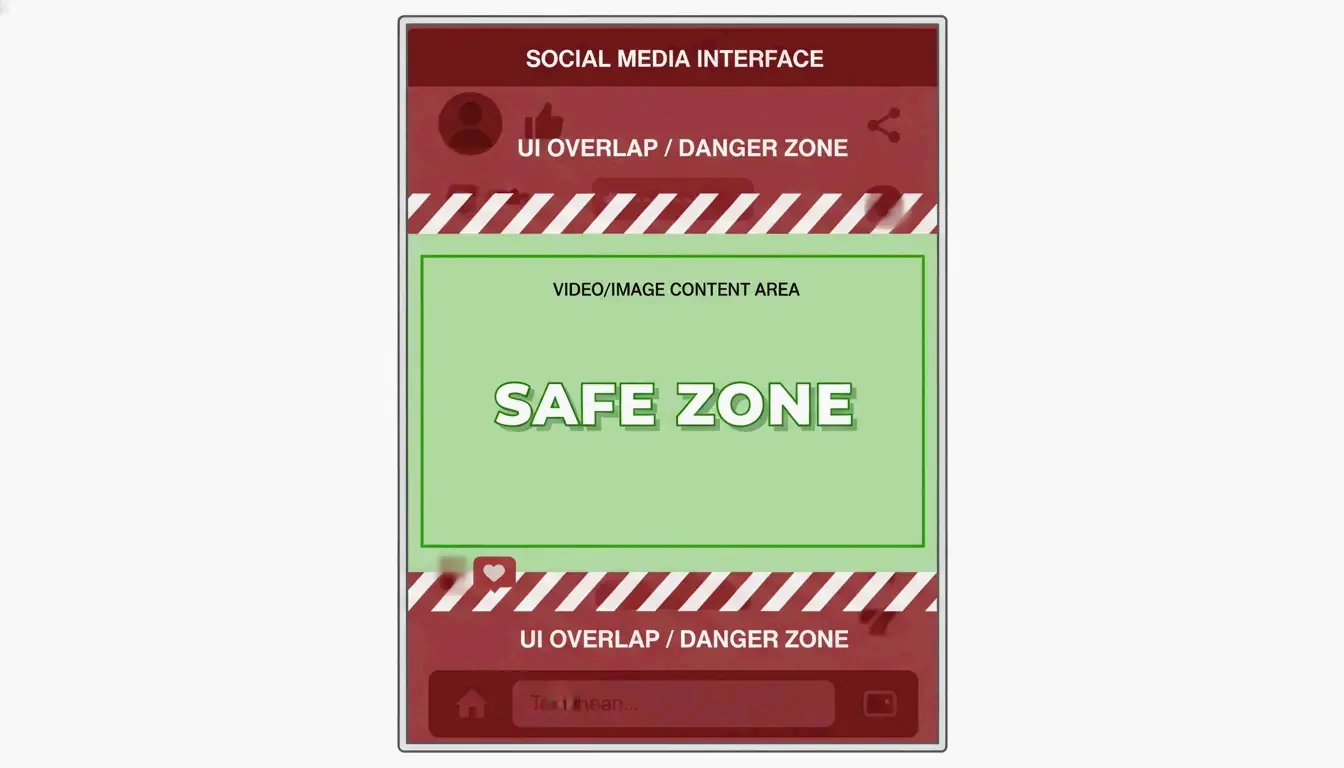
    For Stories and Reels (1080×1920), keep critical content in the center safe zone (approximately 1080×1420 px). Leave at least 250px clear at top and bottom to avoid UI elements (buttons, captions, profile info) covering your content.

    A visual representation of the 'Safe Zone' within a mobile screen frame

    Other Platforms

    Platform Recommended Size Format
    Facebook Cover 820 × 312 px JPEG
    Twitter/X Header 1500 × 500 px JPEG
    LinkedIn Post 1200 × 627 px PNG/JPEG
    YouTube Thumbnail 1280 × 720 px JPEG
    Email Header 600 × 200 px JPEG

    Format Selection: JPEG vs. PNG vs. WebP

    Format Best For Compression Transparency File Size
    JPEG Photography, social media Lossy No Small
    PNG Logos, text, screenshots Lossless Yes Large
    WebP Website images, SEO Lossy or lossless Yes 25–34% smaller than JPEG

    Recommendation: Use JPEG for social media posts (80–90% quality). Use PNG for logos and transparent graphics. Use WebP for websites to maximize SEO and page speed.

    Batch Resizing: Processing Multiple Photos at Once

    Doing one image at a time is a waste of time. In 2026, batch resizing handles entire galleries:

    Platform Tool Key Feature
    Windows Image Resizer Right-click batch resize in Explorer
    macOS Shortcuts app / Preview Built-in automation
    Android Photo & Picture Resizer 4MB → 400KB at 800×600

    Photo & Picture Resizer shrinks a 4MB photo to ~400KB at 800×600 resolution — ideal for email attachments.

    Resizing vs. Cropping: What’s the Difference?

    Action What It Does Quality Impact
    Resizing Changes total pixel count; entire image scaled Downsizing is lossless; upsizing may blur
    Cropping Removes outer edges; changes composition No quality change; some content discarded

    Always resize from the original high-resolution file — never from an already-resized or compressed version.

    Conclusion

    Effective image resizing means matching pixel dimensions to your target platform, locking aspect ratios, and choosing the right export format. Use the Instagram/social media size tables above, keep safe zones clear for Stories, and batch-process large galleries. For web, convert to WebP for maximum SEO benefit.

    FAQ

    What is the difference between resizing and cropping?

    Resizing changes the total pixel count of the entire image — everything stays, just at a different scale. Cropping removes the outer edges to change composition or aspect ratio — some original content is discarded.

    How can I resize without losing quality?

    Downsizing is generally lossless — you are reducing pixel count, which removes redundant data without degrading visible quality. Upsizing (enlarging) requires AI-assisted interpolation to avoid blurriness. Always downsize from the original file.

    Does resizing reduce file size?

    Yes. Reducing pixel dimensions directly removes data, lowering the MB count. Combining a resize with a WebP conversion delivers the most effective compression for web and mobile in 2026.

  • How to Decrease MB of PDF Files: 5 Fast Ways to Shrink Size Without Losing Quality

    How to Decrease MB of PDF Files: 5 Fast Ways to Shrink Size Without Losing Quality

    To decrease PDF file size without visible quality loss, downsample images to 150 DPI, strip metadata, and remove embedded fonts. The best tool depends on your needs: Adobe Acrobat Pro for professional control, Mac Preview for free native compression, Smallpdf for quick online jobs, Cisdem for batch processing, or OCR automation for developers.

    Why Is Your PDF So Large? The Pre-Compression Checklist

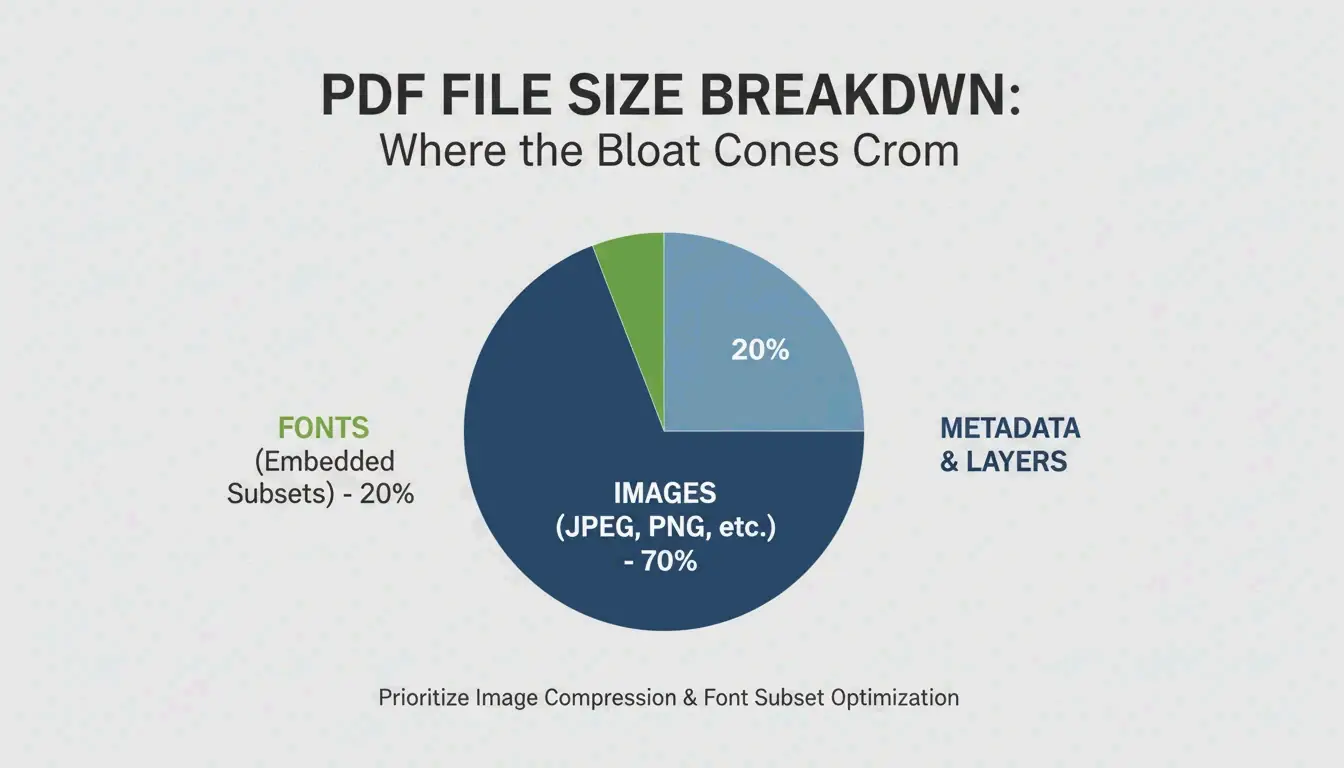
    According to Smallppt, high-resolution images often account for over 70% of a PDF’s total size.

    Size Contributor Typical Impact Fix
    High-res images 70%+ of file size Downsample to 150 DPI
    Embedded fonts Several MB Subset fonts instead of embedding full files
    Hidden layers / metadata Varies Strip via “Optimize PDF” tools
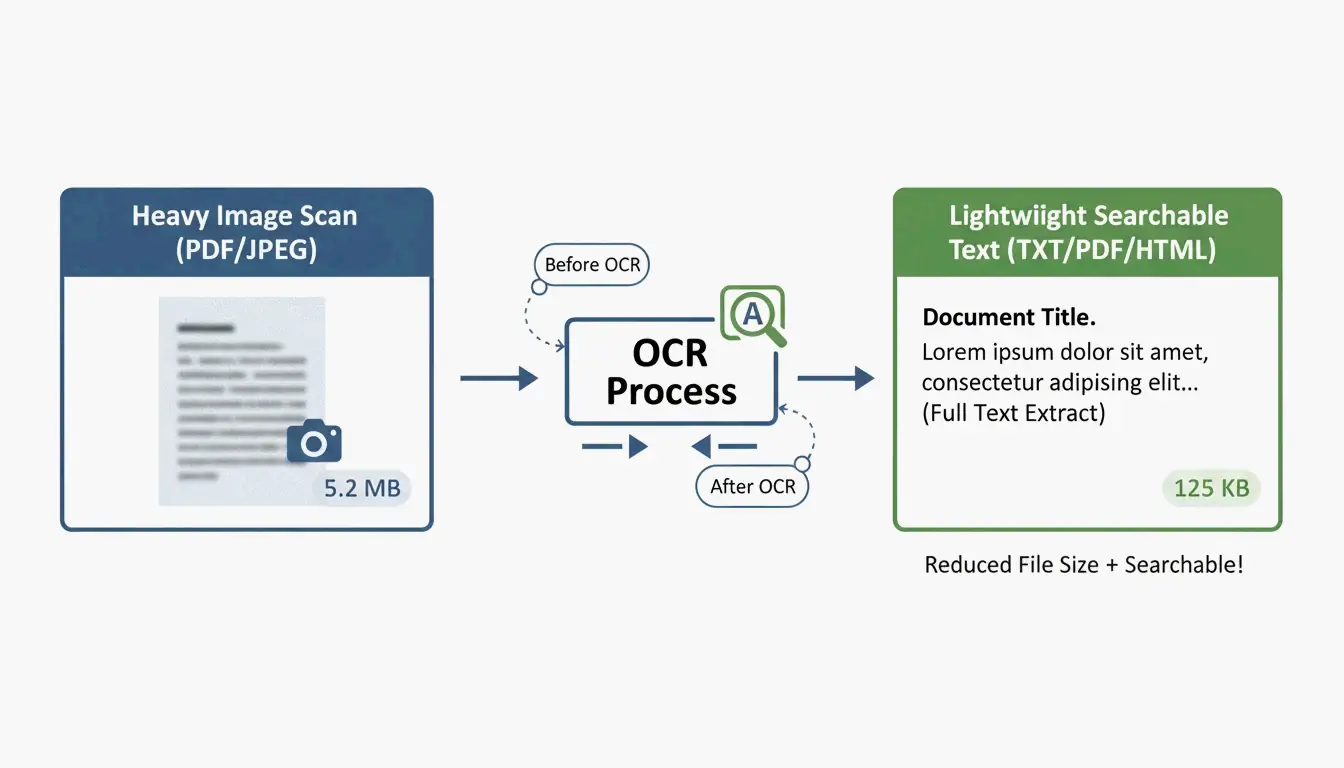
    Unoptimized scans Very large Run OCR, replace with text layer
    Version history Accumulates over edits Clean with “Discard Objects”

    A simple breakdown of PDF size contributors (Images vs. Fonts vs. Metadata)

    The 150 DPI Standard

    Use Case Recommended DPI Quality
    High-quality print 300 DPI Professional print output
    Email / web sharing 150 DPI Sweet spot — sharp on screens, small files
    Basic web reference 96 DPI Minimum for readability, maximum savings

    5 Methods to Reduce PDF Size

    Method 1: Adobe Acrobat Pro — Professional Control

    The gold standard for precise optimization:

    1. Open PDF → All Tools > Compress a PDF
    2. Choose Advanced Optimization (PDF Optimizer)
    3. Downsample images: Set color/grayscale to bicubic at 150 DPI for images above 225 DPI
    4. Discard Objects: Clear hidden layers, old bookmarks, unused form fields

    Batch performance tests show professional desktop software processes up to 100 pages per second depending on hardware.

    Method 2: Mac Preview — Free and Built-In

    No extra software needed on macOS:

    1. Open PDF in Preview
    2. Go to File → Export
    3. In the Quartz Filter dropdown, select “Reduce File Size”
    4. Click Save

    Warning: Cisdem notes the default filter can be too aggressive, making images blurry. For complex files, it can even increase file size.

    Ghostscript: The Power-User Alternative

    For better results on Mac, use Ghostscript via Terminal:

    
    gs -sDEVICE=pdfwrite -dPDFSETTINGS=/ebook \
      -dCompatibilityLevel=1.4 -dNOPAUSE -dQUIET \
      -dBATCH -sOutputFile=output.pdf input.pdf
    
    -dPDFSETTINGS Target Use Typical Reduction
    /screen Web/screen (72 DPI) ~95%
    /ebook Medium quality (150 DPI) ~90%
    /printer Print quality (300 DPI) ~50%

    Method 3: Online Tools — Smallpdf and pdfFiller

    Fastest for one-off jobs, no installation:

    1. Upload your document to Smallpdf or pdfFiller
    2. Pick compression level — Basic (balanced) or Strong (maximum shrink)
    3. Download the optimized file

    Privacy: Reputable platforms now follow GPC, GDPR, HIPAA, and SOC 2 Type II standards. Many offer “local-only” processing in your browser cache. For highly sensitive documents, stick to offline tools.

    Method 4: Batch Processing — Cisdem PDF Compressor

    For hundreds of contracts, invoices, or school resources:

    Cisdem PDF Compressor lets you drag-and-drop entire folders:

    1. Add files — Drag hundreds of PDFs at once
    2. Pick mode — Small, Medium, or Large
    3. Compress — All files processed in seconds

    Essential for real estate, healthcare, and legal industries migrating paperwork to cloud storage.

    Method 5: OCR and Developer Automation

    For programmatic compression at scale, use OCR to convert scanned images into searchable text layers, then replace heavy image backgrounds with lightweight previews.

    IronPDF (C#) example:

    // Compress images to 90% quality across all pages
    pdf.CompressImages(90, true);
    

    This scales image dimensions while stripping excess MBs — ideal for processing thousands of documents in enterprise pipelines.

    The concept of OCR: Image-based PDF to Text-based PDF

    Conclusion

    The most effective PDF compression targets 150 DPI for images and strips metadata and unused fonts. For quick jobs, use Mac Preview or Smallpdf. For professional control, use Adobe Acrobat Pro. For bulk operations, use Cisdem or Ghostscript. For enterprise automation, integrate OCR + programmatic compression.

    FAQ

    Why is my PDF still large after compression?

    Common causes: embedded fonts that can’t be subset, high-density vector graphics resistant to DPI downsampling, hidden layers, or accumulated version history. Use Adobe Acrobat’s “Audit Space Usage” to identify exactly what is consuming space.

    Is it safe to upload sensitive documents to online compressors?

    Only use tools compliant with GPC and GDPR. For legal or medical documents, use offline tools (Adobe Acrobat, Mac Preview, Ghostscript) to ensure data never leaves your machine.

    How do I reduce a PDF to a specific size (e.g., under 5MB)?

    Use Adobe Acrobat’s “Audit Space Usage” to identify the largest components, then manually adjust image compression to “JPEG High” and remove bookmarks, links, and unused metadata. Online tools like pdfFiller also show estimated output size before finalizing.

  • How to Compress PDF on iPhone: 3 Quick Ways to Reduce File Size (2026)

    How to Compress PDF on iPhone: 3 Quick Ways to Reduce File Size (2026)

    To compress PDF on iPhone in 2026, the fastest method is the built-in Files app — long-press your document and tap “Optimize File Size.” For sensitive documents, use local browser-based tools that process in your device’s RAM. For precise size targets (e.g., 500KB for a government portal), use pdfFiller from the App Store.

    Three Methods Compared

    Method Speed Privacy Size Control Batch Best For
    Files app (native) Instant Full (never leaves device) None (automatic) No Quick everyday compression
    Local browser tools Fast Full (processed in RAM) Some (quality slider) Limited KYC documents, bank statements
    pdfFiller (App Store) Fast Cloud upload Precise MB targets Yes Government portals, tax forms

    Method 1: Files App “Optimize File Size” (iOS 19+)

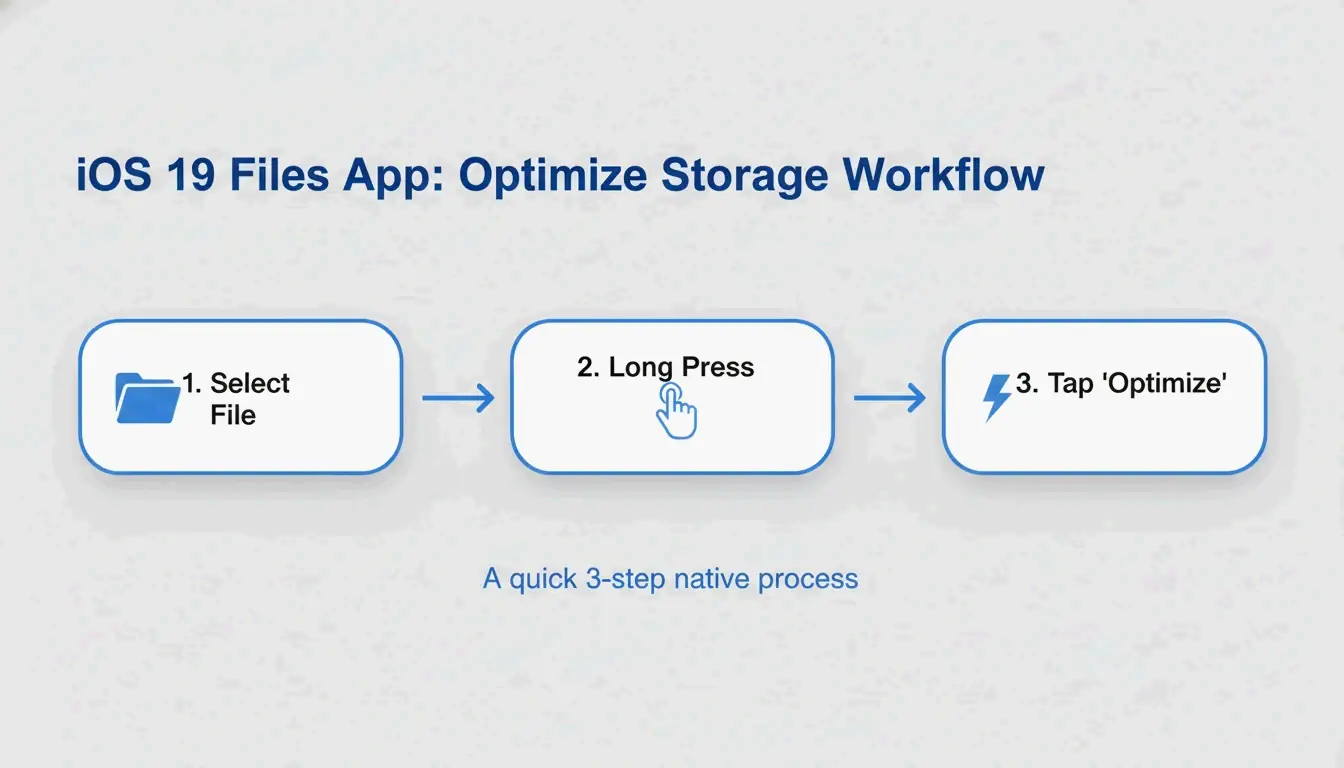
    Apple built PDF compression directly into the Files app — no extra apps needed.

    1. Open the Files app on your iPhone
    2. Find the PDF you want to compress
    3. Long-press the file icon
    4. Tap “Optimize File Size”
    5. A smaller version appears in the same folder (usually named with “optimized”)

    FreePDFCompress notes that modern compression re-encodes images and strips unused metadata, often cutting file size by up to 90% — while keeping vector text perfectly sharp.

    3-step visualization of the native iOS compression process.

    Pros: Instant, free, fully private, no internet needed.
    Cons: No size control (can’t target “exactly 500KB”), no batch processing.

    Method 2: Local Browser Tools (Maximum Privacy)

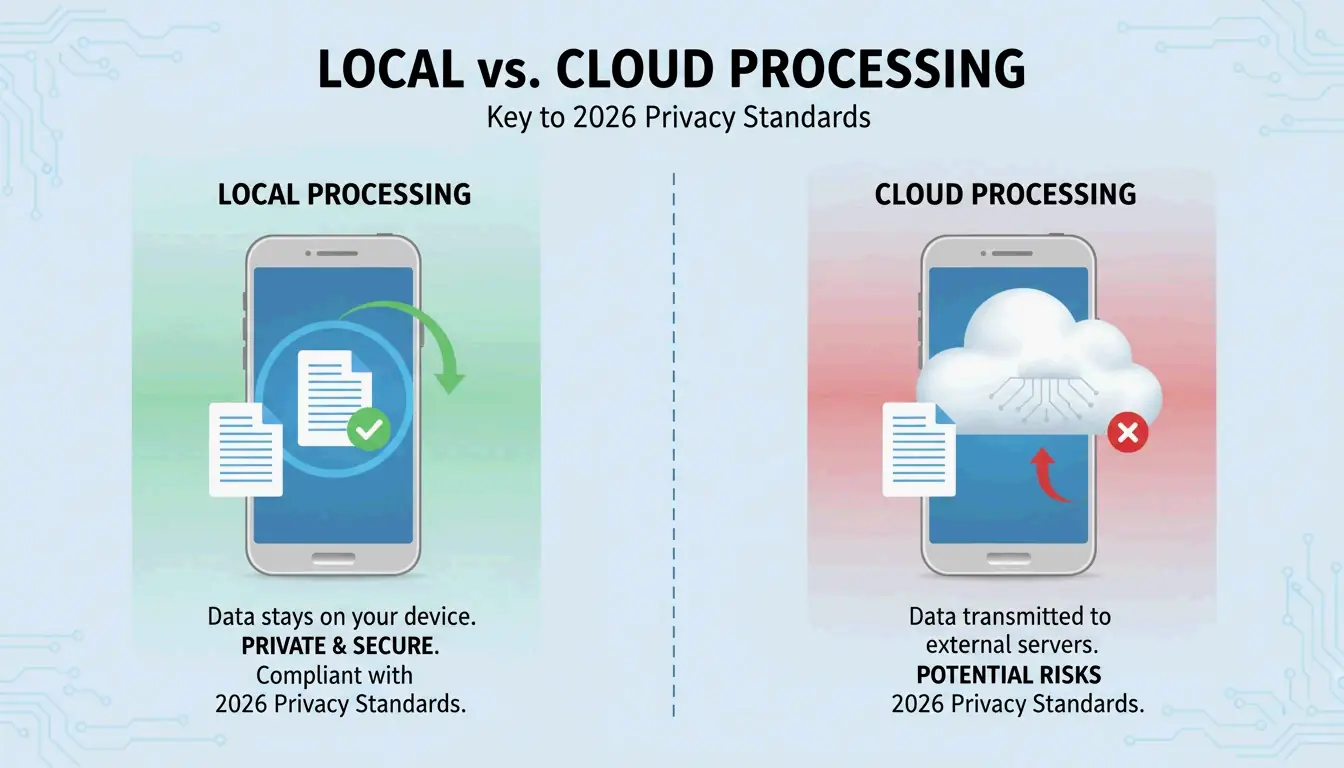
    By 2026, privacy standards have shifted away from cloud-everything. Local browser tools use JavaScript to process PDFs entirely in your iPhone’s RAM — your data is never transmitted to any server.

    FreePDFCompress confirms these tools still achieve 90% size reduction while keeping data fully on-device. In Safari, look for a “Processed Locally” badge as your guarantee.

    When to use this method:
    – KYC (Know Your Customer) paperwork
    – Bank statements and tax documents
    – ID scans and passport copies
    – Any document you wouldn’t email to a stranger

    A simple comparison between Cloud vs. Local processing paths.

    Method 3: pdfFiller (Precise Size Targets)

    When a government portal requires exactly 500KB or less, the native method’s “one-size-fits-all” approach isn’t enough. pdfFiller (App Store) lets you pick specific quality levels and see estimated file size before committing.

    pdfFiller offers three compression levels — High, Medium, Low — with real-time size estimates.

    1. Download pdfFiller from the App Store
    2. Upload your PDF
    3. Tap Compress and pick your target level
    4. Save the optimized file

    Supports batch processing for multiple files at once.

    How PDF Compression Works: DPI, JPEG Re-encoding, and Vector Text

    Component What Compression Does Impact on Quality
    Images JPEG re-encoding at lower quality Visible softening below 96 DPI
    DPI (resolution) Reduced from 300 → 96–150 DPI Fine for screens; avoid for print
    Vector text Unchanged — stays crisp at any size No quality loss
    Metadata Stripped (EXIF, unused fonts) No visual impact; saves KB

    IRCC Canada recommends 96–150 DPI as the sweet spot for 2026 digital standards — keeps text sharp on phone screens while significantly reducing file weight.

    Key insight: Text is vector-based and stays perfectly crisp regardless of compression. Only images and scans show quality changes.

    2026 Upload Target Sizes

    Platform Upload Limit Recommended Target
    Government / KYC portals 200 KB – 2 MB 500 KB
    HR / Resume portals 2 MB 1 MB
    Gmail / Outlook 20–25 MB 5 MB
    WhatsApp (consumer) 16 MB 2 MB
    WhatsApp Business 100 MB 10 MB

    Never re-compress a compressed PDF. FreePDFCompress warns that repeated compression creates artifacts and blurriness. Always start from the original document.

    Conclusion

    For everyday compression, the Files app is fastest and most private. For sensitive documents, use local browser tools with the “Processed Locally” badge. For precise size targets (government forms, tax submissions), use pdfFiller. Always verify text readability at 150 DPI before submitting.

    FAQ

    Will compressing a PDF damage text readability?

    No. PDF text is vector-based — it stays sharp at any compression level. Only embedded images and scans are affected by DPI reduction. FreePDFCompress confirms 150 DPI keeps everything readable on 2026 mobile screens.

    How do I compress a PDF to exactly 200KB or 500KB?

    The native Files app doesn’t offer size control. Use pdfFiller or StrongPDF — both offer quality sliders and presets. To reach 200KB, you typically need to drop image resolution to 96 DPI.

    Is it safe to upload confidential PDFs to online compression servers?

    For sensitive documents (IDs, bank statements, tax forms), avoid cloud-based compressors. Use local browser tools that process in your device’s RAM. Look for a “Processed Locally” badge to confirm your data never leaves your phone.

  • How to Bypass Discord’s 20MB File Limit Without Nitro (2026)

    How to Bypass Discord’s 20MB File Limit Without Nitro (2026)

    Updated September 2026: Discord raised the free upload limit from 10MB to 20MB in August 2026. Numbers and bitrate math in this guide now reflect the new cap.

    Discord’s free upload limit is 20MB (raised from 10MB in August 2026; the old 8MB cap is older still). To bypass it without Nitro, either compress your file to stay under 20MB using HEVC encoding, or share via cloud storage (Google Drive, Dropbox, Streamable) and paste the link. Third-party client mods like Vencord offer a third option but violate Discord’s Terms of Service.

    Discord File Size Limits in 2026

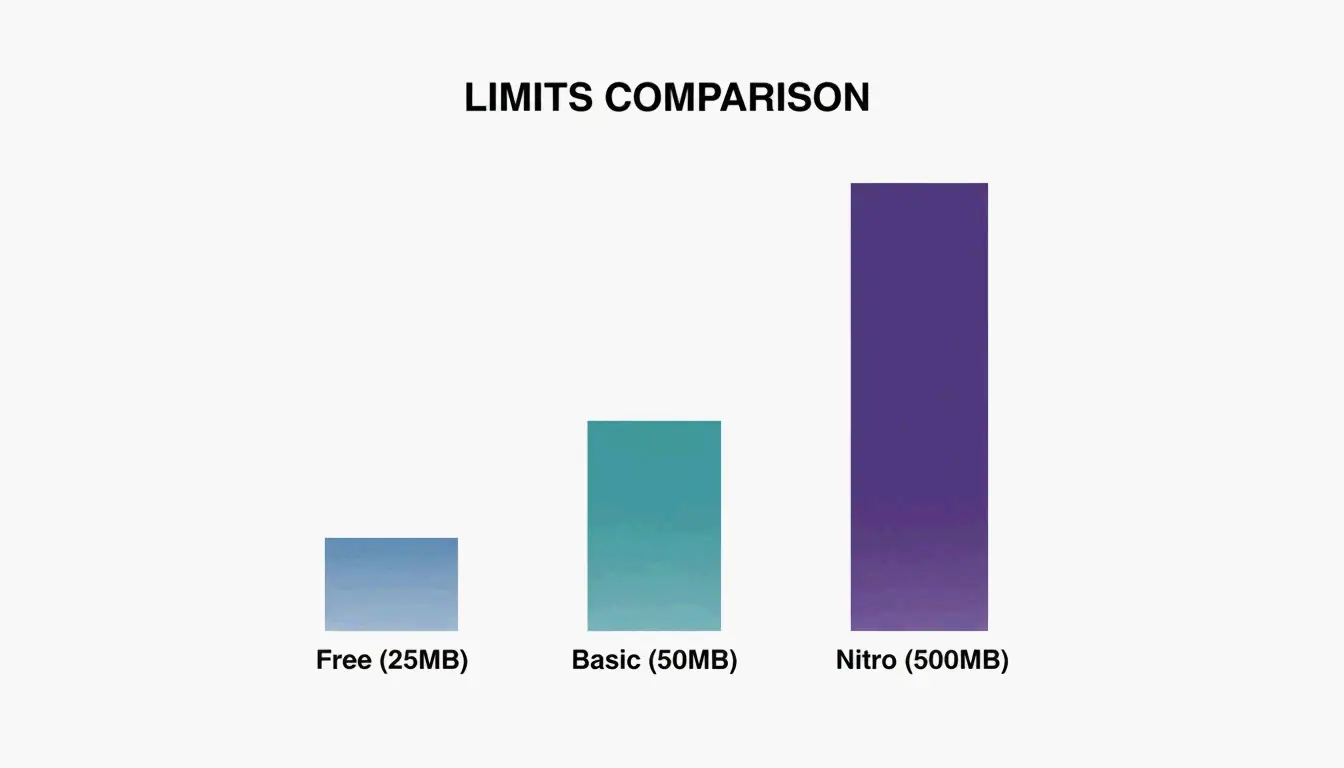
    Tier Max File Size Price
    Free 20 MB $0
    Nitro Basic 50 MB $2.99/month
    Discord Nitro 500 MB $9.99/month

    As 1MB Compress notes, any file exceeding your tier’s limit — even by 1 KB — gets blocked.

    A simple comparison of Discord file limits: Free vs Basic vs Nitro

    Method 1: Compress to Stay Under 20MB

    The most reliable approach is shrinking your file before uploading.

    Optimal Video Settings for Discord

    Parameter Recommended Setting Why
    Resolution 1280 × 720 (720p) Plays natively in Discord’s built-in player
    Frame rate 30 FPS Sufficient for chat clips, saves ~30% vs 60 FPS
    Codec HEVC (H.265) or H.264 HEVC is ~50% smaller at same quality
    Audio 128 kbps AAC Good enough for voice/music, saves extra MB
    Format MP4 or WebM Universal playback in Discord

    Bitrate Formula for 20MB Target

    Calculate your target bitrate: 160 ÷ video length in seconds = target Mbps

    Video Length Target Bitrate Approx. Size
    30 seconds ~5.3 Mbps ~19 MB
    60 seconds ~2.7 Mbps ~19 MB
    2 minutes ~1.3 Mbps ~19 MB
    5 minutes ~0.53 Mbps ~19 MB

    A case study by Filmora shows their compression tools reduce file sizes by 10–90% — a 100MB video can drop to under 20MB without noticeable quality loss at 720p.

    Step-by-Step Compression

    1. Import your video into Filmora, Handbrake, or a web tool like 1MB Compress
    2. Set format to MP4, resolution to 720p, codec to HEVC
    3. Target 20MB — many tools have an “advanced compression” setting for exact file size targets
    4. Export and upload directly to Discord

    Method 2: Cloud Storage Links

    When compression degrades quality too much (long 4K gaming clips, large presentations), host externally:

    Service Free Storage Discord Embed Support Best For
    Google Drive 15 GB Link preview (click to view) Documents, presentations
    Dropbox 2 GB Change dl=0 to dl=1 for direct download General files
    OneDrive 5 GB Link preview Office documents
    Streamable Unlimited (per file) Auto-embeds in Discord Video clips

    Streamable is the top choice for video — it embeds directly in Discord chat so viewers watch without leaving the app. For Dropbox, the dl=1 trick forces direct playback instead of a download page.

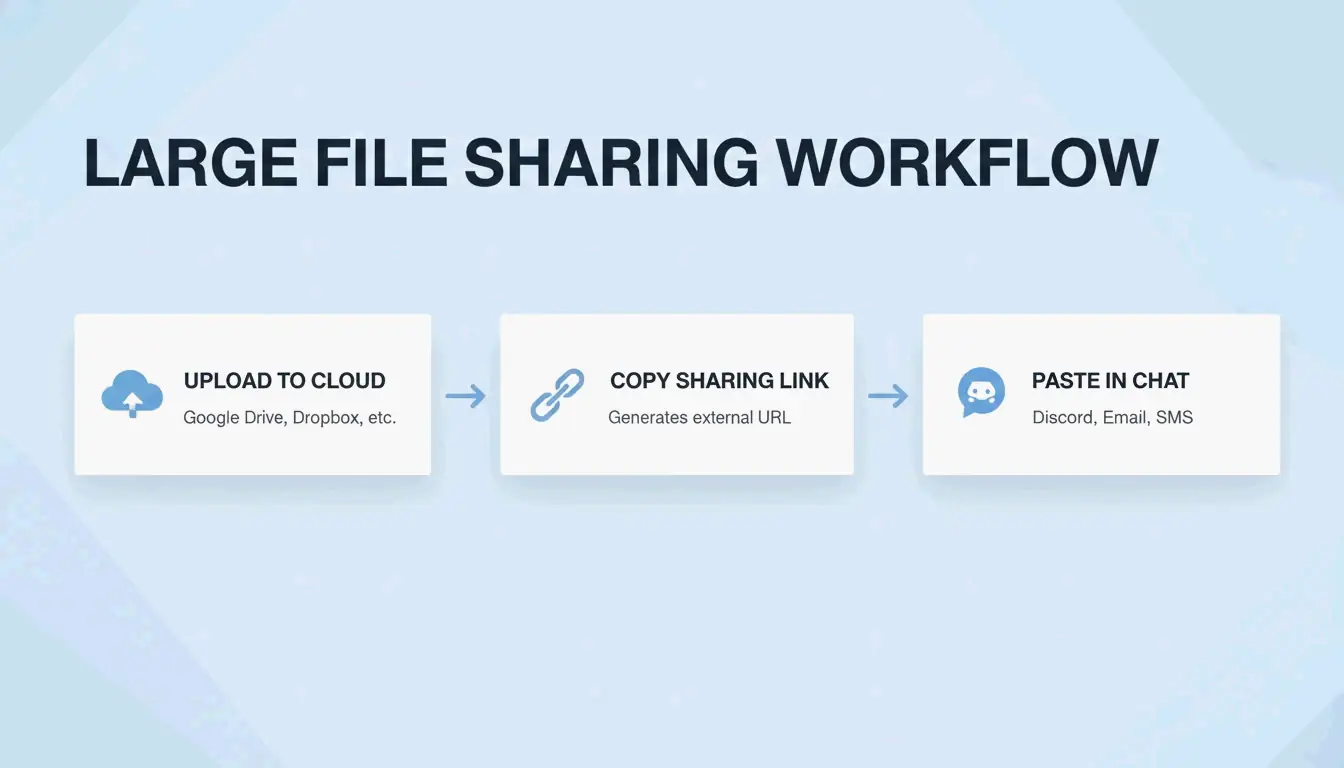
    Simple 3-step process of cloud sharing on Discord

    Method 3: Client Mods (Vencord / BetterDiscord) — Use at Your Own Risk

    Mods like Vencord and BetterDiscord use plugins that automatically detect oversized files, upload them to third-party hosts (Catbox, Litcord), and display them as seamless embeds in chat.

    Aspect Official Discord Client Mods
    Encryption End-to-end (Nitro) Depends on third-party host
    Privacy Discord servers External servers (Catbox, etc.)
    Terms of Service Compliant Violates ToS
    Ban risk None Low but non-zero

    Wikipedia notes that Discord officially forbids client modification. Bans are rare for visual mods, but bypassing paid features (Nitro upload limits) is a clearer ToS violation. For sensitive files, use official cloud sharing instead.

    Conclusion

    For most users, compressing to 20MB with HEVC at 720p is the fastest solution. For long or high-quality files, Streamable provides the best Discord experience (auto-embed, no download). Client mods work but violate Discord’s ToS and rely on third-party servers — use them only for non-sensitive content.

    FAQ

    What is the current Discord free file size limit in 2026?

    20MB per file. Discord raised it from 10MB in August 2026 (the 8MB cap is older still). Numbers like 25MB still floating around online conflict with Discord’s own documentation. Any file exceeding the limit requires compression, a cloud link, or a Nitro subscription.

    Does compressing video for Discord significantly reduce quality?

    It depends on settings. Using HEVC at 720p can reduce file size by up to 90% while keeping video clear on phone and desktop screens. Most users won’t notice a difference from the original when viewed in Discord’s built-in player.

    Is using Vencord or BetterDiscord safe?

    Technically, all client mods violate Discord’s Terms of Service. Bans are rare for visual customization, but using mods to bypass file limits involves uploading to third-party servers with no encryption guarantees. Use official cloud sharing for sensitive files.

  • How to Compress a Video Without Losing Quality: Codec, Bitrate & Tools (2026)

    How to Compress a Video Without Losing Quality: Codec, Bitrate & Tools (2026)

    To compress a video without losing quality in 2026, re-encode with AV1 or H.265 (HEVC) — both are roughly 50–60% more efficient than H.264. Use VBR 2-pass encoding with a target of 5–10 Mbps for 1080p to achieve perceptually lossless output. Free tools like Handbrake handle this in a few clicks.

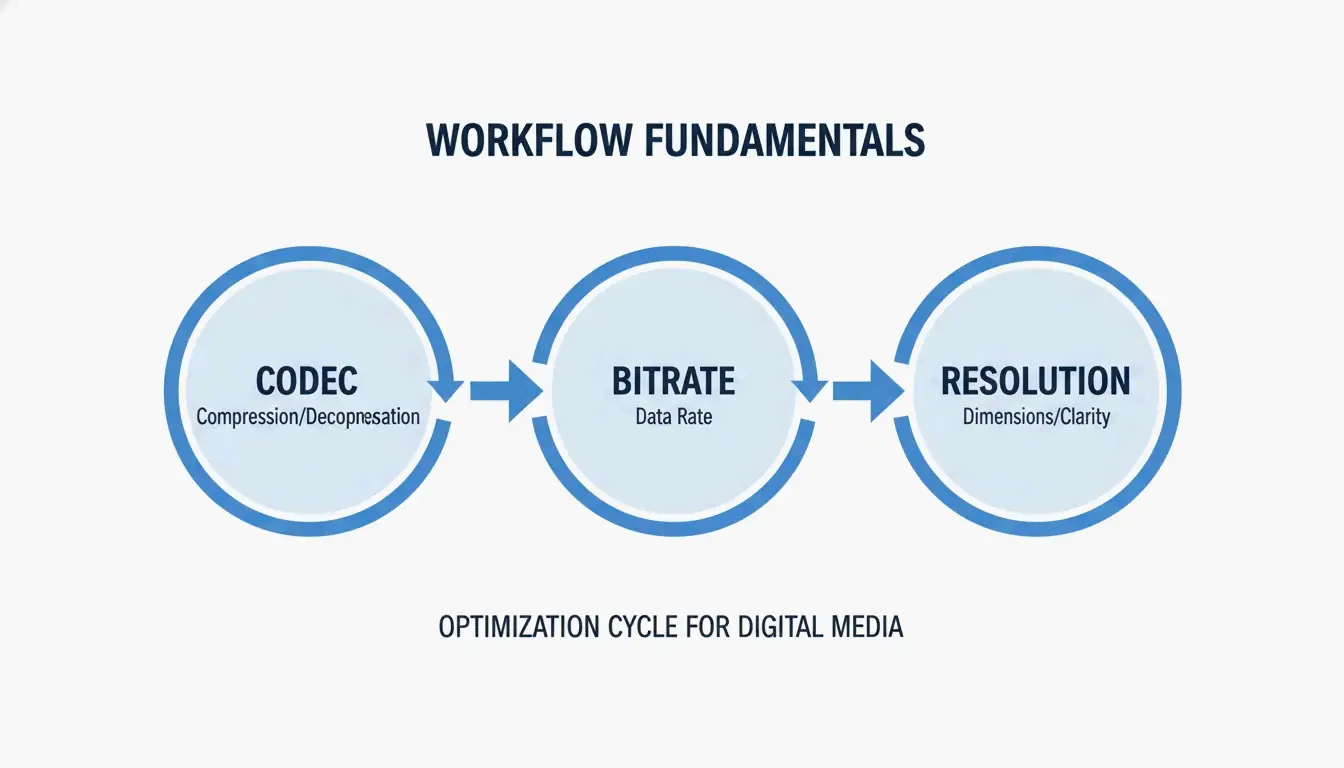
    The Three Pillars of Video Compression

    Effective compression comes down to three decisions:

    1. Codec — The algorithm that encodes your video data
    2. Bitrate — How much data per second you allocate
    3. Resolution — Matching pixel count to the actual display

    A simple 3-node diagram showing the core pillars: Codec, Bitrate, and Resolution.

    Codec Selection: AV1 vs. HEVC vs. H.264

    Codec Efficiency vs. H.264 Royalty Best For Device Support
    AV1 ~63% smaller Free (open-source) Web streaming, YouTube Modern browsers, 2022+ hardware
    H.265 (HEVC) ~50% smaller Licensed 4K HDR, mobile playback Phones, tablets, smart TVs
    H.264 (AVC) Baseline Licensed Maximum compatibility Everything (15+ years)

    Research from MDPI (2024) confirms AV1 saves approximately 63% on bitrate compared to H.264 at equivalent quality.

    Recommendation: Use AV1 for web content. Use HEVC for mobile and 4K. Use H.264 only when you need to support very old devices.

    Bitrate Management: Why VBR 2-Pass Wins

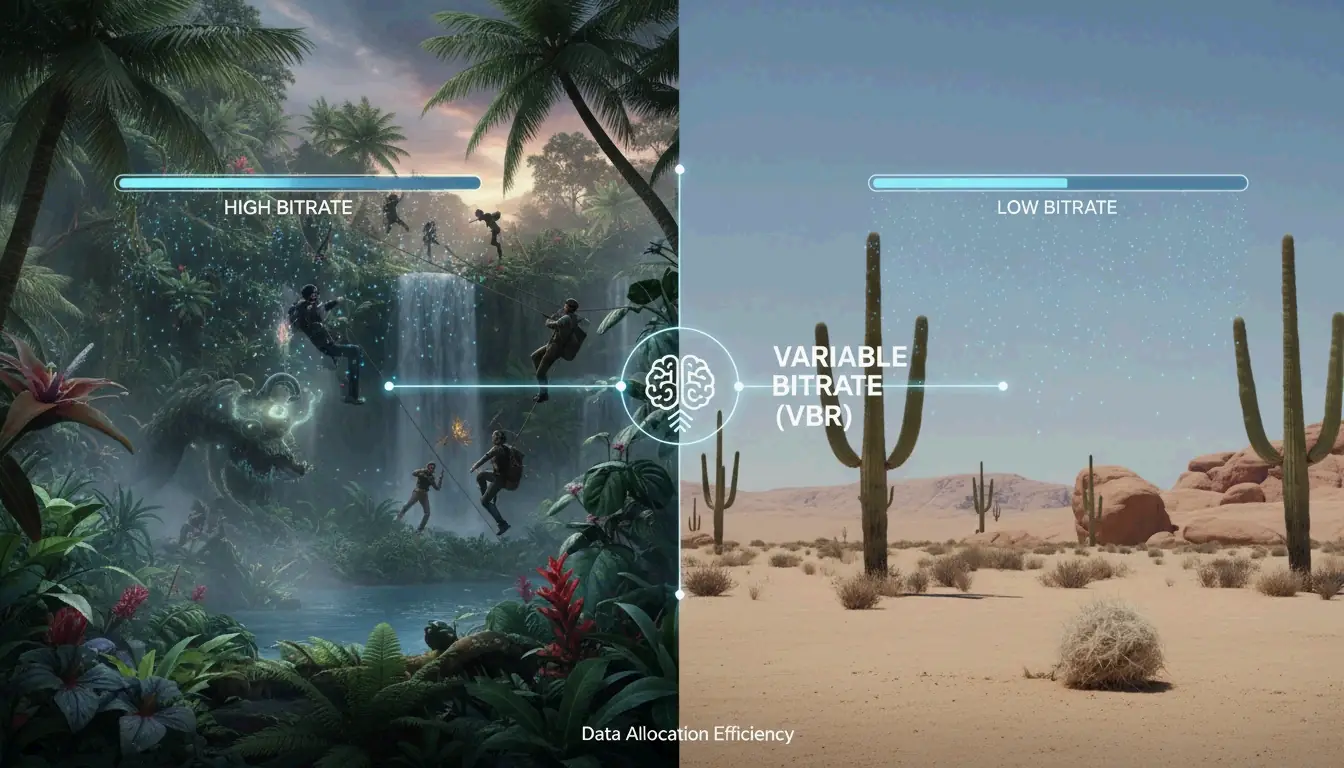
    Constant Bitrate (CBR) uses the same data for every frame — wasteful for static scenes and insufficient for action. Variable Bitrate (VBR) is smarter: it allocates more data to complex, high-motion scenes and saves space on static backgrounds.

    VBR 2-pass encoding scans the entire video first (pass 1), then distributes the data budget optimally (pass 2). This prevents blockiness during fast movement.

    A visual metaphor of VBR: allocating more "fuel" (data) to action and less to static scenes.

    2026 Bitrate Targets

    These are H.264 targets. For H.265 or AV1, reduce by 30–50%:

    Resolution Web / Social High Quality / Archive
    4K (2160p) 35–45 Mbps 50–65 Mbps
    1080p (Full HD) 8 Mbps 12 Mbps
    720p 5 Mbps 8 Mbps

    Swarmify notes that H.265 at RF 22 cuts file sizes by 40–50% with no visible loss on 1080p screens.

    Best Tools for Video Compression

    Tool Type Best For Key Feature
    Handbrake Desktop (free) Full control, any format Manual codec/bitrate/VBR settings
    FFmpeg CLI (free) Batch processing, automation ffmpeg -i input.mp4 -vcodec libx265 -crf 28 output.mp4
    VEED.io Online Quick social clips (<500MB) Automatic optimization
    FreeConvert Online One-off jobs, no install Browser-based
    NVIDIA NVENC GPU hardware 4K processing speed 5x faster than CPU encoding

    HitPaw notes that GPU-accelerated encoding processes 4K video up to 5x faster than CPU-only methods.

    FFmpeg Quick Commands

    
    ffmpeg -i input.mp4 -vcodec libx265 -crf 28 output.mp4
    
    # Compress to AV1 (60%+ smaller, slower encoding)
    ffmpeg -i input.mp4 -vcodec libaom-av1 -crf 30 output.mp4
    
    # Target specific bitrate (VBR 2-pass)
    ffmpeg -i input.mp4 -vcodec libx265 -b:v 5M -pass 1 -an /dev/null
    ffmpeg -i input.mp4 -vcodec libx265 -b:v 5M -pass 2 output.mp4
    

    Platform-Specific Rules

    Every platform re-compresses your upload. Pre-optimizing prevents double-compression artifacts:

    Platform Limit Recommended Settings
    Discord (free) 25 MB Downscale to 720p, H.265, target ~200/seconds of video
    YouTube No hard limit Upload high-bitrate “master” (12+ Mbps 1080p); YouTube re-encodes
    Email (Gmail) 25 MB Compress to 720p, 2-3 Mbps, or use a link instead
    Website / SEO Under 5 MB ideal AV1 or WebM, 5-8 Mbps 1080p

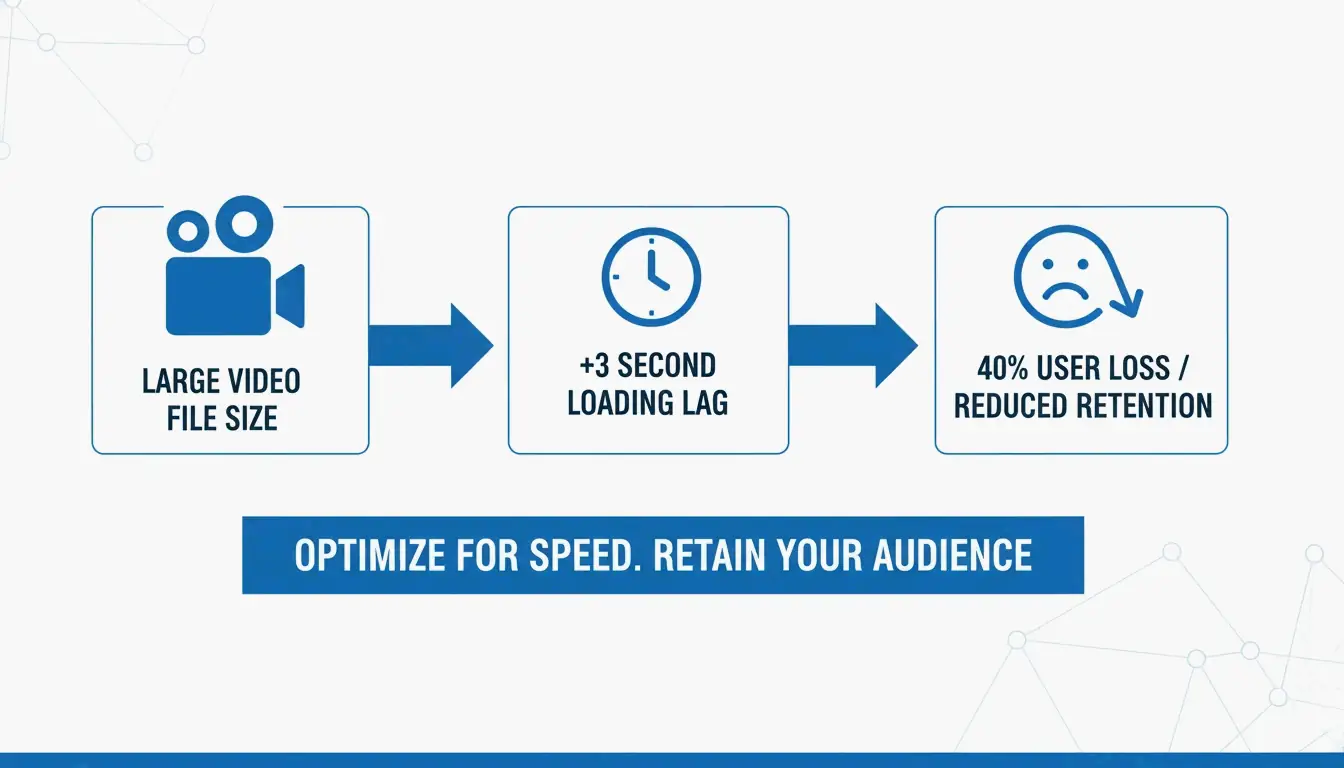
    Tooltester (2026) reports 40% of users abandon sites that take longer than 3 seconds to load — often caused by unoptimized video.

    A simple comparison showing the impact of video size on page load speed/SEO.

    Hidden Savings: Audio and Metadata

    • Audio bitrate: Switch to 128 kbps AAC — sufficient for web video and saves up to 15% total file size
    • Metadata stripping: Remove EXIF data and silent audio tracks from background/hero videos
    • AI-driven optimization: SmartVideo automatically selects the best codec based on viewer bandwidth

    Conclusion

    Video compression in 2026 means using the right codec (AV1 or HEVC), smart bitrate management (VBR 2-pass), and matching resolution to your display target. Start with Handbrake, pick an AV1 or H.265 preset, and use the bitrate cheat sheet above. You can cut file sizes by 60%+ with no visible quality loss.

    FAQ

    Does lowering FPS significantly reduce file size?

    Yes. Dropping from 60 FPS to 30 FPS reduces size by 20–30% (fewer frames to encode). Best for interviews and tutorials. Avoid for sports or gaming content where smooth motion matters.

    What is the best video codec in 2026?

    AV1 wins on efficiency (60%+ smaller than H.264) and is now supported by most browsers. H.265 (HEVC) remains the best for broad device compatibility (phones, tablets, 4K TVs) with a solid 50% size reduction.

    How do I hit Discord’s 25MB limit without pixelation?

    Use H.265 codec. Calculate bitrate: 200 ÷ video length in seconds. Downscale 1080p to 720p — fewer pixels means each one gets more data, producing a clearer image at low bitrates.

  • Why Your Content Needs a Handwritten Feel: Trust Signals in the AI Era

    Why Your Content Needs a Handwritten Feel: Trust Signals in the AI Era

    Generic AI content is a zero-cost commodity in 2026. To build trust, you need human-exclusive signals: lived experience, specific contextual judgment, and a unique personal voice. Data shows 52% of readers stop reading once they detect purely AI-generated content — making authenticity a measurable business advantage.

    Trust Scarcity: The Data Behind the Problem

    Ahrefs 2025 data shows 74.2% of new web pages contain AI-generated text. The result: readers have developed “blindness” to standard marketing copy.

    Metric Value Source
    Web pages with AI text 74.2% Ahrefs 2025
    People who use AI regularly 66% KPMG 2025
    People who trust AI output 46% KPMG 2025
    Readers who abandon pure AI content 52% White Beard Strategies 2026

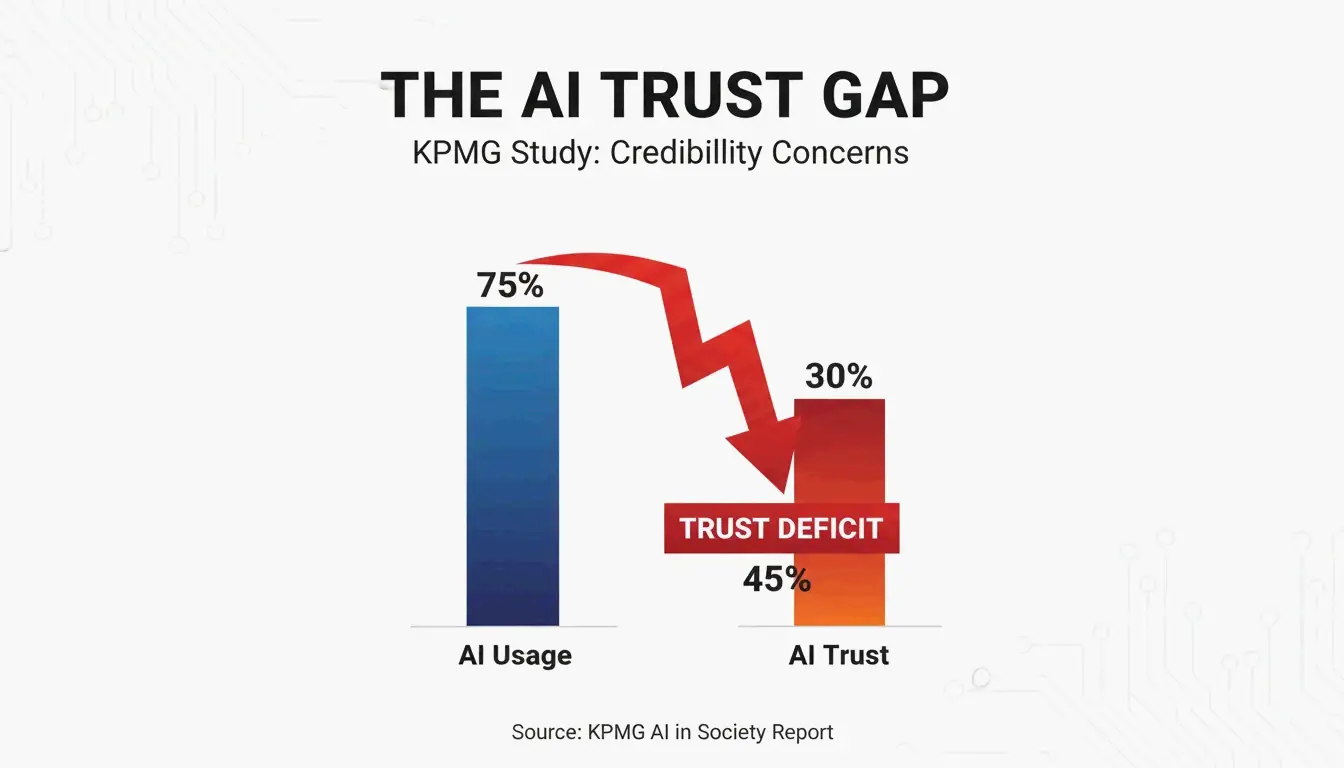
    The gap between usage (66%) and trust (46%) is the core problem. When readers detect a “bot” behind the screen, they discount the author’s credibility immediately.

    A simple contrast showing the gap between AI usage and human trust.

    Competent Mediocrity: The Statistical Average Trap

    AI models converge toward the statistical middle. As Lilian Makena notes, AI polishes away the quirks and rhythms that make a voice recognizable. The output is grammatically perfect but indistinguishable from thousands of other articles on the same topic.

    What Creates the ‘Handwritten’ Signal?

    A “handwritten feel” is not about fonts. It is about showing the friction of real human thought — the kind of evidence that only comes from doing the work.

    Proof of Work: The Trust Mechanism

    Jonathan Mast shares a case study: a founder posted polished AI content daily for three months. Result: 1,200 followers, $0 in revenue. The volume was there, but the human proof wasn’t.

    AI-Only Content Human-Proof Content
    General best practices Specific failures and lessons learned
    Statistical average advice Counterintuitive opinions from experience
    Generic examples First-person anecdotes with real outcomes
    “Safe” recommendations Recommendations that carry personal risk

    The Skin in the Game Audit

    Before publishing, ask: Could a competitor using the same AI tools produce this exact piece? If yes, the content lacks the human risk signal that builds trust. Content that builds credibility costs the creator something — a controversial stance, a vulnerable mistake, or a counterintuitive opinion.

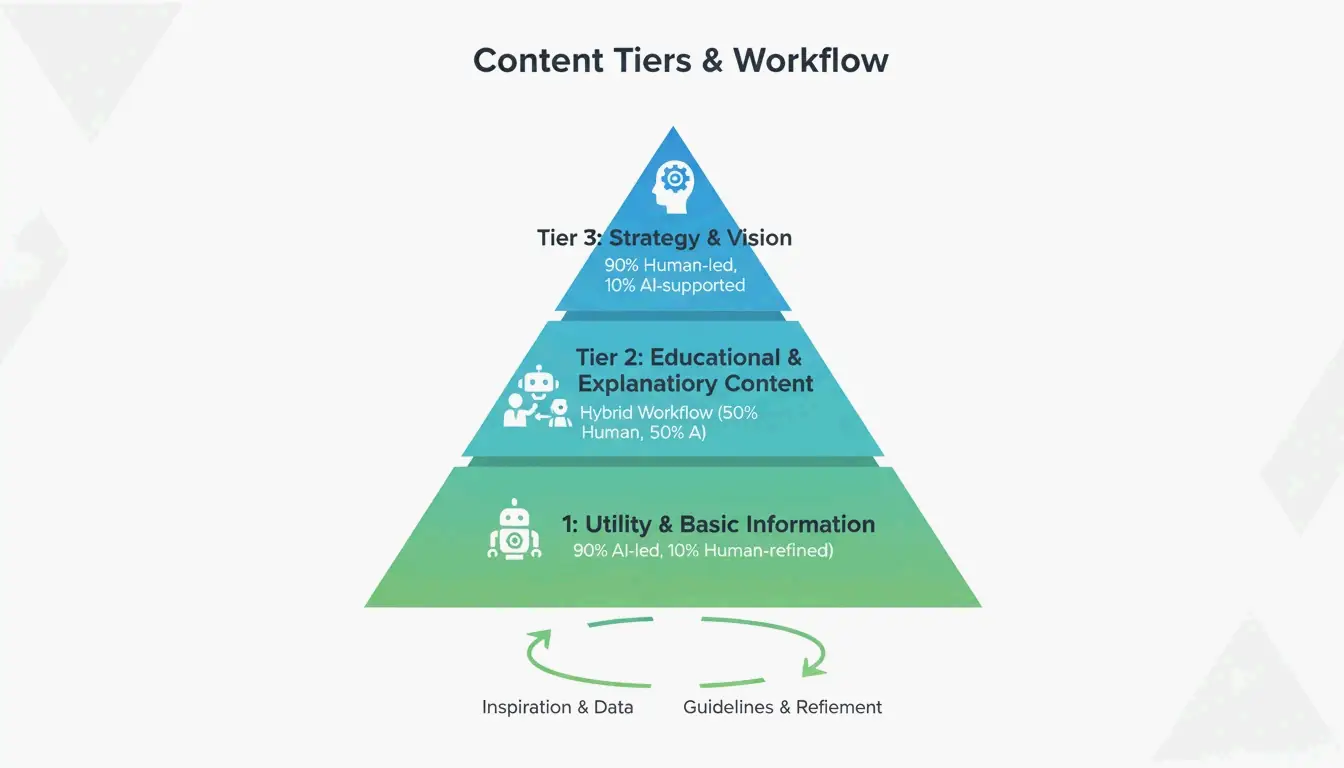
    Tiered Protocol: Human vs. AI Balance by Content Type

    A minimalist 3-tier pyramid showing the human vs. AI balance.

    Tier Content Type Human/AI Split Requirement
    Tier 1 Strategy, opinion, thought leadership 90% human-led Voice anchor before AI touches the draft
    Tier 2 Educational how-to guides Human-anchored, AI-supported Expert adds authenticity signals + real data
    Tier 3 Product descriptions, summaries AI-led, human-verified Human checks accuracy and brand tone

    This hybrid workflow lets you scale production without compromising the high-stakes content that closes sales.

    Cost Per Quality Unit: The Metric That Matters

    “Cost Per Word” is obsolete when words are infinite and free. The new metric is Cost Per Quality Unit — how much it costs to produce content that actually converts.

    The “Trust Tax” from AI-only content: 52% of consumers stop reading once they detect pure AI output (White Beard Strategies). This leads to fewer leads and longer sales cycles.

    Measurement: Track “Attribution by Anecdote” — how often a lead mentions a specific story or unique take from your content during a sales call. This directly correlates trust-building content to revenue.

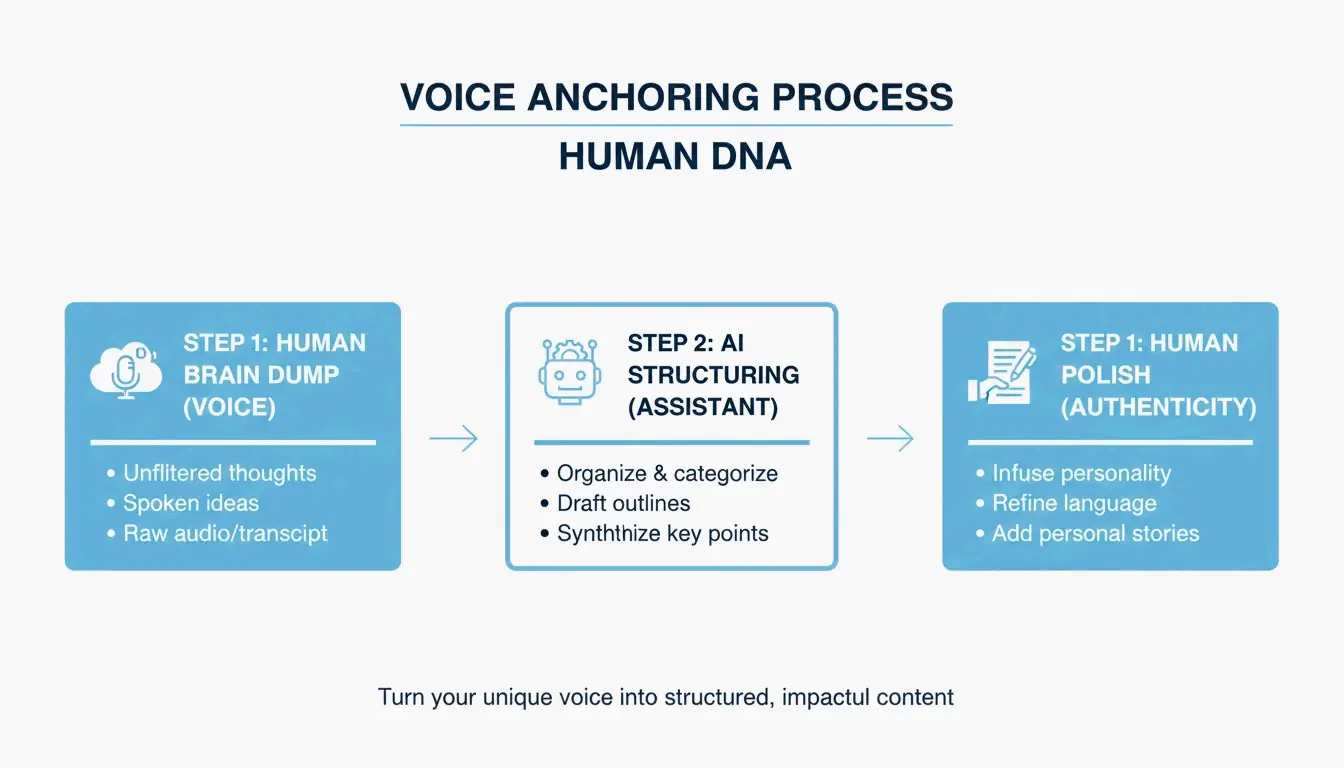
    Voice Anchoring: Scaling Without Losing Authenticity

    The 3-step Voice Anchoring process.

    1. Record a 2-minute “brain dump” of your unique thoughts on the topic (voice-to-text or interview).
    2. Use AI as a research librarian to find supporting data, or as a formatting assistant to organize your thoughts.
    3. Preserve the human perspective as the DNA of the final piece — the viewpoint must come from you.

    As Invoke Media notes, authentic content proves you understand a client’s specific reality rather than repeating publicly available information.

    Conclusion

    In 2026, your only competitive edge in content is the “handwritten feel” — the specific, lived reality of human expertise. Apply the tiered protocol: keep Tier 1 content 90% human-led, use voice anchoring to scale, and measure results with Cost Per Quality Unit rather than Cost Per Word.

    Immediate action: Audit your top 10 pages. Find one generic, AI-sounding section in each and replace it with a specific case study, a personal lesson, or a unique opinion.

    FAQ

    Can I train an AI persona to sound like me and still maintain trust?

    AI can mimic your sentence structure and vocabulary, but it cannot replicate lived experience. Use AI to mirror your structure, then inject a “human anchor” — a story or specific observation only you know. Trust requires current judgment that AI’s training data doesn’t contain.

    How do I measure ROI of trust-building content vs. high-volume SEO posts?

    Shift from “Traffic” to “Conversion Intent” and “Sales Cycle Length.” High-trust content produces fewer visitors but higher-quality leads further along the buyer’s journey. Track “Attribution by Anecdote” — instances where a prospect references a specific take from your content during a sales call.

    What authenticity markers do search engines and readers look for in 2026?

    Search engines prioritize “Information Gain” — new, non-training-data insights added to the web. Readers look for “First-person specificity” (I, We, Our) backed by unique data or real-world photos. A consistent perspective that occasionally disagrees with the AI statistical average is the strongest human-expert signal.

  • Temperature Converter Guide: Formulas, Calibration, and Scale Reference

    Temperature Converter Guide: Formulas, Calibration, and Scale Reference

    Convert between Celsius, Fahrenheit, and Kelvin using these core formulas: °F = (°C × 1.8) + 32, °C = (°F − 32) / 1.8, K = °C + 273.15. For hardware accuracy, calibrate digital thermometers with the Ice Point Method (0°C / 32°F) at least weekly.

    Core Conversion Formulas

    From To Formula Example
    Celsius Fahrenheit °F = (°C × 1.8) + 32 40°C = (40 × 1.8) + 32 = 104°F
    Fahrenheit Celsius °C = (°F − 32) / 1.8 68°F = (68 − 32) / 1.8 = 20°C
    Celsius Kelvin K = °C + 273.15 25°C = 298.15 K
    Fahrenheit Kelvin K = (°F − 32) / 1.8 + 273.15 32°F = 273.15 K
    Celsius Rankine °R = (°C × 1.8) + 491.67 0°C = 491.67 °R

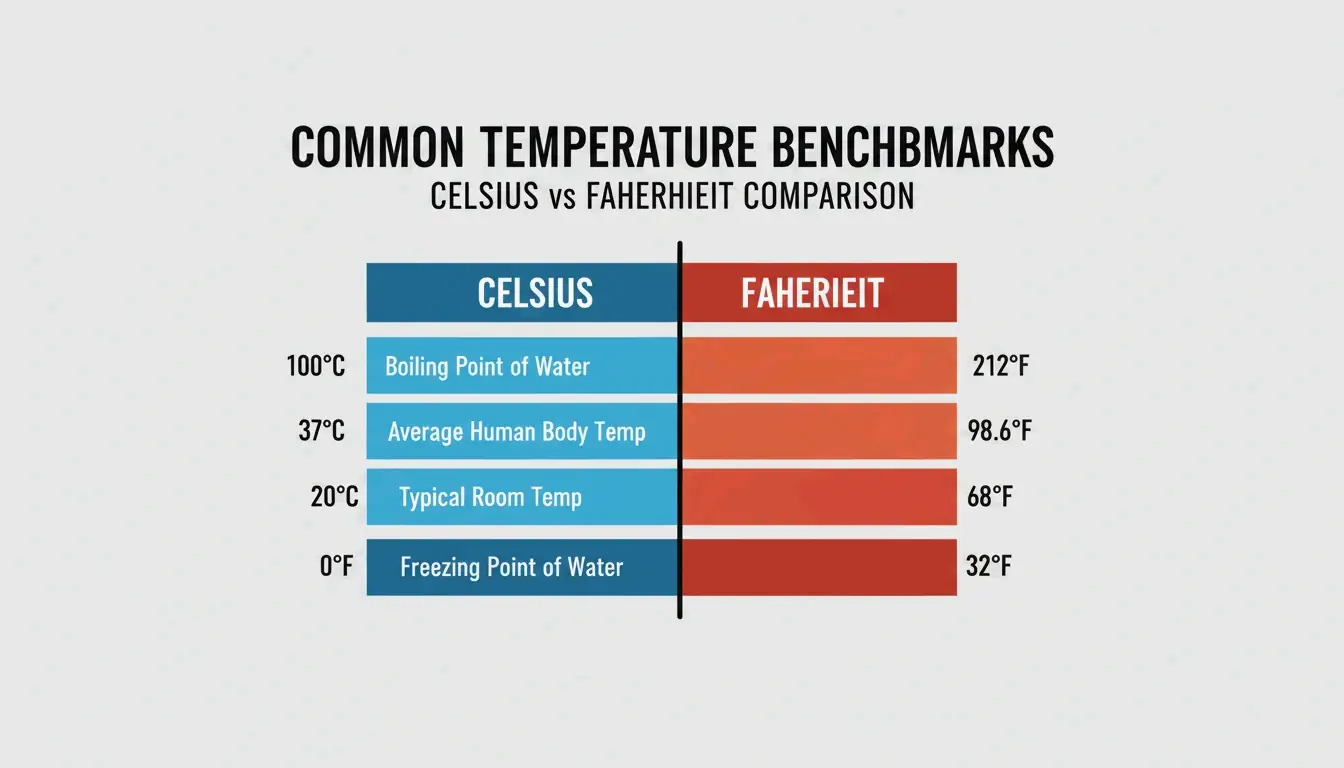
    Key Temperature Benchmarks

    Point Celsius Fahrenheit Kelvin
    Water freezes 0°C 32°F 273.15 K
    Room temperature 20°C 68°F 293.15 K
    Body temperature 37°C 98.6°F 310.15 K
    Water boils (sea level) 100°C 212°F 373.15 K

    A clean comparison bar showing key temperature benchmarks in both Celsius and Fahrenheit.

    Mental Shortcuts for Quick Estimates

    When you need a fast estimate without a calculator:

    Quick & Dirty: Double the Celsius and add 30.

    Actual Shortcut Error
    20°C = 68°F (20 × 2) + 30 = 70°F +2°F
    30°C = 86°F (30 × 2) + 30 = 90°F +4°F
    10°C = 50°F (10 × 2) + 30 = 50°F 0°F

    Adequate for weather and travel decisions. Use the exact formula (C × 1.8) + 32 for cooking, science, or medical contexts.

    For digital conversion, browser-based tools like FastTool Temperature Converter handle all four scales (Celsius, Fahrenheit, Kelvin, Rankine) instantly. The Tootoolz Temperature Converter works offline — useful for remote sites and flights.

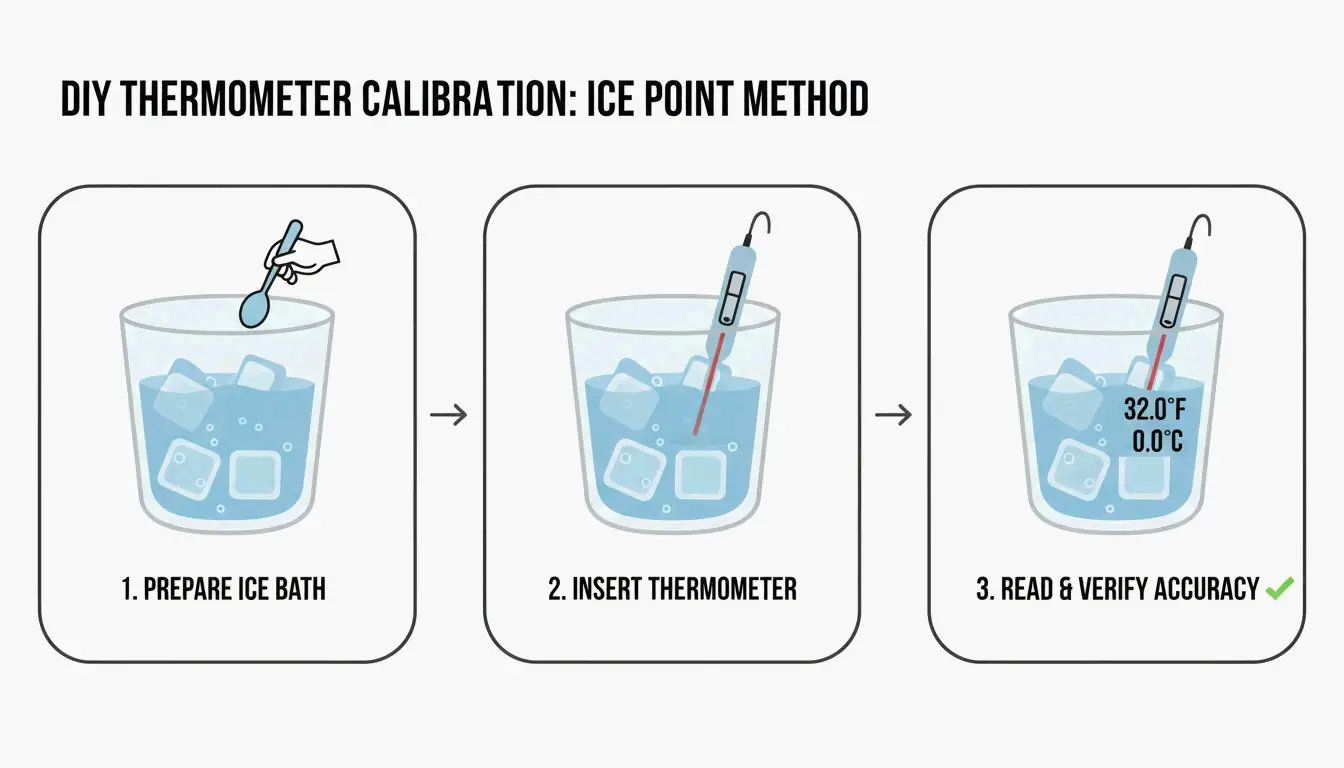
    Thermometer Calibration: The Ice Point Method

    Digital thermometers drift over time due to battery drain or physical impact. The Ice Point Method is the standard calibration procedure.

    A simple 3-step visual guide to the Ice Point Method: Ice Slurry, Stir, and Probe.

    Steps (per Paddl):

    1. Fill a tall glass with crushed ice, add cold water to fill gaps.
    2. Stir for 30 seconds to reach thermal equilibrium.
    3. Insert the probe into the center — do not touch sides or bottom.
    4. Expected reading: 32°F (0°C). If off by more than ±1.8°F (±1°C), adjust the calibration offset.

    Calibration frequency: Weekly for daily-use kitchen thermometers. Immediately after dropping the device or exposing it to extreme temperature swings (e.g., blast freezer → hot oven). Professional kitchens must maintain a calibration log for health inspections.

    For professional-grade accuracy, use NIST-Traceable devices — accuracy certified against the National Institute of Standards and Technology. As Helen Rosner reported in The New Yorker, an oven just 25°F off from its display can ruin an entire baking session.

    Tool Selection by Use Case

    Use Case Recommended Tool Accuracy Key Feature
    Weather/travel FastTool (browser) Exact All 4 scales, instant
    Professional kitchen Thermapen ONE ±0.5°F 1-second reading
    Remote/offline Tootoolz (mobile app) Exact Works without internet
    Lab/scientific NIST-Traceable probe ±0.1°F Certified calibration
    PC hardware tuning AMD Ryzen Master Real-time CPU throttling alerts

    As Dr. Elena Marquez from EastWest Studios notes: “Temperature accuracy is not just a detail — it’s a safety imperative.” This applies equally to HACCP food safety standards and PC thermal management. Club386 reports that AMD Ryzen Master’s Curve Optimizer reduced power consumption by 18.8% while boosting performance by over 5%.

    Programmable Thermostats and Energy Savings

    The U.S. Department of Energy reports that setting a programmable thermostat back 7°–10°F for 8 hours per day saves up to 10% annually on heating and cooling.

    Season Setting When
    Winter (awake) 68°F–70°F (20°C–21°C) While home
    Winter (asleep/away) 58°F–60°F (14°C–16°C) 8+ hours
    Summer (home) 78°F (26°C) While home
    Summer (away) 85°F+ (29°C+) While out

    Note: Heat pump systems require specialized “setback” thermostats to maintain efficiency during temperature recovery.

    Conclusion

    Use the exact formulas for precision work, the “double and add 30” shortcut for weather estimates, and calibrate hardware thermometers weekly with the Ice Point Method. For digital conversion, bookmark a reliable tool like FastTool. For energy savings, a programmable thermostat with a 7°–10°F setback during unoccupied hours delivers measurable annual savings.

    FAQ

    How do I calibrate a digital food thermometer?

    Fill a tall glass with crushed ice and cold water. Stir for 30 seconds. Insert the probe into the center without touching sides or bottom. Adjust the calibration until the display reads 32°F (0°C). Recalibrate weekly or immediately after dropping the device.

    What is the fastest mental estimate for Celsius to Fahrenheit?

    Double the Celsius and add 30. Example: 20°C → (20 × 2) + 30 = 70°F (actual: 68°F). Accurate within ±4°F for temperatures between 0°C and 40°C. Not suitable for cooking or scientific use.

    Is 13°C considered cold?

    13°C (55.4°F) is “cool” or “fresh” — typical spring or autumn weather. Comfortable for walking with light layers: T-shirt plus a cardigan, light jacket, or overshirt, with full-length trousers.