Blog

  • How to Shrink Pictures Without Quality Loss: 2026 Resizing Guide

    How to Shrink Pictures Without Quality Loss: 2026 Resizing Guide

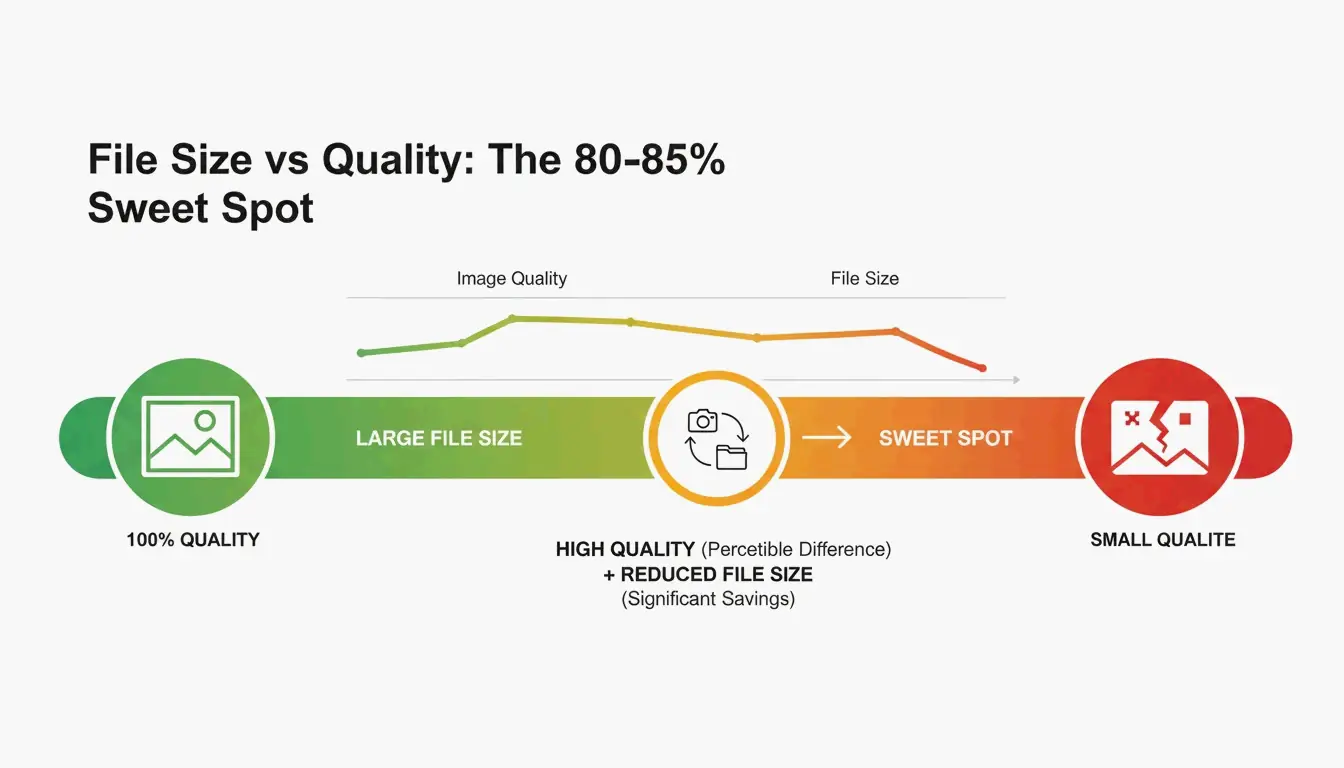
    Shrink a 6MB smartphone photo to 300-700KB by resizing to 1200px width and saving at 80-85% JPEG quality. For maximum compression, convert to AVIF or WebP. Built-in tools (Preview, Photos) handle single files; BIRME or ImageMagick handle bulk batches.

    Built-in Tools: Mac, Windows, and Mobile

    Mac: Preview

    1. Open image in Preview.
    2. Tools → Adjust Size.
    3. Ensure “Scale proportionally” is checked.
    4. Set target width (e.g., 1200px). Height adjusts automatically.

    Windows: Photos App

    1. Open image in Photos.
    2. Click three-dot menu (…) → Resize image.
    3. Select a preset or enter custom dimensions.

    Microsoft Paint alternative: Home → Resize → switch to “Pixels” → set width.

    iPhone: HEIC High Efficiency Mode

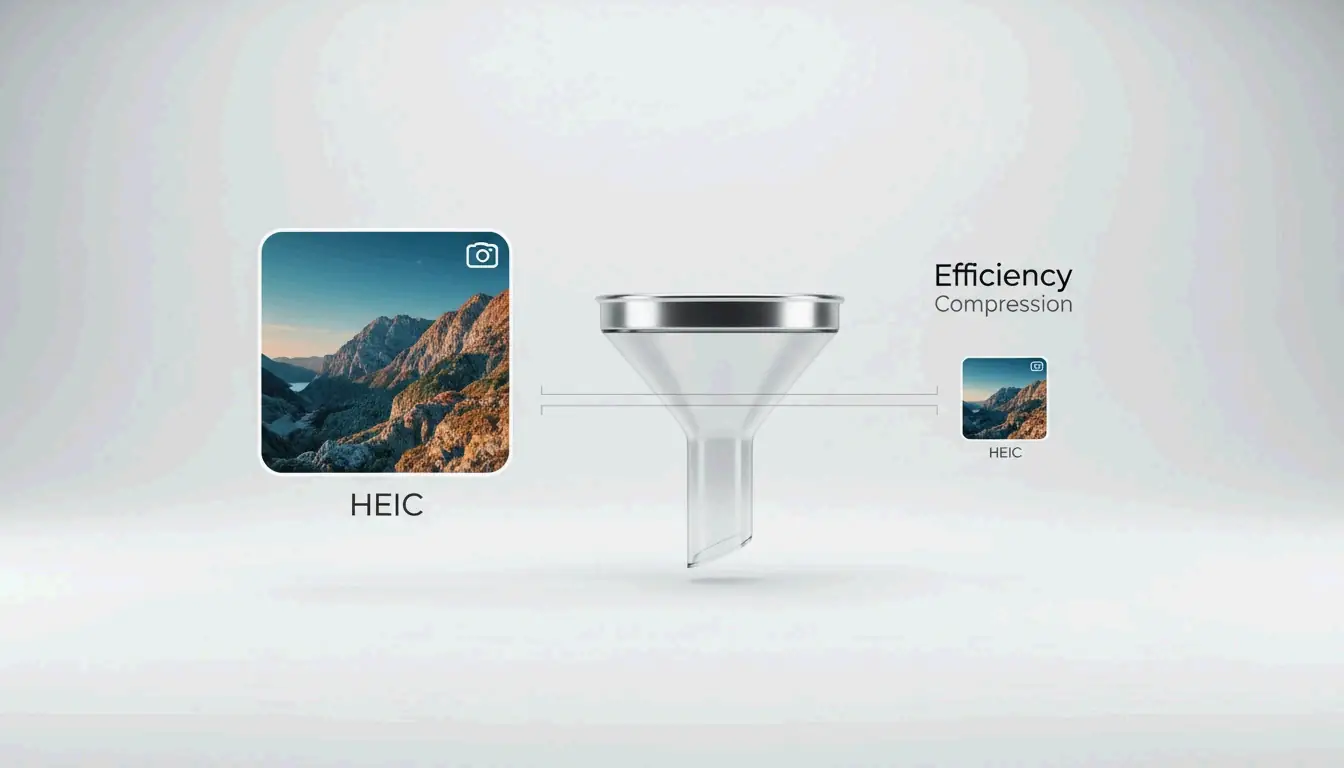
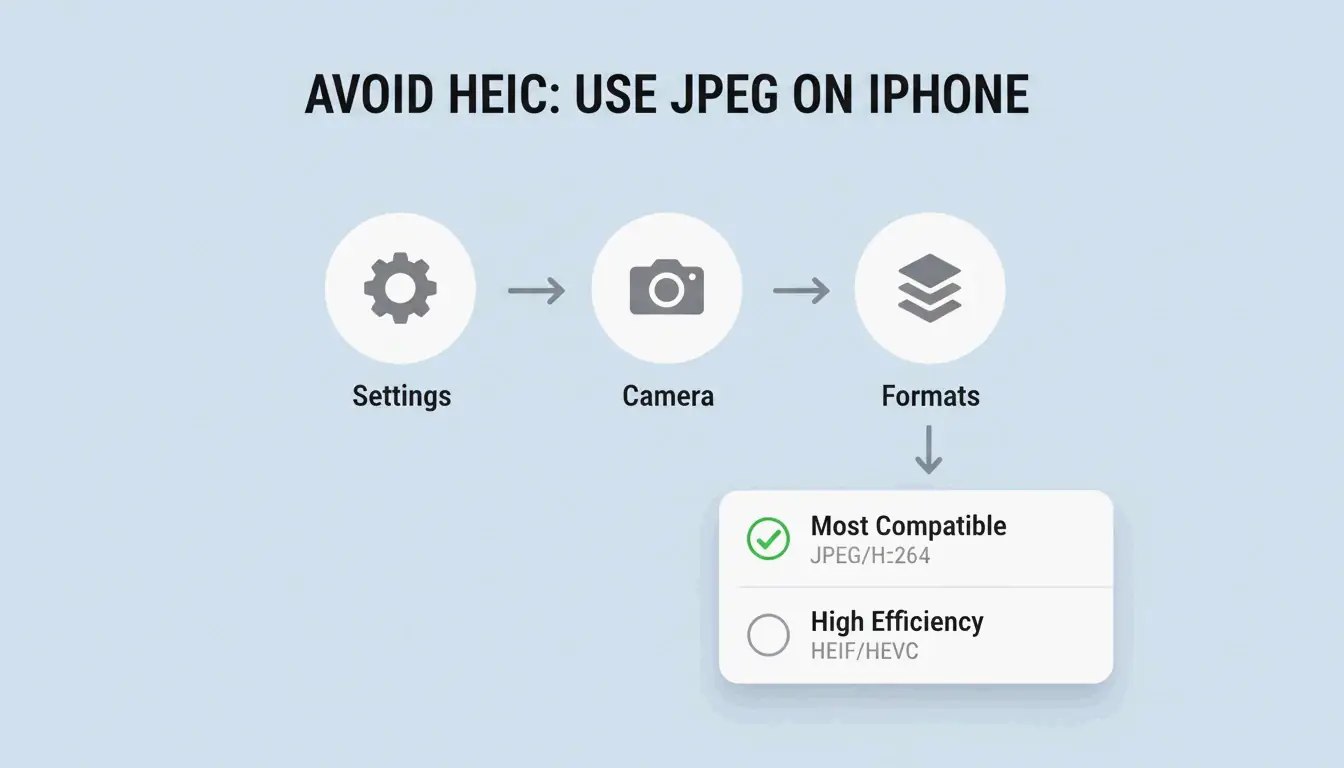
    Switch to Settings → Camera → Formats → High Efficiency. Photos save as HEIC — roughly 50% smaller than JPEG with no quality loss. Per Wondershare UniConverter, this is the single biggest space saver for iCloud Photos.

    Resizing vs. Compressing: What’s the Difference?

    Action What Changes Example
    Resizing Pixel dimensions (width × height) 4000px → 1200px
    Compressing File size (MB/KB) 6MB → 400KB

    Resizing removes pixels. Compressing re-encodes data more efficiently. Both reduce file size, but resizing delivers the largest savings.

    Bulk / Batch Resize Tools

    For hundreds of photos, use browser-based or command-line tools:

    Tool Platform Batch Support Privacy Command
    BIRME Browser Yes Local (JS) Drag-and-drop GUI
    Private Convert Browser Yes Local (JS) Upload interface
    ImageMagick CLI Yes Full offline magick mogrify -resize 1200x *.jpg
    sips (macOS) CLI Yes Full offline sips -Z 1200 *.jpg

    BIRME also offers Smart Cropping — AI detects the focal point and keeps it centered while trimming edges to fit new dimensions.

    Maintaining Aspect Ratio

    Always resize proportionally. Forcing a rectangular image into a square without cropping causes visible stretching. Lock the aspect ratio, or use tools that auto-detect and preserve it.
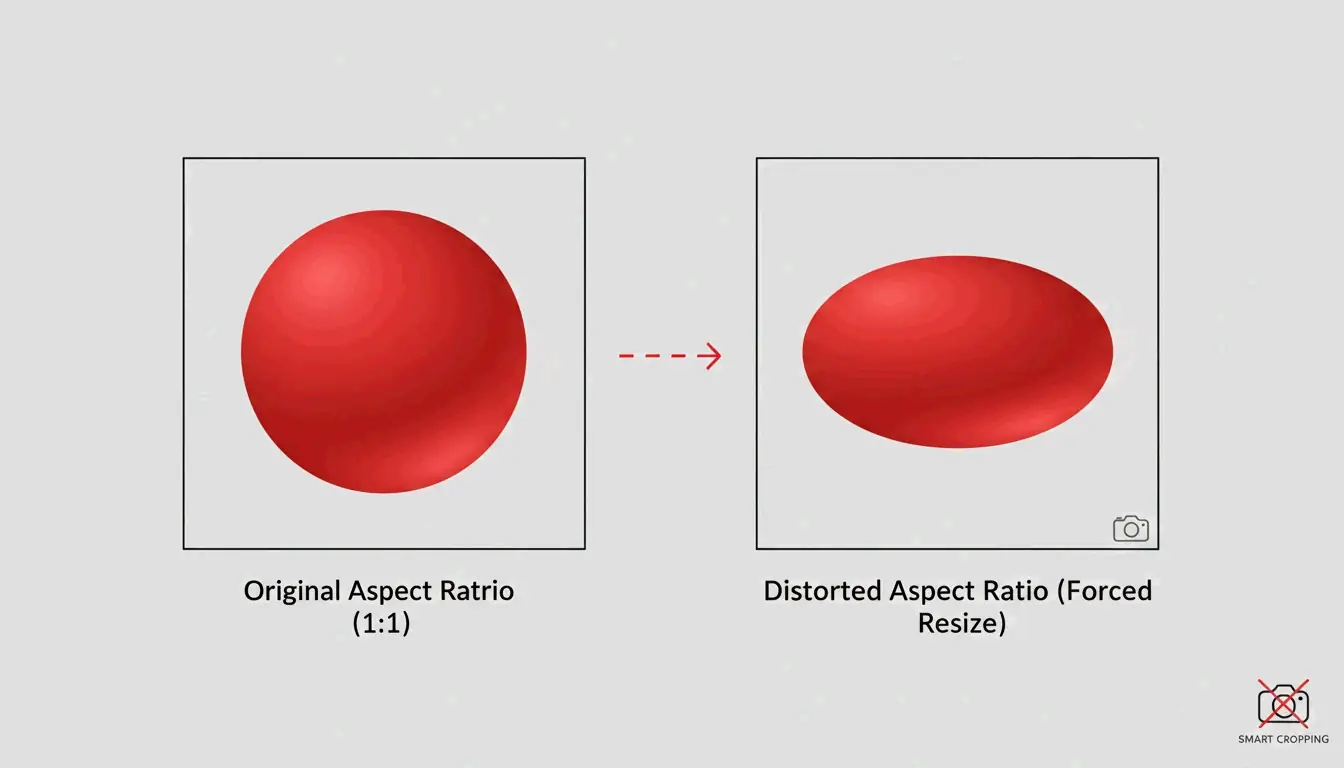
    Correct aspect ratio vs. distorted stretching

    Format Decision Guide for 2026

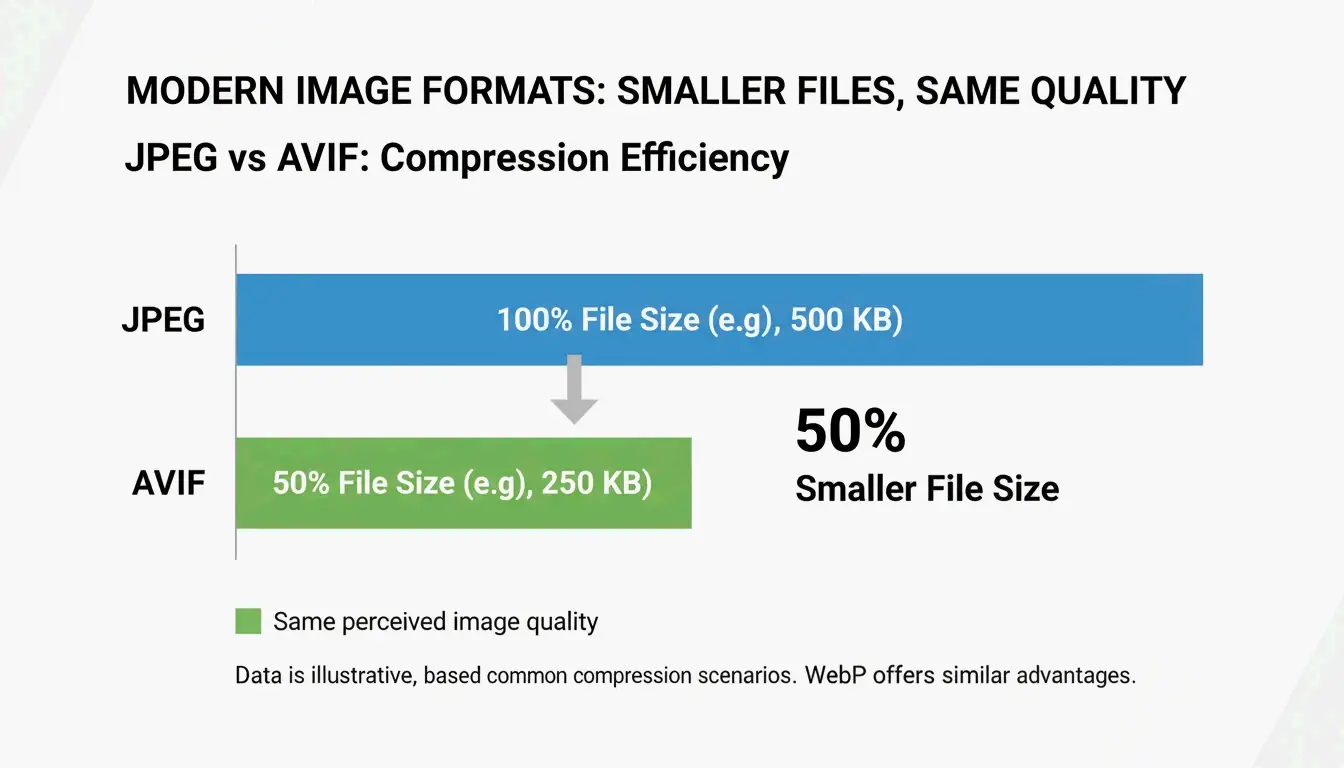
    JPEG vs AVIF file size comparison

    Goal Format Why
    iPhone/Mac local storage HEIC 50% smaller than JPEG, native Apple support
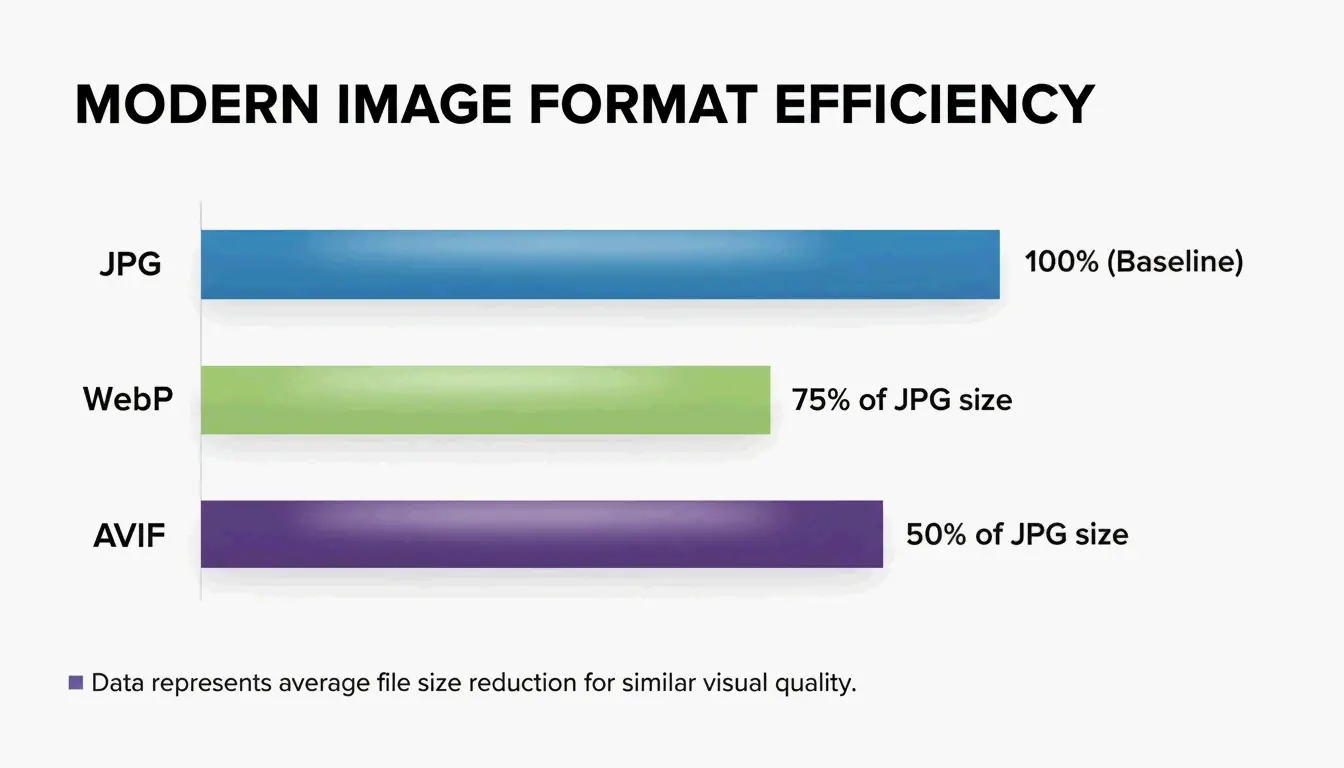
    Website performance AVIF or WebP Up to 50% smaller than JPEG, 97%+ browser support
    Maximum compatibility JPEG (80%) Opens on any device, any OS

    Per Private Convert, AVIF offers 50% better compression than JPEG at equivalent visual quality.

    Social Media Dimensions: Pre-Resize to Avoid Auto-Shrink Blur

    Platforms like Instagram and TikTok apply aggressive auto-compression. Uploading 4K files often produces worse results than uploading at the platform’s native resolution.

    Platform Recommended Size Format
    Instagram/TikTok Reels 1080 × 1920 px JPEG or WebP
    Instagram Square Posts 1080 × 1080 px JPEG or WebP
    YouTube Thumbnails 1280 × 720 px JPEG

    Per the TikTok Creator Community, 1080p uploads often look sharper than 4K because the platform’s compression engine handles smaller files more cleanly.

    Conclusion

    Shrink pictures in three steps: resize to target dimensions using built-in tools or batch processors, maintain aspect ratio, and save in a modern format. For iPhone storage, switch to HEIC. For web, convert to AVIF or WebP at 80% quality. For social media, pre-resize to platform-native dimensions to avoid auto-shrink artifacts.

    FAQ

    What is the difference between resizing and compressing?

    Resizing changes pixel dimensions (4000px → 1200px). Compressing reduces file size by re-encoding data, often without changing dimensions. Both reduce file size, but resizing provides the largest reduction.

    Why do pictures look blurry after shrinking?

    Shrinking removes pixels. If you later enlarge the image, the computer must interpolate missing pixels, producing softness. Blurriness from compression occurs when quality drops below 60%, creating blocky artifacts.

    How do I resize images on my phone without installing an app?

    iPhone: Use the Shortcuts app to create a “Resize Image” shortcut that works from the Photos share sheet. Android: Open a browser-based tool like Private Convert in Chrome — resize in the browser without installing anything.
  • How to Compress HEIC Files Without Losing Quality (2026 Guide)

    How to Compress HEIC Files Without Losing Quality (2026 Guide)

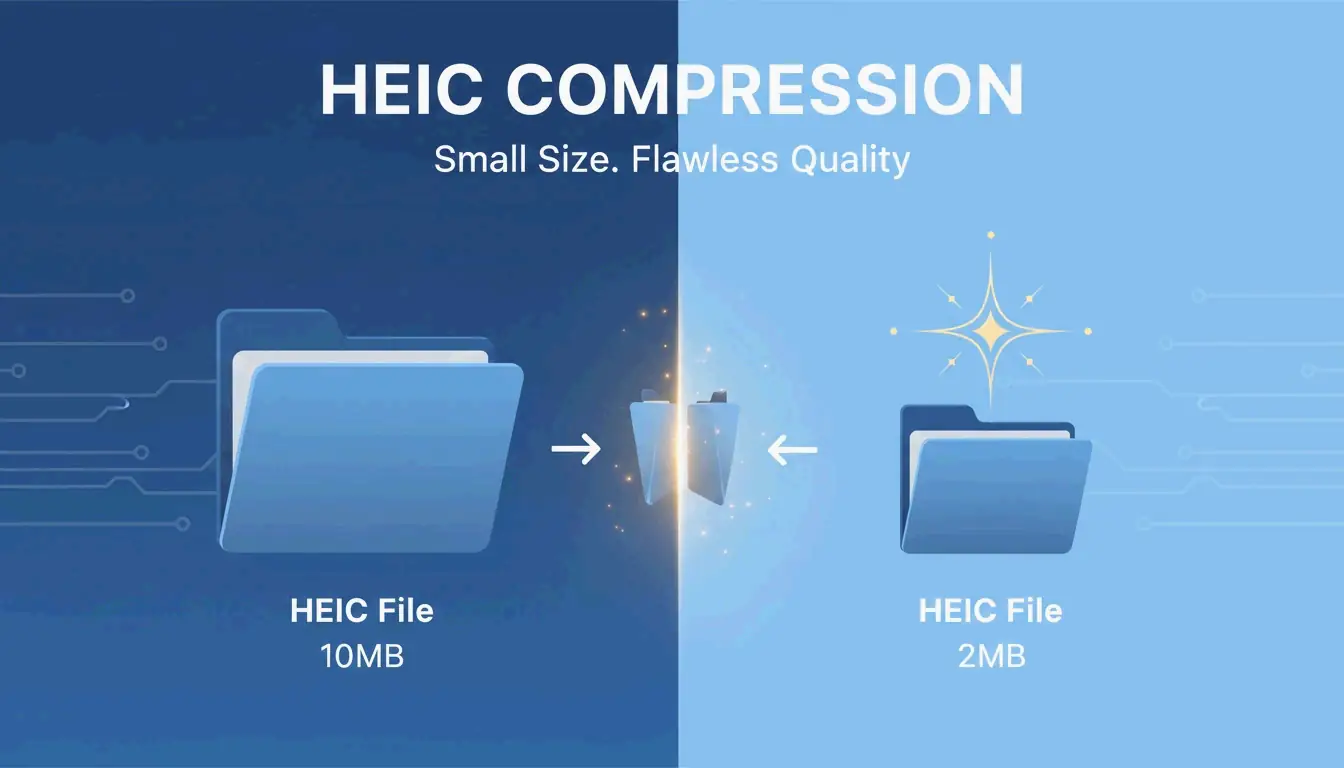
    To compress HEIC files in 2026, you can use browser-based tools like ConvertMinify or Adobe Express, or use the native “Quick Actions” feature on macOS. By setting the quality slider to 80-85%, you can shrink file sizes by up to 80% while keeping visual clarity and EXIF metadata intact. This ensures your iPhone photos meet upload limits without looking blurry.

    The Fastest Ways to Compress HEIC Online and Offline

    High-resolution photography is great, but it creates a constant battle between image quality and storage space. While the High Efficiency Image Container (HEIC) is built to be lean, modern hardware like the iPhone 15 Pro produces 48MP images. According to ConvertMinify, these files typically range from 5–8 MB, which can easily trigger email attachment limits or slow down a website.

    Option 1: Privacy-First Browser Tools (No Upload Required)

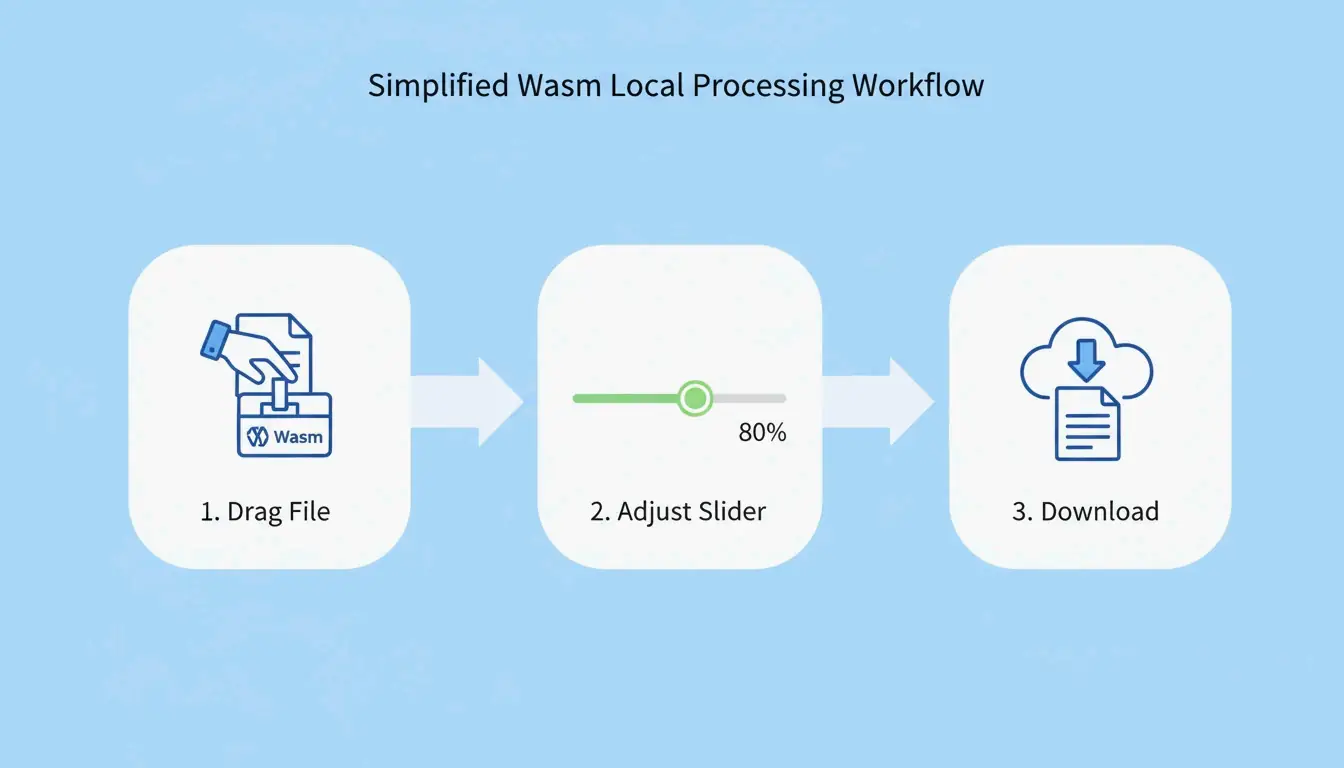
    You no longer need to “upload” files to a mysterious server to shrink them. Modern web standards now allow your browser to do the heavy lifting locally. Tools using WebAssembly (Wasm) and HTML5 Canvas, such as FreeToolio, process images right on your device.

    1. Pick Your Tool: Open a Wasm-based site like ConvertMinify or FreeToolio.
    2. Find the “Sweet Spot”: Move the quality slider to 80-85%. This is the standard setting to keep 10-bit color depth while significantly cutting the file size.
    3. Process Locally: Drag and drop your HEIC files. Because the logic runs via Wasm, your photos stay on your computer, ensuring 100% privacy.
    4. Save: Download your optimized files immediately.

    Simple 3-step local compression process

    Option 2: Native macOS & Windows Methods

    If you prefer to stay away from the browser entirely, your computer already has built-in tools that don’t require any new software.

    • macOS Quick Actions: Highlight your HEIC files in Finder, right-click, and go to Quick Actions > Convert Image. Choosing Small, Medium, or Large will trigger an instant local compression.
    • Windows Photos App: Windows users will need the “HEIF Image Extensions” from the Microsoft Store first. Once installed, open an image in the Photos app, select “Save As,” and use the quality slider to reduce the size.
    • Dedicated Local Apps: For pros handling hundreds of photos at once, native apps like ClearCut or Zipic offer offline processing. These allow for specific CRF (Constant Rate Factor) controls that can shrink files by as much as 90%.

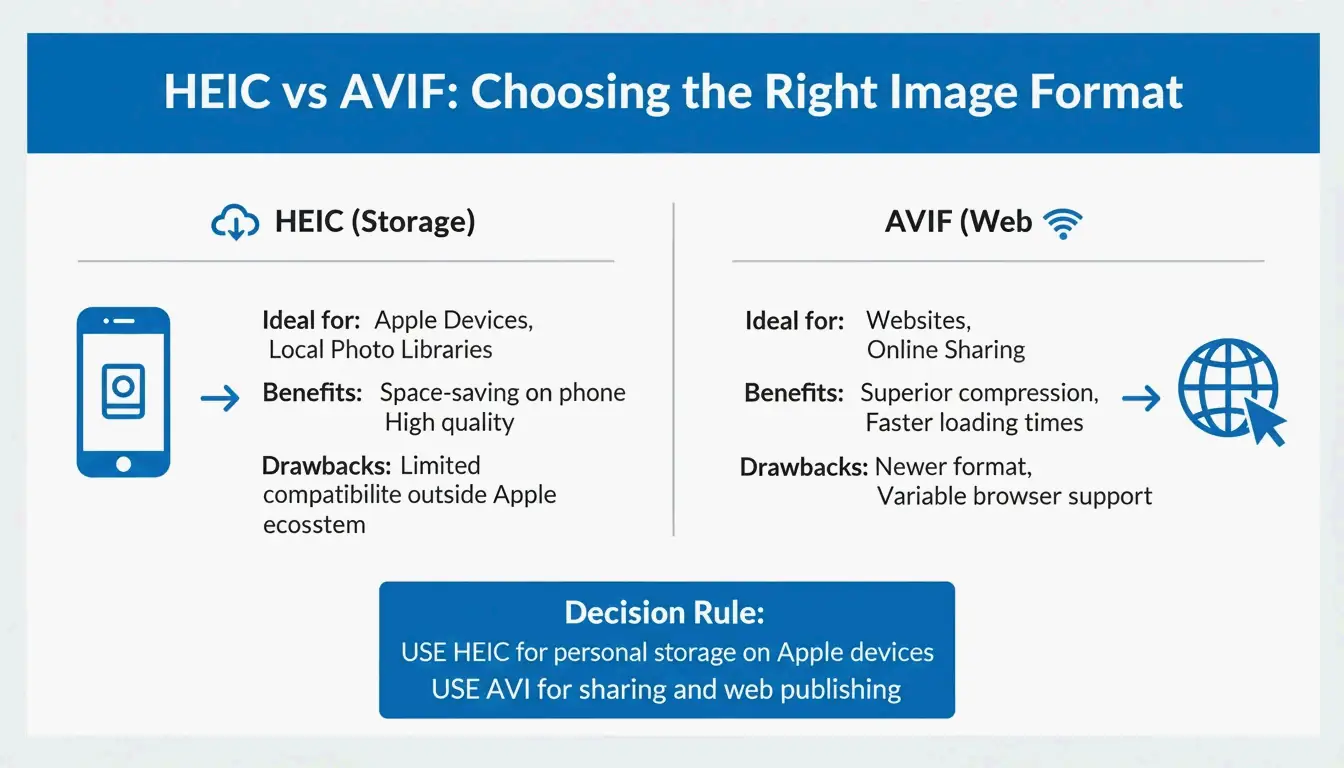
    Modern 2026 Workflow: HEIC for Storage vs. AVIF for Web

    Choosing the right format depends on where the photo is going. HEIC is still the best “master” format for Apple users (iOS 11+) because it supports Live Photos and non-destructive editing.

    However, for sharing on the web, AVIF (AV1 Image File Format) is the new standard. DEV Community notes that AVIF reached about 93% global browser support by 2026. While HEIC is perfect for your phone’s storage, it still isn’t natively supported by browsers like Chrome or Firefox, making it a poor choice for direct web uploads.

    Simple comparison: HEIC for Storage vs AVIF for Web

    The main downside to AVIF is speed. Data from Pixotter shows that AVIF encoding can be 47x slower than WebP or JPEG. For high-traffic sites, the wait is usually worth it because of the massive bandwidth savings and better performance scores.

    How Does HEIC Compression Work?

    HEIC is based on the HEVC (H.265) video standard. As Utilko points out, it is 50% more efficient than JPEG at the same quality level. This allows it to hold 10-bit color and HDR data in a file half the size of an old 8-bit JPEG.

    Understanding Lossy vs. Lossless Compression

    • Lossy Compression: This is the default for iPhone photos. It uses “intra-frame prediction” to remove data the human eye can’t actually see.
    • Lossless Compression: Reserved for archives or medical imaging where every pixel must be perfect. These files are larger than lossy versions but still smaller than TIFF or BMP files.

    Does Compressing HEIC Remove GPS and EXIF Data?

    Compression itself doesn’t delete metadata, but many “lite” online tools strip EXIF data (like your camera settings, GPS, and timestamps) to shave off an extra 50-200 KB. Professional tools like Zipic give you a toggle to keep or remove this info. If you’re posting a photo publicly, stripping the GPS data is actually a smart privacy move.

    Professional Privacy Checklist: Is Your Compressor Safe?

    When you compress HEIC files, security is the most important factor. In 2026, the best practice is to keep everything local.

    1. The Offline Test: Open the tool, then turn off your Wi-Fi. If it still works, it’s using Wasm or HTML5 Canvas and is safe to use.
    2. Cloud vs. Local: Be careful with tools that “upload” your files unless they have a clear, verified policy for deleting them. Native apps like ClearCut are 100% local and don’t even require an account.
    3. Core Web Vitals: For developers, make sure your compressor doesn’t strip color profiles. If it does, images can look “washed out,” which hurts the user experience and your site’s metrics.

    Visual metaphor for local/offline data security

    Conclusion

    Compressing HEIC is a necessity for managing high-res iPhone storage. By 2026, tools have advanced enough to let you do this right in your browser without any privacy risks. Whether you’re trying to fit a photo into an email or optimizing a portfolio, you can reduce the file size without losing the 10-bit depth that makes HEIC so good. For the best results, stick to a Wasm-based compressor at about 82% quality to get the best balance of size and clarity.

    FAQ

    Why are my iPhone HEIC photos so large even though they are ‘High Efficiency’?

    High-resolution sensors, such as the 48MP lenses on the latest iPhones, generate massive amounts of raw data. Additionally, the inclusion of HDR data and 10-bit color depth increases file complexity. According to ConvertMinify, these factors can result in individual files reaching 8 MB despite the efficient codec.

    Can I compress HEIC files on Windows without installing third-party software?

    Yes. You can use the built-in Windows Photos app to “Save As” or “Resize” the image, though you must first ensure the “HEIF Image Extensions” are installed from the Microsoft Store. Alternatively, use a browser-based tool like FreeToolio that processes the file locally using your browser’s resources.

    Does compressing HEIC images remove GPS and EXIF metadata?

    It depends entirely on the tool you select. Most native macOS and iOS compression methods preserve metadata by default. However, many third-party web tools provide a toggle to strip EXIF data to further reduce file size or protect user privacy before social media uploads.

  • How to Compress PNG Files: 2026 Guide to Faster Web Performance

    How to Compress PNG Files: 2026 Guide to Faster Web Performance

    To compress PNG files effectively in 2026, use browser-based tools to apply lossless recompression or lossy quantization. By stripping metadata and optimizing the color palette via tools like pngquant, you can reduce file sizes by 40-80% while maintaining transparency and visual fidelity for web and mobile applications.

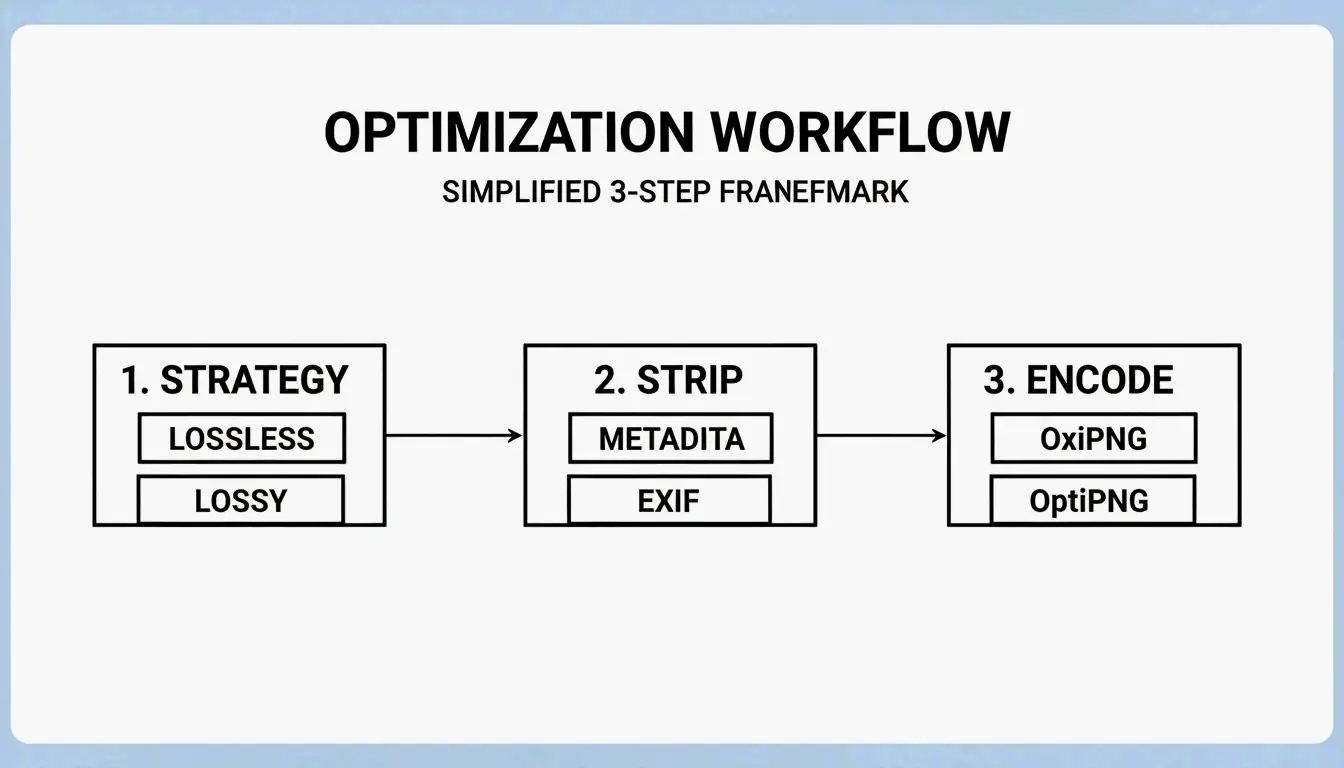
    How to Compress PNG Without Quality Loss: A 3-Step Framework

    Optimizing PNGs for the modern web means finding the balance between mathematical precision and perceptual quality. According to Pixotter, PNG files often carry “hidden weight” — embedded ICC profiles and EXIF data that can add 50-500KB to a single image without improving its appearance.

    Step-by-Step Process

    1. Choose Your Compression Strategy
    2. Lossless recompression: Preserves every pixel exactly; ideal for brand assets like logos.
    3. Lossy quantization: Reduces the color palette for significantly larger savings; best for screenshots or complex web graphics.

    4. Strip Unnecessary Metadata
      Remove non-essential “chunks” within the file. Deleting EXIF data and ICC profiles cuts file size without touching actual pixel data.

    5. Export Using Modern Algorithms
      Use high-performance encoders like OxiPNG (Rust-based, faster and more efficient) or OptiPNG. These test multiple filtering strategies to find the smallest possible lossless encoding.

    3-step PNG optimization workflow

    Lossless vs. Lossy: Which Compression Method to Choose?

    Method Tool Example Size Reduction Quality Impact Best For
    Lossless OxiPNG, OptiPNG 10-30% Zero pixel change Logos, brand assets
    Lossy (Quantization) pngquant 60-80% Color palette reduction Screenshots, complex graphics

    According to ToolTea, lossless compression typically shrinks a file by 10-30% without changing the image at all. Lossy compression via quantization reduces color depth from 24-bit or 32-bit to 8-bit (256 colors), which can shrink files by 60-80% while keeping the alpha channel (transparency) intact.

    The 2026 PNG Standard: What’s New in the W3C 3rd Edition

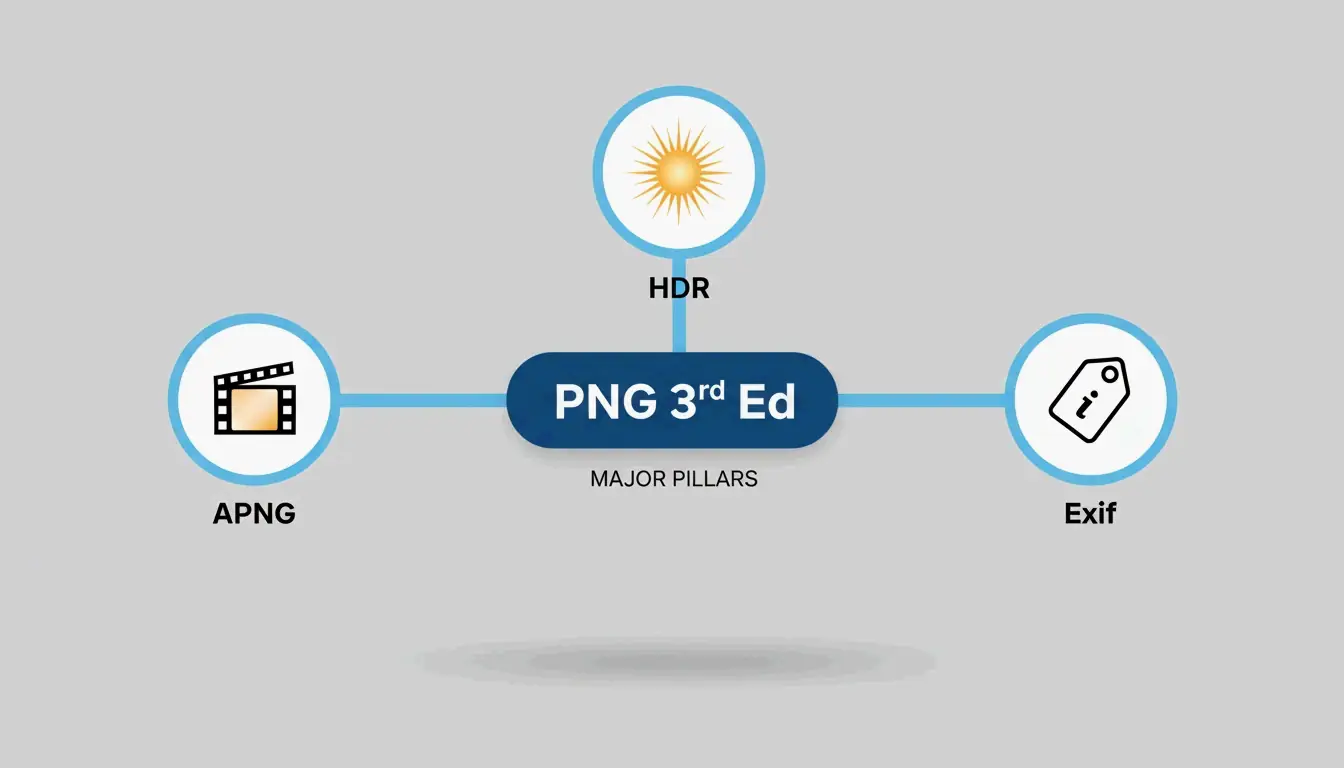
    As of April 2026, the PNG format has received its first major update in years. The PNG 3rd Edition, which became a W3C Recommendation on June 24, 2025, modernized the format for the contemporary web. According to Wikipedia, this update formalized popular but previously “unofficial” extensions.

    Feature Before 3rd Edition After 3rd Edition
    APNG (Animated PNG) Third-party add-on Core spec component
    HDR Support Limited Native support for modern monitors
    EXIF Metadata Unofficial handling Native support via chunk structure

    Key features of the PNG 3rd Edition update

    Why APNG Is Now a Native Standard for Web Animation

    With the 2025 W3C Recommendation, APNG has become the preferred format for high-quality transparent animations. Unlike GIF, which is limited to 256 colors and binary transparency, APNG supports full 24-bit color and smooth 8-bit alpha channels. As a native part of the PNG 3rd Edition, browsers render APNG animations more efficiently, reducing CPU overhead.

    Advanced PNG Optimization: pngquant and PNG-8 Strategy

    For professional workflows, pngquant remains the most effective tool for lossy PNG optimization. It converts 24-bit or 32-bit PNGs into significantly smaller 8-bit indexed images (PNG-8). According to Pixotter, this can shrink UI screenshots by up to 60% with negligible visual difference.

    A real-world case study from iCompressImg demonstrates the potential: a text-based logo was reduced from 156KB to 24KB — an 85% reduction in file weight.

    Feature PNG-24 (Truecolor) PNG-8 (Indexed)
    Colors 16.7 million Up to 256
    Transparency Full alpha channel Alpha or binary
    File Size Large Small (60-80% reduction)
    Best For Complex gradients Logos, icons, UI elements

    Developer Tip: Automating Compression in CI/CD Pipelines

    For scalable web projects, automated image compression prevents unoptimized assets from reaching production. The Sharp library in Node.js, powered by libvips, handles high-speed PNG processing. By integrating a compression script into your CI/CD pipeline, every PNG asset is automatically optimized and metadata-stripped before deployment.

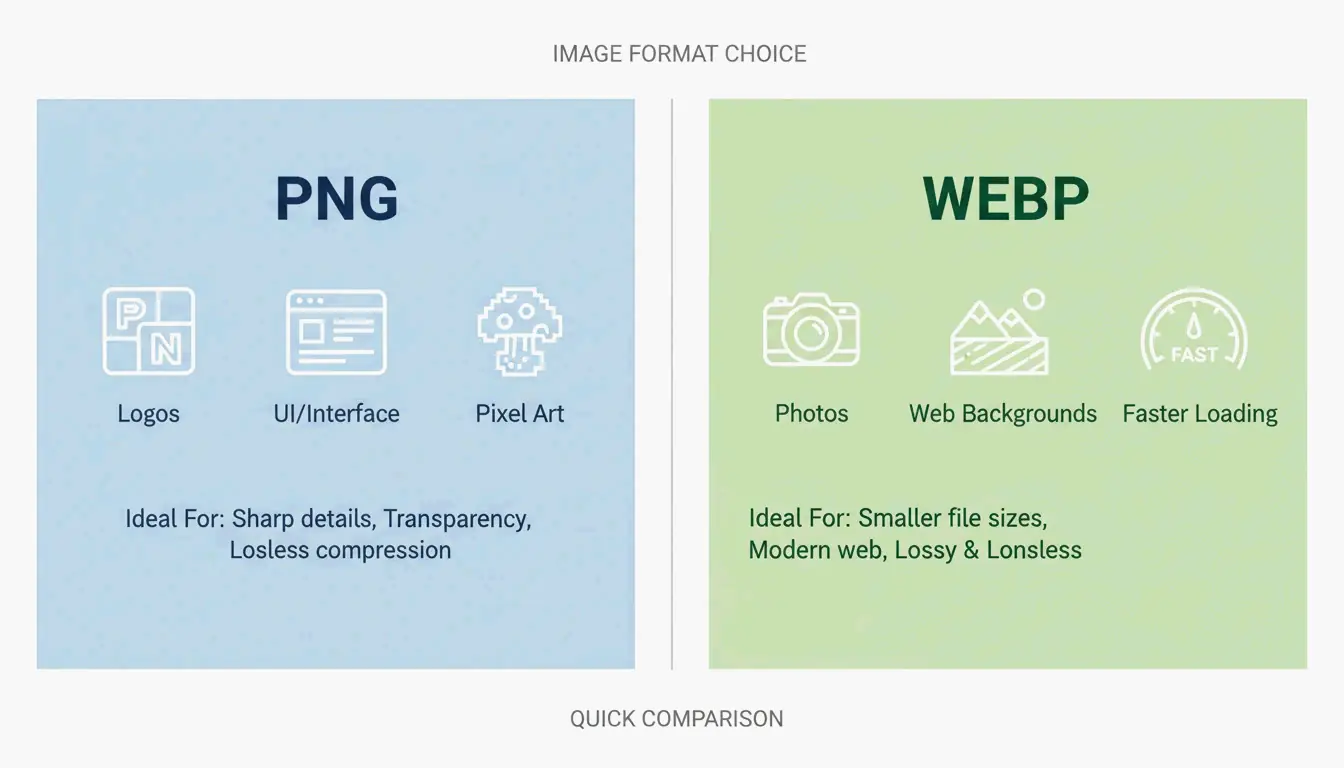
    Should You Convert PNG to WebP for Better Performance?

    For photographic content, WebP often delivers superior results. WebP handles both lossy and lossless compression and supports transparency like PNG. According to 2026 benchmarks from Pixotter, a WebP file at 80% quality is typically 20-35% smaller than a lossy-quantized PNG at equivalent quality.

    Comparison of PNG vs. WebP for different use cases

    However, PNG remains the better choice in these scenarios:

    • Pixel art or sharp edges: PNG’s DEFLATE algorithm handles high-contrast, flat-color edges better than WebP.
    • High-fidelity source assets: If further editing is planned, keep the image as a lossless PNG to avoid generation loss.
    • Maximum compatibility: Some legacy email clients and enterprise tools still require standard PNGs.

    Conclusion

    Compressing PNGs effectively requires matching the right tool to the task. Using the 2025/2026 W3C standards and tools like pngquant, you can achieve significant page load improvements without sacrificing visual quality.

    Recommended workflow:

    1. Start with OxiPNG for lossless metadata stripping and structural optimization.
    2. If the file remains too large, apply pngquant for 8-bit quantization.
    3. For non-critical photographic content, convert to WebP for the 60-85% reduction needed for modern Core Web Vitals compliance.

    FAQ

    Does PNG compression lose image transparency?

    No. Standard lossless compression preserves the alpha channel perfectly. Even lossy tools like pngquant are designed to maintain transparency boundaries, though they may slightly reduce the number of colors within semi-transparent areas to achieve a smaller file size.

    What is the difference between lossless and lossy PNG compression?

    Lossless compression (e.g., OxiPNG, OptiPNG) optimizes the file’s internal structure and removes metadata without changing any pixels. Lossy compression (e.g., pngquant) reduces the total number of colors in the image, which significantly shrinks file size but technically alters the original pixel data.

    Can I compress a PNG to a specific file size like 100KB?

    Directly targeting a specific file size is difficult for PNG because compression efficiency depends on image complexity. However, you can approach a target size by iteratively reducing the color palette (quantization) or by resizing the image dimensions to reduce the total pixel count.

    Why is my PNG file still large after compression?

    The file may contain significant hidden metadata such as large ICC color profiles or EXIF data that some tools do not remove by default. Additionally, images with complex gradients or “noise” compress poorly with the DEFLATE algorithm because there are fewer repeating patterns to exploit.

  • How to Compress JPG Files: The 2026 Guide to Faster Loading and High Quality

    How to Compress JPG Files: The 2026 Guide to Faster Loading and High Quality

    The most effective way to compress JPG files in 2026 is a two-step approach: first resize to display dimensions, then apply lossy compression at 75-85% quality. This “double-punch” method typically reduces file sizes by 40-70% while keeping the image visually indistinguishable from the original. Online tools like TinyIMG and native apps like Mac Preview handle this efficiently for any workflow.

    The “Double-Punch” Workflow: How to Compress JPG for Maximum Results

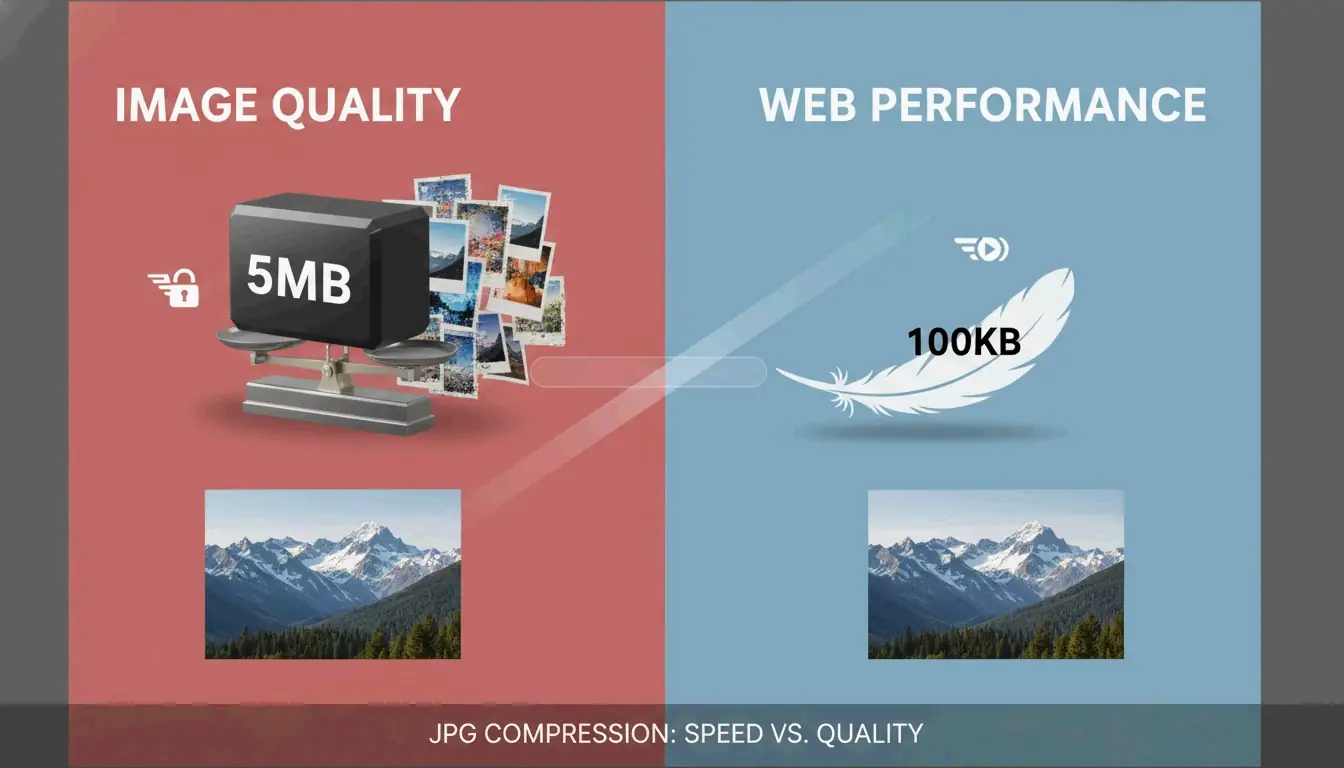
    High-resolution photos from modern smartphones and professional cameras typically range from 5MB to 10MB. Simply hitting “compress” on these files is rarely sufficient for web optimization. To reach a target size like 100KB without introducing blur or artifacts, a two-step strategy is required.

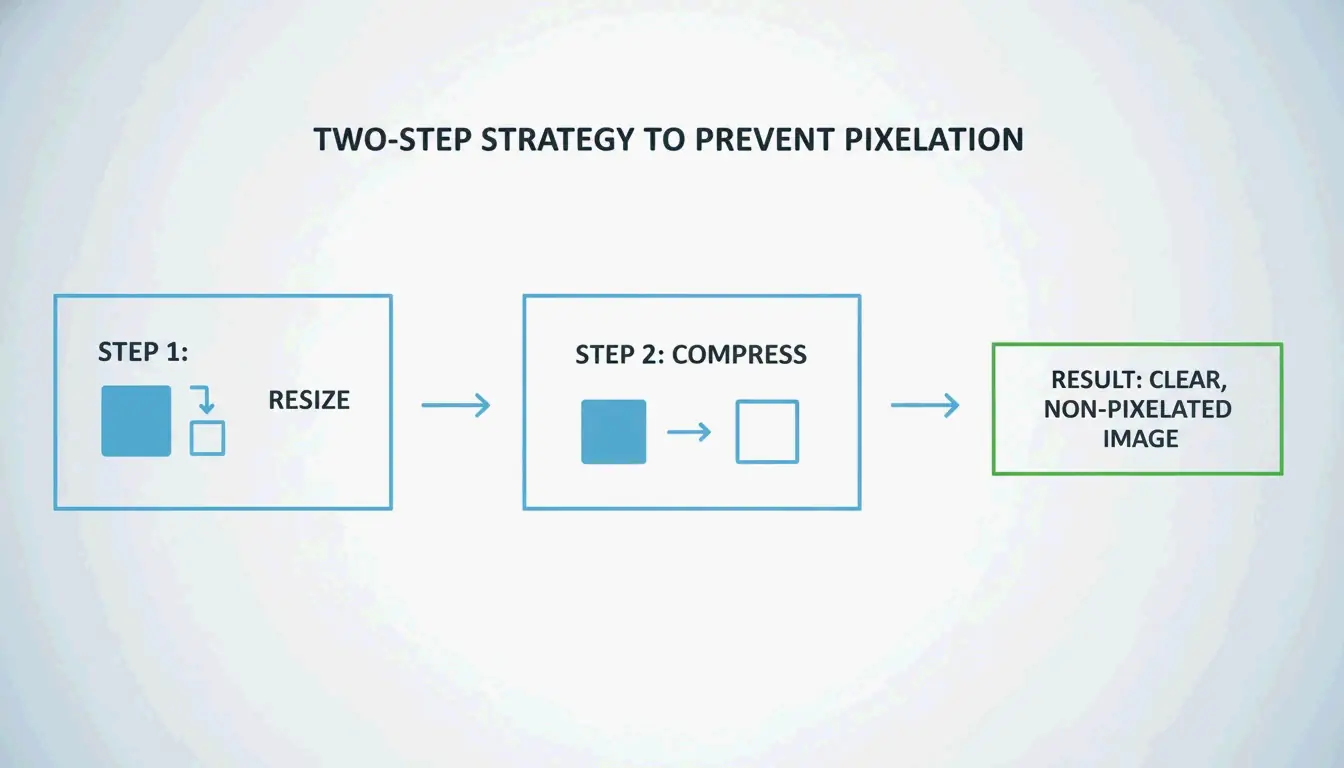
    According to ShortPixel, forcing a 2000px wide image into a 100KB file without resizing first produces visibly pixelated results. The “Double-Punch” method solves this by addressing dimensions before data.

    The 2-step process: Resize then Compress

    Step 1: Resize to Display Dimensions

    Before compressing, set the pixel dimensions to match the actual display size on your site. Common targets:

    Use Case Recommended Width
    Blog hero images 1200px – 2000px
    Thumbnails 400px – 600px
    Profile pictures 200px – 400px

    Shrinking dimensions is the fastest way to reduce file weight.

    Step 2: Apply Lossy Compression

    Once the image is at the correct size, use lossy compression to strip unnecessary data. This process modifies the image’s underlying code to remove details invisible to the human eye. ShortPixel demonstrates that combining a resize to 1200px with smart compression can shrink a 5MB photo to under 100KB — a 98% reduction — while maintaining crispness.

    Finding the Sweet Spot: The 75-85% Quality Rule

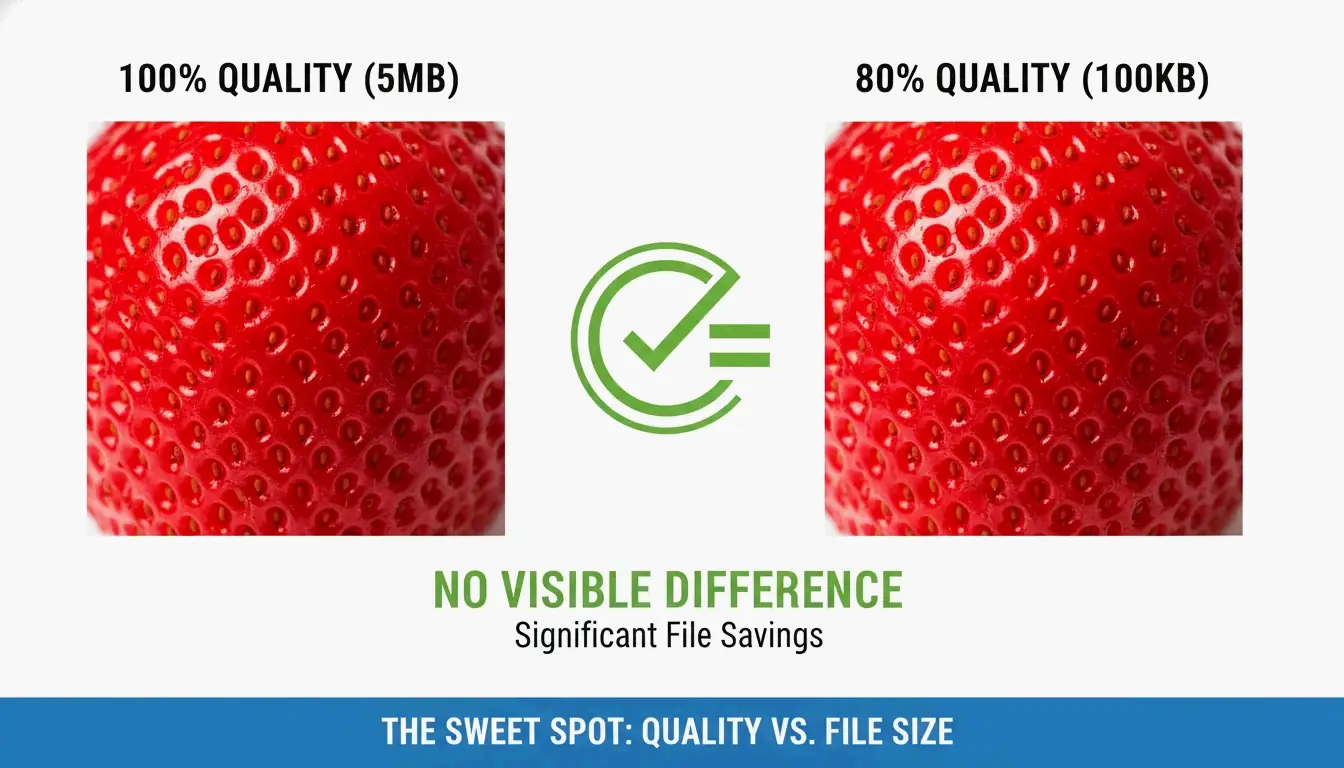
    Technical guides from GWAA identify the 75-85% quality range as the professional “sweet spot.” Within this range, file savings reach 40-70% with no perceptible difference from the original in side-by-side comparison.

    Side-by-side comparison of 100% vs. 80% quality

    Best Tools to Compress JPG Online: Comparing the Options

    The right tool depends on your priorities: privacy, speed, or batch capacity.

    Tool Processing Location Best For Privacy Level
    TinyIMG Server-side Bulk SEO optimization for Shopify/e-commerce Server-processed, then deleted
    TinyJPG Server-side Quick single-image compression Server-processed, then deleted
    CodeItBro Browser-side (HTML5 Canvas) Privacy-sensitive images Files never leave your device
    FreeToolio Browser-side (HTML5 Canvas) Local-only processing Files never leave your device
    Adobe Express Server-side Manual single-image control Standard cloud policy
    GWAA Server-side Quick web compression Secure servers, auto-delete

    GWAA processes images on secure servers and deletes them after processing. For maximum privacy, browser-side tools like CodeItBro and FreeToolio use HTML5 Canvas to compress images directly on your device.

    How to Compress JPG on Windows and Mac (No Software Needed)

    Both major operating systems include built-in compression tools that require no additional software.

    Windows Photos App

    1. Open your JPG in the Windows Photos app.
    2. Click the three-dot menu and select Resize image.
    3. Adjust the Quality slider to reduce file size.
    4. Save the new version. Windows Paint also offers percentage-based and pixel-based resizing via the “Resize” button.

    Mac Preview

    1. Open the image in Mac Preview.
    2. Navigate to Tools > Adjust Size to change dimensions.
    3. Go to File > Export to access compression options.
    4. Move the Quality slider to see the predicted file size update in real-time.

    Stripping EXIF Metadata

    A significant portion of a JPG’s file size comes from EXIF metadata — hidden information including camera settings, GPS location, and timestamps. Tools like ImageOptim for Mac or the settings within ShortPixel strip this data, saving additional kilobytes without modifying a single pixel of the actual image.

    Beyond JPEG: Should You Use WebP or AVIF in 2026?

    JPG remains the universal standard, but newer formats deliver substantially better efficiency for modern web applications.

    Format Size vs. JPEG Key Features Browser Support (2026)
    AVIF 50-60% smaller HDR support, transparency ~93%
    WebP 25-34% smaller Wide compatibility, transparency ~97%
    JPEG Baseline Universal compatibility 100%

    According to Graviton (2026), AVIF is currently the most efficient format available. WebP offers a balance of compression and compatibility, with roughly 25-34% smaller sizes than JPEG based on Google Developers research cited by TinyIMG.

    Switching to these formats directly improves Core Web Vitals, specifically the Largest Contentful Paint (LCP) score. For full compatibility in 2026, developers use the picture element to serve AVIF to modern browsers with a JPG fallback.

    Comparison of JPG vs. WebP vs. AVIF file efficiency

    The Science of Lossy Compression and Generation Loss

    Understanding compression mechanics leads to better results. JPEG uses the Discrete Cosine Transform (DCT) process, which breaks image data into frequency components. The “lossy” operation occurs during quantization, where the algorithm discards high-frequency details that human vision cannot easily detect. GWAA notes that your quality setting (1-100) directly controls these quantization tables.

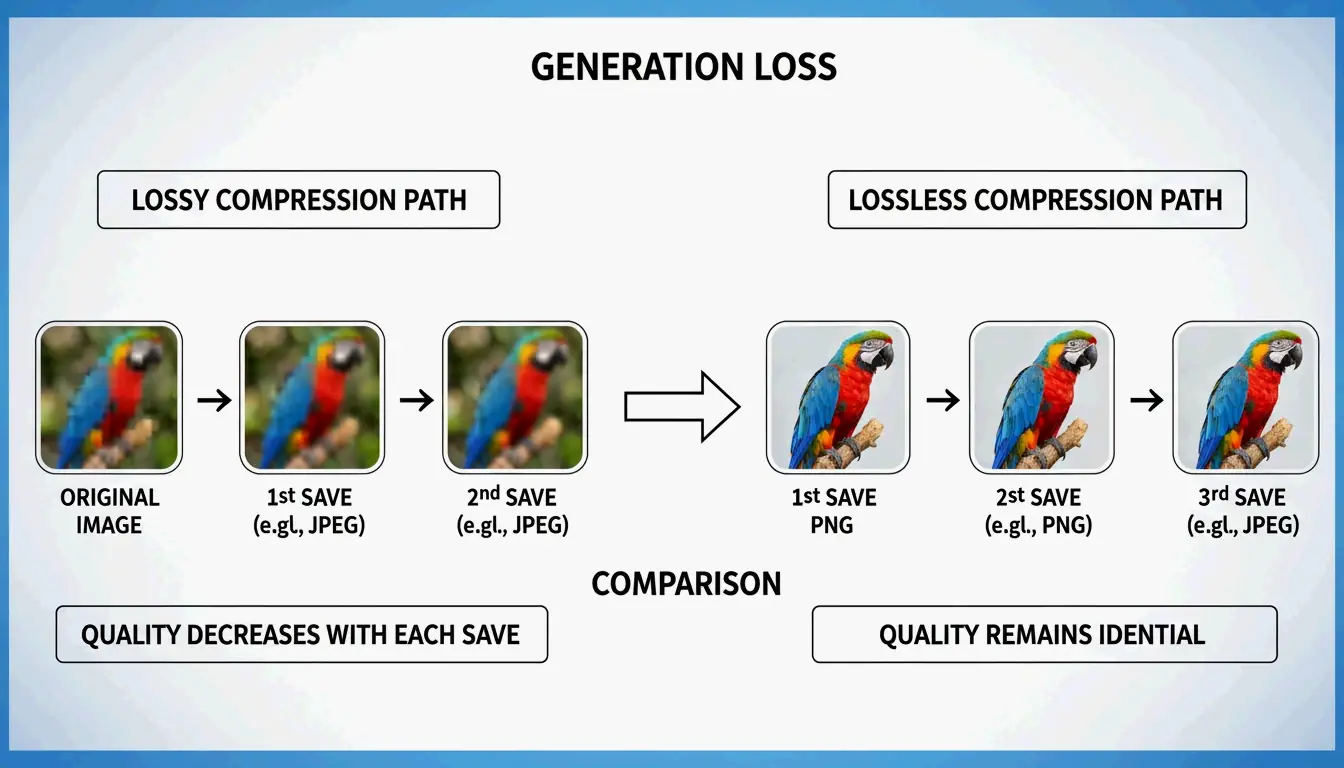
    Critical warning: Avoid recompressing already-compressed files. This causes Generation Loss — a compounding degradation where each save cycle adds new blurry artifacts and muddy textures. Always start from your original, uncompressed source file.

    Conclusion

    Mastering JPG compression in 2026 requires balancing dimensions with modern lossy algorithms. By maintaining the 75-85% quality range, resizing for your specific display requirements, and stripping hidden EXIF metadata, you can achieve fast-loading pages without sacrificing visual quality.

    Recommended workflow: Resize first, then use a tool like TinyIMG or ShortPixel for final compression and format conversion before uploading.

    FAQ

    Is 50 KB considered a small image file size for web use?

    Yes, 50 KB is an excellent target for standard blog images, thumbnails, or UI elements. Hero images can safely range between 150-200 KB. Keeping smaller assets at 50 KB ensures rapid loading and optimal Core Web Vitals performance for mobile users.

    Does compressing a JPG file multiple times destroy image quality?

    Yes. This phenomenon is known as “Generation Loss.” Because JPEG uses lossy compression, each save cycle causes the Discrete Cosine Transform (DCT) algorithm to discard additional data. Repeatedly compressing the same file will eventually produce visible artifacts, blurring, and color distortion.

    Can I compress a 5MB high-resolution photo to under 100KB without it looking blurry?

    Yes, but only if you resize the dimensions first. A 4000px image forced into a 100KB limit will appear extremely blurry due to aggressive data stripping. If you first resize to 1200px wide, a 100KB export will remain crisp and clear for web viewing.

  • How to Compress HEIC Files Without Losing Quality (2026 Guide)

    How to Compress HEIC Files Without Losing Quality (2026 Guide)

    To compress HEIC files in 2026, set the quality slider to 80–85% — the sweet spot that typically cuts file sizes by 40–50% with no visible quality loss. Use browser-based tools like ConvertMinify that process images locally via WebAssembly, keeping your photos private. For broader compatibility, convert to WebP or the resurgent JPEG XL, which is approximately 20% more efficient than standard JPEG.

    The 80–85% Sweet Spot: Why It Works

    HEIC has been Apple’s default since iOS 11 (2017) and is roughly 50% more efficient than JPEG — storing twice the photos in the same space, according to ConvertMinify. But as phone cameras push past 48MP, even HEIC files balloon to 5–8MB.

    Quality Setting File Size Reduction Visual Impact
    90–100% Minimal (10–20%) No visible difference
    80–85% 40–50% Indistinguishable to the naked eye
    60–79% 50–70% Slight softening in fine details
    Below 60% 70%+ Visible artifacts

    Data from ConvertMinify confirms that the 80–85% range consistently halves file size while preserving visual fidelity.

    A simple comparison showing the 80-85% quality "Sweet Spot" balance

    Step-by-Step: Compress HEIC Locally in Your Browser

    1. Pick a local tool — ConvertMinify or FreeToolio process everything in-browser via WebAssembly; your files never leave your device
    2. Upload — Drag HEIC files into the tool; it shows current dimensions and size
    3. Set quality to 80–85% — Optionally resize (2048px width is a common social media standard)
    4. Strip EXIF metadata — Saves an additional 50–100KB per photo and removes GPS coordinates
    5. Download — Save optimized files locally

    HEVC (H.265) and 10-Bit Color: The Technical Edge

    HEIC’s performance comes from the HEVC (H.265) video codec, which uses spatial prediction and flexible block sizes to organize image data far more efficiently than JPEG.

    Property HEIC JPEG
    Color depth 10-bit (1 billion+ colors) 8-bit (16.7 million colors)
    Typical iPhone 15 Pro 48MP 5–8 MB 12–20 MB
    Efficiency vs. JPEG ~50% smaller Baseline

    When compressing or converting HEIC to an 8-bit format, you lose those smooth gradients captured by high-end sensors. To preserve them, use tools that support high-depth output or choose JPEG XL as your target format.

    Format Comparison: HEIC vs. WebP vs. AVIF vs. JPEG XL

    Format Compression Efficiency Transparency Browser Support (2026) Best For
    HEIC 50% smaller than JPEG No Limited (native on Apple) iPhone photo storage
    WebP 25–34% smaller than JPEG Yes 97%+ General web images
    AVIF ~50% smaller than JPEG Yes 92%+ Maximum compression
    JPEG XL ~20% better than HEIC Yes Chromium v145+ High-quality archives, HDR
    JPEG Baseline No Universal Maximum compatibility

    The 2026 story is JPEG XL’s comeback. Added to Chromium v145 in late 2025, it outperforms HEIC, AVIF, and WebP in both speed and quality — making it the new gold standard for archives.

    Compatibility Warning

    HEIC caused real problems when the College Board rejected HEIC uploads from iPhones during AP exam submissions. Converting to a web-standard format is often a necessary step.

    Optimal Dimensions for Common Use Cases

    Use Case Recommended Dimensions Target File Size
    Instagram Post 1080 × 1350 px 200–500 KB
    Website Hero 1920 × 1080 px 300–800 KB
    Email Attachment 1600 × 1200 px 200–600 KB
    Full Archive Original resolution 1.5–3.0 MB

    Windows and Android: Solving HEIC Compatibility

    Windows often shows blank icons for HEIC files. The fix:

    1. Install HEIF Image Extensions (free, from Microsoft Store)
    2. Install HEVC Video Extensions (may require a small licensing fee)

    For batch processing, tools like Zipic (Mac) or browser-based batch converters handle hundreds of files at once.

    To stop using HEIC on iPhone: Settings → Camera → Formats → “Most Compatible” forces all new photos to save as JPEG.

    A simple 3-step path to change iPhone camera format settings

    Conclusion

    Compressing HEIC at 80–85% quality cuts files by 40–50% with no visible loss. Use privacy-first browser tools that process locally. For web use, convert to WebP or JPEG XL for maximum efficiency. On Windows, install the HEIF extensions or use free third-party viewers. Always strip EXIF data before sharing publicly.

    FAQ

    Does compressing HEIC to JPEG result in quality loss?

    Yes — it is a lossy-to-lossy conversion. You lose 10-bit color depth and may introduce compression artifacts. ConvertIMG recommends keeping JPEG quality at 80% or higher during conversion to minimize visible degradation.

    How can I strip GPS metadata from HEIC files?

    Use compression tools with “EXIF-stripping” or “Metadata removal” toggles. This saves 50–100KB per file. ConvertMinify considers this essential for privacy when sharing photos on social media or public forums.

    Why does Windows require a paid extension for HEIC?

    The HEVC (H.265) codec has licensing fees. Microsoft provides HEIF Image Extensions for free, but the HEVC decoder is often a paid add-on. iformat.io recommends free alternatives like VLC or browser-based compressors to avoid these fees.

  • Best Locale Converter Online: BCP 47 and Currency Standards Guide (2026)

    Best Locale Converter Online: BCP 47 and Currency Standards Guide (2026)

    A locale converter online transforms language tags and regional settings into standardized formats like IETF BCP 47. It controls how dates, numbers, and currency appear to users — switching from en-US (MM/DD/YYYY, $) to en-GB (DD/MM/YYYY, £) automatically.

    BCP 47 Language Tags: The Standard Structure

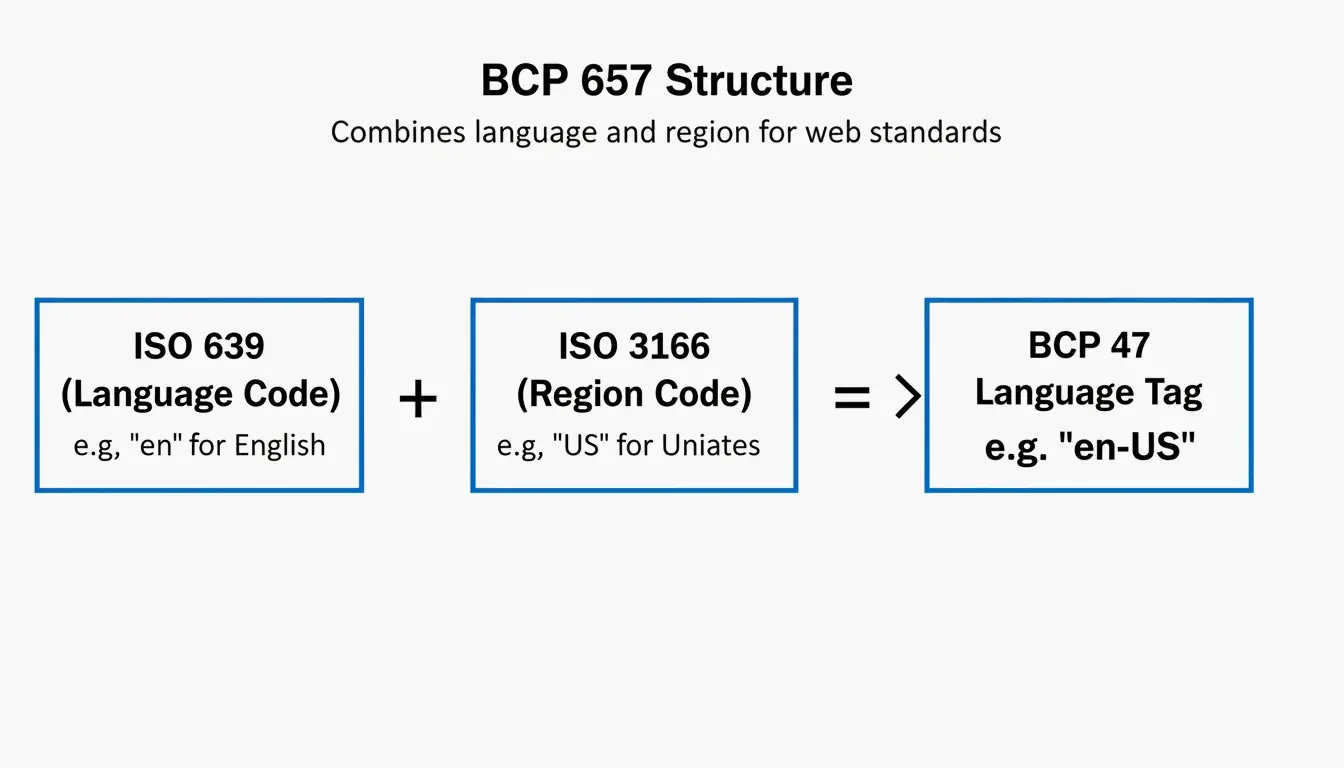
    Every locale tag combines two ISO codes:

    Component Standard Example Meaning
    Language ISO 639 en, ja, zh Language identifier
    Region ISO 3166 US, GB, JP Country/territory
    Script (optional) ISO 15924 Hant, Hans Writing system
    Variant (optional) IANA valencia Dialect or variant

    Full tag example: zh-Hant-TW = Chinese + Traditional script + Taiwan

    According to Java Documentation, a Locale object is a “mechanism for identifying objects” — not a container for data itself.

    BCP 47 language tag structure breakdown

    Language Tag Matching (RFC 4647)

    Method Behavior Use Case
    Filtering Returns all matching tags Content negotiation
    Lookup Returns single best match User preference fallback

    How Locale Changes Date, Number, and Currency Formats

    Locale Date Format Number Format Currency
    en-US MM/DD/YYYY 1,234.56 $1,234.56
    en-GB DD/MM/YYYY 1,234.56 £1,234.56
    de-DE DD.MM.YYYY 1.234,56 1.234,56 €
    ja-JP YYYY/MM/DD 1,234 ¥1,234
    zh-Hans-CN YYYY-MM-DD 1,234.56 ¥1,234.56

    Unicode Locale Extensions

    Advanced locale tags use u- extensions for granular control:

    Extension Example Effect
    u-ca-japanese en-US-u-ca-japanese Japanese Imperial calendar
    u-nu-thai th-TH-u-nu-thai Thai digit rendering
    u-cf-standard en-US-u-cf-standard Standard currency format

    Without BCP 47 compliance, systems may confuse zh-Hant (Traditional Chinese) with zh-Hans (Simplified Chinese), producing unreadable content.

    Currency Conversion: Mid-Market Exchange Rate

    When locale conversion handles money, accuracy depends on the exchange rate source.

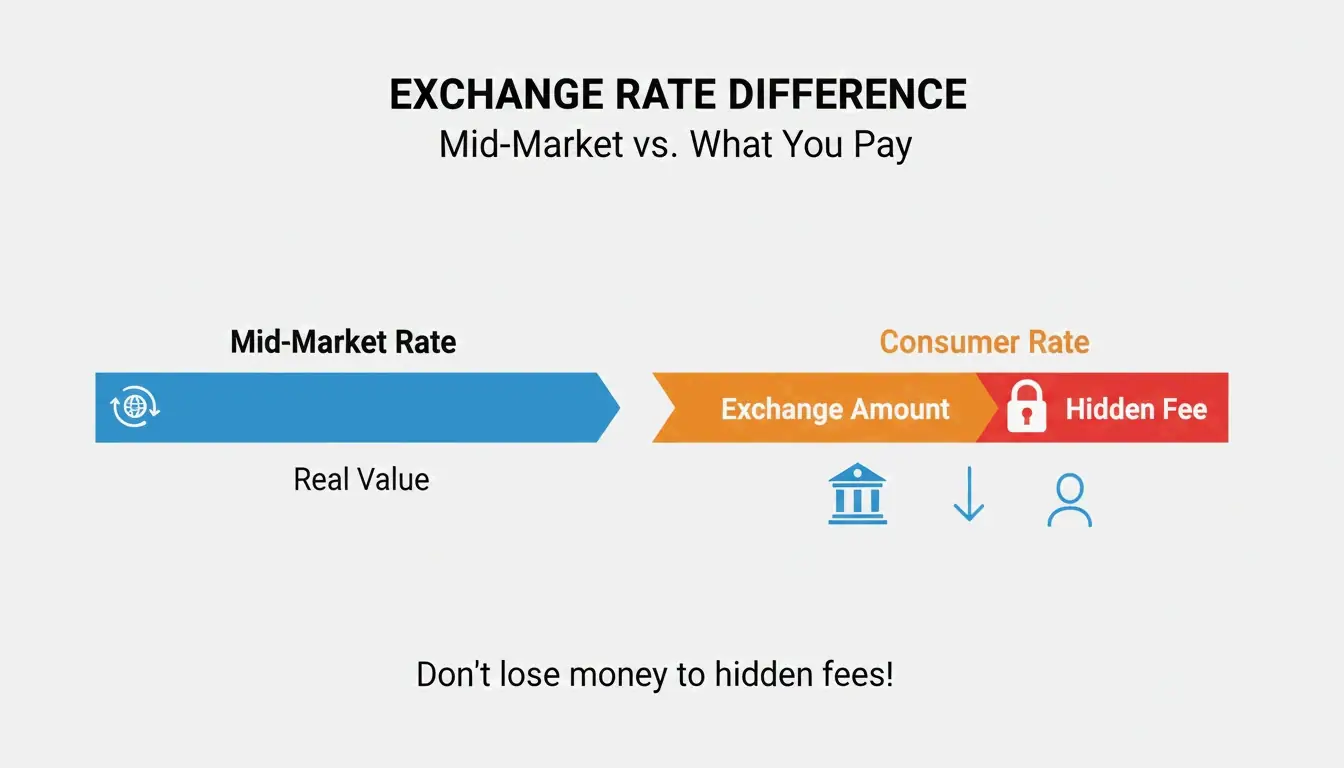
    Rate Type What It Is Who Gets It
    Mid-market rate Midpoint between buy/sell prices Interbank traders
    Consumer rate Mid-market + hidden markup Most individuals and businesses

    Wise emphasizes using the mid-market rate for transparency. OANDA tracks 31+ years of data across 38,000+ currency pairs for enterprise accuracy.

    Mid-market rate vs consumer rate comparison

    Developer Tools: Java Locale and BCP 47

    // Convert Java Locale to BCP 47 tag
    Locale locale = Locale.US;
    String tag = locale.toLanguageTag(); // Returns "en-US"
    
    // Create Locale from BCP 47 tag
    Locale fromTag = Locale.forLanguageTag("zh-Hant-TW");
    

    Java Documentation requires toLanguageTag() for modern web API compatibility.

    Enterprise Localization: Translation and Privacy

    PII Anonymization

    When creating localized test datasets, businesses must protect Personally Identifiable Information (PII). Tools like those shared by Rekhu Chinnarathod automatically mask Social Security numbers, credit card details, and other sensitive data — ensuring GDPR, HIPAA, and DPDP compliance.

    Prompt-to-Dataset Generation

    Rekhu Chinnarathod demonstrates AI tools that generate structured multi-locale datasets (JSON, CSV, SQL) from plain English descriptions, automatically respecting regional formats for US, UK, and India.

    Community Impact

    Queens Public Library uses LanguageLine to offer interpretation in 190+ languages, connecting residents with services in their preferred locale.

    Conclusion

    A locale converter does three things: standardize language tags via BCP 47, format data (dates, numbers, currency) by region, and enable accurate currency conversion using mid-market rates. For developers, integrate BCP 47-compliant APIs. For business users, always verify your converter uses the mid-market exchange rate.

    FAQ

    What is the difference between a language tag and a locale?

    A language tag (e.g., en) identifies only the language. A locale (e.g., en-US) adds regional rules for formatting dates, currency symbols, and cultural preferences specific to a country.

    How do I convert a Java Locale to a BCP 47 tag?

    Use Locale.toLanguageTag() — it converts the Locale object into an IETF BCP 47-compliant string. For reverse conversion, use Locale.forLanguageTag("en-US").

    Why do different currency converters show different rates?

    Some tools show the mid-market rate (transparent), while others embed a hidden markup. Rate freshness and data source (OANDA vs. a specific bank) also cause variation. Always check if your converter uses the mid-market rate as the baseline.

  • What Is a Data Matrix 2D Barcode? A Technical Guide for 2026

    What Is a Data Matrix 2D Barcode? A Technical Guide for 2026

    If you’ve ever looked closely at a tiny electronic component, a pharmaceutical package, or an aerospace part, you might have spotted a small square pattern of black and white cells. That’s a Data Matrix 2D barcode — and unlike the QR codes you scan with your phone, this one is built for the industrial world.

    Defined by ISO/IEC 16022 and using ECC200 error correction, Data Matrix is the go-to standard for tracking small items across global supply chains. As of 2026, it’s the required format for pharmaceutical serialization and Direct Part Marking on metal and plastic components.

    This guide covers how Data Matrix works, when to choose it over a QR code, what the GS1 Sunrise 2027 deadline means for your business, and even how to generate one programmatically.

    Understanding the Data Matrix 2D Barcode: Definition and Core Principles

    A Data Matrix is a grid of black and white “cells” (modules) arranged in a square or rectangle. Unlike traditional 1D barcodes that store data in a single horizontal line, Data Matrix encodes information in both dimensions — horizontally and vertically. This 2D approach lets it pack significantly more data into a much smaller footprint.

    According to Wikipedia, a single Data Matrix symbol can hold:
    – Up to 2,335 alphanumeric characters
    – Up to 3,116 numeric digits

    The technology is governed by the ISO/IEC 16022 standard, which is in the public domain — meaning anyone can implement it without licensing fees. Its ability to encode complex data into a space smaller than 1 mm² has made it indispensable in electronics manufacturing, aerospace, and medical device tracking.

    The Anatomy of a Data Matrix Symbol

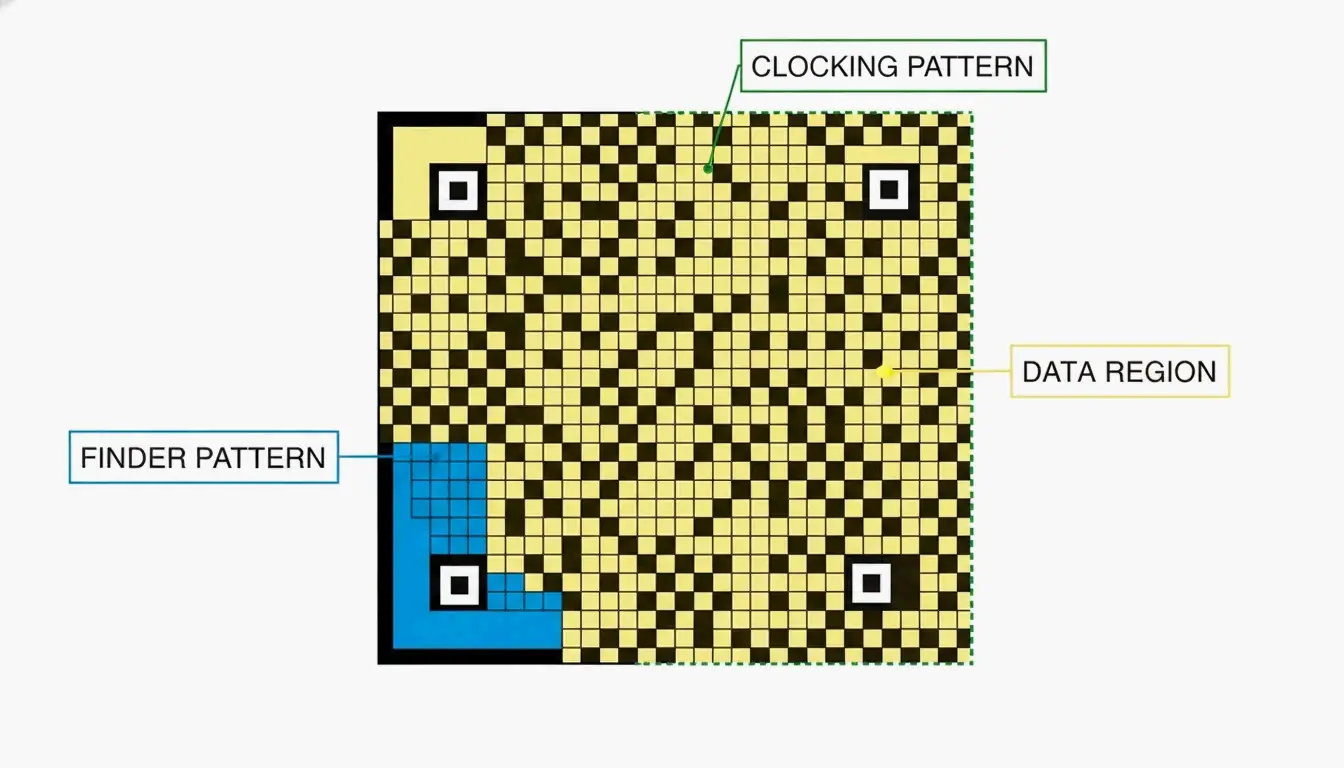
    Every Data Matrix code has three structural components that tell a scanner how to read it:

    Component What It Does
    Finder Pattern An “L” shape formed by two solid borders. Helps the scanner locate the code and determine its orientation.
    Clocking Pattern The two borders opposite the “L,” made of alternating dark and light cells. Tells the reader the grid’s row/column count.
    Data Region The interior area where actual information is stored. The grid grows as more data is added (10×10 up to 144×144 modules).

    A minimalist diagram identifying the three structural components of a Data Matrix code.

    Why ECC200 Is the Industry Standard for Error Correction

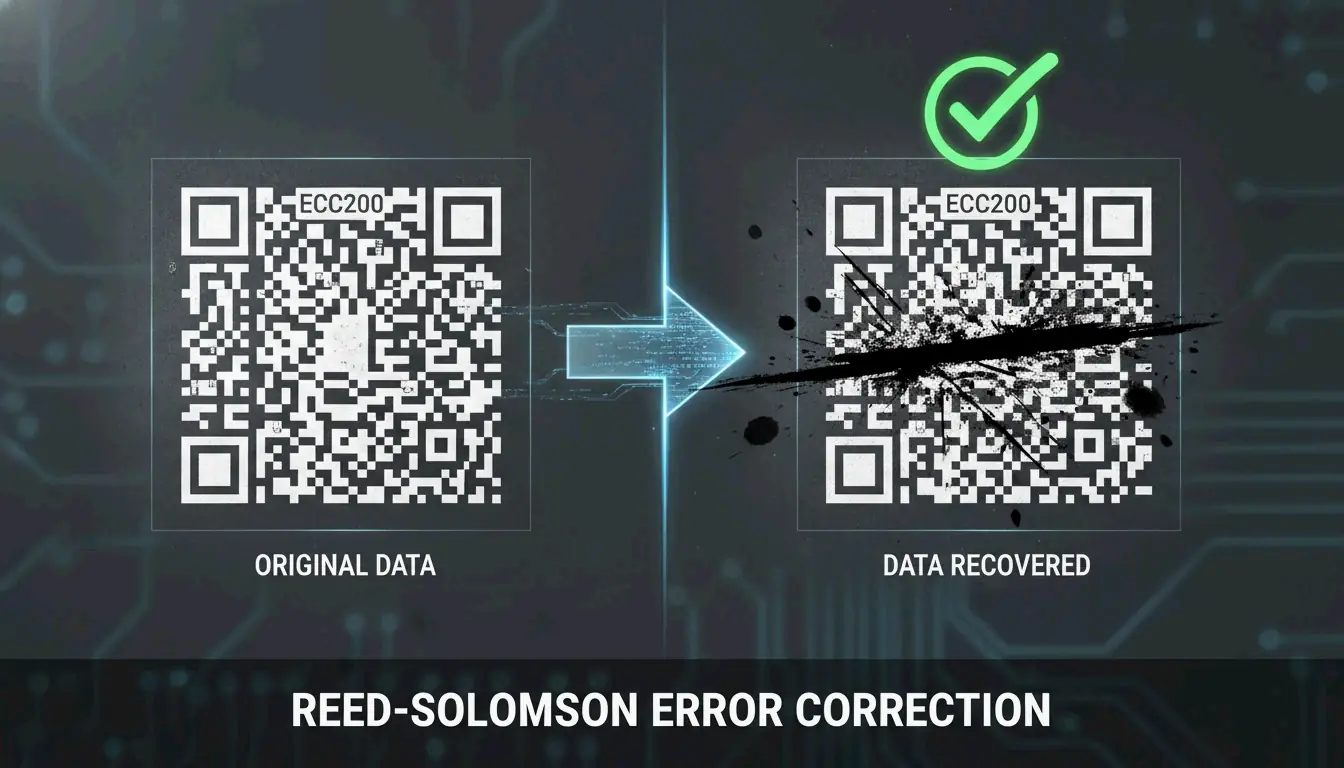
    The reliability of modern Data Matrix codes comes from ECC200, which uses Reed-Solomon error correction to add redundant data to each symbol. This backup information allows a scanner to reconstruct the original message even when the code is partially damaged.

    How much damage can it survive? Wikipedia notes that ECC200 can typically be read even when up to 30% of the symbol is damaged — as long as the “L” finder pattern remains intact.

    This is a significant upgrade over older error correction versions (ECC000–ECC140), which are now largely retired and only appear in “closed” systems where the same organization handles both printing and scanning.

    Feature ECC200 (Current) ECC000–140 (Legacy)
    Error tolerance Up to 30% damage Varies, generally lower
    Standard today Yes — global standard Only in closed systems
    Data capacity Up to 3,116 digits Lower

    A visual demonstration of error correction: a partially obscured barcode still being successfully scanned.

    Data Matrix vs. QR Code: Which 2D Symbology Should You Choose?

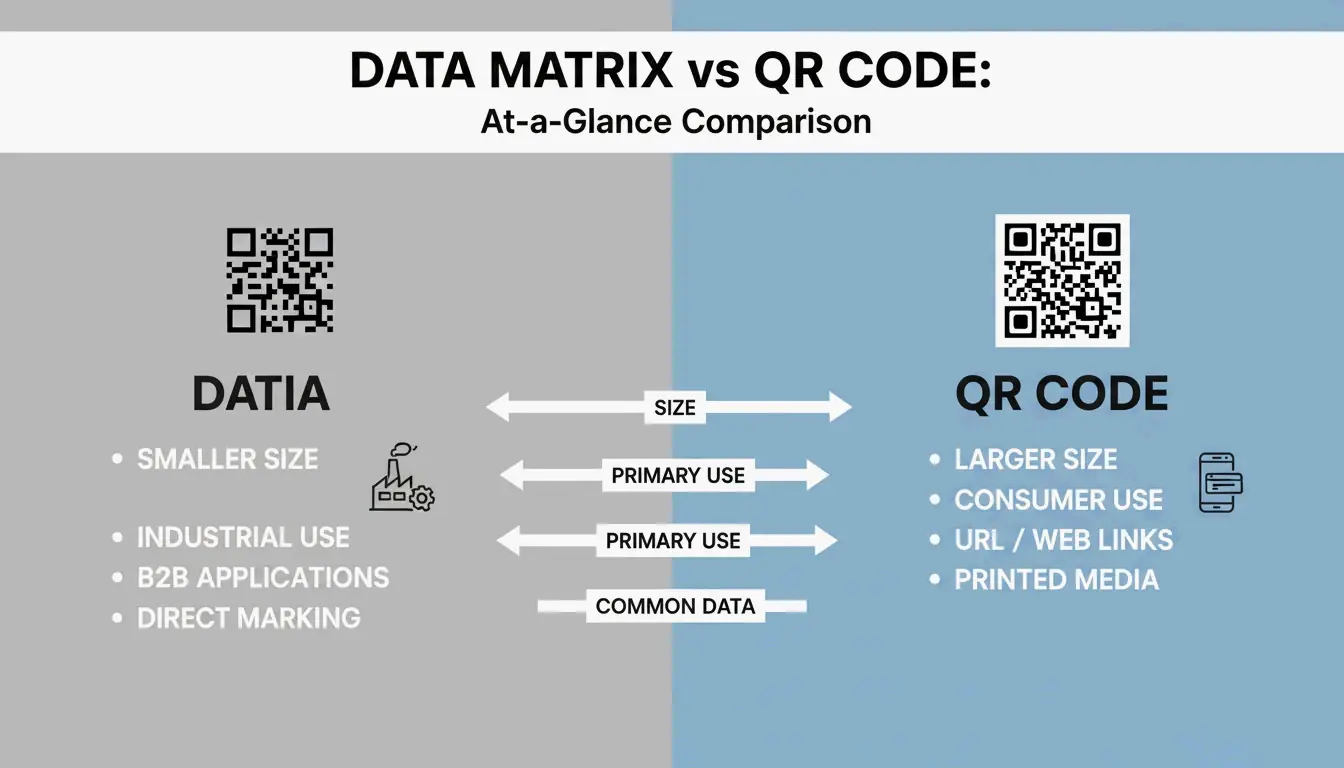
    Both are 2D barcodes, but they’re built for different purposes. Data Matrix serves industrial B2B applications; QR Codes are designed for consumer-facing marketing and engagement.

    When Data Matrix Is the Right Choice

    • Small parts and tight spaces — Data Matrix modules can be as small as 0.1 mm, making the overall code much smaller than a QR Code carrying the same data (Alsace Techniques Etiquetage).
    • Pharmaceutical serialization — Legally required for drug tracking in many markets.
    • Direct Part Marking (DPM) — Etched directly onto metal or plastic parts for permanent identification.

    When QR Codes Make More Sense

    • Consumer engagement — Almost any smartphone (iOS 11+ and Android 8+) can scan QR codes natively, no special app required.
    • URLs and marketing — QR Codes support branding elements like logos in the center.
    • General public use — While Data Matrix can technically hold a URL, most consumers don’t have software that reads it.

    A side-by-side scale comparison between a Data Matrix and a QR Code containing the same data.

    2026 Update: GS1 DataMatrix and the Sunrise 2027 Deadline

    If you work in logistics or healthcare, GS1 DataMatrix is likely already on your radar. It’s important to understand that a standard Data Matrix and a GS1 DataMatrix aren’t identical — the GS1 version embeds a hidden “Function 1” (FNC1) character at the start to signal that the data follows GS1 global standards.

    Two major regulatory forces are driving adoption:

    1. DSCSA (Drug Supply Chain Security Act) — In the U.S., GS1 DataMatrix is required for pharmaceutical tracking.
    2. GS1 Sunrise 2027 — A global initiative to ensure all Point of Sale (POS) systems can scan 2D barcodes by 2027 (GS1 Sweden).

    Sunrise 2027 Preparation Checklist

    1. Hardware audit — Verify your scanners are imagers, not older laser models. Laser scanners cannot read 2D codes.
    2. Software update — Ensure your inventory systems recognize GS1-specific fields like Expiration Dates and Batch Numbers.
    3. Label redesign — Begin transitioning from 1D UPC barcodes to GS1 DataMatrix or GS1 QR Codes to carry richer product data.

    Industrial Implementation: Direct Part Marking (DPM) and Verification

    For parts that need to be tracked for years — or decades — companies use Direct Part Marking (DPM). Instead of printing a label, the Data Matrix is etched directly into the metal or plastic surface using lasers or chemical etching. The mark survives heat, chemicals, abrasion, and heavy wear.

    The accuracy is remarkable. BarcodeFactory reports that barcode scanners make a substitution error roughly once in every 15,000 to 36 trillion characters — making Data Matrix one of the most reliable identification methods available.

    To maintain this accuracy in production, businesses use ISO/IEC 15415 verification, which grades codes on a scale from A (best) to F (fail). For most industrial applications, a grade of C or better is required to ensure the code can be read reliably by different scanners across the supply chain.

    Developer’s Corner: Generating Data Matrix in C#/.NET

    If you’re building barcode generation into your own software, libraries like IronBarcode make it straightforward. Iron Software demonstrates that creating a compliant ECC200 symbol takes just a few lines:

    using IronBarCode;
    
    // Generate a Data Matrix barcode
    var myBarcode = BarcodeWriter.CreateBarcode(
        "GS1-GTIN-12345",
        BarcodeWriterEncoding.DataMatrix
    );
    
    // Customize size and save
    myBarcode.ResizeTo(250, 250);
    myBarcode.SaveAsPng("datamatrix-label.png");
    

    Tip for 2026: Always leave a Quiet Zone (blank border) of at least 1–2 module widths around your code. Without it, scanners may misread the edges.

    Conclusion

    The Data Matrix 2D barcode is the workhorse of industrial and healthcare identification — small enough to fit on a pill bottle, durable enough to survive laser etching onto metal, and reliable enough to remain readable even when 30% damaged.

    With the GS1 Sunrise 2027 deadline approaching, now is the time to audit your scanning hardware, update your software to handle GS1 fields, and start transitioning your labels. Whether you’re a supply chain manager or a developer building the next barcode tool, understanding Data Matrix is no longer optional — it’s a competitive advantage.

    FAQ

    Can a standard smartphone camera app read a Data Matrix code?

    Most iPhone and Android cameras default to QR code scanning. For Data Matrix, you’ll typically need a third-party app or a specific “business mode.” For professional or industrial environments, dedicated scanning hardware or specialized apps are strongly recommended.

    What is the maximum data capacity of a Data Matrix ECC200 symbol?

    An ECC200 symbol can hold up to 3,116 numeric digits or 2,335 alphanumeric characters. The physical size of the code grows as you add more data, reaching a maximum grid of 144×144 modules.

    What is the difference between a standard Data Matrix and a GS1 DataMatrix?

    A GS1 DataMatrix begins with a hidden “Function 1” (FNC1) character that tells the scanner the data follows GS1 standards — using specific Application Identifiers for fields like Expiration Date, Batch Number, or GTIN. This is required for pharmaceutical and food safety regulations in most markets.

  • The Ultimate Guide to Lossless Image Compression: Maximize Quality and Performance in 2026

    The Ultimate Guide to Lossless Image Compression: Maximize Quality and Performance in 2026

    As of March 2026, lossless image compression reduces file sizes by 5-30% — and up to 50% with modern formats like AVIF and WebP — by removing redundant data without sacrificing a single pixel. Unlike lossy methods, lossless compression ensures bit-for-bit reconstruction of the original image, making it essential for logos, text-heavy graphics, and professional workflows that demand pixel-perfect fidelity and optimized Core Web Vitals.

    What Is Lossless Image Compression? Understanding the Mechanics

    Lossless image compression is a technical standard that shrinks a digital file while allowing exact reconstruction of the original data. According to Wikipedia, this works by eliminating statistical redundancy rather than discarding visual details.

    The core difference is mathematical. Lossy formats like JPEG use the Discrete Cosine Transform (DCT) to approximate pixel values and discard fine details. Lossless compression preserves every R, G, B, and alpha channel value exactly as recorded in the source. This prevents Generation Loss — the progressive quality degradation that occurs when a file is repeatedly opened, edited, and saved in a lossy format. Convertio reports that JPEG quality can visibly degrade after just 3-5 save cycles, while lossless files remain identical regardless of how many times they are saved.

    Comparison of Lossy (data loss) vs. Lossless (data preservation) after multiple saves

    The Science of DEFLATE: How PNGs Stay Sharp

    The most common lossless engine on the web is the DEFLATE algorithm, which powers the PNG format. As Pixotter explains, this operates in two stages:

    1. Filtering: Converts raw pixels into “residuals” (differences between neighboring pixels).
    2. Compression: Packs residuals using LZ77 dictionary matching and Huffman coding.

    This two-stage process is why sharp edges and solid colors in logos remain perfectly crisp in PNG format.

    Lossless WebP vs. PNG: The 2026 Standard for Web Performance

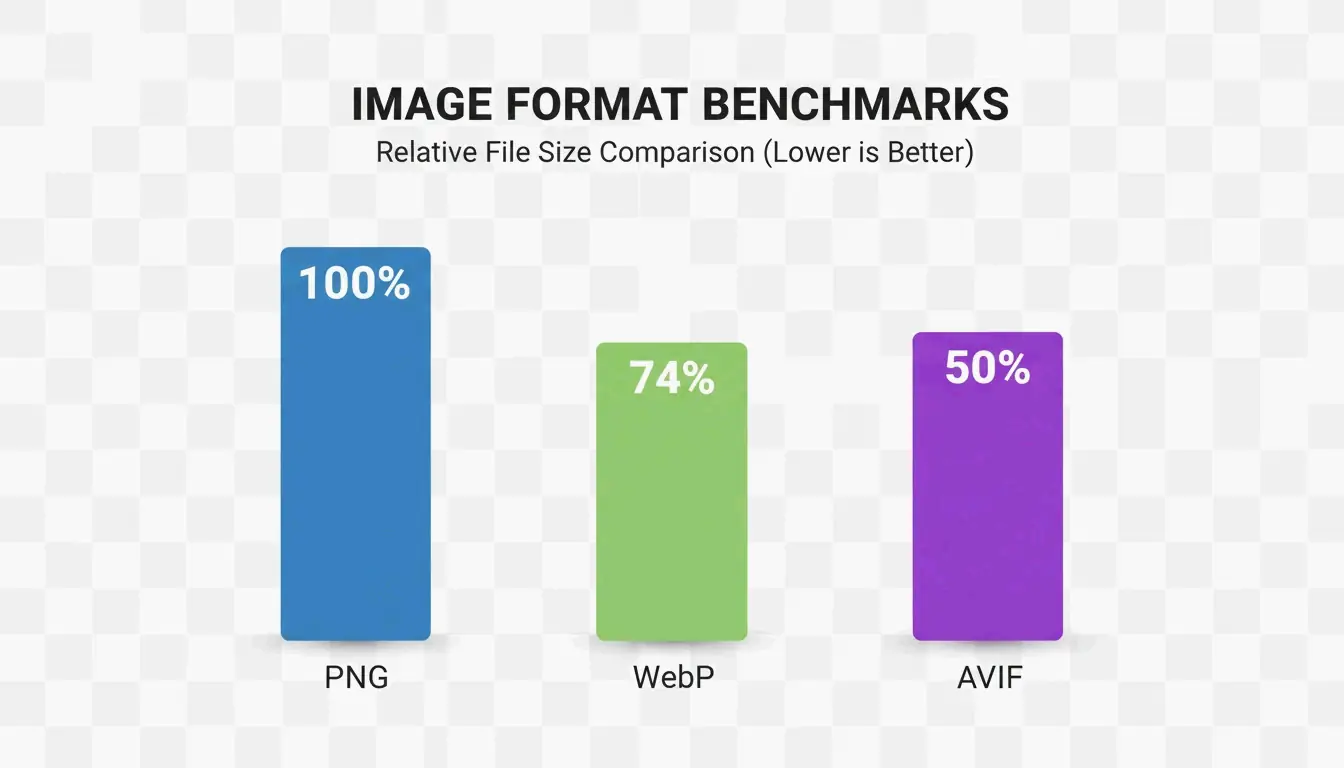
    By 2026, Lossless WebP has largely replaced PNG as the default choice for web graphics. Benchmarks cited by MeloTools show that Lossless WebP produces files approximately 26% smaller than PNGs while maintaining identical pixel-perfect quality.

    Format Compression Ratio Transparency Browser Support (2026) Best Use Case
    PNG Baseline Full alpha 100% Legacy compatibility
    Lossless WebP ~26% smaller than PNG Full alpha 97% Web graphics, logos
    AVIF ~50% smaller than PNG Full alpha 93-95% Maximum compression

    The shift toward WebP is driven by Core Web Vitals targets, specifically Largest Contentful Paint (LCP). Smaller files mean hero images and UI elements load faster, directly improving search rankings. Resizo confirms that switching from PNG to Lossless WebP is the fastest way to save bandwidth without any visible quality loss.

    Is AVIF the Future of Lossless Compression?

    AVIF represents the next efficiency tier. It uses the advanced AV1 encoder to achieve superior compression ratios. According to MeloTools, AVIF can cut total payload sizes by 50% compared to older formats. One case study documented a 73% reduction in total page weight simply by migrating to AVIF and WebP.

    Bar chart comparing file size savings across PNG, WebP, and AVIF

    The trade-off is encoding speed. Data from Pixotter shows that AVIF encoding can be 47x slower than WebP or JPEG. For most production sites, the bandwidth savings justify the processing time. The recommended 2026 approach: serve AVIF to the 93-95% of browsers that support it, with WebP or PNG as a fallback.

    The Decision Matrix: When to Choose Lossless vs. Visually Lossless

    Image Type Recommended Format Quality Setting Rationale
    Logos and UI Graphics Lossless WebP or PNG 100% Prevents ringing artifacts on sharp edges
    Hero Photography Lossy WebP or AVIF 80-85% Visually identical, 10-18x smaller
    Archives / Medical / Legal True Lossless PNG 100% Every bit must be preserved
    Mixed-Content Sites Lossy at 80% quality 80% Sweet spot for quality and size

    Convertio reports that a 36 MB raw image can compress to a 2-4 MB JPEG at quality 85 with no perceptible difference. Additionally, removing EXIF metadata (GPS, camera info) saves 10-25 KB per image without affecting visual quality, as noted by MeloTools.

    Local Tools and Privacy: Compressing Without Data Leaks

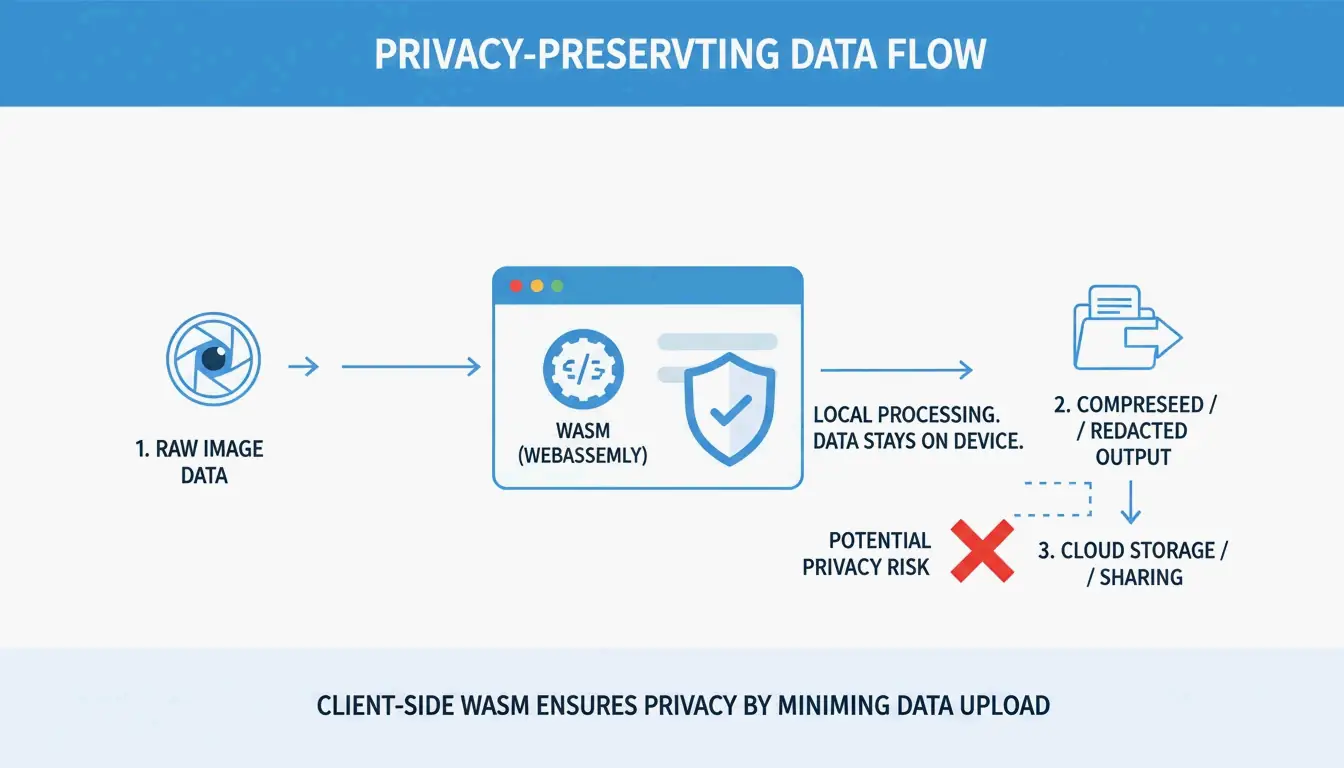
    In high-security fields like healthcare and law, privacy is as critical as file size. Many online compressors upload files to remote servers, creating potential GDPR or HIPAA exposure. MeloTools and Resizo recommend browser-based local processing via WASM. With this method, compression happens entirely in your computer’s memory — the image never leaves your device.

    3-step visualization of local vs. cloud processing for privacy

    Privacy verification test: Open the tool, then disable Wi-Fi. If it continues to function, it uses WASM or HTML5 Canvas and is safe for sensitive documents.

    Conclusion

    In 2026, lossless image compression extends well beyond PNG. WebP and AVIF are now essential for balancing pixel-perfect quality with modern web performance. While PNG remains a reliable fallback, newer formats deliver equivalent quality with significantly less data.

    Actionable steps:

    1. Audit your current image assets.
    2. Migrate sharp UI elements and logos to Lossless WebP for ~26% file size savings.
    3. Use AVIF with proper fallbacks for hero images to boost LCP scores.
    4. Adopt local, browser-based compression tools to protect both performance and privacy.

    FAQ

    Can I convert a lossy JPEG back to a lossless PNG to restore its original quality?

    No. Once data is discarded during lossy compression (JPEG), it is permanently lost. Converting a JPEG to PNG will prevent further quality loss during future saves, but it cannot repair existing artifacts or reconstruct the original pixels that were removed by the JPEG algorithm.

  • Master PromptKit iOS: From Panic’s SSH Client to AI-Powered Vibe Coding

    Master PromptKit iOS: From Panic’s SSH Client to AI-Powered Vibe Coding

    PromptKit iOS represents a dual frontier in mobile development: professional remote server management through Panic’s Prompt 3 and the emerging “vibe coding” workflow powered by AI. Whether the task is managing backend infrastructure through SSH terminals or generating Swift code via natural language with Claude 3.5 Sonnet, iOS has become a primary platform for high-speed application deployment in 2026.

    What is Prompt by Panic? The Gold Standard for iOS SSH Terminals

    Prompt by Panic (version 3) is widely regarded as the premium terminal emulator for iPhone and iPad. It is designed for developers who need desktop-grade SSH capabilities on mobile devices. For engineers who operate in a mobile-first workflow, it provides a bridge that enables server infrastructure management with the same responsiveness expected from a macOS terminal.

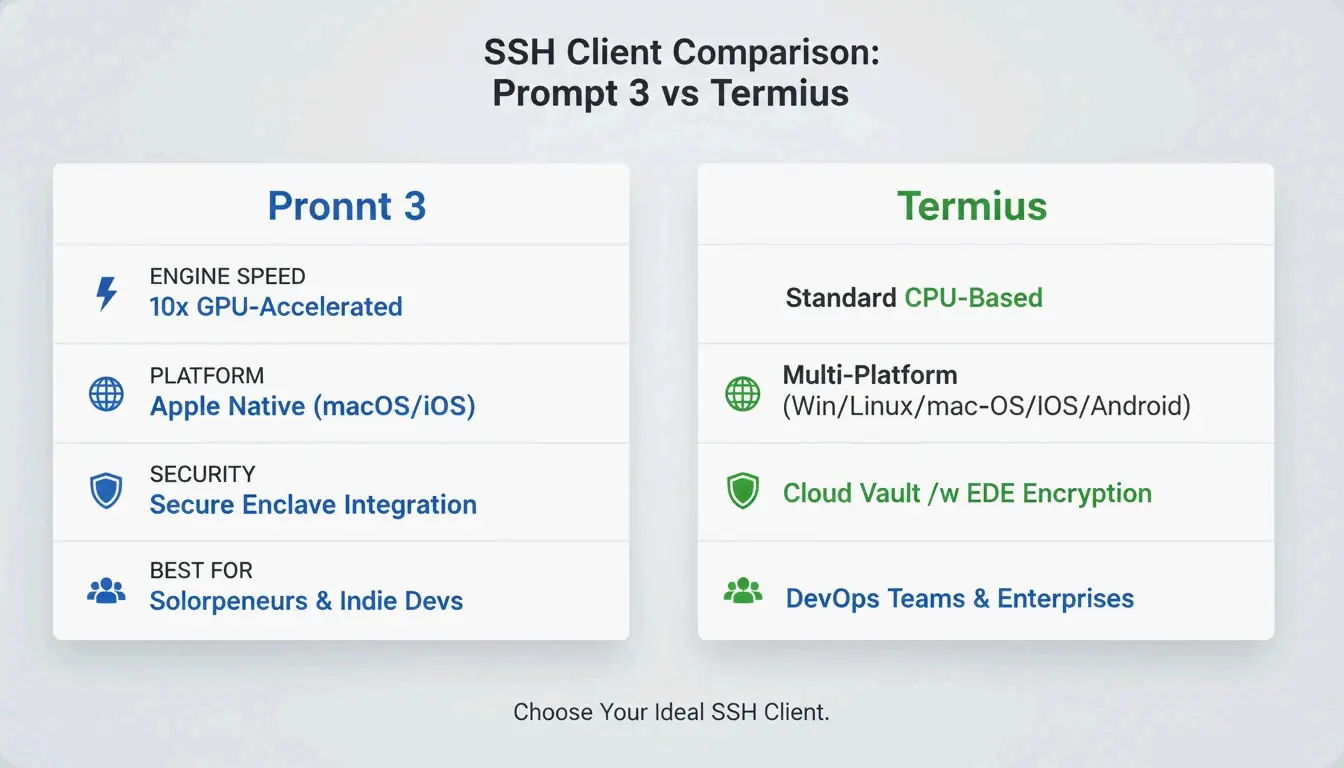
    According to AppsTorrent, the text engine in Prompt 3 is 10x faster than previous versions. It uses GPU acceleration to handle large log files and complex terminal output without lag, and integrates with the iOS Secure Enclave for FaceID and TouchID authentication while keeping private keys hardware-encrypted.

    Key features that define the Prompt 3 experience:

    • Panic Sync: Keeps servers, passwords, and private keys in sync across iOS and macOS.
    • Clips: A library for saving frequent commands (such as sudo systemctl restart nginx) that can be triggered with one tap.
    • Mosh and Eternal Terminal: Support for roaming connections that stay alive when switching from Wi-Fi to 5G or waking a device from sleep.

    Prompt 3 vs. Termius: Which SSH Client Wins?

    Feature Prompt 3 Termius
    Platform Focus Apple ecosystem (iOS + macOS) Cross-platform (iOS, Android, Windows, Linux)
    Text Engine GPU-accelerated, 10x faster than prior versions Standard rendering
    Security Secure Enclave integration, FaceID/TouchID Cloud Vault for team credential sharing
    SFTP Support Basic Comprehensive
    Best For Individual developers in Apple ecosystem DevOps teams across multiple platforms

    Prompt 3 excels within the Apple ecosystem because of its native feel and GPU speed. However, Termius is often preferred by DevOps teams working across Windows and Linux. Termius offers broader SFTP support and a “Cloud Vault” for team-based credential sharing. For individual developers who want the fastest, most Mac-like terminal experience on an iPad, Prompt’s engine and Secure Enclave integration provide a clear edge in both security and responsiveness.

    Comparison table between Prompt 3 and Termius.

    What is Vibe Coding? Building iOS Apps with AI Prompts

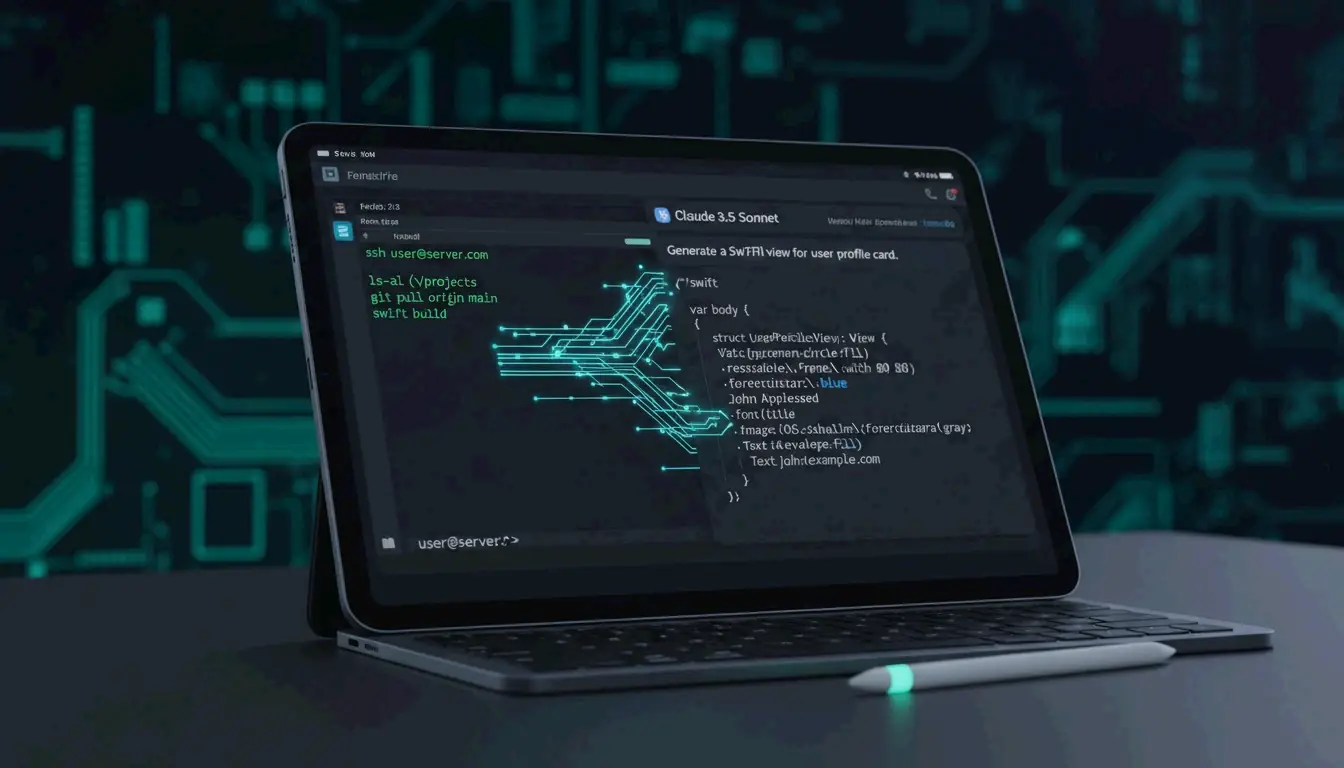
    “Vibe coding” represents a shift in software construction. Instead of writing Swift code line by line, creators use natural language instructions — prompts — to direct AI agents. The developer provides the “vibe” (intent, design, and logic), and models like Claude 3.5 Sonnet handle the implementation.

    In the current iOS landscape, Claude 3.5 Sonnet and the “Claude Code” interface are the primary tools driving this approach. Developers often begin with a “Genesis Prompt” — a detailed, comprehensive instruction — to scaffold an entire SwiftUI project in minutes. Code becomes a commodity rather than a manually crafted artifact.

    The speed is significant. As one Reddit case study demonstrates, a developer built a functional, store-ready iOS app in 5 hours using a single well-structured prompt. However, as Dragos Roua observes, this ease of creation changes market dynamics: the real value now lies in rapid iteration and unique product vision rather than the ability to write syntax.

    The Dual-Prompt Workflow: Managing Servers and Code Simultaneously

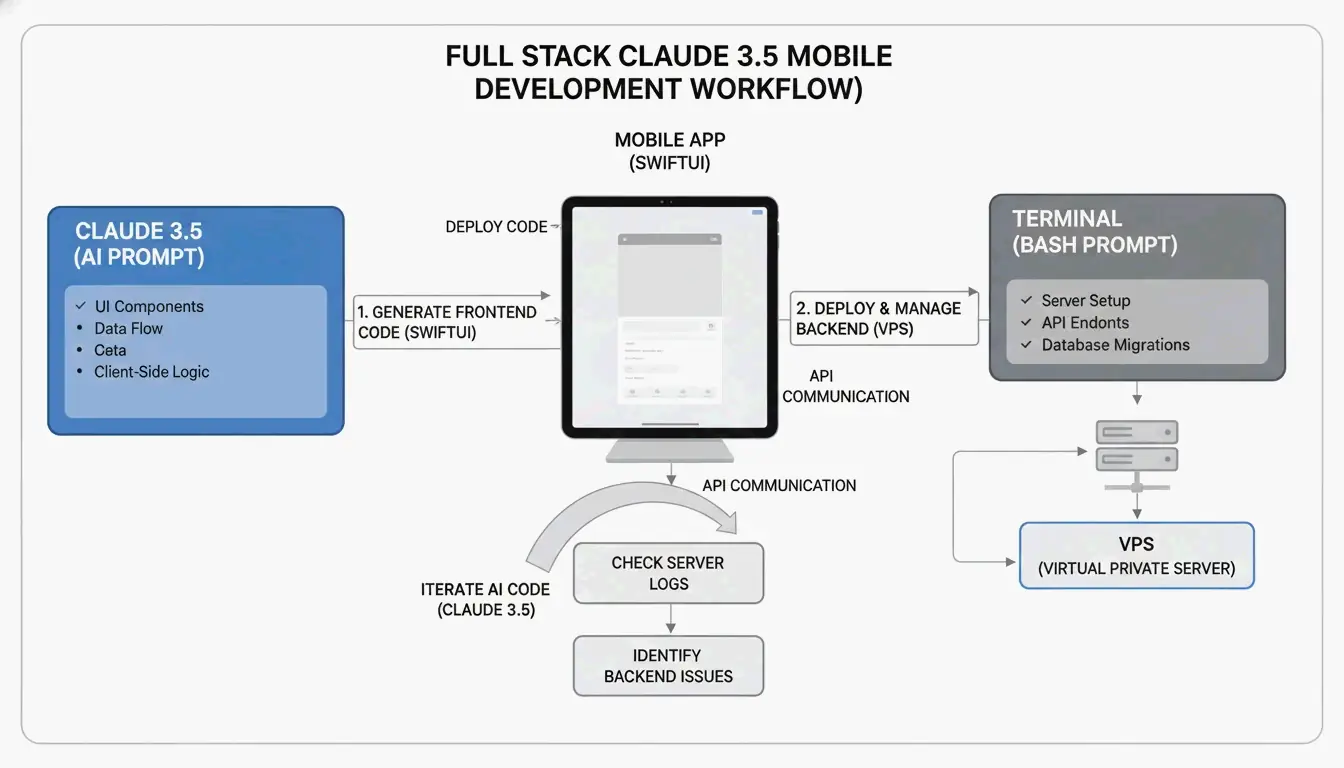
    Modern iOS development increasingly relies on a “Dual-Prompt” strategy: AI prompts for the frontend and Panic’s Prompt 3 for the backend. This workflow allows developers to stay within the iOS ecosystem while building complex, data-driven applications.

    1. AI Prompting: Use Claude 3.5 Sonnet to generate SwiftUI views, state management, and API logic.
    2. Terminal Management: Use Prompt 3 to SSH into a VPS (such as DigitalOcean or AWS), set up a Node.js or Python backend, and manage databases.

    The Dual-Prompt Workflow architecture.

    By bridging AI-generated code and manual server management, it becomes possible to deploy full-stack solutions directly from an iPad. A developer might prompt an AI to write a Swift function that fetches data from a REST API, then switch to Prompt 3 to check server logs in real time and confirm the endpoint is responding correctly.

    The Ultimate Genesis Mega Prompt for iOS and StoreKit 2

    Effective vibe coding requires a structured template to ensure the AI does not overlook technical requirements. A “Genesis Mega Prompt” should cover:

    Component What to Specify Example
    Project Overview App name, core features, target iOS version “Fitness tracker app, iOS 18+”
    Technical Stack Framework, architecture, concurrency model SwiftUI, MVVM, Swift Concurrency
    StoreKit 2 Integration Modern purchase APIs Product.products(for:), product.purchase()
    Design System Colors, typography, spacing Hex codes, 44pt touch targets

    When integrating StoreKit 2 via AI, explicitly specify “modern StoreKit 2 Swift API” to avoid legacy code generation. This ensures the AI implements reactive purchase buttons and entitlement checks that update the UI automatically when a user subscribes.

    Essential Developer Tools: From Expo CLI to Blink Shell

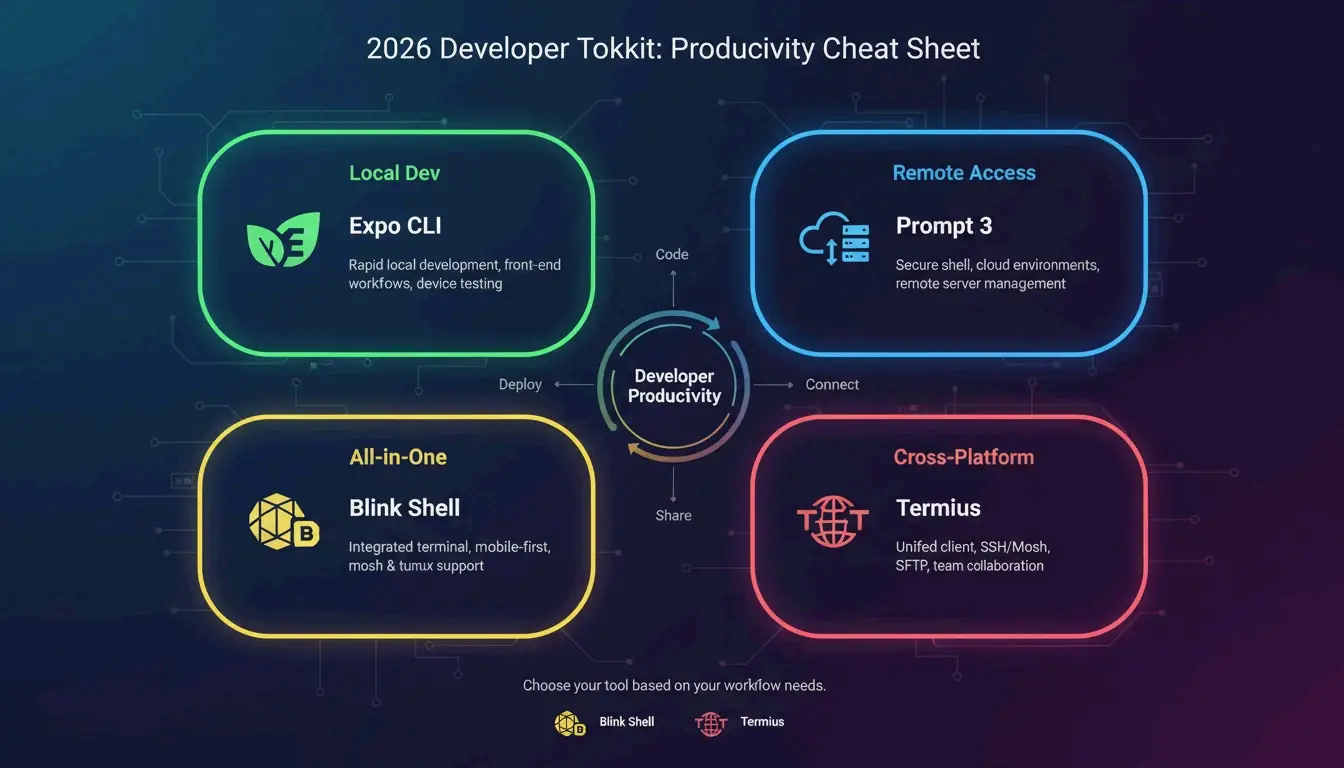
    Beyond Panic’s tools, the 2026 iOS developer toolkit includes several utilities for cross-platform and local development:

    Tool Primary Use Case Standout Feature
    Expo CLI React Native development npx expo run:ios for native compilation
    Blink Shell Integrated terminal + IDE Built-in VS Code (Code Server) module
    Termius Cross-platform SSH Sync between iOS, Android, Windows
    • Expo CLI is best for rapid JavaScript and TypeScript mobile development with native module prebuilding.
    • Blink Shell is ideal for developers who want a VS Code interface alongside Mosh and SSH terminals on an iPad.
    • Termius excels at syncing server lists across iOS, Android, and Windows devices.

    2026 iOS Developer Toolkit Summary.

    Conclusion

    The convergence of high-performance SSH management in Prompt 3 and AI-driven vibe coding with Claude 3.5 Sonnet has turned the iPhone and iPad into legitimate professional workstations. By combining a 10x faster GPU-accelerated terminal for server management with rapid AI-assisted app generation, developers can move from concept to the App Store faster than ever.

    The practical next step is to set up Prompt 3 for secure remote server access and experiment with a Genesis Mega Prompt in Claude 3.5 Sonnet to begin shipping SwiftUI projects directly from an iPad.

    FAQ

    What is the best SSH terminal app for iPad and iPhone in 2026?

    Prompt 3 by Panic is the top choice for users seeking speed and deep iOS integration, featuring a GPU-accelerated text engine that is 10x faster than competitors. Termius is a better fit for teams requiring cross-platform synchronization across Windows and Linux. Blink Shell is ideal for developers who need a built-in VS Code environment on their iPad.

    How do I use a Genesis Prompt to build an iOS app with AI?

    Provide an AI model like Claude 3.5 Sonnet with a high-level architectural overview that includes SwiftUI requirements, MVVM patterns, and specific framework needs such as StoreKit 2. The AI uses this specification as a “source of truth” to generate boilerplate code, UI components, and application logic, allowing you to iterate on the product vision rather than the syntax.

    What is the difference between Prompt 3 and Termius for iOS developers?

    Prompt 3 is built exclusively for the Apple ecosystem, prioritizing macOS and iOS depth, Secure Enclave security, and high-speed text rendering. Termius is a multi-platform tool that offers broader protocol support (SFTP, Telnet) and features designed for collaborative teams who do not exclusively use Apple hardware.

    Can I really deploy a full-stack application from an iPad?

    Yes. Using the Dual-Prompt workflow, you can generate SwiftUI frontend code with Claude 3.5 Sonnet and manage the backend infrastructure through Prompt 3’s SSH terminal. This allows you to write code, configure servers, manage databases, and deploy applications — all from an iPad without needing a traditional desktop development environment.

  • Xbox Gamertag Character Limit in 2026: Rules, Costs, and the 12-Character Rule

    Xbox Gamertag Character Limit in 2026: Rules, Costs, and the 12-Character Rule

    Your Xbox gamertag is your identity across the entire Xbox Network — the name that shows up in multiplayer lobbies, friend lists, and achievement feeds. But if you’re thinking about changing yours in 2026, there’s a hard rule you need to know: all new gamertags are capped at 12 characters, including spaces.

    Legacy “Classic Gamertags” from the Xbox 360 era can still be up to 15 characters long — but only if they’ve never been changed since the modern system took over. Once you modify your name, there’s no going back to the old length.

    This guide covers everything: the current character limit, how the suffix system works, what it costs to change, and tips for finding a short, clean name.

    Understanding the 12-Character Limit in 2026

    Every new Xbox gamertag — whether you’re creating a fresh account or renaming an existing one — must fit within 12 characters. According to CodeItBro, this standard replaced the old 15-character cap from the Xbox 360 era to create a more consistent, globally unified naming system.

    The limit applies across the entire ecosystem:
    – Xbox Series X|S consoles
    – Xbox One consoles
    – Xbox App on PC
    – Xbox mobile apps (iOS and Android)

    With over 120 million active users on the network as of early 2023 (Wikipedia), finding a truly unique name has become harder over the years. To address this, Xbox now supports non-Latin scripts and alphabets — but even those must still fit within the 12-character display window.

    The Suffix System: How Duplicate Names Work

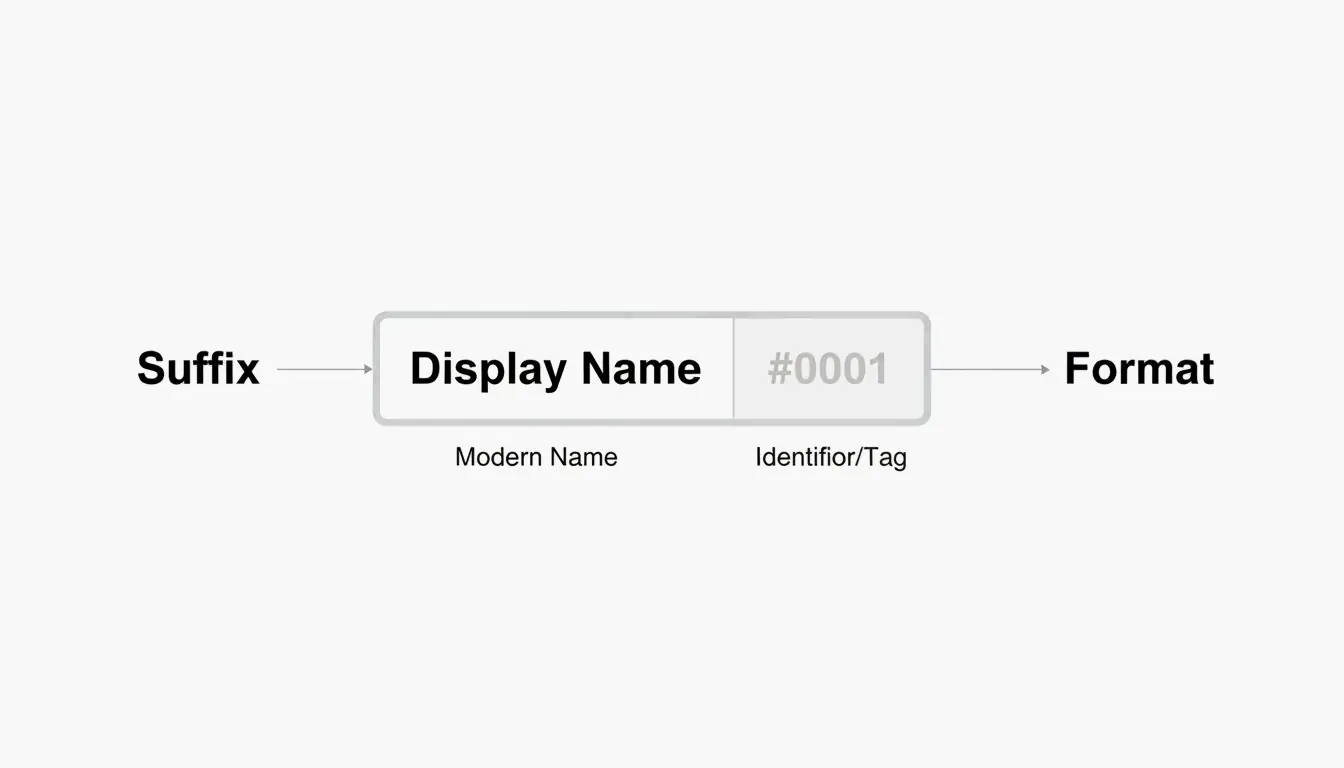
    Here’s where things get interesting. If the name you want is already taken, you can still claim it — Xbox appends a hashtag suffix (like #1234) to differentiate you from the person who had it first.

    A few things worth knowing about suffixes:
    – They’re assigned automatically — you don’t pick the numbers.
    – They don’t count toward your 12-character limit.
    – They appear in a smaller font in most game UIs, so your core name still looks clean.
    – Friends can find you by searching just your base name.

    So a full-length name like “ShadowWalker” would display as “ShadowWalker#9999” — but only the “ShadowWalker” part needs to fit within 12 characters.

    现代 Gamertag 的组成结构:名字 + 后缀

    The “Point of No Return”: Classic vs. Modern Gamertags

    This is the most important thing to understand before changing your name in 2026.

    If your current gamertag was created before the 2019 update and is longer than 12 characters, changing it means you permanently lose that extra length. Think of it as a one-way door.

    According to Microsoft Q&A, there is no technical way to revert to a classic-length tag once you’ve made the switch. The current infrastructure simply doesn’t support creating tags longer than 12 characters — not even for legacy users.

    A Real Example from 2026

    In April 2026, a user named Armonster attempted to restore their 13-character legacy tag after a name change. The system blocked the request entirely. Even though the name had been theirs originally, the modern system couldn’t process a tag longer than 12 characters.

    Bottom line: If you’re sitting on a classic 13–15 character gamertag that you like, think carefully before changing it.

    How to Change Your Xbox Gamertag (Step-by-Step)

    Whether you’re on a console or your phone, the process is straightforward. The system checks name availability in real time as you type.

    On Console (Xbox Series X|S)

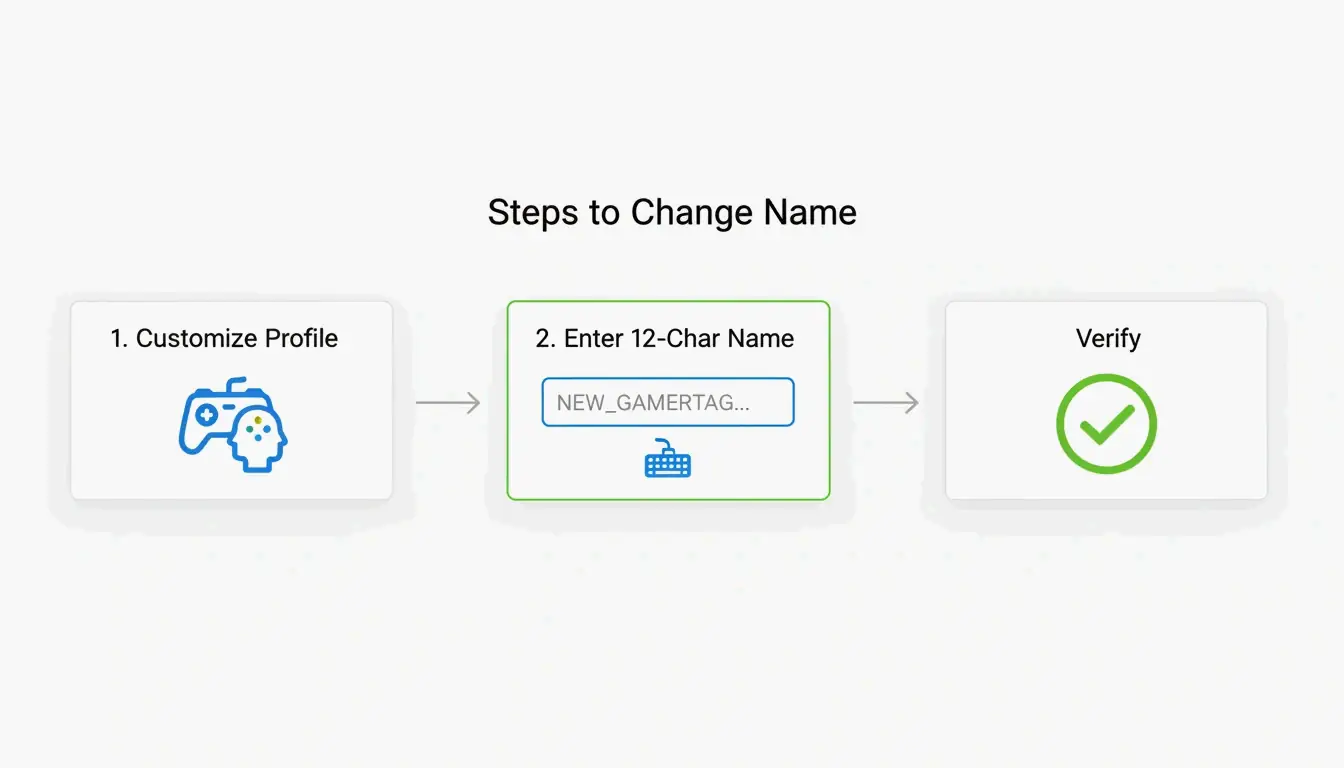
    1. Press the Xbox button on your controller.
    2. Navigate to Profile & System.
    3. Select your profile, then choose Customize Profile.
    4. Click your current gamertag.
    5. Type your new name (up to 12 characters).
    6. Confirm the change.

    On the Xbox Mobile App

    1. Open the Xbox App.
    2. Tap your profile picture.
    3. Go to Settings → Edit Gamertag.
    4. Enter your new name and confirm.

    Verification

    According to Theportablegamer, you’ll see a green checkmark if the name is available, or a red X if it’s taken. If it’s taken, the system will automatically offer you a suffix version.

    修改 Gamertag 的精简步骤

    Troubleshooting: Verification Loops

    Some players in 2026 have reported getting stuck in “verification loops” — the app keeps asking them to sign in repeatedly without completing the name change. If this happens:

    1. Clear the app cache (Settings → Apps → Xbox → Clear Cache).
    2. Try the change through a web browser at account.xbox.com instead.
    3. Check your Enforcement Status — if you have an active ban or strike, name changes are blocked until the penalty expires.

    How Much Does It Cost to Change Your Gamertag?

    Microsoft uses a simple pricing model:

    Change Cost
    First change (new accounts) Free
    Every subsequent change $9.99 USD or 800 Microsoft Points
    Cooldown between changes 30 days

    The fee exists to discourage abuse — without it, people could constantly rename themselves to evade moderation or confuse other players. As Theportablegamer notes, this price has remained unchanged for years.

    The Rare Name Hunt: Finding a 4-Letter Gamertag

    Short gamertags — especially 4-letter ones — are the holy grail. They look clean, never need a suffix, and are easy to remember.

    The reality: most 4-letter English words were claimed years ago. But you can still find options if you’re persistent:

    • Alphanumeric combos — Mix letters and numbers (e.g., “K7VR”, “N3XT”).
    • Non-dictionary words — Unique letter combinations that are pronounceable but not real words.
    • Generator tools — The CodeItBro Gamertag Generator has a “Hunt 4-Letter Tags” mode that checks availability for short handles.

    If your dream 4-letter name is taken, the suffix system is a solid fallback. Since suffixes render in a smaller font in most game menus, a name like “Raven#3847” still looks relatively clean on-screen.

    Conclusion

    The 12-character limit is the firm standard for the Xbox Network in 2026. The suffix system makes it possible to share a display name with others, but the length cap itself is non-negotiable for any new or changed gamertag.

    Before making a change:
    – Count your characters carefully — 12 is the max, spaces included.
    – Protect your classic tag — If you have a legacy 15-character name you like, think twice before changing it. You can’t go back.
    – Budget for the fee — Your first change is free, but every one after that costs $9.99 with a 30-day cooldown.

    FAQ

    Can I change my 12-character modern tag back to a 15-character classic tag?

    No. Once you move to the modern system, the 15-character legacy option is permanently lost. There is no tool, setting, or support path that can revert your tag to the old length.

    Why do some players still have 15-character names in 2026?

    Those are “Classic Gamertags” created before the 2019 system update. As long as those players never change their name, they keep the old length. But the moment they modify it — even to fix a typo — they’ll be moved to the 12-character system.

    What special characters are allowed in Xbox gamertags?

    Spaces are allowed and count as one of your 12 characters. Numbers are fine too. Most special symbols (!, @, #, %, etc.) are blocked to maintain compatibility across all Xbox games. The # symbol is reserved exclusively for the system-generated suffix and can’t be used in the name itself.